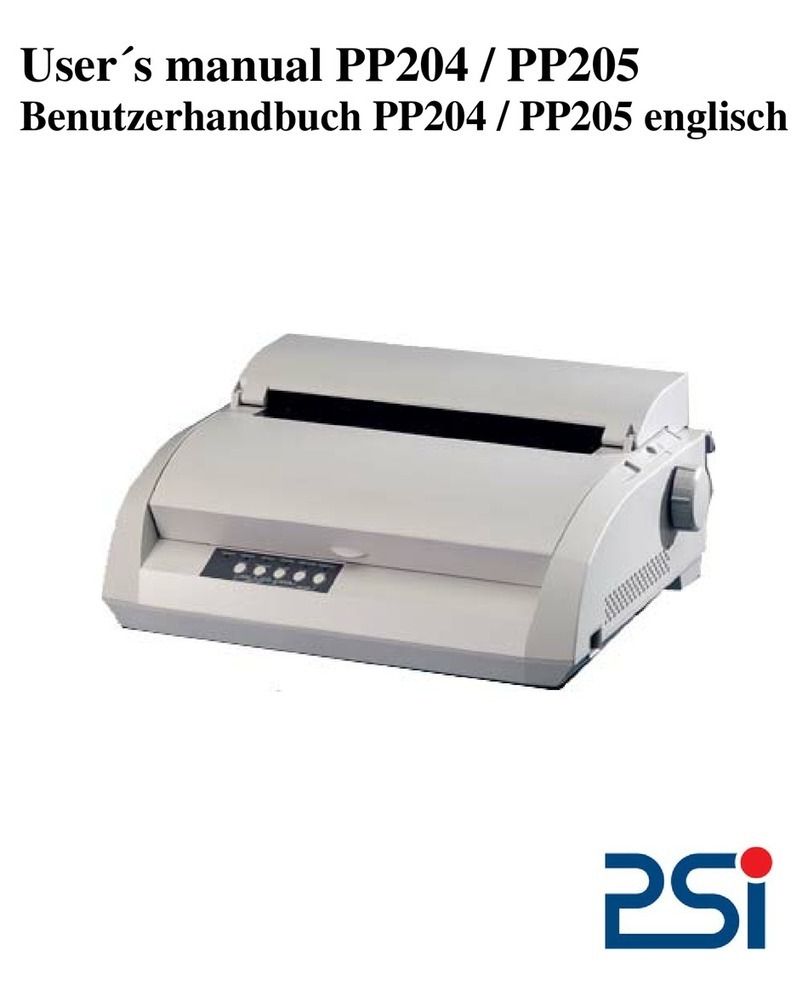
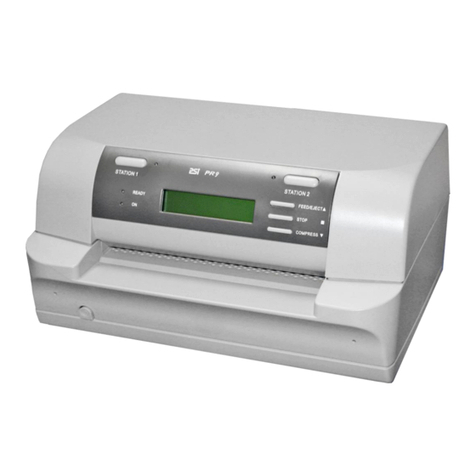
PSI P 405 User manual

P 4 0 5
User's Manual
Acknowledgements
EPSON is a Trademark of Seiko Epson Corporation.
IBM is a Trademark of International Business Machines Corporation.
Proprinter is a Trademark of International Business Machines Corporation.
HP is a Trademark of Hewlett Packard Corporation.
A Publication of PSi Printer Systems international GmbH
Eiserfelder Straße 316
57080 Siegen @Germany
Pub. No. 5112 991 19021 Juni 2001
Order No.
Great care has been taken to ensure that the information in this handbook is accurate and complete.
However, should any errors or omissions be discovered or should any user wish to make suggestions
for improving this handbook, please feel encouraged to send us the relevant details.
The contents of this manual are subject to change without notice.
Copyright © by PSi Printer Systems international.
All rights strictly reserved. Reproduction or issue to third parties in any form is not permitted without
written authorization from the publisher.

Electromagnetic Compatibility
III
Safety Regulations
The printer P 405 fulfils the safety regulations according to UL 1950 and VDE
(IEC 950) and CSA 22.2/No. 950 for computer systems.
The mains cable must be connected to a ground protected wall-socket. The
selected voltage of the printer needs to agree with the local voltage.
The power plug must be easily accessible at any time so that it can be
disconnected immediately in case of danger or for maintenance purposes..
Comme le câble de secteur sert de dipositif d'arrêt-urgence, sa connexion à
l'imprimante doit être tout le temps accessible.
Before installing the printer, check the surrounding conditions in which the
printer will be placed (see next page, Operating Environment and chapter 1).
During a thunderstorm you should never attempt to connect or disconnect any
data transfer cables.
The power supply should only be opened and checked by authorized
personnel. Repairs and maintenance beyond the descriptions of chapter 9
may only be attempted by authorized personnel as well. Repairs done
inappropriately may cause damage and severe danger for the user.
We certify that the equipment at issue,
Type: Printer P 405
corresponds to the law regulations ruling electromagnetic compatibility of
appliances (89/336/EWG) and, therefore, fulfils the requirements for conformity
marking with the CE-sign.
This equipment has been tested and found to comply with the limits for a
Class B digital device, pursuant to Part 15 of the FCC rules. These limits are
designed to provide reasonable protection against harmful interference in a
residential installation. This equipment generates, uses, and can radiate radio
frequency energy and, if not installed and used in accordance with the in-
struction manual, may cause interference to radio communications.
However, there is no guarantee that interference will not occur in a particular
installation. If this equipment does cause harmful interference to radio or
television reception, it can be determined by turning the equipment off and on.
The user is encouraged to try to correct the interference by one or more of the
following measures:
-Reorient or relocate the receiving antenna.
-Increase the separation between the equipment and
receiver.
-Connect the equipment to an outlet on a circuit different from
the circuit to which the receiver is connected.
-Consult the dealer or an experienced radio/TV technician for
help.
Shielded interface cables should be used with this unit to ensure compliance
with Class B limits.
Changes and modifications not explicitly allowed by the equipment's
manufacturer could void the user's authority to operate the equipment.
Changes et modifications pas expressément approuvés par le producteur
peuvent dévaluer l'autorité d'opérer l'équipement.

III IV
Operating Environment
Avoid installing the printer where it is exposed to moisture or heat (eg. direct
sun light).
-Temperature: + 10EC to + 35EC (+50EF to +95EF)
-Humidity: 20% to 80%
-Humidity with Automatic
Sheet Feeder (ASF): 30% to 70%
Slots and openings in the printer's housing are provided for ventilation. Always
ensure that these openings are not obstructed.
Also ensure that the cables at the rear of the printer do not interfere with the
output paper path.
When processing fanfold paper always place the printer with its front edge
slightly off the edge of the table.

Table of Contents
VVI
Table of Contents
Preface .........................................................XI
About this Manual .................................................XI
1. Getting Started ...............................................1-1
1.1 Unpacking .................................................1-1
-Transport Lock ...........................................1-4
-Repacking Information .....................................1-4
1.2 Installing the Personality Module ................................1-5
1.3 The Power Supply ...........................................1-6
-Main Input Voltage Selection ................................1-6
1.4 Power ON/OFF Switch .......................................1-7
1.5 Installing the Ribbon Cassette ..................................1-8
1.5.1 Replacing the Ribbon Cassette .............................1-12
1.6 Selection of Operator Panel Language .........................1-13
1.7 Tractor ...................................................1-14
-Inserting Fanfold Paper ...................................1-14
1.8 Manual Sheet Insertion ......................................1-17
1.9 Paper Source Selection .....................................1-19
1.10 Test Printouts .............................................1-20
1.11 Connection to a Computer ...................................1-24
-Parallel/Serial Interface ...................................1-24
1.12 Emulation Selection .........................................1-25
2. Printer Operation .............................................2-1
2.1 Control Panel ...............................................2-1
2.2 Function Keys ..............................................2-2
2.2.1 Short Description of Keys ..................................2-2
- in the printer operation state READY or BUSY ................2-2
- in the printer operation state LOCAL ........................2-2
2.2.2 Detail Description of Keys in the printer operation
state READY or BUSY ....................................2-3
-Quick Settings ........................................2-3
-Top Row Keys ........................................2-4
-Lower Row Keys .......................................2-4
2.2.3 Meaning of the Keys in the LOCAL Mode ......................2-7
-Lower Row Keys .......................................2-7
2.3 Menu Mode ................................................2-8
2.3.1 To Activate the Menu ......................................2-9
2.3.2 To Confirm Selection .....................................2-10
2.3.3 How to Save Settings .....................................2-11
2.4 Quick Settings .............................................2-12
2.5 Status and Error Messages ...................................2-13

Table of Contents Table of Contents
VII VIII
3. Configuring the Printer ........................................3-1
3.1 What means Configuration ....................................3-1
3.2 Standard Configuration .......................................3-3
3.3 Explanation of the Printout ....................................3-4
3.4 Explanation of Individual Menu Items ............................3-5
Main Functions ................................................3-5
-MACRO SELECT ...........................................3-5
-CHANGE MACRO ..........................................3-5
-INSTALLATION ............................................3-5
-SAVE .....................................................3-5
-PRINT OUT ................................................3-6
Main Function CHANGE MACRO .................................3-6
-FONT .....................................................3-6
-Secondary FONT ...........................................3-6
-PRINT QUALITY ............................................3-7
-SUB/SUPER FONT .........................................3-7
-PITCH ....................................................3-7
-Secondary PITCH ...........................................3-7
-LINE ......................................................3-7
-PAGE LENGTH ............................................3-8
-VERT.POS.ADJ ............................................3-8
-LEFT MARGIN .............................................3-9
-RIGHT MARGIN ...........................................3-10
-TOP MARGIN .............................................3-10
-BOTTOM MARGIN .........................................3-10
-PERFORATION SKIP .......................................3-11
-PAPER SOURCE ..........................................3-11
-EMULATION ..............................................3-12
-CHARACTER SET .........................................3-12
-Secondary CHARACTER SET ................................3-12
-LINE MODE ..............................................3-12
-$$ COMMANDS ...........................................3-13
-TEAR-OFF mode ..........................................3-13
Main Function INSTALLATION
Sub-Function INTERFACE .....................................3-14
-BUFFER .................................................3-14
-WORD LENGTH ...........................................3-14
-I/F Type ..................................................3-14
-BAUD RATE ..............................................3-14
-PARITY BIT ...............................................3-14
-PROTOCOL ..............................................3-14
-CTS MODE ...............................................3-15
-HP: ENQ/ACK .............................................3-15
Sub-Function ADJUSTMENT ...................................3-15
-AGC POSITION ...........................................3-15
-PLATEN GAP .............................................3-16
-AGC ADJUST .............................................3-16
-PAPER-IN ADJUST ........................................3-16
-CUTTING V-POS. ..........................................3-17
-TRACTOR FF MODE .......................................3-18
-UNI-DIRECT. CMD .........................................3-18
Special Menu Items under INSTALLATION .........................3-19
-LANGUAGE ..............................................3-19
-MENU ACCESS ...........................................3-19
-SELF TEST ...............................................3-20
-HEX DUMP ...............................................3-20
Menu Overview ........................................... Menu-1

Table of Contents Table of Contents
IX X
4. Maintenance .................................................4-1
-Preferred Materials ..........................................4-1
4.1 Cleaning the Platen and Surrounding Areas ......................4-1
4.2 Cleaning Procedure .........................................4-3
4.3 User Replaceable Parts ......................................4-4
4.3.1 Replacement of the Print Head ..............................4-4
-Print Head Removal ....................................4-4
-Print Head Installation ...................................4-6
4.3.2 Replacement of the Platen .................................4-8
-To Remove the Platen ..................................4-8
-To install the Platen ....................................4-9
5. Trouble Shooting and Diagnostics ..............................5-1
-How to Use this Section ......................................5-1
5.1 Power-related Problems ......................................5-2
5.2 Error Messages .............................................5-2
5.3 No Printout ................................................5-5
5.4 Operation-related Problems ...................................5-6
5.5 Print-related Problems ........................................5-7
5.6 Ribbon or Carriage-related Problems ............................5-9
5.7 Print Tests .................................................5-9
6. Options .....................................................6-1
7. Technical Data ...............................................7-1
Appendices
Appendix A System Interface Descriptions ........................... A-1
1Serial Interface RS-232C / RS-422 ............................... A-2
-Interface Characteristics ..................................... A-2
2Transmission Protocols and Connection Diagrams ................... A-3
2.1 DTR - Ready/Busy ....................................... A-3
2.2 XON / XOFF ............................................ A-6
2.3 Serial Interface with RS-422 ............................... A-8
2.4 HP: ENQ/ACK Handshake Protocol ......................... A-9
3Parallel Centronics Interface ................................... A-10
®
3.1 Transmission Protocl Description .......................... A-11
3.2 Timing Diagram ........................................ A-12
4Shared Operation ............................................ A-13
5Recommended HP Printer Cables ............................... A-14
Appendix B Print Samples of Resident Fonts and Barcodes ............. B-1
Appendix C Character Set Tables .................................. C-1
Appendix D Control Codes Quick Reference
- HP-Emulation ......................................... D-1
Appendix E Control Codes Quick Reference
- IBM Emulation ........................................ E-1
Appendix F Control Codes Quick Reference
- EPSON LQ / ESC/P2 Emulation ...........................F-1
Appendix G Control Codes Quick Reference
- Barcode ............................................. G-1
Appendix H Miscellaneous
-Bestellnummern ...................................... H-1
-Order Numbers ....................................... H-2
-P405 User's Manual Revision Survey ..................... H-3
-Information for the System Manager ...................... H-4

Preface
XI XII
Preface 4. Maintenance
About this Manual suggests how to identify and correct simple problems.
This manual covers the printer in combination with an interface module (Perso-
nality Module). 6. Options
The Personality Module (PM) is an integral part of the printer, and the type of in the packaging of options may be inserted here.
PM used significantly influences the behaviour or operation of the printer.
The structure of this manual is such that the operator is led step-by-step All technical details or data about the printer can be found here.
through the various procedures. It starts with the unpacking and setting-up,
moves on to detailed instructions for operating the printer and ends with the Appendix
mounting of options.
The manual is divided into the following chapters: This chapter gives hints about possibilities to connect the printer to the
1. Getting Started version of the operating system. Additionally, cable connection is
This chapter covers the unpacking and setting-up of the printer and the illustrated.
installation of the PM (Personality Module) and ribbon cassette. By the
end of this chapter the printer should be fully functional and tested in its B. Print Samples of Resident Fonts
primary form. It is not yet connected to the host computer system and no
options are mounted. C. Character Set Tables
2. Operating the Printer
This chapter discusses in great detail the operation of the operator panel, D. Quick Reference HP Emulation
all menu functions, and the general operation of the menu. General E. Quick Reference IBM Proprinter Emulation
status messages (e.g. COVER OPEN) are also described. F. Quick Reference LQ 2550 / ESC/P2 Emulation
3. Configuring the Printer Control code description of the emulations: HP, EPSON LQ, IBM
This chapter explains how to configure the printer so that it can Proprinter (AGM) and Barcode programming.
communicate with the corresponding system environment. Then this
chapter thoroughly describes the printer's operating controls. In the last H. Miscellaneous
part you will find explanations of individual menu items. At The end of this Ordernumbers, Survey of the Manual and System Manager Informations
chapter you will find the Menu tree.
shows how to clean the printer and how to replace the platen and the
print head.
5. Trouble Shooting and Diagnostics
This is a brief description of all available options. Supplements enclosed
7. Technical Data
A. Interface Description
various computer systems and explains particularities depending on the
All printer supported character sets are listed in this chapter.
G. Quick Reference Barcode programming

Preface
XIII XIV
Conventions Used in this Guide
The following conventions are used:
Bold Headlines and important information.
Note: Contains special advice to facilitate handling.
Caution: Contains important information to prevent damage
of the equipment.
[ENTER] Key functions are always depicted in brackets or
indicated by the symbol e.g. .

16
4
7
2
3
2
7
1
3
5
8
4
Getting Started
1-1 1-2
1. Getting Started A First Look at the Printer
1.1 Unpacking -Printer Base Unit(3) -Front Cover (4)
Check each item against the check list detailed below. Contact your delivery -Control Panel (7) -Tractor for Continuous Paper (8)
agent immediately if any item is missing or damaged. -Output Stacker (9) -Power Switch (10)
The printer package should contain the following: -Personality Module (PM) (13)
-Top cover (1) -24-Needle-Printer (3)
-Power cord (7) -Ribbon cassette (2)
A separate box contains the Personality Module (6) incl. the "User's manual".
Caution: Do not connect to the mains until the mains voltage selection
has been checked and the Personality Module is installed.
Note: Save all packing material and boxes for future transportation of the
printer.
Before installing the printer, spend some time familiarizing yourself with the
printer.
- Top Cover (1) -Ribbon Cassette (2)
-Manual Front Insertion Guide (5) -Slot for Memory Card (6)
-Power Cord Socket (11) -Tear Off Edge (12)

2
9
Getting Started Getting Started
1-3 1-4
Site Considerations Transport Lock
Environment Conditions You will find a red shipping tab under the top cover (2).
-Install the printer in an area away from any heat source, air conditioner or
strong drafts. Grasp the top cover (2) on the left and right, lift it and remove the transport
-Avoid installing the printer in a dusty or humid environment.
Work Location To ensure maximum protection when transporting the printer, always
-Place the printer on the stand or a flat, solid level area such as a desk.
-Slots and openings in the printer's housing are provided for ventilation; -Remove the output stacker and the mains cable.
always ensure that these openings are not obstructed. -Remove the ribbon cassette.
-When processing fanfold paper always place the printer with its front edge -Pack the printer in its original packing material and ship in its original box.
slightly off the edge of the table.
-Also ensure that the cables at the rear of the printer do not interfere with the
output paper path.
Power Requirements
-No special wiring is required. A typical office wall outlet is sufficient.
-Do not plug into the same wall outlet other equipment besides the printer
such as coffee machines, copy machines or air conditioners.
locking clip (12) from the print head drive belt.
Re-packing Information
-Remove any installed paper handling option.
-Reposition the transport locking clip.

613
11
6
Getting Started Getting Started
1-5 1-6
1.2 Installing the Personality Module 1.3 The Power Supply
The printer functions only in combination with an installed interface module, Mains Voltage Selection
called a Personality Module (PM). In general, the mains voltage selection is determined at factory site.
The illustration below shows the standard PM with a serial and parallel inter- Since an incorrect voltage selection can seriously damage the printer, please
face. For detailed information about your PM, see Chapter 2. pay special attention to the following:
Note -To avoid damage due to electrostatic discharge, do not touch the corresponds to your mains voltage:
pins or components of the PM. either 230 V for 180 to 264 V alternating current
-Never attempt to install or remove a PM while the printer is switched 2. If it is necessary to change the voltage, slide the selector button to the
ON. required voltage selection.
1. Remove the PM (6) from its packaging. cable to the power cord socket and then to the mains.
2. Insert the Personality Module (6) with the component side upwards until the
connector fully engages. Hand tighten the two lock screws (13). Note: As the power cord serves as a safety cut-off, its connection to the printer
1. Make sure that the specified voltage on the voltage selector (14)
or 115 V for 90 to 140 V alternating current.
3. Connect the printer to the mains using the power cord (8). First connect the
must be accessible any time.

1
Getting Started Getting Started
1-7 1-8
1.4 Power ON/OFF Switch
The power ON/OFF switch (1) turns the printer's power supply ON or OFF.
When switched ON the printer performs an internal self-test which checks the
electronics, the print head carriage movement and the interface. Power ON is
indicated by a green LED on the operator panel.
During selftest the display shows the information TEST ....
When the internal test has been completed successfully the display shows the
printer status, the selected macro an emulation. example:
READY 1 HP or BUSY 1 HP if data has already been transmitted.
If an error occurs the display will show an error message and the printer enters
the STOP mode.
Note: If the display shows anything diffrent please refer to chapter 5
Troubleshooting and Diagnostics.
1.5 Installing the black ribbon cassette
Note: Informations about installing the 4-colour-ribbon cassette you will find in
chapter 6 Options.
It is recommended to use only original ribbon cassettes (part numbers in
appendix H) put out by our company. Using other ribbons will void your war-
ranty.
Caution: Never manually move the print head fully to the right hand stop.
Note: Always press [START/STOP] before opening the top cover.
1. Switch the printer ON at the power switch; Power LED is lit.
2. Press [START/STOP] .
3. Lift the top cover to gain access to the ribbon cassette mountings. The print
head will move to the correct position, aligned with the cut-out in the paper
guide plate to facilitate the installation of the ribbon cassette.
4. Remove any excess slack by turning the green knob on the ribbon cassette
clockwise. Move the ribbon feed guide to the position indicated on the pla-
stic cover of the cassette.

Getting Started Getting Started
1-9 1-10
5. Position the lower mounting pin (a) on the guide to the right. Slide the
cassette downward. In this position, the green ribbon feed guide touches
the green plastic clip.
6. Move the cassette toward you until you hear a click on both sides. Swing
the ribbon underneath the print head for the final click. The audible clicks
inicate that the mounting pins have engaged properly.

1.
2.
Getting Started Getting Started
1-11 1-12
Note When installed correctly the ribbon cassette has a sloping position. 1.5.1 Replacing the Ribbon Cassette
7. Move the print head back and forth to settle the ribbon in the correct position.
8. If necessary remove excess ribbon slack by turning the green knob
clockwise.
9. Close the top cover and press [START/STOP] .
Caution: The print head may be very hot immediately after printing!
1. Lift the top cover to gain access to the ribbon cassette mountings. The print
head will move to the correct position, aligned with the cut-out in the paper
guide plate to facilitate the installation of the ribbon cassette.
2. Now swing the lower part of the ribbon to the back.
In this way the mounting pins loosen from the lower position.
3. Then press the upper part of the ribbon to the back. Die upper mounting pins
get free and the ribbon can be taken out.
4. To install a new ribbon cassette please see 1.5 Installing the ribbon
cassette (see pages before).

MENU a a
aaabc
94
93
MENU
4
Getting Started Getting Started
1-13 1-14
1.6 Selection of Operator Panel Language 1.7 Tractor
The printer control panel and LCD display menu is used for the next steps. It is
possible to change the language in the printer menu from English to French or Inserting Fanfold Paper for the First Time
German. The following example shows how to change from English to Ger- -Ensure that the printer is placed in the depression on the top of the stand
man: (option). If the printer is used without a stand, align the printer with the front
Key Display against the resistance and remove by pulling forward.
1. Switch the printer on
2. (93) LOCAL
3. (94) MACRO SELECT 6
4. [\] -- [\]INSTALLATION 6
5. [Y]7INTERFACE 6
6. [\] -- [\]7LANGUAGE 6
7. [Y]7ENGLISH *
8. [\]7DEUTSCH
9. [Y]7DEUTSCH *
10. [Z]7SPRACHE 6
11. [Z]INSTALLATION 6
12. [\]MENÜ SICHERN 6
13. [Y]7SICHERT 6
MENÜ SICHERN 6
14. (93) BEREIT 4 HP
Note: A description of the Function Keys is in chapter 2 Printer Operating.
edge of the table. The cables at the back of the printer should be tucked into
the cable clips in order not to block the paper path.
-Hold the front of the manual insertion guide (4) on both sides, pull upwards

12
14
13
14
Getting Started Getting Started
1-15 1-16
-Pull the green tractor lock levers (12) toward you to release the tractors.
-Lock both green tractor levels
-Roughly adjust the tractors (13) to the paper width, and space out the paper
supports (14) evenly.
-Open the tractor covers (16) and insert the paper.
-Close the tractor covers.
-Tighten the upper edge of the fanfold paper by slightly pushing the right
tractor to the right. Make sure not to stress the paper too much.
-Lock the tractors by pushing back the green lock lever again.
-Reapply the manual front insertion guide
Note: If you do not refit the manual front insertion guide, there is no
guarantee for a proper paper transport and accurate printing.

2
5
22
Getting Started Getting Started
1-17 1-18
-Select the paper source TRACTOR using either the menu selection of the -Move the left hand paper guide into the position indicated by ±•(22) on the
printer or your software (chapter 1.9). insertion guide. In this setting the margin has the smallest value possible.
-Initiate a printout (chapter 1.10), to check the margins. Readjust the tractors -Adjust the right hand paper guide to the width of the paper to be used.
until the printout appears within the desired margins.
1.8 Manual Sheet Insertion
Install the output stacker (5) into one of the two rails in the top cover (2).
The meaning of the two Positions:
-for paper with 80 g/m² or thicker use the steeper position (left picture);
-for thinner paper use the less inclined position (right picture).
-Check, if the manual sheet insertion is installed. displayed.
-Select MANUAL as the paper source using either the menu settings or your
software (see also chapter 1.9 Paper Source Selection).
Note: If continuous form paper is in print position on the platen and has not
been teared off, it will be moved forward and TEAR OFF PAPER will be

Getting started Getting started
1-19 1-20
1.9 Paper Source Selection
The basic selections for PAPER SOURCE are:
-TRACTOR (Default, indicated by ’)
-MANUAL
Select 'MANUAL' as paper source on the operator panel
The following diagram shows which keys to press and what is displayed on the
operator panel.
Key Display
1. Switch the printer ON, wait for READY ... status.
2. (93) LOCAL
3. (95) 7TRACTOR ’
Note: Starting now the top row of keys function as arrow keys.
4. [\]7MANUAL
5. [Y]7MANUAL ’
6. (93) READY 1 HP
-After that LOAD MANUAL is displayed. Insert a single sheet evenly. After a
short delay, the printer draws in the sheet.
1.10 Test Printouts
There are three test printouts available.
-PRINT TEST 1 shows a pattern of all printable characters. Use this to check
if the printer operates correctly.
-PRINT TEST 2 produces a standard letter (ECMA-132) which can be used
for measuring the printer's throughput.
-PRINT TEST 3 lists all available fonts, contains the page count to identify the
actual number of printed pages, and gives information on technical releases
which are intended for service purposes.
The print tests are printed using the parameters set in the menu, e.g. font, pitch
etc. Refer to section "Menu Mode" for details.
ABCDEFGHIJKLMNOPQRSTUVWXYZabcdefghijklmnopqrstuvwxyz0123456789!§
§ABCDEFGHIJKLMNOPQRSTUVWXYZabcdefghijklmnopqrstuvwxyz0123456789!
!§ABCDEFGHIJKLMNOPQRSTUVWXYZabcdefghijklmnopqrstuvwxyz0123456789
9!§ABCDEFGHIJKLMNOPQRSTUVWXYZabcdefghijklmnopqrstuvwxyz012345678
89!§ABCDEFGHIJKLMNOPQRSTUVWXYZabcdefghijklmnopqrstuvwxyz01234567
789!§ABCDEFGHIJKLMNOPQRSTUVWXYZabcdefghijklmnopqrstuvwxyz0123456
6789!§ABCDEFGHIJKLMNOPQRSTUVWXYZabcdefghijklmnopqrstuvwxyz012345
56789!§ABCDEFGHIJKLMNOPQRSTUVWXYZabcdefghijklmnopqrstuvwxyz01234
456789!§ABCDEFGHIJKLMNOPQRSTUVWXYZabcdefghijklmnopqrstuvwxyz0123
3456789!§ABCDEFGHIJKLMNOPQRSTUVWXYZabcdefghijklmnopqrstuvwxyz012
23456789!§ABCDEFGHIJKLMNOPQRSTUVWXYZabcdefghijklmnopqrstuvwxyz01
123456789!§ABCDEFGHIJKLMNOPQRSTUVWXYZabcdefghijklmnopqrstuvwxyz0
0123456789!§ABCDEFGHIJKLMNOPQRSTUVWXYZabcdefghijklmnopqrstuvwxyz
z0123456789!§ABCDEFGHIJKLMNOPQRSTUVWXYZabcdefghijklmnopqrstuvwxy
yz0123456789!§ABCDEFGHIJKLMNOPQRSTUVWXYZabcdefghijklmnopqrstuvwx
xyz0123456789!§ABCDEFGHIJKLMNOPQRSTUVWXYZabcdefghijklmnopqrstuvw
wxyz0123456789!§ABCDEFGHIJKLMNOPQRSTUVWXYZabcdefghijklmnopqrstuv
vwxyz0123456789!§ABCDEFGHIJKLMNOPQRSTUVWXYZabcdefghijklmnopqrstu
uvwxyz0123456789!§ABCDEFGHIJKLMNOPQRSTUVWXYZabcdefghijklmnopqrst
tuvwxyz0123456789!§ABCDEFGHIJKLMNOPQRSTUVWXYZabcdefghijklmnopqrs
stuvwxyz0123456789!§ABCDEFGHIJKLMNOPQRSTUVWXYZabcdefghijklmnopqr
rstuvwxyz0123456789!§ABCDEFGHIJKLMNOPQRSTUVWXYZabcdefghijklmnopq
qrstuvwxyz0123456789!§ABCDEFGHIJKLMNOPQRSTUVWXYZabcdefghijklmnop
pqrstuvwxyz0123456789!§ABCDEFGHIJKLMNOPQRSTUVWXYZabcdefghijklmno
opqrstuvwxyz0123456789!§ABCDEFGHIJKLMNOPQRSTUVWXYZabcdefghijklmn
nopqrstuvwxyz0123456789!§ABCDEFGHIJKLMNOPQRSTUVWXYZabcdefghijklm
mnopqrstuvwxyz0123456789!§ABCDEFGHIJKLMNOPQRSTUVWXYZabcdefghijkl
lmnopqrstuvwxyz0123456789!§ABCDEFGHIJKLMNOPQRSTUVWXYZabcdefghijk
klmnopqrstuvwxyz0123456789!§ABCDEFGHIJKLMNOPQRSTUVWXYZabcdefghij
jklmnopqrstuvwxyz0123456789!§ABCDEFGHIJKLMNOPQRSTUVWXYZabcdefghi
ijklmnopqrstuvwxyz0123456789!§ABCDEFGHIJKLMNOPQRSTUVWXYZabcdefgh
hijklmnopqrstuvwxyz0123456789!§ABCDEFGHIJKLMNOPQRSTUVWXYZabcdefg
ghijklmnopqrstuvwxyz0123456789!§ABCDEFGHIJKLMNOPQRSTUVWXYZabcdef
fghijklmnopqrstuvwxyz0123456789!§ABCDEFGHIJKLMNOPQRSTUVWXYZabcde
efghijklmnopqrstuvwxyz0123456789!§ABCDEFGHIJKLMNOPQRSTUVWXYZabcd
defghijklmnopqrstuvwxyz0123456789!§ABCDEFGHIJKLMNOPQRSTUVWXYZabc
cdefghijklmnopqrstuvwxyz0123456789!§ABCDEFGHIJKLMNOPQRSTUVWXYZab
bcdefghijklmnopqrstuvwxyz0123456789!§ABCDEFGHIJKLMNOPQRSTUVWXYZa
abcdefghijklmnopqrstuvwxyz0123456789!§ABCDEFGHIJKLMNOPQRSTUVWXYZ
Zabcdefghijklmnopqrstuvwxyz0123456789!§ABCDEFGHIJKLMNOPQRSTUVWXY
YZabcdefghijklmnopqrstuvwxyz0123456789!§ABCDEFGHIJKLMNOPQRSTUVWX
XYZabcdefghijklmnopqrstuvwxyz0123456789!§ABCDEFGHIJKLMNOPQRSTUVW
RINT TEST 1

Getting started Getting started
1-21 1-22
Eilzustellung
Norddeutsche Farbwerke KG
Herrn Dr. Grauert
Große Elbstraße 64
2000 Hamburg 4
Org. III 5/37 H-A
4 34 22.04.75
17.04.75 Volkmann
Vordruckgestaltung für den allgemeinen Schrift-
verkehr, für das Bestell- und Rechnungswesen
E i l t
Sehr geehrter Herr Dr. Grauert,
Sie können das Schreiben der Briefe, Bestellungen, Rechnungen usw.
sowie das Bearbeiten des Schriftguts rationalisieren, wenn die
Vordrucke Ihres Unternehmens den folgenden Normen entsprechen:
DIN 676 Geschäftsbrief; Vordrucke A4
DIN 677 -; Vordruck A5
DIN 679 Geschäftspostkarte; Vordrucke A6
DIN 4991 Vordrucke im Lieferantenverkehr; Rechnung
DIN 4992 -; Bestellung (Auftrag)
DIN 4993 -; Bestellungsannahme (Auftragsbestätigung)
DIN 4994 -; Lieferschein/Lieferanzeige
DIN 4998 Entwurfsblätter für Vordrucke
Diese Normen enthalten alle Einzelheiten für den sinnvollen und
zweckmäßigen Aufdruck. Wenn dazu bei der Beschriftung genormter
Vordrucke DIN 5008 'Regel für Maschinenschreiben' beachtet wird,
entstehen übersichtliche und werbewirksame Schriftstücke.
Die beifgefügten 6 Mustervordrucke zeigen, daß das Beachten der
Normen die künstlerische und werbewirksame Gestaltung der Vor-
drucke nicht ausschließt.
Da wir uns auf die Herstellung genormter Vordrucke spezialisiert
haben, können wir besonders billig liefern. Eine Probestellung
wird Sie und Ihre Geschäftsfreunde von den Vorteilen überzeugen.
Mit bester Empfehlung
NORAG
Druckerei und Verlagshaus KG
Herrmann
Anlagen
6 Mustervordrucke
PRINT TEST 2
To start a print test:
1. Switch the printer ON (display shows READY 1 HP).
The following identifies the keys to press and the corresponding operator
panel displays.
Key Display
2. (93) LOCAL
3. (94) MACRO SELECT 6
4. [\] -- [\]INSTALLATION 6
5. [Y]7INTERFACE 6
6. [[] -- [[]7SELF TEST 6
7. [Y]7PRINT TEST 1
Use [\] to select PRINT TEST 2 or 3.
8. [Y]7PRINT TEST 1 *
9. (93) PRINT TEST 1 *
The printer starts to print using paper from the defined paper source.
Note: A number of VALUE settings is summarized in a "Macro". It is
possible to have a total of four macros, each with a different summa-
ry of VALUE settings.

Getting started Getting started
1-23 1-24
To stop the print test: 1.11 Connection to a Computer
1. (93) 7PRINT TEST 1 *Parallel/Serial Interface
2. [Z]7SELF TEST 6-Connect the interface cable coming from the computer to the printer's
3. (93) READY 1 HP -The printer is by default set to PARALL./ RS232 (shared interface) with the
-Switch OFF the printer and computer.
parallel (15) or serial port (16).
following parameters:
-8 Kbyte buffer,
-8 bit,
-Parallel/RS-232,
-no parity,
-9600 baud
-XON/XOFF protocol
-CTS ignore
"Shared" means that, after Power-ON, both the serial and the parallel inter-
faces are available for data transfer. The port to which data is sent becomes
active automatically. If the parallel or serial parameters need to be changed,
see Chapter 2, Menu Mode, and Appendix A, Interface Description.
Table of contents
Other PSI Printer manuals
