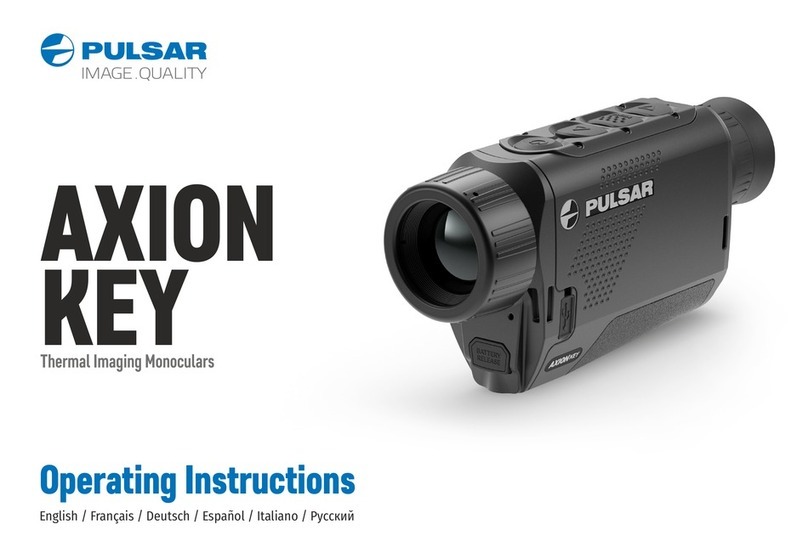
Pulsar Axion 2 XQ35 User manual

Manual Axion 2 XQ35
About the device
Description
Axion 2 thermal imaging monoculars are designed for use both at night-
time and during the day and provide exceptional image quality even in
adverse weather conditions (fog, smog, rain) and beyond obstacles like
branches, tall grass, dense foliage, etc. known to hinder target detection.
Unlike night-vision devices based on electron-optical converters, thermal
imaging devices do not need an external light source and are resistant to
bright light.
Axion 2 thermal imagers are designed for various applications including
hunting, observation, security, terrain orientation, search and rescue
operations, etc.
To get started, see the sections:
Battery Charging
Battery Installation
Powering on and Image Setting

Package Contents
•Axion 2 thermal monocular
•APS 5 rechargeable battery
•2 battery-locking covers
•Power adapter
•USB Type-C cable
•Carrying case
•Hand strap
•Quick reference user manual
•Lens cleaning cloth
•Warranty information
•Tripod adapter
Features
•Compact and lightweight
•Functional and ergonomic design
•8-colour display palette
•3 calibration modes: Manual, Semi-Automatic, Automatic
•Three levels of sensitivity enhancement: Normal, High, Ultra
•Stadiametric Rangefinder
•Display-Off function
•Defective pixel repair
•Updatable firmware
•Wide operating temperature range (-25°С to +40°С / -13°F to +104°F)
•Fully waterproof (IPX7 rated)
•Tripod mount

Video/Audio Recording
•Built-in video and sound recorder
•Integration with iOS and Android devices
•Wi-Fi remote control and viewing using a smartphone
•Storing photos and videos in Cloud when using the Stream Vision 2 App
Battery Pack
•Quick Change Li-Ion Battery Pack APS 5
•Charging from USB Power Bank
•Quick-Charge power delivery
Components and Controls

1. Eyepiece focus ring
2. LED indicator
3. DOWN/REC button
4. MENU button
5. UP/ZOOM button
6. Power ON/OFF/CALIBRATION button
7. Lens focus ring
8. Lens cover
9. Tripod adapter socket
10. USB Type-C connector
LED indicator (2) displays the current status of the device:
LED Indicator
Operating Mode
Device is turned on
The device is turned on/video recording
The device is turned on/battery charge < 10%
The device is turned on/video recording/battery
charge < 10%
Specifications
Model
XQ35
XG35
SKU
77478
77476
Microbolometer

Type
uncooled
Resolution, Pixels
384x288
640x480
Pixel Pitch, µm
17
12
Frame Rate, Hz
50
Optical
Characteristics
Optical Magnification,
x
2
2.5
Smooth Digital Zoom, x
2-8
2.5-20
Digital Zoom, x
x1, x2, x4
x1, x2, x4, x8
Lens Focus, mm
35
Relative Aperture, D/f'
1.0
Minimum Focus
Distance, m/y
5 / 5.47
Eye Relief Diameter,
mm/inch
4 / 0.16
Angular Field of View
(Horizontal x Vertical),
degree
10.7х8
12.5х9.4
Linear Field of View, m
at 100 m
18.2
21.9
Eyepiece Focus Range,
Diopter
+4 / -5
Detection Distance for
Deer-Sized Objects,
m/y
1300 / 1422
1750 / 1914

Display
Type
AMOLED
Resolution, Pixels
640x400
1024x768
Operational
Characteristics
Power Supply, V
3 - 4.2
Battery
Type/Capacity/Nominal
Output Voltage
APS 5 Li-ion Battery Pack / 4900 mAh / DC 3.7 V
External Power Supply
5 V, 9 V (USB Type-C)
Battery Run Time at
t=22°C, hours*
11
7
Degree of Protection,
IP Code (IEC60529)
IPX7
Operating
Temperature Range, °C
/ °F
-25 … +40 / -13 –+104
Dimensions, mm/inch
152x50x74 / 5.98x1.97x2.91
Weight (without
battery), kg/oz
0.3 / 10.58
Video Recorder
Photo/Video
Resolution, Pixels
528x400
1024x768
Video/Photo Format
.mp4 / .jpg
Built-in Memory
16 GB

Wi-Fi Channel**
Frequency
2.4/5 GHz
Standard
IEEE 802.11 b/g/n/ac
* Actual battery life may vary depending on the use of Wi-Fi and the built-
in video recorder.
** Reception range may vary depending on various factors: obstacles,
other Wi-Fi networks.
Power supply
Battery Charging
The Axion 2 thermal imager comes with an APS 5 rechargeable Lithium-
ion battery. APS 5 batteries support USB Power Delivery fast charging
technology when using a standard charging set (charger*, USB Type-C
cable, power adapter). Before first use, make sure the battery is fully
charged.

5. Wait until the battery is fully charged (indication in the status
bar: ).
Option 2
1. Insert the APS 5 battery (13) along the guide into the APS 5
charger* (15) slot as far as it will go.
2. Connect the plug of the USB Type-C cable (17) to the USB Type-C
connector of the Power Adapter (18).
3. Plug the Power Adapter (18) into a 100-240 V socket.
4. Connect the other end of the USB Type-C cable (17) to the USB Type-C
connector (15) of the charger.
5. LED indicators (16) will display the battery charge level (see Table).
6. Wait until the battery is fully charged (LED indication (16): ).

Note: Two batteries can be charged at the same time, a second slot is
provided for it.
LED indication (16) in the
battery charging mode
Battery Level
Battery charge level is from 0% to
25%
Battery charge level is from 26% to
50%
Battery charge level is from 51% to
80%
Battery charge level is from 81% to
99%
Battery is fully charged. It can be
disconnected from the charger.
Defective battery. Do not use the
battery!
LED indication (16) in the
standby mode**
Battery Level
Battery charge level is from 0% to
25%
Battery charge level is from 26% to
50%
Battery charge level is from 51% to
80%
Battery charge level is from 81% to
99%
Battery is fully charged. It can be
disconnected from the charger.
Defective battery. Do not use the
battery!
* Available separately

** Standby mode is when the batteries are in the charger but the Power
Adapter is not connected. In this mode, the indicators are only on for 10
seconds.
Attention! When using a Power Adapter that does not support USB
Power Delivery fast charging technology, the flicker frequency of the LED
indicators decreases by a factor of 3 and the charge time increases.
Attention! The charger heats up during fast charging. Excess heat is
removed through the radiator and does not affect the device operation.
Battery Installation
1. Put the Lock-cover (12) on the rechargeable APS 5 battery (11).
2. Insert the APS 5 battery (11) along the guide into the battery
compartment (13).
3. Lock the battery (11) by turning the Lock-cover (12) clockwise until it
stops.
4. Turn the Lock-cover (12) counter-clockwise to remove the battery (11).
External Power Supply
External power can be supplied from an external source, such as a Power
Bank (5 V, 9 V).
1. Connect the external power source to the USB Type-C connector (9) on
the device.

2. The device will switch to draw power from the external source while the
АPS5 battery is gradually recharged.
3. A battery icon will appear on the display showing the percentage-
charged level.
4. An icon will be displayed when the device is powered by an external
power source and the АPS5 battery is not connected.
5. The device automatically switches to the APS 5 battery when the external
power supply is disconnected.
Attention! Charging APS 5 batteries from an external source at
temperatures below 0°C (<32°F) can reduce battery life. When using
external power, connect the power bank to the device only after it has
been turned on and working (warming) for at least several minutes.
Precautions
•Always use the APS 5 charger (purchased separately) to charge APS 5
batteries. Using an unsuitable charger can cause irreparable damage to
the battery and fire.
•Do not charge the battery immediately after exposure to a cold
environment. Let the battery warm for at least 30 minutes before
charging.
•Do not leave the battery unattended while charging.
•Do not use the charger if it has been modified or damaged.
•Do not leave the battery in a plugged-in charger after charging is
complete.
•Do not expose the battery to high temperatures or open flames.
•Do not use the battery as a power source for devices that do not support
APS 5 batteries.
•Do not disassemble or deform the battery or charger.
•Do not drop or strike the battery or charger.

•Protect the battery and charger from water and moisture.
•Keep the battery out of the reach of children.
Recommendations for Use
•The batteries should be partially charged (50 to 80 %) for long-term
storage.
•Charge at an ambient temperature of 0°C to +35°C (32°F to 95°F) or the
lifespan of the battery will decrease significantly.
•Using the battery at sub 0°C (<32°F) ambient temperature decreases
battery capacity. This is normal and not a defect.
•Using the battery at temperatures outside the range of -25°C to +40°C (-
13°F to 104°F) may reduce battery life.
•The battery is short-circuit protected. Any situation that may cause short-
circuiting should be avoided.
Getting Started
Powering on and Image Setting
1. Open the lens cover (8). The lens cover can be secured to the strap using
the built-in magnet.
2. Press the ON/OFF (6) button briefly to turn on the device.
3. Adjust the eyepiece focus ring (1) of the device until the symbols on the
display are sharp.
4. Rotate the lens focus ring (7) to focus on the object being observed.
5. Enter the main menu with a long press of the MENU (4) button and select
the desired calibration mode: Manual (M), Semi-Automatic (SA) or
Automatic (A).
6. Calibrate the image by briefly pressing the ON/OFF (6) button. If
the SA or Acalibration mode has been selected the microbolometer is
closed with an internal shutter automatically. However, if
the Mcalibration mode has been selected you must close the lens cover
before calibrating manually.

7. Select the required amplification level (“Normal” , “High” ,
“Ultra” ) by briefly pressing the UP (5) button.
8. Enter the main menu with a long press of the MENU (4) button and select
the desired colour mode (for more details see the Colour Modes section).
9. Activate the quick menu by briefly pressing the MENU (4) button to adjust
the brightness, contrast and smooth digital zoom (for more details see
the Quick Menu section).
10. After use, turn the device off by a long press of the ON/OFF (6)
Warning! Never point the lens at intensive energy sources such as laser
radiation emitting devices or the sun. It can damage electronic
components in the device. The warranty does not cover damage arising
from failure to comply with operating instructions.
Button Operation
Operation
Button
Power device on
short press
Power device off
long press for 3 secs
Turn display off
long press for less than 3 secs
Turn display on
short press
Calibrate the microbolometer
short press
Switching amplification levels
short press
Control discrete digital zoom
long press

Video Recorder
Button
Start/pause/resume video
recording
short press
Stop video recording
long press
Switch to video / photo
long press
Capture a photo
short press
Main Menu
Button
Enter main menu
long press
Navigation upwards/rightwards
short press
Navigation downwards/leftwards
short press
Confirm selection
short press
Exit submenu without confirming
selection
long press
Exit menu (switch to viewing
mode)
long press
Quick Menu
Button
Enter quick menu
short press
Switch between quick menu
options
short press
Increase value
short press
Decrease value
short press

Exit quick menu
long press
Interface
Status Bar
The status bar at the bottom of the display shows current operating
statuses via icons, including:
•Colour Mode (shown only when the Black Hot colour mode is selected)
•Amplification level
•Smoothing Filter (displayed when the function is on)
•Calibration Mode (in Automatic calibration mode a countdown
timer will appear instead of the calibration mode icon 3 seconds
before automatic calibration begins).
•Microphone
•Magnification
•Wi-Fi Connection
•Time
•Power Indication:
- charge level if the device is powered by a battery
- charge level if the device is charging and powered by a battery
- no battery, the device is connected to an external power supply

Quick Menu
The basic settings (adjusting brightness and contrast, using the
Stadiametric Rangefinder function) can be changed using the quick access
menu.
•Enter the menu by briefly pressing the MENU (4).
•A short press of the МENU (4) button enables you to toggle between
functions, as described below.
Brightness –press the UP (5)/DOWN (3) buttons to change display
brightness from 0 to 20.
Contrast –press the UP (5)/DOWN (3) buttons to change image
contrast from 0 to 20.
Note: display brightness and contrast settings are saved in the memory
when the device is turned off.
Stadiometric Rangefinder - change the position of special marker
lines to determine the distance to the object being observed by pressing

the UP (5)/DOWN (3) buttons (for more details see the Stadiametric
Rangefinder section).
Smooth Digital Zoom –press the UP (5)/DOWN (3) button to change
the value of the digital zoom from 2 to 8. The digital zoom changes in 0.1
increments.
•Press and hold the MENU (4) button to exit the menu or wait for 10
seconds to exit automatically.
Main Menu
Enter the Main Menu
1. Enter the main menu with a long press of the MENU (4) button.
2. Press the UP (5)/DOWN (3) buttons to move through the menu items.
3. Press the MENU (4) button briefly to select the menu item.
4. Press and hold the MENU (4) button to exit the menu or wait for 10
seconds to exit automatically.
5. Automatic exit takes place after 10 seconds of inactivity.

General View of Menu
Tab 1

Tab 2
Colour Modes
Colour palette selection.
Other manuals for Axion 2 XQ35
1
Table of contents
Other Pulsar Laboratory Equipment manuals