Pura Vida PSII-48PV User manual

INSTALLATION INSTRUCTIONS
PSII-48PV / PMIII-82PV
IMPORTANT SAFETY INSTRUCTIONS:
READ COMPLETELY BEFORE PROCEEDING
When using this electrical equipment, adhere to all basic safety precautions. Please
observe the following:
• Follow all applicable electrical codes, including proper bonding procedures.
•
servicing the unit.
•
supply when servicing.
UV EXPOSURE & PROTECTION:
UV
Read and follow these instructions. Ensure manual stays with facility owner for future
reference. Maximum recommended operating pressure is 50 PSI.
FOLLOW EXACT ASSEMBLY
OF THE QUARTZ TUBE & BULB WILL
VOID WARRANTY.
WARNING!
!

INSTALLATION:
1. Install the UV unit in a readily accessible and well lit area to facili-
tate inspection and maintenance. The UV should be installed after
2. Inspect for hidden electrical wiring or plumbing prior to drilling any
holes.
3. -
izontal installation, attach mounting clips to the wall and unscrew
base from chamber (Stand on base while turning unit counter
clips.
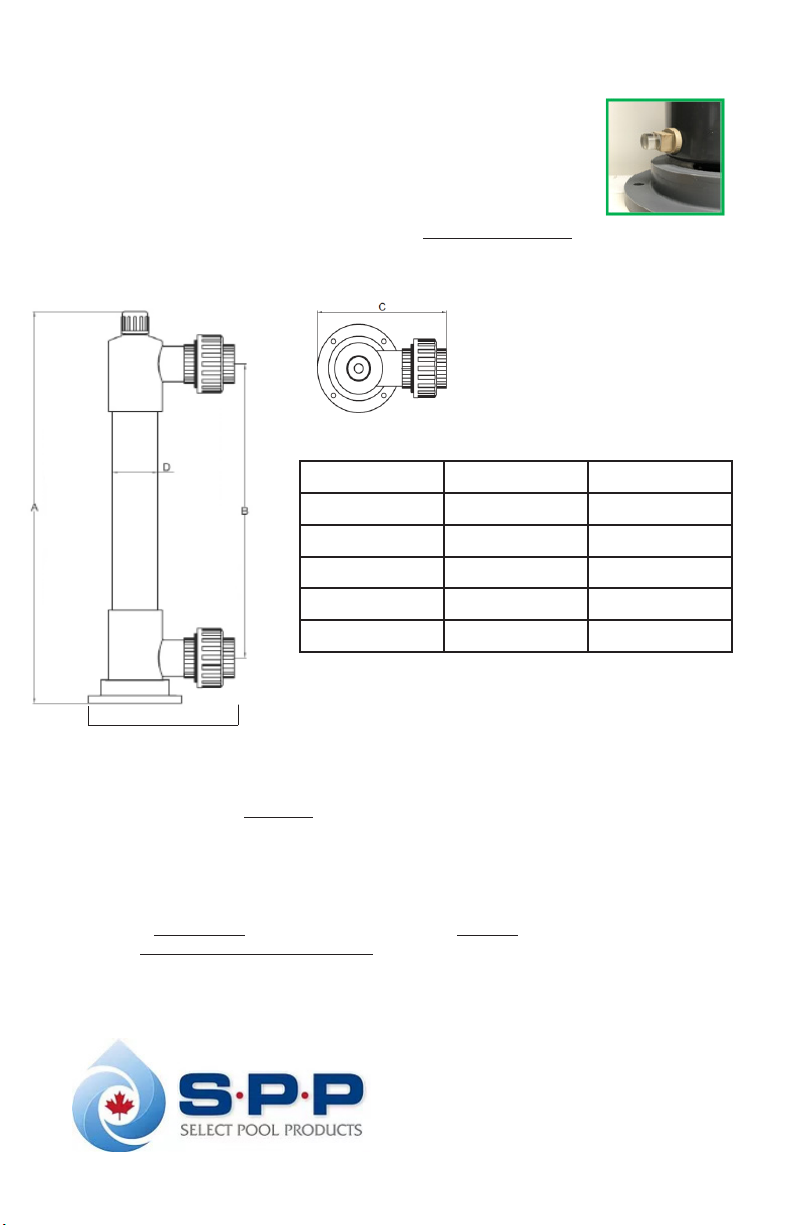
4. Connect plumbing. For horizontal and vertical installation, outlets
are dual purpose and can be used for incoming or outgoing water
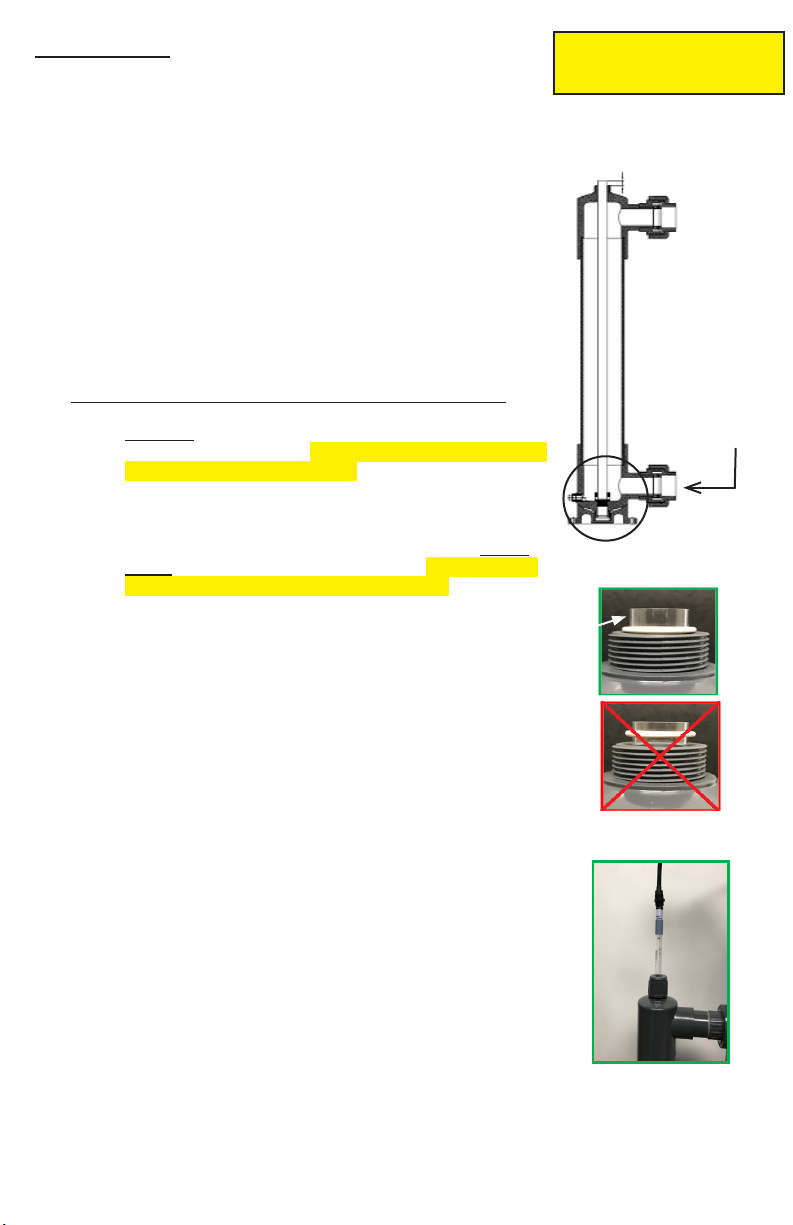
Install the quartz tube & perform a pressure test. (Quartz tube and
the sides of the quartz tube and lamp. Handle by the ends only.
Carefully
Ensure the spring is inside quartz
tube at all times during operation
sure the quartz tube is lowered directly in the centre of the
into the holder in the base.
14mm
The nut will not
thread on if quartz tube is installed incorrectly.
PERFORM A PRESSURE TEST
secure and not moving in unit.
original position. Hand tighten on top of chamber
Installing the Lamp
8.
Figure 3
Figure 2
14mm
WARNING!
Figure 1
Correct
14mm
Perform visual
inspection to ensure
quartz tube is in the
bottom union.
IMPORTANT: This UV system operates independently of pool pump in plug in applications
unless using a dual socket timer (to plug in pump and UV unit).
a) Ensure UV unit is o when pump is o.
b) Wire UV unit in conjunction with pool pump in hard wire applications.

Parts List:
Item Description PSII-48PV
Part #
PMIII-82PV
Part #
1 Water Proof Strainer
2 01A 01A
3 4P180 4P180
4 UV Lamp
Rubber O-Ring
Quartz Tube
Chamber UP114890
8 Ballast UV-8/88 UV-8/88
9 Mounting Clip 89123 114123
10 Spring 1343
12 Drain Plug
13 PVUK2 PVUK2
14
Pressure Test Cap 01A-PTC 01A-PTC
REPLACING UV LAMP AND CLEANING THE QUARTZ TUBE:
Avoid touching the sides of the quartz tube and lamp, handle by the ends only.
1. Disconnect power source.
2.
3.
4.
While holding the lamp end, slowly and carefully
lamp out of chamber by lifting lamp straight out of unit. Dispose of lamp according to your local
regulatory laws.
8.
9. To reinstall follow these steps in reverse.
IMPORTANT: Ensure to reinsert the quartz tube correctly leaving only 14 mm of glass
See Figure 1.
MAINTENANCE & TROUBLESHOOTING:
• Quartz tube is to be cleaned during bulb replacement with glass cleaner.
• UV lamp replacement is recommended every 10,000 hours of operation or every 2 years.
• For purchasing replacement parts please contact your local dealer.
• If light on ballast turns red, bulb and quartz tube should be inspected and replaced if necessary.
• For winterization follow instructions on page 4.
•
may be a 1-2mm gap between the holder and the quartz tube. The water pressure may cause
14 15
13
12

Dimensions:
www.selectpoolproducts.ca
WARRANTY POLICY
VESSEL AND BALLAST
We guarantee that the vessel and electrical ballast will be free from defects in material and
two years from the date of install.
UV LAMP AND QUARTZ TUBE
We guarantee that the UV lamp and quartz tube will be free from defects in material and
defective.
This guarantee will not apply to any product that has been , repaired by unauthorized
personnel, or improperly installed or winterized
after purchase.
inlet / outlet
Distance between inlet & outlet
Overall length less lamp lead wire
PSII-48PV PMIII-82PV
A 31.7” 38”
B 23.8” 29.3”
C 10.75” 10.25”
D 3.5” 4.5”
Outlet Size 1.5/2” 2”
inlet / outlet
WINTERIZING INSTRUCTIONS:
Recommended operating temperature is between 2°C - 40°C (36°F -
104°C). Do not allow unit to freeze before fully draining.
1. Disconnect from power source.
2.
3.
4. Tip the unit on an angle to remove any standing water.
Storing the entire unit in a dry and warm location is highly recommended.
Figure 4
C
This manual suits for next models
1
Table of contents
Other Pura Vida Water Filtration System manuals
Popular Water Filtration System manuals by other brands

Festo
Festo VABD B Series Assembly instructions

3M
3M Filtrete 3US-PS01 Installation and operating instructions

Puretec
Puretec Multitrol MUL-E3 Series user guide

Aqua Medic
Aqua Medic AC Runner 3.2 Operation manual

Plasma Made
Plasma Made GUC 1314 Airfilter Installation and user manual

Alfalaval
Alfalaval MOPX 205 TGT-24 manual