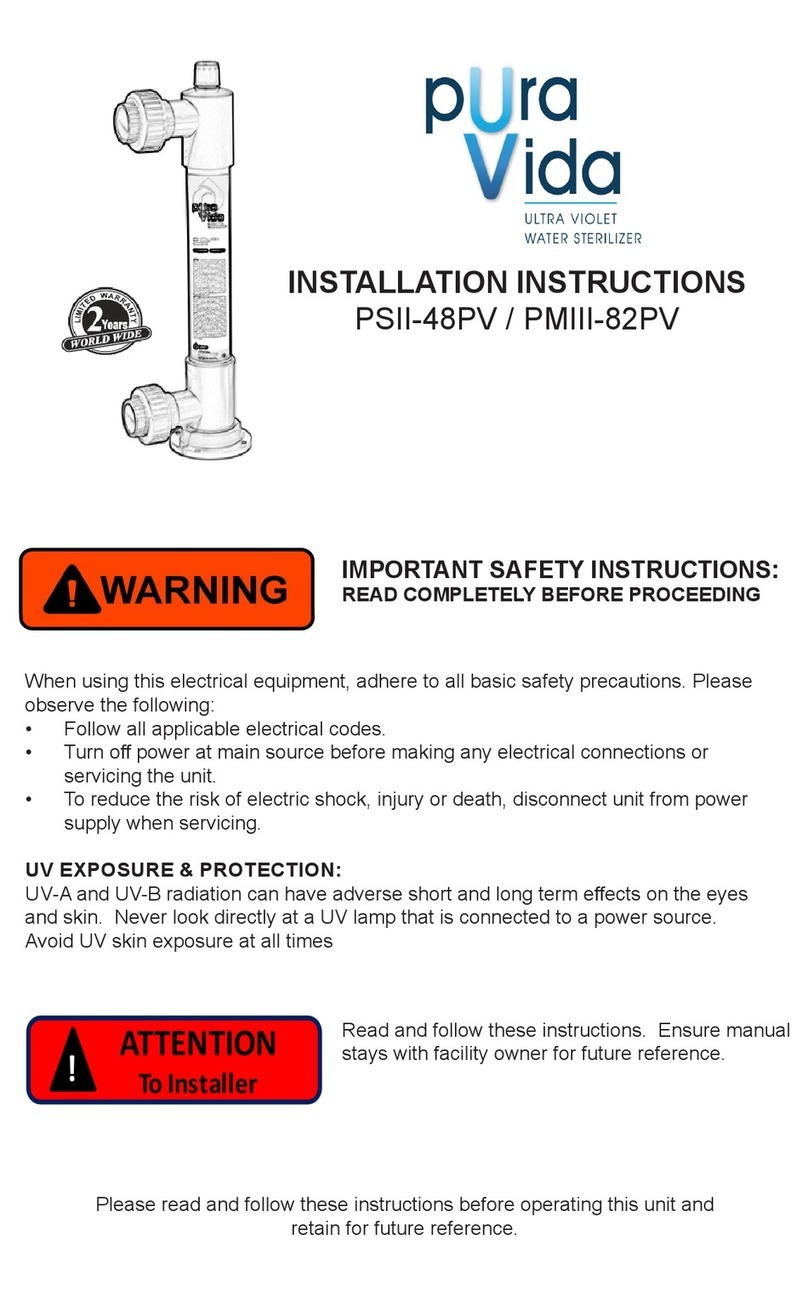
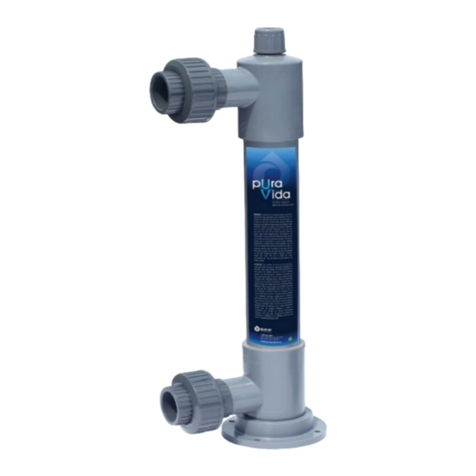
Pura Vida PV2-42C User manual

PV2-42C & PV2-82C
OPERATION & INSTALLATION INSTRUCTIONS
Scan QR code for
French Manual.
Scannez le code QR
pour le manuel en
français.
INSTALLER: LEAVE THIS
MANUAL WITH OWNER

Congratulations on purchasing the Pura Vida Ultraviolet Water Sterilizer.
By purchasing this system, you are receiving not only a high quality
product but also peace of mind. In addition to your chlorine or salt
chlorine generator, a UV system gives you reassurance that your family
will have access to cleaner, safer pool water, while dramatically reducing
chemical usage. This is a chemical free process which is simple in its
concept and effective in its abilities to inactivate microorganisms which
are resistant to chlorine. Simple maintenance, continuous disinfection
and ultimately safe water, Pura Vida makes it that easy.
PROUDLY MADE IN
NORTH
AMERICA

1|Page
TABLE OF CONTENTS
SAFETY CONSIDERATIONS 2
BEFORE YOU BEGIN 3
WATER CHEMISTRY 3
ASSEMBLY & PARTS LIST 4
LOCATION 5
INSTALLATION 6
MAINTENANCE 7
WINTERIZATION 8
OPERATION 9
CONTROLLER 9
LAMP COUNTDOWN SEQUENCE 9
LAMP REPLACEMENT 10
SYSTEM TROUBLESHOOTING 10
SYSTEM SPECIFICATIONS 11
LIMITED WARRANTY STATEMENT 12
WARRANTY REGISTRATION 13

2|Page
SAFETY CONSIDERATIONS
Although your UV system has been manufactured to the highest safety standards, care
must be followed when operating and/or maintaining your system.
Read and follow these instructions. Ensure manual stays with owner for future
reference.
1. Before servicing this equipment, disconnect the power cord from the electrical
outlet.
2. Energy given off by the UV lamp is harmful to your eyes and skin. NEVER look
directly at an illuminated UV lamp without adequate eye protection and always
protect your skin from direct exposure to the UV light.
3. For complete disinfection, use ONLY genuine replacement parts.
4. Do not operate the unit if it has any damaged or missing components.
5. To avoid possible electrical shock, use only with a properly grounded electrical
outlet.
6.
7. Do not use this system for any purpose other than what it was intended for.
Misuse of this system could potentially cause harm to the user or others.
8. The disinfection system should be directly installed into a ground fault circuit
interrupter (GFCI). If the use of an extension cord is required, the cord must be
manufactured with a minimum of 16 gauge wire and care should be taken to
avoid potential tripping hazards.
9.
THIS PRODUCT IS NOT TO BE USED FOR GENERAL LIGHTING / ILLUMINATION.

3|Page
BEFORE YOU BEGIN
The following will be needed for installing the UV system:
Tools
• Pipe cutter, hacksaw or other specialized tools required to cut/modify into your
existing pool plumbing
•
Other materials
• PVC/PVC glue
•
(THIS SEALANT IS INCLUDED IN YOUR SYSTEM PARTS
SAVE PACKAGING FOR QUARTZ TUBE AND BULB FOR WINTER STORAGE.
WATER CHEMISTRY
UV disinfection is extremely effective against microorganisms but only if the UV light
can pass through the water it needs to treat. This means that the quality of your water is
very important in order to ensure complete disinfection.
Regular water chemistry testing should be performed as usual.
RECOMMENDED WATER PARAMETERS
Chlorine residual: 1-3 ppm free chlorine
pH: 7.4 - 7.6
Total akalinity: 80 - 120 ppm

4|Page
ASSEMBLY AND PARTS LIST
Unpack the system and ensure all the components are included with the system. Your
system is shipped with the following components:
CONTROLLER
(with 2 screws
for mounting)
PV2RCHO-4.12
POWER CABLE
260004
North American
GLAND NUT
320006
O-RING
300038
UV LAMP
PV2RL-600HO
(PV2-42C Series)
PV2RL-950HO
(PV2-82C series)
SLEEVE SPRING
310039
QUARTZ SLEEVE
PV2RQ-600
(PV2-42C Series)
PV2RQ-950
(PV2-82C series)
CHAMBER
300105
(PV2-42C Series)
300106
(PV2-82C series)
UNION
310192 (2 unions)
UNION
Pressure Test Plug
390110
Drain Port Plug
300116
Sealant for Unions
310198
Optional Mounting Hardware
510008 (2 clamps)
*not included
OUTLET
INLET

5|Page
Figure 1. Diagram of ow
FLOW RATES
LOCATION
Place UV system in an area to ensure there is enough
space at the lamp connector end to safely remove the
UV lamp and/or quartz sleeve (Figure 2). The controller
will require a ground fault circuit interrupter (GFCI or
GFI) outlet and should be mounted beside or above
the chamber. Ensure controller can be mounted upright
& not directly exposed to the elements. If installing
unit in horizontal position, you must assemble all
components in vertical position.
PUMP FILTER HEATER SALT CELL OR CHLORINATOR
PV2
UV
Figure 2. Lamp
Removal Spacing
leave at
least an
additional
chamber
length to
facilitate
lamp and
sleeve
removal
RECOMMENDED PLACEMENT
OUTLET
INLET
INLET
OUTLET

6|Page
INSTALLATION
The chamber can be installed either horizontally or vertically. Vertical installation is the
preferred method with the inlet at the bottom (lamp connection at the top) If installing
horizontally additional mounting hardware is required (PN 510008).
The use of a by-pass assembly is recommended as it will allow you to isolate the UV
chamber. This will allow for easier access in case maintenance is required.
If installing vertically, the base can be mounted to the ground
however it is recommended leaving the unit unfastened for easy
removal when storing during the off season.
It is recommended to have a pool professional connect the
UV chamber to the water supply and may be a requirement
depending on where you are located.
Step 1: Please note, the
inlet should be at the bottom and the outlet at the top of the
chamber. Use the union sealant that is included in the box to
glue union to threads on stainless steel chamber. Use regular
PVC plumbing glue to attach union to pool piping.
Step 2: Perform a Pressure Test (See Figure 3). Insert pressure
test cap in top of chamber & screw on top gland nut. Turn on
pump and observe for any leaks. Proceed to Step 3 if no leaks
detected.
Step 3: Inserting the Quartz Sleeve. Remove glant nut & pressure
test cap. Gently remove the quartz sleeve from its packaging.
Be careful not to touch the length with your hands. The use of
cotton gloves is recommended for this procedure as oils from
the hands can leave residue on the sleeve and lamp which can
ultimately block the UV light from getting to the water. Carefully slide the sleeve into the
chamber until you feel it rest inside the centre of internal metal basket holder at bottom
of unit
Caution: Anymore than 12mm of glass exposed can cause the quartz tube to break and
void warranty.
Step 4: Install O’Ring and Spring. Slide the o’ring onto the quartz sleeve until it is butted
up against the chamber. Insert spring inside quartz tube. PLEASE NOTE: DO NOT install
a UV lamp inside the quartz sleeve without the spring in place. Do not proceed if more
than 12mm of glass is exposed from chamber.
Step 5: Install gland nut. Hand tighten the provided gland nut over the quartz sleeve
onto the threaded top of the chamber. It has a positive stop to prevent over-tightening.
DO NOT USE TOOLS for this step.
Figure 4. Quartz
Sleeve Installation
NOTE: Installation of your UV disinfection systems shall comply
with applicable provincial/state & local regulations.
Figure 3. Pressure
Test Cap Installation

7|Page
Step 6: Lamp installation. Carefully, remove the lamp
from its packaging. Always hold UV lamps by their ceramic
ends, not by the glass. Again, the use of cotton gloves is
recommended. Make sure spring is inserted into the quartz
tube before this step. Gently lower lamp into quartz
sleeve.
Step 7: Connecting the lamp. Plug the lamp connector
into the lamp. Note the keying for proper alignment
(Figure 5). Insert the lamp connector into the gland nut,
gently push down then turn the connector approximately
¼ turn clockwise to lock the connector to the gland nut
(Figure 6).
Step 8: Tighten the captive ground screw to the ground
lug on the UV chamber to ensure proper grounding
(Figure 7).
Step 9: Mount controller in an upright vertical position
near by with supplied screws. Ensure it is not directly
exposed to the elements. We recommend installing a
small hood to protect the controller.
Your system is now ready to be plugged into the
appropriate GFCI protected outlet. You may consider
keeping quartz tube and bulb packaging for off season
storage, if this winterization method is required (See
page 8).
PLEASE NOTE: A timer is recommended in conjunction
with your pool pump to ensure the Pura Vida UV system
is running at the same time as the pump.
MAINTENANCE
CLEANING THE QUARTZ SLEEVE
At a minimum, the quartz sleeve should be cleaned on an annual basis. Depending on
the water quality, the quartz sleeve may require periodic cleaning. The following steps
outline a basic cleaning procedure.
Step 1:
through the system. Otherwise, turn off main water valve (and/or turn off the pool pump).
Step 2: Disconnect power cord of UV system from electrical outlet.
Step 3: Release water pressure by opening union and letting water drain from the
system.
Step 4: Remove the captive ground screw from the ground lug on the UV chamber.
Step 5: Remove the lamp connector from the chamber (gland nut) by pushing the lamp
connector gently down and turning it ¼ turn counter-clockwise. Disconnect the lamp
connector from the lamp. CAUTION: the lamp may be hot!
Figure 5. High Output
UV Lamp Connection
Figure 6. Lamp Connector
Figure 7. Ground Screw

8|Page
Step 6: Being careful to touch only the ceramic ends, remove the lamp out of the
chamber.
Step 7: Unscrew the gland nut from the chamber exposing the end of the quartz sleeve.
Step 8: Carefully remove the quartz sleeve and o-ring by gently twisting and pulling the
quartz sleeve.
Step 9: Using a soft, lint-free cloth or towel wipe the sleeve down using a commercial
scale cleaner (i.e. CLR®or LIME-A-WAY®). This removes scaling or mineral deposits that
may be on the outside of the quartz sleeve. Be careful not to get any moisture or liquids
inside of the sleeve and ensure spring stays in place inside quartz sleeve.
Step 10: Dry the sleeve with separate cloth.
Step 11: Slide the sleeve back into the chamber following step 3 from the installation
section of the manual. Replace the o’ring and ensure spring is re-installed into quartz
sleeve.
WINTERIZATION
Recommended operating temperature is between 2-40 degrees C (36-104F). Please
ensure the Pura Vida and pump is off before winterizing.
There are 2 options for winterization:
WHEN BASE IS NOT AFFIXED TO CONCRETE: The Pura Vida unit should be disconnected
and stored indoors for winter. Unscrew the unions to disconnect the plumbing and remove
the drain plug to allow excess water to escape. Keeping the system fully assembled
move the chamber and controller inside for the winter.
WHEN BASE IS AFFIXED TO CONCRETE OR IF REQUIRED TO
LEAVE CONNECTED TO PLUMBING: Disconnect Power. Unscrew
the unions to disconnect the plumbing and remove the drain plug.
Remove the controller from wall mount and carefully disconnect
the lamp from the lamp cable. Unscrew ground screw from the
ground lug on chamber. Carefully remove the quartz tube and lamp.
These are fragile and must be handled with care, gloves are strongly
recommended. Ensure the spring remains in the quartz tube as it is
essential for reassembly. Utilize original packaging to safely store
the lamp and quartz sleeve. Apply the pressure test cap and screw a
top gland nut, as noted in STEP 2 of installation. After water has been completely drained
the unions can now be re-connected if desired.
IT IS ESSENTIAL TO STORE ELECTRONICS/CONTROLLER INSIDE DURING WINTER
MONTHS.
*When ready to reconnect the Pura Vida in the spring, please refer to the original
installation instructions above.
**If proper winterization and installation instructions are not followed, the warranty will
be rendered void.
Pressure Test Cap
Installation

9|Page
OPERATION
Pura Vida systems come with a feature laden controller that incorporates both the lamp
driver (ballast) and control features in a fully sealed case to prevent water intrusion.
Controllers feature a built in lamp monitor, with both audible and visual indication
of lamp life, and auto sensing dual voltage for plug in or hard wired use.
CONTROLLER
Simplistic in operation, this system features a tri-colour LED light
indicating system status and a 4-digit display to indicate lamp life
remaining. Pressing the button will change the display to indicate
total running time. When the UV lamp is on and within its operating
age, the LED will be green. When the UV lamp is not on or the lamp
life has expired, the LED will be illuminated red and an audible buzzer
will sound. To remedy this condition, the UV lamp must be replaced
with a new genuine Pura Vida UV lamp.
PLEASE NOTE: A timer is recommended in conjunction with your
pool pump to ensure the Pura Vida UV system is running at the
same time as the pump.
LAMP COUNTDOWN SEQUENCE
The system counts down the number of days until a lamp change is required.
At thirty days remaining, the LED or display screen will change to a yellow caution
indicator. At seven days remaining, the system will additionally repeat an audible chirp.
Past the zero day threshold, the LED or display screen changes to solid red with a
continuous buzzer.

10|Page
At any point during this sequence, the audible chirp or alarm can be deferred for seven
deferrals used will be displayed as below. Once the deferral expires, the alarm will sound
once again. The deferral can be repeated up to three times. PLEASE NOTE: At any point
after lamp expiration, the water disinfection rate is now compromised.
LAMP REPLACEMENT
After the lamp is expired, it must be replaced with the same part number as indicated
by the label on the chamber. Begin replacing the lamp by unplugging the power for the
controller, then refer to step 8 from the installation section of the manual (page 6) for
been reset.
SYSTEM TROUBLESHOOTING
Hard Alarms: The following give a constant audible alarm.
System Display Problem Resolution
The system has detected a
problem with the lamp.
Reset lamp protection circuit
-unplug unit for 10 seconds.
Replace the lamp with the part as
indicated on the silver label on the
chamber or on the Maintenance
parts screen.
Although the lamp is
powered and visibly
illuminated, due to the
lamp’s age its UV output
proper disinfection.
Replace the lamp with the part as
indicated on the silver label on the
chamber or on the Maintenance
parts screen.
For any other questions or troubleshooting, please contact your dealer or reach out to us

11|Page
SYSTEM SPECIFICATIONS
Model PV2-42C PV2-82C
Flow Rate
42 GPM 82 GPM
159 lpm 310.4 lpm
9.5 m3/hr 18.6 m3/hr
Port Size 1.5” MNPT 2” MNPT
Electrical 90-265V/50-60Hz.
(IEC power cord included)
Plug Type American, NEMA 5/15, 3 wire for all 110V systems
Lamp Watts 67 101
Replacement Lamp PV2RL-600HO PV2RL-950HO
Replacement Sleeve PV2RQ-600 PV2RQ-950
Replacement Controller PV2RCHO-4.12
Chamber Material 316L Stainless Steel, A249 Pressure Rated
Tubing, Polished & Passivated
Chamber Dimensions 3.5 x 26.9”
(8.9 x 68.3 cm)
3.5 x 40.7”
(8.9 x 103.4 cm)
Controller Dimensions 8.6 x 4.2 x 4” (21.7 x 10.8 x 10.2 cm)
Operating Pressure 0.7-10.3 bar (10-150 psi)
Operating Water
Temperature 2-40° C (36-104° F)
Lamp Change
Reminder YES (4-digit LED display)
Visual Lamp Out
Indicator YES
Audible Lamp Out
Indicator YES
Shipping Weight 7.9 kg
(17.5 lbs)
10.0 kg
(22.1 lbs)

12|Page
LIMITED WARRANTY STATEMENT
Products manufactured by Select Pool Products are warranted to the original user only
warranty only applies to the original purchaser and is not transferable. Warranties will not
be approved after installation of replacement parts has been completed without prior
authorization from Select Pool Products or one of its approved dealers.
UV SYSTEMS
Three (3) year Limited Warranty on the stainless steel chambers, from the
date of original purchase, or installation (proper documentation required for
ELECTRONICS
Three (3) year Limited Warranty on the controller, from the date of original
UV LAMPS & QUARTZ SLEEVES
One (1) year Limited Warranty on all ultraviolet lamps, UV sensors and quartz
sleeves from the date of original purchase, or installation(proper documentation
This Pura Vida Ultraviolet Water Sterilizer will be repaired or replaced, at our sole
option, providing that the ultraviolet system or any component is defective in materials
or workmanship for the periods outlined above and subject to the “Limitations of
to replacing the part, without charge, F.O.B. Select Pool Products’ closest Distribution
Facility or applicable service depot. Pura Vida will not be liable for any costs of removal,
installation, transportation, or any other charges which may arise in connection with a
warranty claim. Select Pool Products will not be liable for damage or wear to products
caused by abnormal operating conditions, accident, abuse, misuse, unauthorized
alteration or repair, or if the product was not installed or winterized in accordance with
the Manufacturer’s installation and operating instructions.
Limitations of warranty
This warranty does not apply to any of the following:
• A product that has been incorrectly installed according to the installation manual.
•
manufacturer.
• A product where the serial number has been altered, defaced or removed.
• Damage caused by the use of parts that are not compatible, suitable and/or
authorized by Select Pool Products for use with the product (e.g. non-original
lamps or sleeves).
• Damage caused during shipment of the product.
• If the product has not been stored properly or properly assembled.

13|Page
For Warranty Service
SELECT POOL PRODUCTS will not be liable for any incidental or consequential damages,
losses, or expenses arising from installation, use, or any other causes. There are no
purpose, which extend beyond those warranties described or referred to above.
Please visit: www.selectpoolproducts.ca/warranty-submission-form to submit a
warranty claim for any part considered defective. Proof of purchase as well as part
numbers will be required. Select Pool Products will contact you within 48 hrs to process
the claim. Please do not replace or discard any parts until instructed to do so by Select
Pool Products. For further assistance call 1-855-881-0889.
This limited warranty is the sole and exclusive warranty made by SELECT POOL
PRODUCTS with respect to this ultraviolet disinfection product, and is given in lieu
of any other warranty. To the extent allowed by applicable law, any and all express or
implied warranties not set forth herein are waived and disclaimed, including any implied
SELECT pOOL PRODUCTS’
liability under this limited warranty is limited solely to those liabilities set forth above.
In the event that any provision of this limited warranty should be found to be or become
invalid or unenforceable under applicable law, the remaining terms and conditions hereof
shall remain in full force and effect and such invalid or unenforceable provision shall be
construed in such a manner as to be valid and enforceable.
WARRANTY REGISTRATION
It is imperative that you complete the warranty registration process. This not only
registers your UV disinfection system for the provided manufacturer’s warranty, but
also allows the factory to provide you with any important product updates or technical
bulletins concerning your product. The registration process is a simple process and can
ONLY be done online at www.uv-warranty.com. Please ensure that ALL information is
PLEASE NOTE: This information is for the sole
purpose of technical support for your disinfection system and will not be used, or sold,
to any other organization for any other purpose.

PN#:910432
Version Date: 11-2021
1-855-881-0889
104A-3345 North Service Road, Burlington, ON L7N 3G2
www.selectpoolproducts.ca
EPA Establishment
#088776-CAN-001
This manual suits for next models
1
Table of contents
Other Pura Vida Water Filtration System manuals
Popular Water Filtration System manuals by other brands

Watts
Watts PWSCAB30K Pure Water Installation, operation and maintenance manual

Miele
Miele DFKS-A-1 Operating and installation instructions

Rayne
Rayne RayneClear Installation, operation & service manual

Solmetex
Solmetex Hg5 Installation and maintenance instructions

HYDRALOOP
HYDRALOOP H350 owner's manual

US Water Systems
US Water Systems 320-USP-DS-10 owner's manual