Purus - ENG - Installation Instruktions Purus Line Twist - 21123 - 2012:1
Purus - ENG - Installation Instruktions Purus Line Twist - 21123 - 2012:1
3
(2)
(5)
(4)
(1)
(3)
Purus AB, Södergatan 7, SE 275 31 Sjöbo, Sweden – Tel +46 416-257 00, Fax +46 416-257 20
info@purus.se, www.purus.se
This product complies with Industry Standards Safe Water Installation [Branschregler Säker
vatteninstallation]. The supplier guarantees the correct function of the product if industry
standards and the product installation instructions are followed. PURUS is a member of the
Swedish Tile Association and the Swedish Flooring Trade Association.
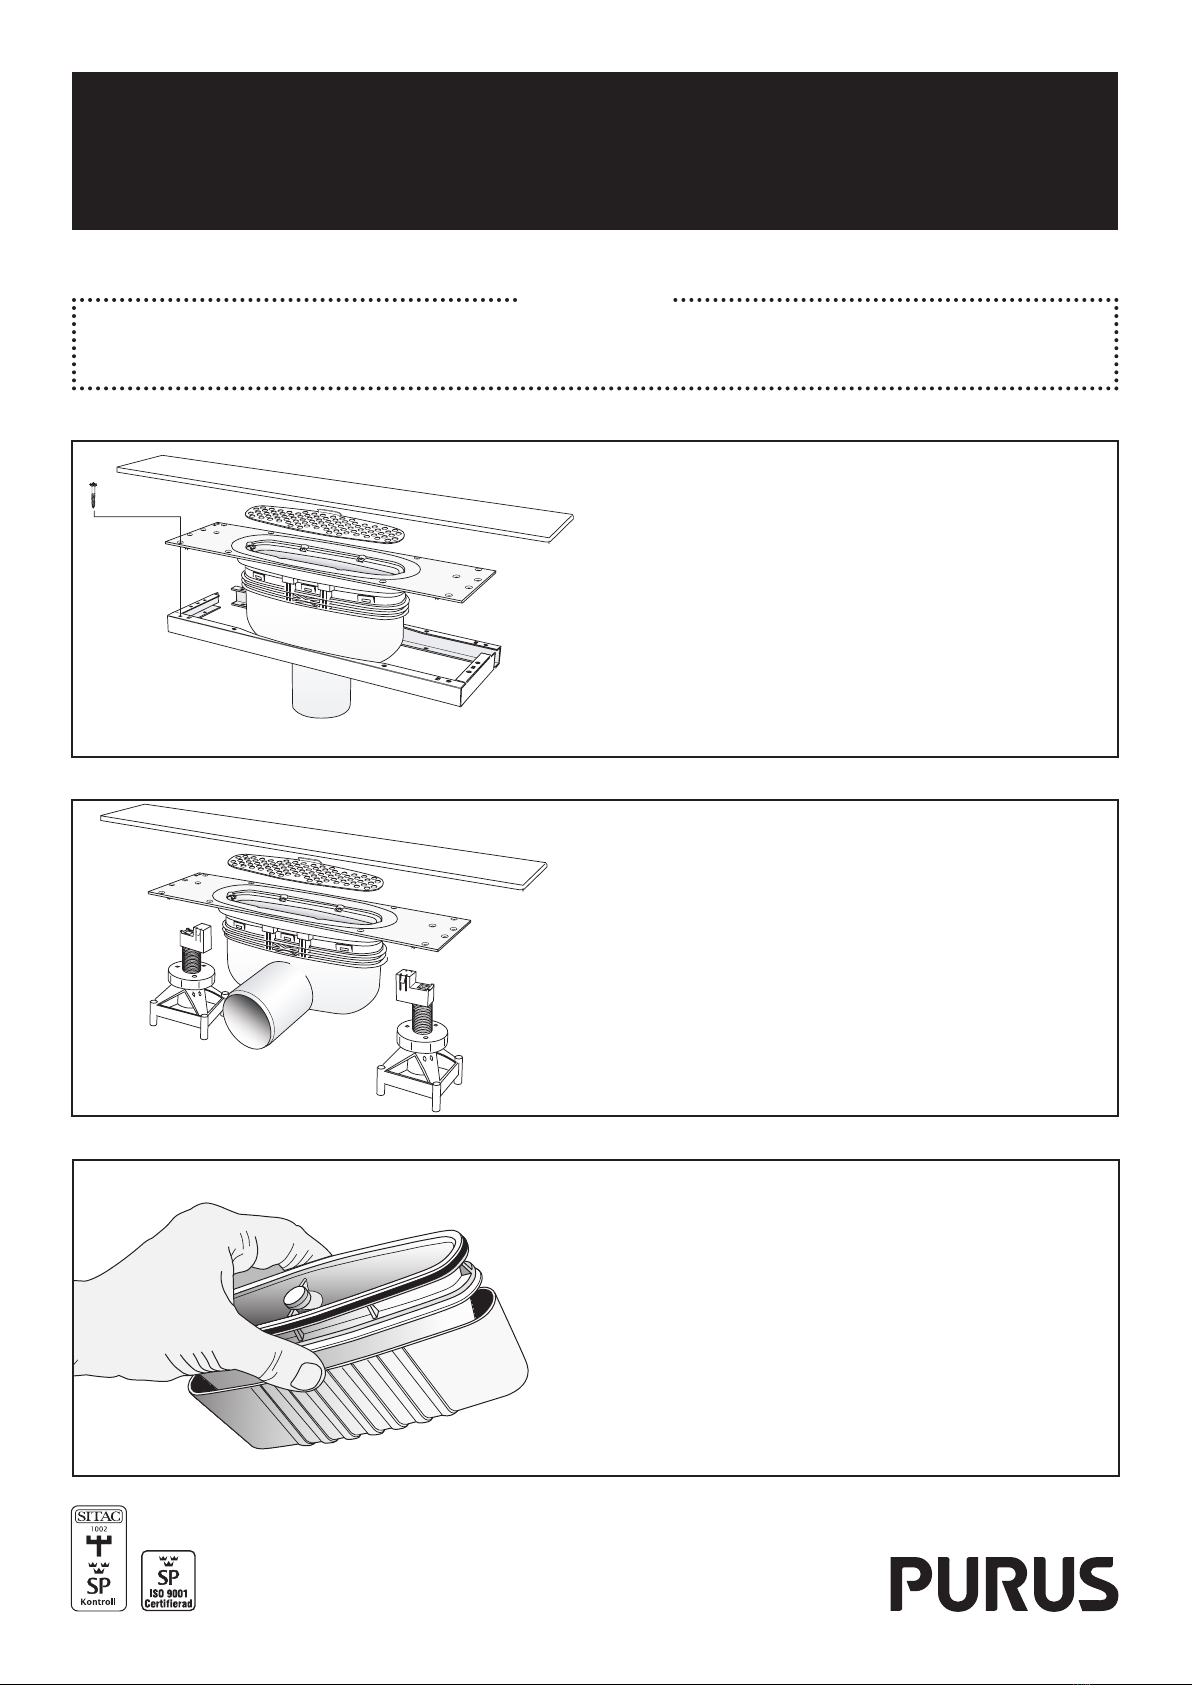
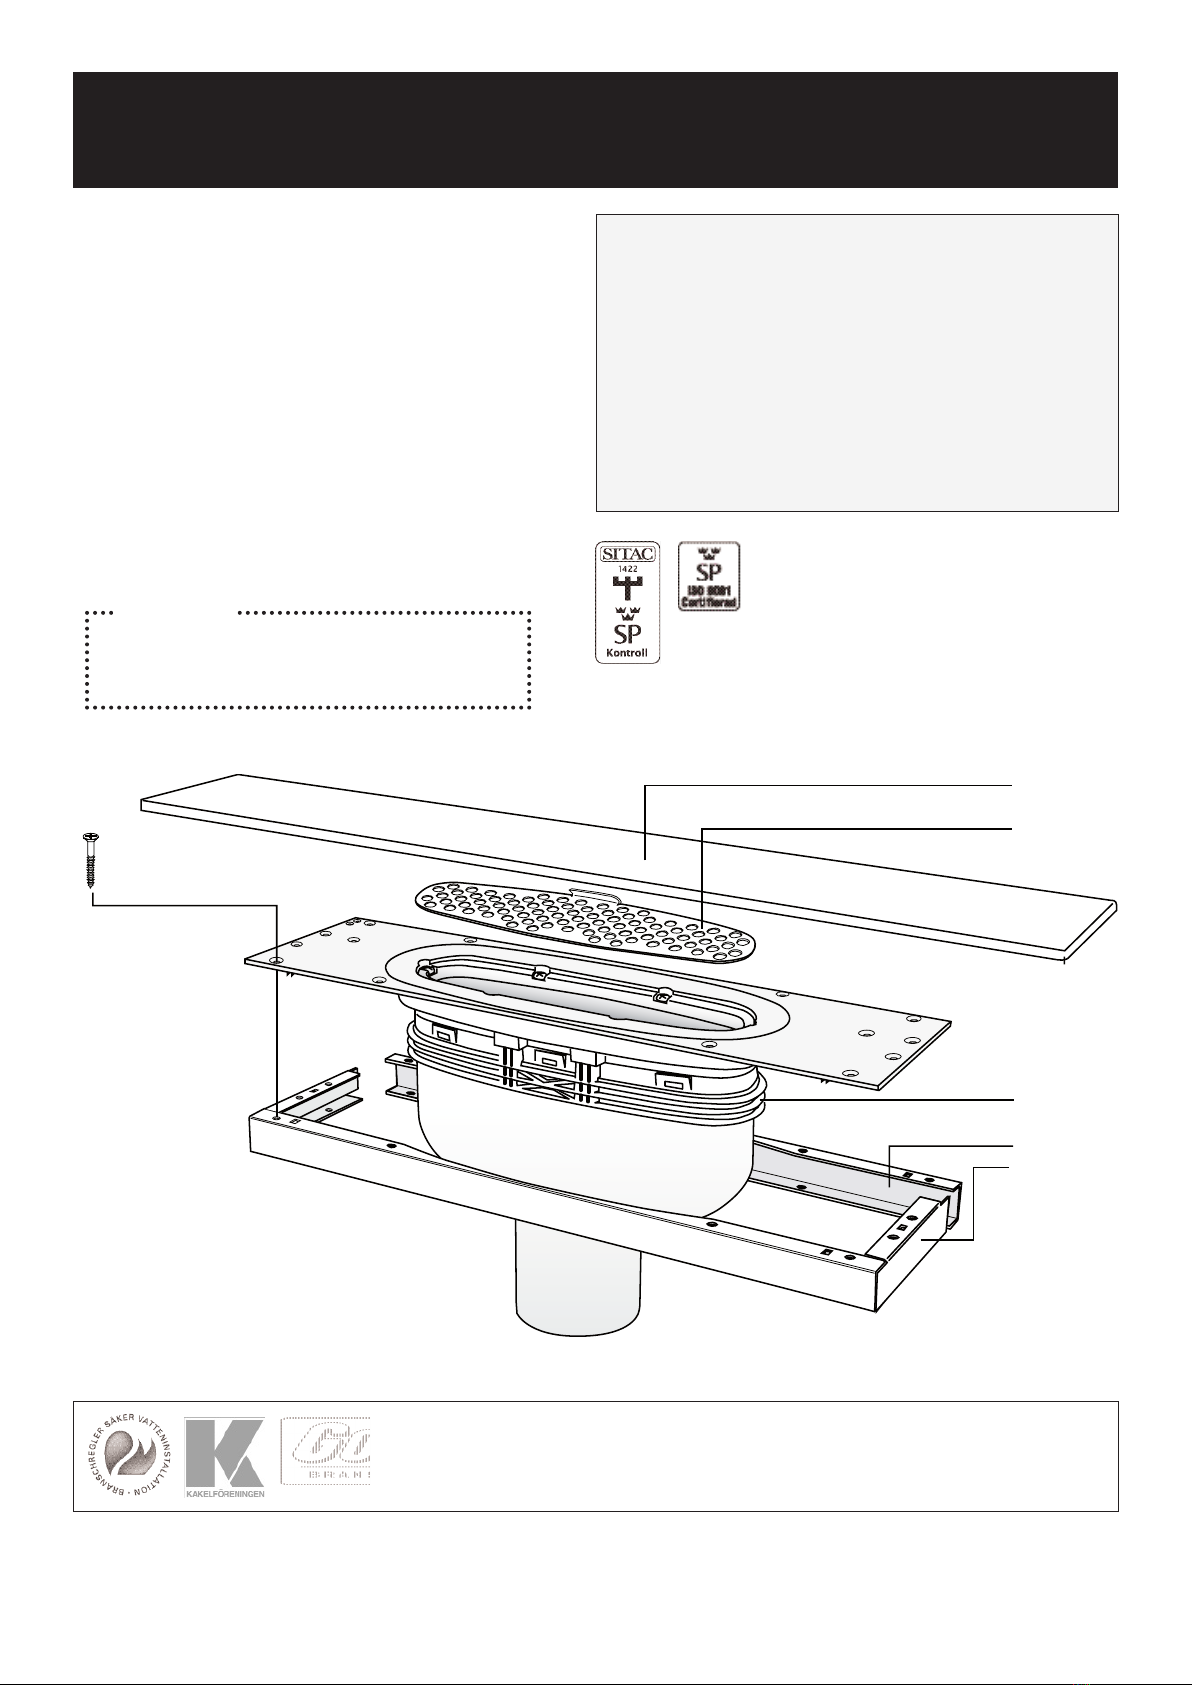
Installation Instructions Purus Line
For timber joist floors with
clinkers and stainless
frame/strainer
The box contains:
1 Floor drain.
2. Stainless frame/strainer.
3. Installation frame timber joist floor (H: 35 mm).
4. Wood screws (12 pce.).
5. Stainless hair strainer.
6. Purus support for embedment (2 pce.).
(not illustrated)
Note:
Read the installation instructions carefully
before installation. For installation by authorised
heating, ventilation & sanitation professional.
Our continual product development
may result in changes in specifications
which we reserve the right to.
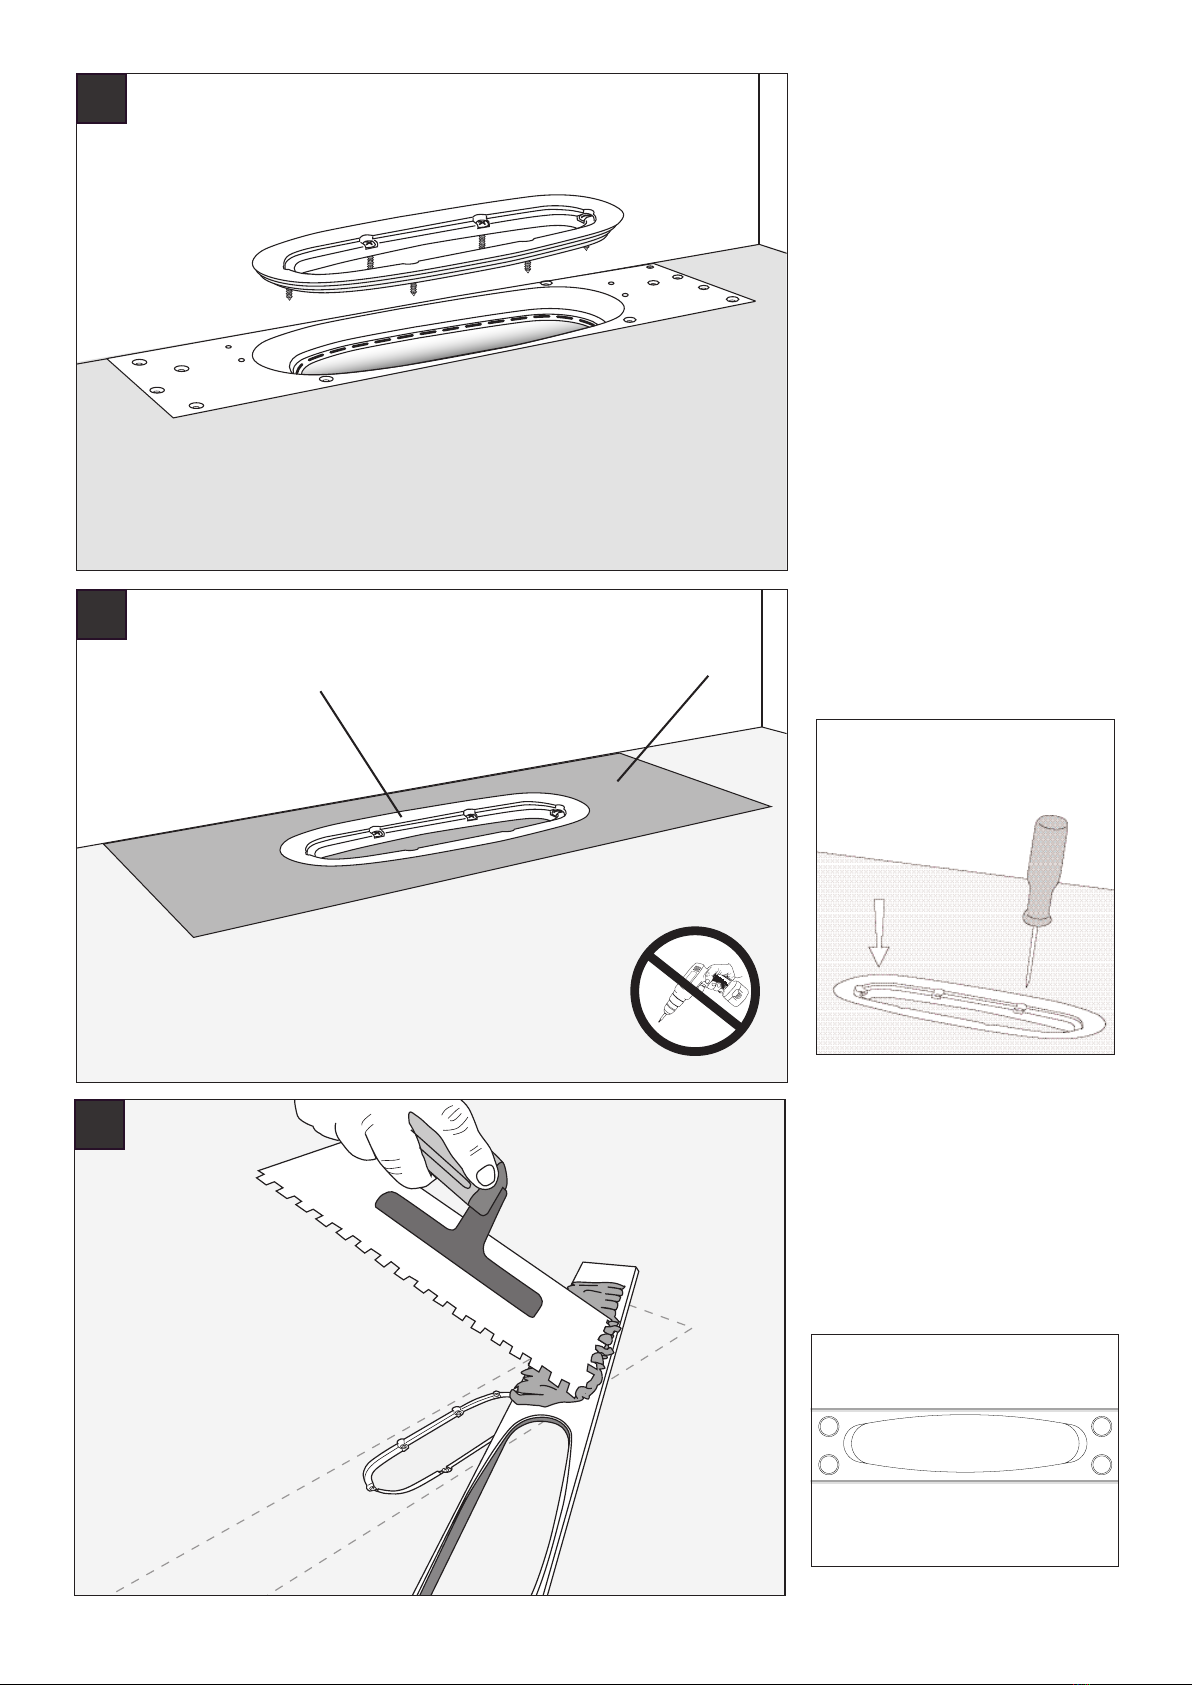
For connection with sealing membrane and ceramic
floor BKR’s (Swedish Board of Housing, Building &
Planning) industry guidelines must be observed.
For connection with plastic mat as sealing membrane,
GBR’s industry guidelines must be observed.
(2)
(5)
(4)
(1)
(3)
Purus AB
Denna produkt är anpassad till Branschregler Säker vatteninstallation. Leverantören
garanterar produktens funktion om branschreglerna och produktens monteringsanvisningar
följs. PURUS är medlem i Kakelföreningen och Golvbranschens riksorganisation.
För träbjälklag med klinker
och rostfri ram/sil
Lådan innehåller:
1 Brunnsdel.
2. Rostfri ram/sil 10 mm hög.
3. Monteringsram träbjälklag.
4. Träskruvar (12 st.)
5. Rostfri hårsil.
6. Purusstöd för ingjutning (2 st.)
(inte på skissen).
OBS!
Läs noga igenom monteringsanvisningarna
innan montering. Bör installeras av
auktoriserad VVS-Installatör.
Vår ständiga produktutveckling kan
medföra ändringar i specikationer,
vilket vi förbehåller oss rätten till.
För anslutning av tätskikt och keramiska golv
skall BKR:s branschregler följas.
För anslutning av plastmatta som tätskikt skall
GVK´s branschregler följas.
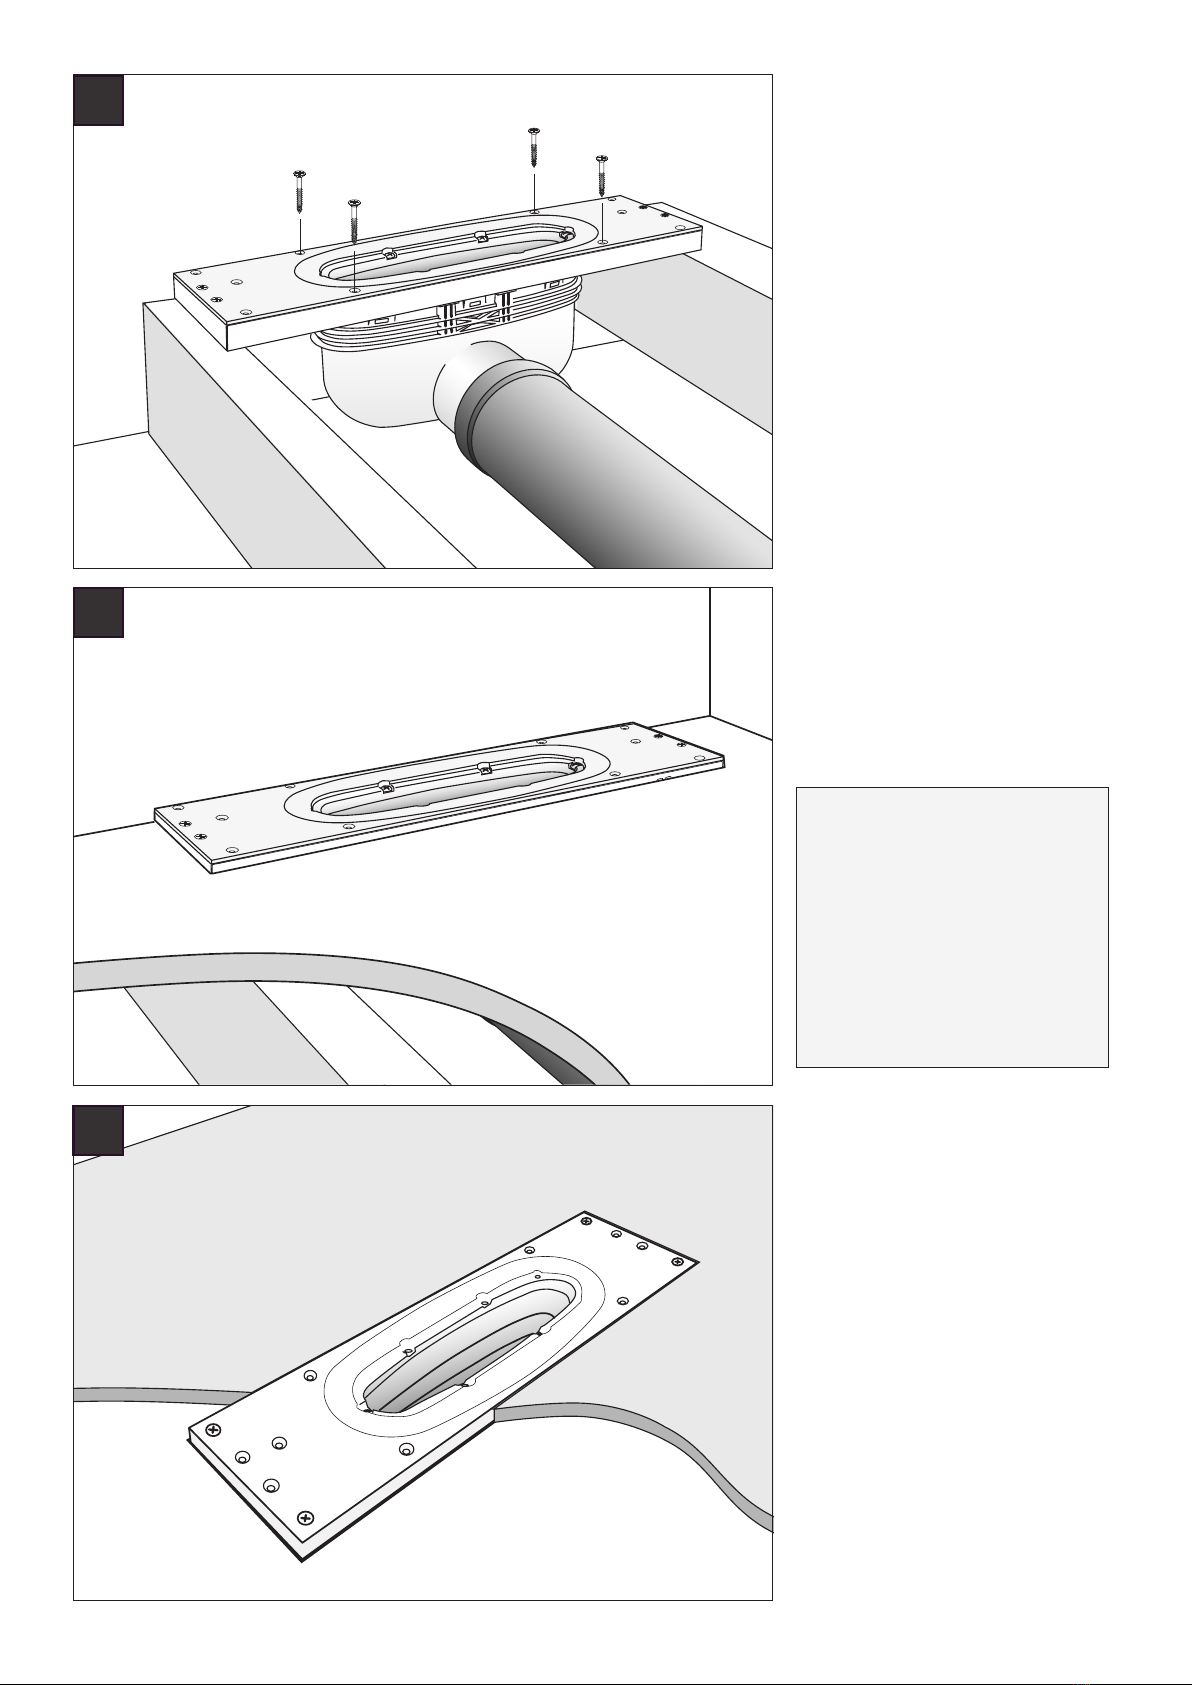
NOTE!
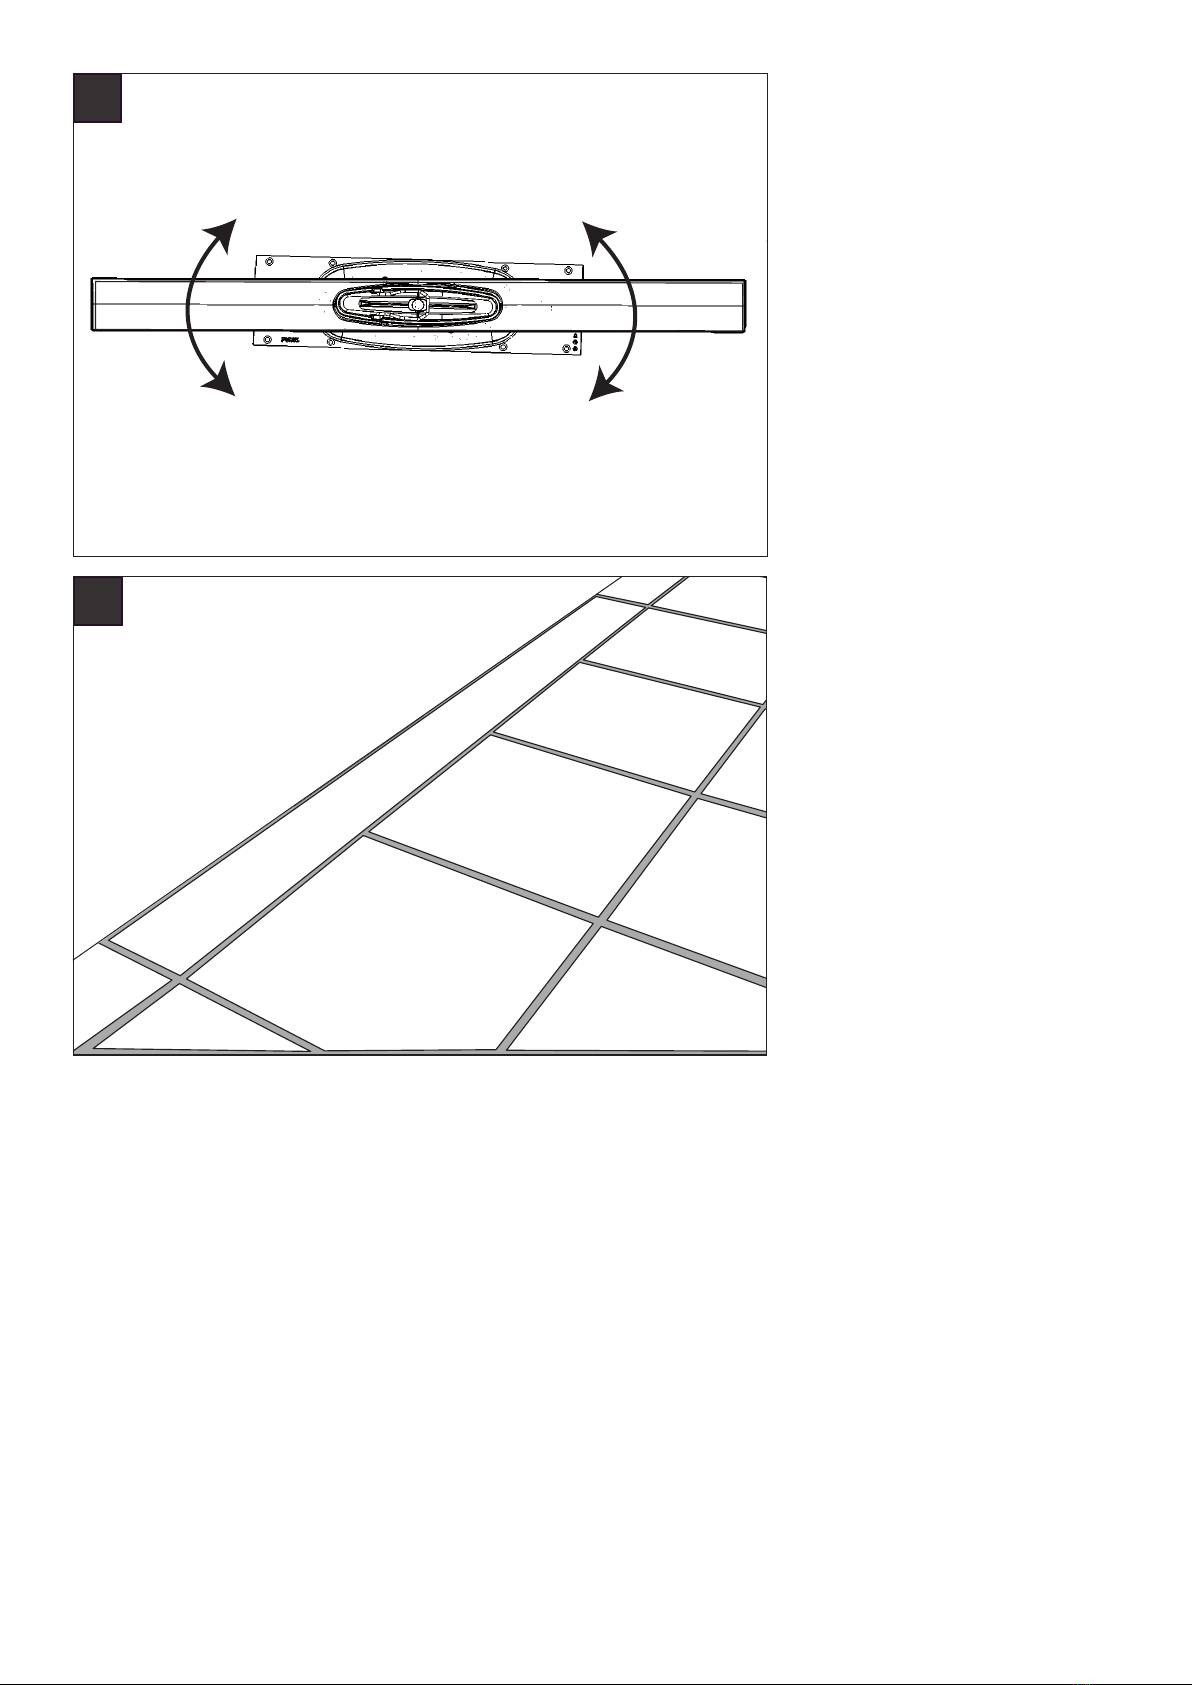
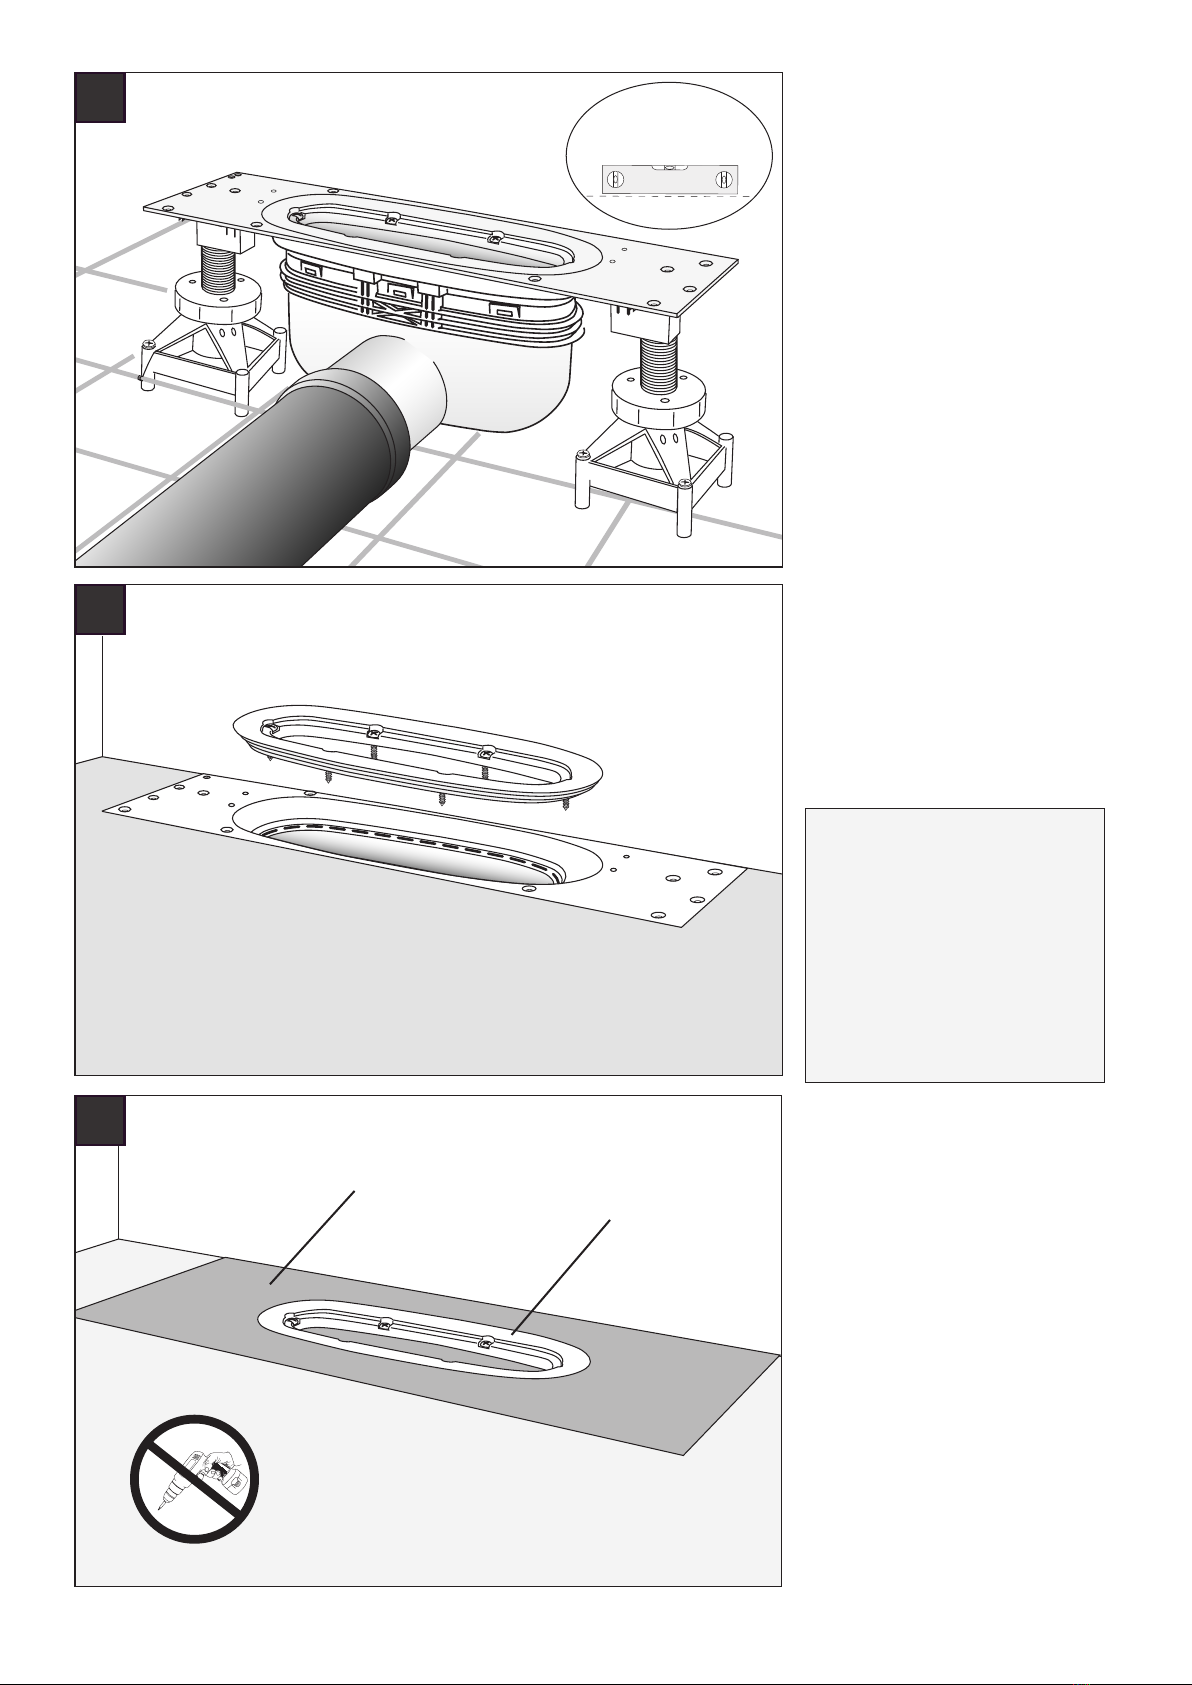
The gully must be located centrally
under the frame