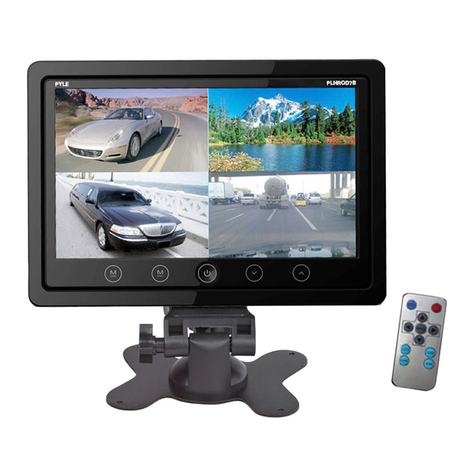
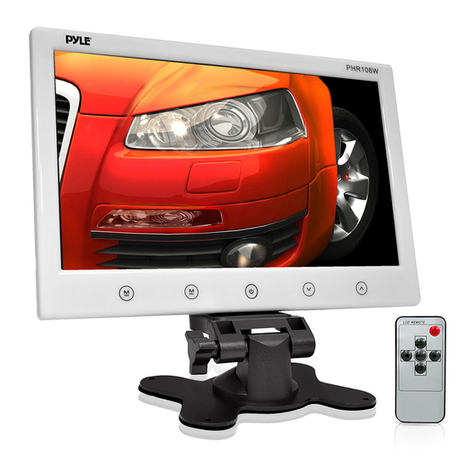
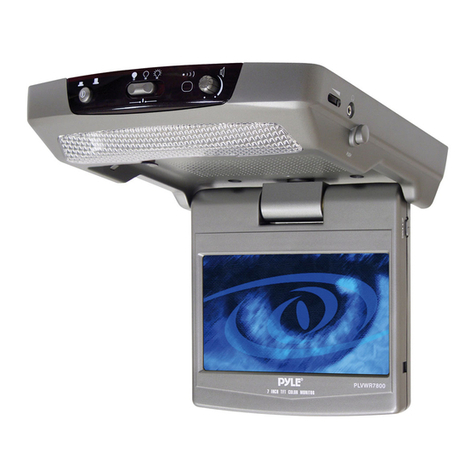
Pyle PLST70 User manual

OPERATING
INSTRUCTIONS
pyLE
PLST70
Touch
Screen
7"
Motorized
TFT/LCD
Monitor
With
AMI/FM-MPX
Radio
OPERATING
INSTRUCTIONS
English
WWW.PYLEAUDIO.COM

Welcome!
Thank
you
for
purchasing
our
company
digital
media
player!
To
operate
the
unit
correctly,
please
read
the
owner
s
manual
carefully
before
using
the
unit.
Keep
these
instructions
and
retain
this
bookletfor
future
reference.
1
CONTENTS
N
O
t
O
£
■
Oil
III
S-t
cl
I
I
cl
t1
O
rtf-
a.+a.+a.+aa+aa+aa
+
a
laaaifiif
iitiiaaaaf
aif
iffaiff
afu
+
>
aafiaaiif
iitiiaaaafiaf
^
Wiring
Diagram.............
4
Introduction
for
Key
board
—.............
5
Instruction
for
buttons.......
Location
or
the
Remote
Control.....10
Remote
Control
Operation.........^
I
n
St
al
I
iitl
O
lli.ai..ii..i.ii>.i>.ii..i.ii..i..i..i..i..ii.ai.ai.«i#..a.iia.i..i.
4
i
.
.i..i...i..i.ai..i..ia.^
y
S
peel
f
ic
ation
.
.
a...........a**......."is
Simple
Troubleshooting
Guide
......-19
2

Notes
on
installation
Of
3
The
unit
is
designed
for
12
V
DC
.
negative
ground
operation
system
only,
Before
installing
(he
unit,
make
sure
your
vehicle
is
connected
loDC
12V
negative
ground
electrical
system
.
rj?
■
Tbe
negative
battery
terminal
must
be
disconnected
before
making
connections,,
which
can
reduce
damaging
the
unit,
due
to
short
circuit
.
:£=
■
Be
sure
to
connect
the
color
coded
leads
correctly
according
to
the
diagram.
Incorrect
connections
may
cause
the
unit
malfunction
or
damage
the
vehicle
’
r
electrical
system.
;'i?
’Be
sure
to
connect
the
speaker
(-)
leads
to
the
speaker
{
-)
terminal.
Never
connect
the
left
and
right
channel
speaker
cables
each
other
□
rlo
the
vehicle
body
,
(^=Do
not
block
vents
or
radiator
panels.
Blocking
them
will
cause
heat
to
build
up
inside
and
may
result
in
five.
^
After
the
completion
of
the
installation
and
begin
to
play
the
unit!
including
replacing
the
battery
J,please
press
the
RESET
button
on
the
front
panel
with
pointed
objects
(suchas
hall-point
pen)to
set
the
unit
to
initial
status
.
3
Wiring
Diagram
0
Radio
ANT
0
Output
Sockct(fcmalc)
©
VideoOut
Receptacle
0
Kusc
Holder
©
Output
Socket
(male)
4

Introduction
for
Key
board
1,
Power
0
n
/0
f
if
M
ode
2,
AdjustAngle-
3,
A
djust
Angle+
4*
LCD
Display
Window
5.
Screen/setting
6.
Open
TFT
Screen
7.
Reset
Button
8.
VOL/SEL
9.
USB/LED
I
O.Ams
/|4I/pH
/
B
a
nd
/Memory6
11,
SD(LED
Flash)
12.
Memory
5/RDM
1
3.
Memory4
14,
USB/SD
Protection
lid
1
5.
Memory
3
/
KEPT
1
6.
Memory!/Play/Pause
1
7.
Memory
1
/St
op
1
8.
Remote
Sensor
19.
U
S
B
Insert
20.
SD
Insert
5
Instruction
for
buttons
1)
Power
On/OffVMode
Press
the
burton
for
less
than
1
sec
to
switch
on
the
power
and
depress
the
button
for
3
seconds
to
Switch
oil
the
power.when
the
set
is
oppress
the
button
Lo
select
the
Ra
dio/Aux
Sequentially.
When
insert
USB
or
SD.press
MODE
toswith
to
USB
or
SD
mode.
The
playing
will
be
starting.
2)
Adjust
Angle-
Press
the
button
to
adjust
the
ITT
Panel
angle
to
your
need
3)
Adjust
Angle-
Press
the
burton
to
adjust
the
TFT
Panel
angle
to
your
need
4)
LCD
Display
Window
5)
Screen/set
ting
ft)
Open
TFT
Screen
Press
this
button
once
the
TP
F
Panel
will
be
opened
automatically
and
Press
again
to
close
the
TFT
Panel
7)
Reset
Button
Press
tile
reset
button
oji
the
control
panel
by
using
a
ball-piont
pen
or
a
similar
tool.
This
will
reset
the
buile-in
microcomputer
8)
VOL/SEL
Hutton
Rotate
this
button
for
increasing
or
decreasing
the
volume
level,Press
and
hold
for
1
second.uhe
VGL/BAS/TRE/BAL/TADER
will
be
on
display
by
order.
Rotate
the
button
to
select
your
desired
sound
level.
9)
USB
LED
indication
When
insert
USB,LED
will
turn
on.
I
0)
1
JAMS/1^,
PM/Band/S
Memory/Button
During
the
Radio
Mode,press
BAN
D
key
to
select
FM1
,FM2,FM3
T
M
W
1,
MW2,
Press
1^1
key
or
PM
key
once
to
scan
the
frequency.
Press
and
hold
(he
key
to
start
the
auto
scan.Press
AMS
button
for
Introduction
of
station.
Press
Memory
6
During
playing
MF3/MP4,press
and
hold
1^
f
or
next
track
and
PM
for
upper
track.
Press
Band
to
display
TV
system
NTSC,PAL
by
order.
6

Instruction
for
buttons
m:
radio
Main
Menu
ANGLE*
ANGLE-
Redpower
Copyright
Reserved
TFT
Panel
control
At
the
Radio
mode.
Touch
the
screen
once,
the
TFT
control
Manual
will
be
displayed
on
screen.
Press
the
function
icon
or
rotate
the
encoder
key
to
adjust
the
sound/Pieture
to
your
desired
level.
FMI:
Current
Channel
Repeat
touch
FMI
button
to
make
a
change
for
the
wave
band:
FMI
—
>
FM2
—>
FM3—
>
AMI
—
>AM2
1
:
87.5
2:
90.10
3:
98.10
4:
106.10
5:
107.90
6:
87.50
is
pre-keep
channcl.thcse
buttons
is
very
conenient
to
let
you
choose
the
relative
channel
quickly,
like
when
you
click
3:
98.l0.the
unit's
channel
is
3:
98.10.
AMS:
Automatic
Scan/
Memory
station
Press
AMS
button
to
scan
/display
the
memory
station
by
10
seconds
from
1-6
station,
when
start
AMS
function,
the
frequency
flashes
continuously
until
the
appropriate
station,
then
play
the
radio
station
by
press
1
-6
number
key
accordingly
or
AMS
key.
When
play
AMS
up
than
3
seconds,
will
start
the
auto
memory
function,
the
radio
will
select
the
station
automatically
and
store
it
on
the
number
buttons.
Remark:
The
machine
at
most
store
6
stations
per
each
frequency,
pis
refer
to
the
number
button
operation
to
use
number
key.
7
Instruction
for
buttons
m
M
:
MTR/ETR
MTR:
Press
m/W
to
choose
the
different
station
up
or
down.
ETR:
Press
m/*|
up
than
3
seconds,
the
radio
w
ill
scan
the
stations
up
or
down,
and
stays
on
the
station
when
have
program.
Play
version
When
play
version,
touch
the
middle
of
the
screen
by
hand
or
sth
else
then
will
display:
TFT
Panel
control
At
the
DVD
mode.
Touch
the
screen
once,
the
TFT
control
Manual
will
be
displayed
on
screen.
Press
the
function
icon
or
rotate
the
encoder
key
to
adjust
the
sound/Pieture
to
your
desired
level.
8

Instruction
for
buttons
11)
SD
LED
indicaton.
When
insert
SD,
LED
will
turnon.
1
2
)Memory
5/
RDM
During
radio
inode.
Press
ill
is
button
to
preset
the
station
memory
for
memory
5
,
during
playing
press
ittci
random
piny.
13)
Memory
4
While
radio
mode.
Press
this
button
preset
the
station
memory
for
memory4.
14)
USB
t
S
D
protection
lid
15)
Memory3/
RPT
While
radio
mode.
Press
this
button
preset
[lie
station
memory
Ibr
memory3.
During
the
playing
MP3,
press
this
button
to
display
PRT
L
PRTDIR.OFF
by
order,
16.)
Memory
2/PLAY/PAUSE
While
radio
mode
,Press
this
button
preset
the
station
memory
for
memory
2
,
During
the
playing
MP3/MP4,press
this
button
to
switch
to
play
or
pause
.
1
7
)
M
c
mory
I
'Slop
While
radio
mode,Press
this
button
preset
the
station
memory
for
memory
1.
During
the
playing
MP3/MP4,
press
this
button
to
stop.
ISjRemote
Sensor
19)
USB
Insert
20?
SD
Insert
9
Location
of
the
Remote
Control
H
Power
On,'Qt'L'
H
Pune
I
Angle
Adi
u
si
FI
Open
IT-'T
Screen
Q
Direction
Left
□
Band
AM/FM
FI
Confirm
FI
Volume
Up
0
Seek/Ncst
Track
n
Stereo
EE
MP3/MP4
On
Screen
Display
m
Audio
Sc
leer
ion
Vol
Bul'TRe
Bass'Fadier
m
Auto
Memory
Scan
Ft
old
^
Luecl/D
is
lance/P
Lay
}
Number
keys
££
Audio
EE
Direct
ion
Riglic
Qj
Sub-Title
FI
5
|
tinCii
kurnpt!
and
Anf|<fi
a
ic
:l
Ui
freq
u
l*
iky
iVf
i
ic
li
[E
Rad
10/
L'S
B/AL
\
FTT
Slop/Resumo
FT
1
Volume
down
^
Audio
Mine
2!
SetUp
See
k/
Pro
v
i
ouh
Track
S
Zoom
El
Direction
UP
^
Llireolion
Down
10

Remote
Control
Operation
?£
X
X
X
:
X
"X
^
^
X
X
X
X
X-
-St
55
X-
X
X
X
X
Replacing
the
batteyr
*
W
h
en
I
b
c
ran
g
c
c>
T
C
It
e
opera
I
son
u
f
the
card
remote
control
becomes
short
or
no
functions
while
opera
Ling,
Replace
the
battery
with
a
new
button
eelt-Make
sure
the
battery
polarity
before
replace.
1,
Pull
out
the
Battery
Holder
while
pressing
the
Stopper®
2,
Put
the
button-type
battery*
*}
mark
upward
into
the
Battery
3
[older.
Z,
Insert
the
Battery
Holder
into
the
Remote
Control.
*
Mote:
Sd
hi
<
■
modf
Is
on
no
t
t
w
prj
ipped
h'j
th
teiri
nit’
CJjjj
l
rnl
I
(Hr
V
h
0
tild
ipnu
i\
t
li
t>
L-^j-J
I
i)i
t.\
u
ht)M
I
reu
J
t)
tf
Li/fl
t
ft/
1
1
X
X"
X
X
X
X"
X
X
X
X
X
X
X
X
X
X
X
X
X
X
X
ft'ftftftSftft'ftftftft-ftftftftftftftftXftft
*
Power
On/Off
-Press
D
(0
)button
to
turn
On/Off
the
power.
X
X
-
X
X
X
X
X-
X
X
X
X"
X
X
X
X
X
X
X
X
X
X
*
Panel
Angle
Adjust
-Prcss|3{
I/-)
button
to
adjust
the
f
FT
Panel
angle
to
your
need
Press
the
burton
to
adjust
the
TFT
Pane!
angle
to
your
need
*
Open
TFT
Screen
Press
0i
A
Jbutton
once
the
TFT
Panel
will
be
opened
automats
rally
and
Press
again
to
close
the
TFT
Panel
ft
ft
ft
ft
ft
ft
&
ft
ft
ft
ft
X
ft
ft
ft
ft
ft
ft
ft
ft
ft
*
Direction
Left
-Press
0
(A
/
W<3/I>)
to
select
your
desired
menu,
t
h
e
n
press
0
(ENTER)
or
press
the
play
button
S
*
■
'
)
to
confirm.
Mote
This
function
works
in
main
me
an
mode
only,
refer
to
page
S3
.
X
X
X
X
X
X
X
X
X
X
X
X
X
X
X"
X
X
X
X
-
X
X
*
BandAM/FM
-During
radio
mode,
press
Q
*
BAND
)
to
switch
Receiv¬
ing
band.
-At
the
playing
mode,
when
it
stops,,
press
H
(SAND)
to
suith
NTSC
or
PAL
and
AUTO
-During
TV
mode,
press
this
b
utt
on
PA
L/
N
TS
C
to
s
w
i
tc
it
V-
¥
■
y
W
V-
y
y
y
V
V-
y
w
V-
y:
NX
y
V-
y.
V-
V-
St
aaaaaaaaaaaaaaaaaaaaa
11
Remote
Control
Operation
X
X
X
X
X
X-
X
XXX-
X
X
X
X
X
X
X
X
X
X
X
*
Volume
Up
-Press
Q
(
VOL*
or
VOL-
>
button
lo
increase
nr
decrease
the
volume
level
respectively.
ftft-ftftftftftftftftftftftftftftftftftftft
*
Seek/Next
Track
-During
radio
mode,
c
ontinuously
press
|jj{
m
or
M
)
button
to
manual
search
a
station
down
ward
or
upward
respectively;
press
and
hold
Ofm
or
WH
)
button
,
the
radio
will
automatically
search
a
station
downward
or
upward
respcclively
until
it
finds
a
station.
-During
the
playing
mode,
press
E(
H-t
or
W
)
to
choose
upward
or
downward,
press
and
hold0(HM
or
)
button
to
fast
rewind
or
fasl
forward
for
you
to
reach
your
desired
track
quickly
When
discontinuous!/.
X
X
ft
XXX
ft
XXft
ft
ft
ft
K
ft
ftX
K
ft
XX
*
Stereo
During
the
radio
mode,press
01.ST)
button
to
change
the
sound
to
lefl/right
speaker
or
stereo
mode.
X
ft
ft
X
X
ft
ft
X
X
*
X
St
X
ft
X
X
ft
Si-
X
X
ft
*
MP4
On
Screen
Display
—
During
MP3.
M
P4
M
od
e
.
press
EE
(
O
SD
)
h
u
i
to
n
fo
r
l
b
e
l
i
rs
L
time.The
display
shows
single
track
elapsed
time
.single
iruek
left
time
or
entire
disc
left
time
.press
it
again.the
display
show's
MP3,MP4
Mode,
and
the
track
being
played
and
the
a
m
o
u;
n
t
o
f
th
e
w
hole
i
Le
m.
When
playing
radio,
press
OSD
for
li
long
time,
th
s
11
pre
>
%
V
OL+
or
V
OL
to
a.di
u
st
h
lui
ir.
t
hen
press
SEL,press
VOL+-
or
VOL-
to
adjm&l
minute
Jf
you
don't
operate
ihts
fund
ion
,5
.Second
h
will
return
ft
X
X
X
ft
ft
X
X
ft
ft
ft
X
X
ft
ft
X
X
X
ft
X
X
*
Audio
Selection
VoE
Bat
T
Re,'
Bass
.Fader
Pre
ss
(he
HI
(.SRI.
Ibutton
to
increase
or
decrease
the
volume.
Balance
.Treble,
Bass.Rader
control
levels.
XftftftXXftftXftftftXftftftXftftXX
*
A
uto
Mem
o
rv
Sean
/
T
V
Sea
n
/Hold
During
play
ing
mode,
firstly
press
OS
(AMS/PAUS)
to
stop
the
current
track,
press
it
again
to
continue
playback.
Pi
css
m
(AMS)
button
to
scan
each
stored
station
5
seconds
respectively
which
stored
in
CB
(i-6
)
number
bartons.
When
AMS
mode
is
carried
out.
You
also
can
press
the
corresponding
number
button
or
AMS
button
when
your
desired
station
is
charged.
It
starts
playing
that
station.
Press
and
bold
IE
(AMS}
button
for
more
than
3
seconds
to
activate
automatically
memory
storing
function,
The
radio
automatically
selects
a
station
and
has
it
stored
i
n
any
one
ol
the
number
buttons
fd
(1-6).
X
y
v
y-
y
w
y
y
y
v
y.
y
y-
y.
y
v
y.
y.
v
y
y.
*
Loccl/Di
stall
cc/PIay
-During,
T
he
p
1
a
y
i
n
g
m
o
d
e,
p
re
s
s
EE
(LGC)
button
to
show
"play
1
.
-During
radio
mode,
press
this
button
Ll
L
O
C.
"
will
be
shown
on
the
display.
ft
ft
ft
ft
X
ft
ft
ft
x
ft
ft
ft
X
ft
ft
ft
X
ft
ft
x
ft
12

Remote
Control
Operation
*
Number
keys
-During
radio
mode,
you
can
select
one
of
(he
6
stored
stations
on
caeh
h
l
l
n
d
by
press
t
ng
any
one
of
the
number
but
Ion
0E
-During
the
playing
mode,
you
can
select
any
track
directly
by
using
|£J
number
button
(0'1Q+).
l
or
example*
if
you
need
the
fifteenth
track,
you
can
first
press
button
10
+
and
then
press
button
5,
the
corresponding
tarck
{15}
will
be
played.
Note:
When
button
10t
j'.h
firm
pressed,
it
works
as
10+
it
works
os
20+
wfi
l'.t
press
ed
at
the
Set
■
<>
rid
fj'drr
the
third
tun
e
,,,
Tfl
+,,,
jxnd
the
like,
*
Audio
-During
the
playing
mode,
continuously
press
EEji
(Audio)
can
change
the
sound
to
left
/
right
speaker
or
stereo
mode.
-V-
V-
W
W
>/
¥
■
V-
V-
V-
'it
V-
SK
-it-
V-
V.
-V.
V-
¥
Xt
W
i'i’i
rTr.
,M
A
r\
A
i^s
i^t.
/V
^
A
A
M
A
A
i*V
t
A
*
Subtitle
Selector
-During
DVD
file
mode,
press
m
(SUB-T)
button
to
switch
the
menu
to
China
or
English
.
3£
X
-
X
X
-
X
-
X
X
X
X
X
X
X
-
X
X
X
-
X
X
X-
X
X
X-
*
Setting
CDs
Playback
Time
—
—
I
n
VC
D
form
at
fi
I
e
„
M
P3
modc,
press[E
(GOTO)
key
and
set
the
lime
when
you
begin
to
play
the
track,
and
the
television
will
display
the
time
Enter
your
desired
time
by
pressing
number
button
UJ
((M0+).
por
example,
enter:
25:0^
press
enter
it
will
automati
colly
start
play
mg
the
track
from
point
of
the
twenty-fifth
minutes
in
the
disc.
-In
DVD
format
file
playing
mode.
press
01
(GOTO)
key
once
and
input
udcsircc
track
number,
then
press
IB
key
lo
play
the
DVD
File
from
the
position
corresponding
to
the
track
number
selected
-lit
DVD
formal
file
playing
mode,
press
IB
(GOTO)
key
and
twice
inputs
desired
time
to
play
the
DVD
File
from
(he
position
corresponding
to
the
time
selected.
For
example,
press
IB
(GO’O;
key
and
the
television
will
display
the
time
--;--,Entcr
your
desired
time
by
pressing
number
button
EH
(Q~1G+|Then
press
Jg
button,
it
will
automatically
start
playing
the
track
from
poini
of
your
desirec
time
in
Lhe
disc,
-During
radio
mode
,
press
(his
button
to
switch
frequency.then
press
ENTER
to
confirm.
ft
X
K
ft
K
H
ft
ft
&
K
3
*
RadkVUSBAAUX
-Press
IQ
(MODE)
button
to
switch
to
Radio/SDorUSB
/AUX.
in
turn.
Insert
USR-'SD
card
then
press
mode
enter
into
playing
state
automatically,
13
Remote
Control
Operation
English
X-
&
X
X
X-
K
X
X-
&
X
X
&
X
X
as
X
X
ft
X
X
ft
x
ft
*
Slop/Resume
-In
MPEG4
mode,press
S3
(STOP)button
to
suspend
lhe
p
]
ay
back
and
"
Pre
S
t
o
p"
sho
w
n
SYSTEM
SETUP
TV
SYSTEM
V.DEO
TV
TYPE
PASSWORD
RAT
INC
DEFAULT
EXIT
SETUP
■
’L-JE5
4
i--z
111
?
on
TV,press
it
again
to
stop
lhe
playback,
*
SET
UP
KEY
-In
playing
mode.press
key
(Setup),
menu
will
be
showed
on
Screen.(sec
the
pielrue)
Pressing
Q
(ENTER)
key
to
cor
firm
after
selecting
your
desired
content:
SYSTEM
SETUP:
TV
system,
video,
TV
type,password.rating
.default
ila-
system
can
dismay
MS
r,
PAL,
AITU.
when
selecting
tv
systeiri(sbc>wn
as
picture)
It
can
set
up
password
when
selecting
password
(Shawn
as
picture!
I
ho.
piisiU
uni
opium
i
;n
n
i
;i
1
1
/.mi
Iul4u
.1.
and
you
cannot
set
the
ratine
limit
or
change
lhe
password.
In
order
for
iFie
Ratings
feature
work,
(lie
password
mode
must
be
turned
on.
tf
you
Want
to
set
the
ralings
limit,
you
vvill
need
to
enter
lhe
default
password,
which
is.
0000,
(hen
press
Enter
lo
confirm.
To
change
the
password.you
wilt
be
prompted
for
the
old
password,
then
be
prompted
for
a
new.
Enter
a
4
diyil
number
(this
is
your
password)
SYSTEM
SETUP
TV
SYSTFM
VIDEO
RATING
DEFAULT
EK'T
SETUP
SYSTEM
SETUP
r
s
ystem-
VtDEO
TV
TYPE
PASSWORD
SATING
DEFAULT
EXIT
SETV?
NTSC
PAL
ihe
HjMeni
can
display
interlace
S-VlDEO,whin
selecting
video!
shown
,is
phi
in
el
SYSTEM
SETUP
TV
SYSTEM
VIDEO
-
>.
B.VIDEQ
TV
TYPF
PASSWORD
RATING
DEFAULT
Es.lT
SETUP
(h
p
sysl
em
ca
n
display
4
:
3
prs.4:
.VJLH
.
16i9
tn
adj
nst
Ihe
size
of
tv
.when
Selecting
tv
typeishown
as.
picturel
l
tic
s
ys
I
c
m.
lu
ii
cl
is
p
I
ay
K
id
I
n
Audit
H
»
p
L
in
n
s,
when
selecting
Haling
SYSTEM
SETUP
TV
SYSTEM
'
VIDEO
TV
TYPE
PASSWORD
^
RATING
-
►
p
DEFAULT
iwi-
E
9
C.I
1
SETUP
lhe
system
can
display
restore,when
selecting
DEFAlJ
LT
(Shawn
as
pit
1
ure)
SYSTEM:
SETUP
TV
SYSTEM
VIDEO
TV
TYPE
PASSWORD
RATING
nuiwc
DEFAULT
—
►
E!UT
SETUP
14

Remote
Control
Operation
English
LANGUAGE
SETUP:OSD
language,
audio
Sang.subtitcl
lang.menu
lang,
exit
setup
I'Im
system
can
display
Hut
la^hi,
0^rtimtiv.
Jipuash,
Fj
jjich..
Poitgaese
.Lfitin,Italian
for
opdeiw
when
selecting
OS
r>
Huai
;i£l:
I
Sh
H
H
il
A*
pic(
□
Ft'I
LANGUAGE
SETUP
□
EG
LANGUAGE
AUPIP
I
ANC1
SUBTRIE
LANS
MEW
LXM'.]
Di-J>:
LANG
El
IT
SETi,--'
the
system
can
display
English.
Germany.
Spaisll
Frunch.,
Pnjljzueiic.Lai
in,Italian
For
oplkms
when
sckcling
audio
Langi
Slim*
it
ns,piflurel
language
SETUP
OSD
LANGUAGE
_
AUDIO
LANG
-
►
*
“
■■
SUMlTl£
LUNG
—
WEh'J
LANG
LI
I'.'X
LANG
EX
I
I
ELI
L-?
the
system
tall
display
Enn|jHh.Gcnn[iiiy,5pLl,Nll,
Frnndi,
FEUl£ueKC,
Latin,
Italian,
<iFJ'
fur
fipilous
when
Srkrlillji
suhlJllHShuwii
as
picture
1
LANGUAGE
setup
OSB
eONGLAGE
_
ALOIOLAJlC-
"
■
<—
SUHflfLE
LANS
“
►
-
—
MENU
LANG
DIVfcLANG,
EMI
&ETUF
Llt>Li
xy
sirm
cun
display
Lint!Iisli.Germany.
Spai>tl,
Fnirii'I
Porty-iicxc,
La
till.
Italian
fur
npiluHs
w
h
cn
sc!
cc
t
i
ng
m
enu
La
11
il
f
Sli
o
w
n
us
piclu
ret
LANGUAGE
SETUP
osn
language
AUDIO
LftNG
SUE’.TlL
LANG
.
UEK
J
LANG
DivX
LANG
EOT
SCTl'S
the
system
can
displayWIKCEW
EL,
WI.MWE.LT
El.',
ISOWEST
ELL
3SOCEN
EU.
CYRILLIC
TDgKlSHfor
OpIlOIkS
VI
Ill'll
seietlIU£
l>EYX
LANGisbItw31
US
plrturH’.
LANGUAGE
SETUP
DEO
LANGUAGE
AUDIO
LANG
SUBTHli
LAND
MEN,i
LANG
diyxlanq
FaIT
KFTi.
a
AUDIO
SETUPiaudio
out,key,
exit
setup
tlic
system
can
display
spdityijflfVspdif/raw.
spdif/pcimwhen
selecting
audio
out.
i
Show
a
ns
picture!
AUDIO
SETUP
audio
our
—
►
_,
KEY
EXIT
SETUP
w
'
11
can
adjust
I
lie
size
when
selecting
key
i
Stum
fi
ns
piclu
re
1
AUDIO
SETUP
AUDIO
OUT
^
—
1
KEY
-
-
1
EXIT
SETUP
I
.
—
*1
—
1
-
—
1
—
1
V1D
HO
S
HT
l
j
P:b
rtgh
t
n
css
so
n
L
rus
L,
hue
SLtturation
h
sharpuess,exit
setup
11
can
adjust
Ihe
brightness
when
selecting
Lt
r
i
gilt
ness
(S
li
o
w
n
as
pi
r(
u
rc
i
VIDEO
SETUP
B
NIGHT
NESB
—
►
-
-15
CONTRAST
—10
HUE
—
1
S
ATLJRATIOJv
SHARPNESS
—
1
EXIT
SETUP
—
0
It
can
adjusl
I
lie
contrast
when
selecting
Cii
II1
ras
t
(S
h
0
W
n
II
5
picture
I
VIDEO
SETUP
BRIGHTNESS
—12
CONTRAST
-
►
-
—10
HUE
—8
SATURATION
—4
SHARPNESS
EXIT
SETUP
-E
It
[031
adjust
the
hue
when
selecting
IIlil*.
(Shown
as
piclu
rc!
P3
ease
SC
Lcct
!
■
X
1
1
HH]J
11
u
IL
Jin'
c
jell.
15
Remote
Control
Operation
English
VIDEO
SETUP
BRIGHTNESS
—
H
CONTRAST
--
■
4
HUE
-
►
"
—.J
SATURATION
-1
SHARPNESS
—
-4
EXIT
SETUP
—
«
■
M
can
adjust
the
saluralinn
when
selecting
Siitu
t
utii.m,
(Shown
as
picture!
VIDEO
SETUP
BRIGHTNESS
-'ll
CONTRAST
m
|fl
HUE
-
■
SATURATION
-+
■
"
’
■
-
■
SHARPNESS
■
-a
EXIT
SETUP
—
D
11
can
adjtisl
the
sharpness
when
selecting
Sharpness.!
Show
ii
us
picture!
VIDEO
SETUP
BRIGHTNESS
CONTRAST
-
—
■
a
HUF
—
i
SATURATION
«
■
—4
SHARPNESS
—
►
—
a
EXIT
SETUP
SPEAKER
SETUP
□
PWM
MIX
EXIT
SETUP
LT.'RT
STEREO
VSS
DIGITAL
SETUP^op
mode,dyn.amic
range.
(Jua
3
mu
no,
exi
t
se
t
up.
i'
h
r
sys
tern
w
MI
u
ft'er
LI
N
E
O
U
T
and
k
F
HE
MOD
lo
choose
when
selecting
OF
MODE.
(Shown
as
picture)
DIGITAL
SETUP
OPMODE
—
►
.
...,-
Dr
NAM
C
RANGE
■
r
'•emot-
DUAL
MONO
EXIT
SETUP
ViiEicanctinoHcllVIVAMIt
RAN
OF
including
F
I
I.
I
when
selecting
DYIVAMlC
RAM
tit,
(Shu
wn
as
picture!
digital
setup
opmo.de
DYNAMIC
RANGE—'
’
■
F
UIL
DUAL
MONO
“
I
T?
EXIT
SETUP
—OFF
The
system
will
oiler
SI
EKEtXMGIVO
I,,
MONO
R
and
MIX
MONO
to
choose
when
n
e
I
cciing
DlJAl.
MON0
1
Shnwn
a
s
picture)
DIGITAL
SETUP
OP
MODE
DYNAMIC
RANGE
□
UAL
MONO—
>
■
EXIT
SETUP
HOb
O
■
UU,
UliMT>
KKKKKKKSKS-KKSS
X
X
X
X
XX
X-
X
*
ZOOM
KEY
-In
MPEG4
playing
mode,
press
gg
(ZOOM)
key
once
lor
2
x
Mode,
tv,
ice
fen
3
x
Mode,
third
time
for
4
x
Mode.
forth
1y
lime
lor
l
/
2
x
fivc
times
for
i/.'iX
si%
limes
tor
L/
4
X
,
s
e
v
e
n
times
tooti
.VhjFi
fv‘0
/.
I'J
I'.M
/
i'n
J7.
tin
ii
I’D
Xil’A
jjfin
Urj;
mmic.
X
X
X
X
X
X
X
X
X
X
X
X
X
X'
X
&
#
X
X
X-
>S-
16

Installation
#:
$
Bf
&
JS
»'
&
Mf
*'
&
&
SK
$
j£
&
5S
Jjf
&
&
M
*
JK
3£
$
$
&
&
$
$
&
&
SSf
&
Sf
&
^
M
K
SR
B??R
£
Parts
List
n
be
numbers
in
the
list
are
keyed
to
those
in
the
instructions.)
®
-*
M4X6
^
a4
Mounting
Example
17
Specification
General
Power
Requirements..
J4.4YDC
Load
Impedance....4fi
Max.
Power
0
utpu
t.80
W
x4
Tone
Controls.._±8dB(Bass
100Hz.
treble
tOKHz)
Dimensions
.
....
Apprt>s.l92xl78x50mm(dxwxh)
M0tinting
DimenSJon
5.Approx.169x182x53mm(dxwxh)
Wei
gilt.
Approx.
2-2
kg
Video
Section
Video
System.AUTCtfPAL/NTSC
Mounting
Angle.-.0
to
-w-lo'
Video
System—.4:3
LcticrHox
an-rf
4:3
Pan
Scan
Video
Output
level.l
ovp-p
75
ohms
Horizontal
Resolution.^OO
Audio
Section
Maximum
Output
level.2Vnns{-i-/'3dBl
Frequency
Response..
..
20
w
20Khz
Signal-lo-noise
Ratio
.
.
85dR
Separation.EtMB
AM
Tuner
Section
Flequ
e
ncy
Ran
ge..
5
22-
1
6
20{
Ewropc/China),
5
30-
L
7
I
Oj
U.
S.
A)
IF
Range.
4
50KHz
Usable
Sensitivity(-20dli').
2
5
J
.B
FM
Tuner
Section
Tuning
Range.87.5-108(F.urnpe/Chinai,87
5-107.901.5.
A}
IF
Range....
1
0
.
7MHz
Usable
sensitivity
£-30dB.).15JB
Signal-tn-noise
Ratio.
tiOJB
Stereo
Separation
.
3
0
dEM
IKHzl
Frequ
e
ncy
Respo
nse.
30-15000Hz
&
$
$
$
«
k
Nt&
ft
ms
st
&
&
&«
■
*
&
mm
&
$
$
$
$
mt
sh
m
$
w
&
w.
me
be-&
mu
$
$
$
*
m
$
%
A
Dire
to
t
!
inlhsiums
product
impra
ivmenl,
specifications
an
d
design
otv
sub
jet
t
In
change:
without
notice
18

Simple
Troubleshooting
Guide
Problem
C
ause/So
lution
No
power
Chet
i
find
maltt
stree
wfi
ether
the
fuse
is
bio
wm
replace
with
tf\
e
proper
value
tf
accessary.
Some
errors;
nceur
w
itoc
LCD
or
no
functinn
when
pressing
ihe
button.
it
Press
the
RESE.TftNfii'rJit)
Unable
Lo
receive
sta
Lions.
^
Check
and
make
sure
whether
the
antenna
is
inserted
or
the
an
ten
na
is
property
connected,
if
so.
insert
the
antenna
or
connect
it
properly.
Poor
effecton
receiving,:t
station.
if
.!
n/L'fi
no
may
not
he
th
e
proper
length
Make
sure
the
antenna
is
fully
f
riended
or
broken
if
broken
Replace
the
antenna
with
n
wen
1
one
^
The
briHuicttsilng
signal
is
too
-weak
^
Site
antenna
is
poorly
grounded,
cheek
a/ui
make
sure
the
antenna
ts
properly
grounded
ut
its
moun
ting
location
ACDs
cannot
be
Loaded.
A
C
D
v
ts
htfih.
il
in
the
mechanism
i[
A'l
re
If
an}
Of
the
problem
per
si
st
after
check
fist
ft
os'
been
matte,
con
suit
i
vttr
nearest
service
deafer
Merer
attempt
to
disassemble
vttvrttnlt
(>
r
vaursoff
19
Table of contents
Other Pyle Monitor manuals

Pyle
Pyle PLD89MU User manual

Pyle
Pyle PHUD18OBD User manual

Pyle
Pyle PLVW95U User manual

Pyle
Pyle Monitor PLHR9TSB User manual

Pyle
Pyle PLVWR7800 User manual

Pyle
Pyle View PLDVD7M User manual

Pyle
Pyle PLVW17iW User manual

Pyle
Pyle PLHRQD7B User manual

Pyle
Pyle Home PLVW15IW User manual

Pyle
Pyle PHR105B User manual

Pyle
Pyle PLM102 User manual

Pyle
Pyle PM15LCD User manual

Pyle
Pyle Home PLVW10IW User manual

Pyle
Pyle TFT/LCD Video Quad Monitor User manual

Pyle
Pyle PLVHR70 User manual

Pyle
Pyle PLDN83BT User manual

Pyle
Pyle PLVW92U User manual

Pyle
Pyle PLVW9iW User manual

Pyle
Pyle PLHSG6 User manual

Pyle
Pyle PLDVDBG5 User manual