Qi Aerista QASTB18A01 User manual

USER GUIDE
SMART TEA BREWER
AROMATIC | AUTOMATIC | APP-ENABLED
Patented infusion system for getting
the taste just right
Fully customizable temperature and time
Programmable timer for
automatic brewing
QI AERISTA SMART TEA BREWER

www.qiaerista.com
CONTENTS PAGE
Important Safeguards
Brewer Parts
Before First Use
Usage – Brew Mode
Usage - Keep Warm Mode
Usage – Heat Mode
Cleaning & Care
Downloading The App
Main Screen Features
Login/Registration
Brew Screen Features
Connect Brewer
Brewer Operations Overview
Customize Temperature & Time
Customize Brewer Settings
Reservation Timer
Profile Screen Features
Tea Library Features
Troubleshooting
Warranty Policy
App Guide
3-4
5
6-7
8
9
9
10
11
11
11
12
12-13
13
13
14
15
16
17
18
19
PRODUCT INFORMATION
Model No. QASTB18A01 QASTB18A02
Rated Voltage 100-120V 220-240V
Rated Power 694-1000W 840-1000W
Max. Capacity 0.70L/24oz 0.70L/24oz
Min. Capacity 0.23L/8oz 0.23L/8oz

www.qiaerista.com
PAGE 03
IMPORTANT SAFEGUARDS - READ ALL INSTRUCTIONS
DO always read all instructions prior to first use.
DO always keep all plastic bags, covers and
packaging material away from children to
prevent choking hazard.
DO always ensure hands are dry before handling
the Plug or pressing the buttons on the Base.
DO always ensure the Pot is properly placed and
oriented correctly on the Base before operation.
Then insert the Plug into wall socket.
DO always closely supervise children to ensure
that they do not use or be near the Brewer
without close adult supervision.
DO always keep the Brewer clear of walls,
curtains and other heat or steam sensitive
materials.
DO always ensure the mains supply voltage is
the same as the one indicated on the Base.
DO always ensure the Flow Tube, Sheath, Spray
Cap, and Filter are properly secured at their
designated locations inside the Pot before
brewing operation.
DO always fill the Pot with clean drinking water.
DO always ensure the Lid and Infuser are
correctly aligned on the Pot and securely
attached to the Pot during use especially when
pouring. Hold down on the lid during pouring if
necessary for added security.
DO always place tea leaves inside the Infuser
and not directly inside the Pot.
DO always use the Pot Handle when handling
the Brewer.
DO always exercise caution when touching the
Pot Handle or Lid as they may become very
warm during use.
DO always exercise caution of the steam and hot
gases emitted from the Spout or around the Pot
especially near the Pot Handle during use.
DO always exercise caution when moving the
Pot containing hot liquid.
DO always exercise caution when pouring liquid
from the Pot as boiling water and steam will
scald.
DO always ensure the Brewer is cool before
adding water, putting on or taking off parts, and
cleaning. The Heating Plate is subject to residual
heat after use.
DO always ensure the Brewer is only used in
household and similar applications such as:
This appliance can be used by children aged
from 8 years and above only if they have been
given supervision or instruction concerning use
of the appliance in a safe way and if they
understand the hazards involved. Cleaning and
user maintenance shall not be made by children
unless they are older than 8 and supervised.
Keep the appliance and its cord out of reach of
children aged less than 8 years.
This appliance can be used by persons with
reduced physical, sensory or mental capabilities
or lack of experience and knowledge if they
have been given supervision or instruction
concerning use of the appliance in a safe way
and understand the hazards involved.
DO always follow the Cleaning & Care section
when cleaning any parts to the Brewer.
DO NOT use the Brewer for other than its
intended use. The Brewer is designed and
manufactured specifically for the purpose of
heating and brewing drinking water and tea
only. Any misuse of the Brewer may lead to
product malfunction and/or injury.
DO NOT use the Brewer to heat or brew any
other liquids or food.
DO NOT use accessory attachments that are not
recommended by the manufacturer.
DO NOT use any app to connect and operate the
Brewer other than official versions released by
the manufacturer.
DO NOT let children play with the Brewer.
DO NOT alter any components of the Brewer.
THE DOS:
THE DON’TS
staff kitchen areas in shops, offices and
other working environments;
farm houses;
by clients in hotels, motels and other
residential type environments;
bed and breakfast type environments.
DO always turn off the Brewer by pressing the
ON/OFF button to OFF status. Then remove the
Plug from socket when not in use or before
cleaning.

www.qiaerista.com
PAGE 04
IMPORTANT SAFEGUARDS – READ ALL INSTRUCTIONS
The Brewer generates heat during use.
Proper precautions must be taken to
prevent the risk of burns, scalds, fires
or other damage to persons or proper-
ty caused by touching the exterior
while in use or during cooling.
DO NOT use the Brewer at places where water
boils below 90oC/194oF (>2800m/9200ft above
sea level).
DO NOT place the Brewer on or near a hot gas or
electric burner, or in a heated oven or
microwave oven, or in a refrigerator or freezer.
DO NOT let Power Cord hang over edge of table
or counter, touch hot surfaces or become
knotted.
DO NOT place the Brewer on an inclined surface.
DO NOT place the Pot and the Base on a wet
surface.
DO NOT let the Pot when it is hot to get in touch
with a cold surface.
DO NOT place the Pot directly on a gas or
electric cooker or hot plate.
DO NOT pour or spill water onto the Connector.
DO NOT place anything on top of the Brewer.
DO NOT operate the Brewer with a damaged
Power Cord or Plug, or after the Brewer has
malfunctioned or has been damaged in any
manner.
DO NOT operate the Brewer without water as it
will damage the Brewer.Do ensure the Brewer is
cooled down before refilling it with water.
DO NOT use a base unit other than the Base
supplied with this Brewer.
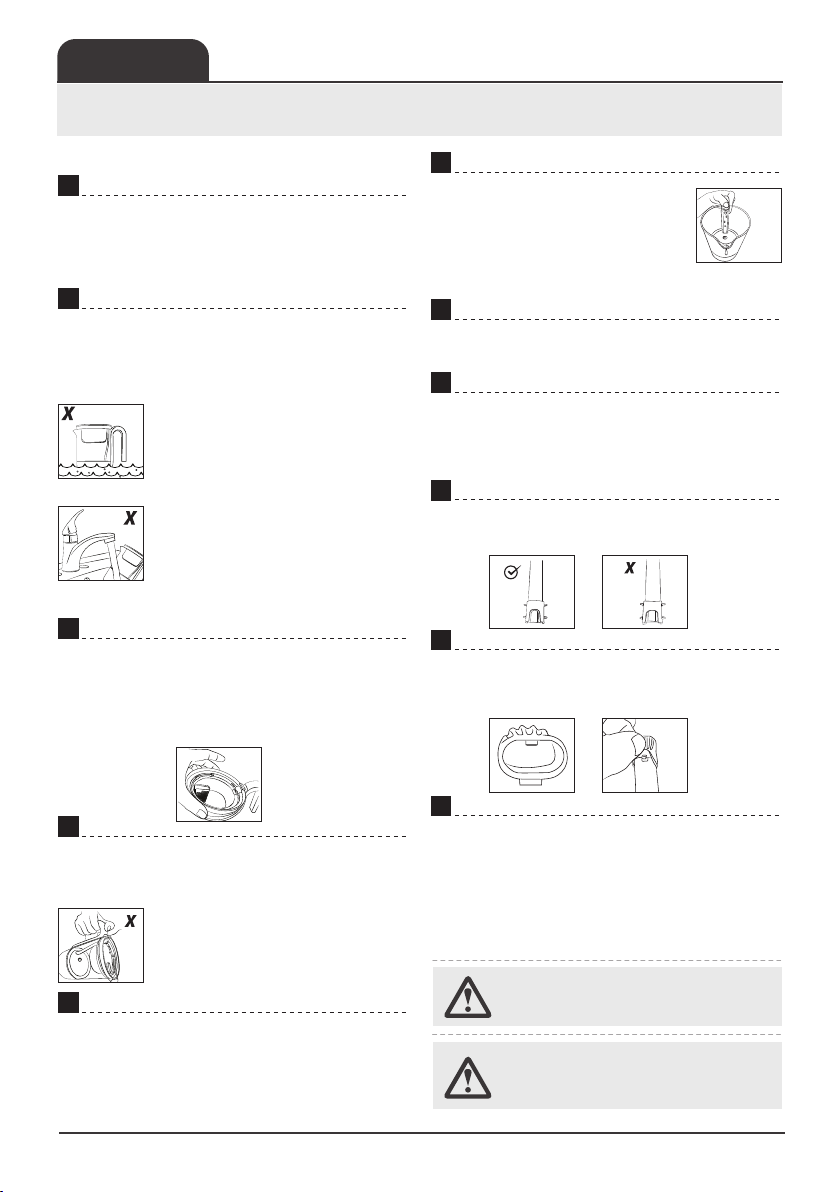
DO NOT use the Brewer if the Pot is cracked or
the Pot having a loose or weakened Pot Handle.
DO NOT insert any object into slots or holes of
the Brewer.
DO NOT lift the Pot while it is heating or
brewing.
DO NOT remove the Lid or Infuser when the
Brewer is heating or brewing as hot water and
steam will scald.
DO NOT leave the Brewer unattended when in
use.
DO NOT place hand or other body parts under
the Spout when pouring from the Brewer.
DO NOTclean the Pot with harsh cleansers, steel
wool pads, or other abrasive material.
DO NOT push, bend or rub the Temperature
Sensor inside the Pot when cleaning.
DO NOTturn the Pot upside down for drying as it
may cause glass breakage.
As a safety precaution, a short Power Cord is
provided to reduce the risks of personal injury or
property damage resulting from pulling,
entangled in or tripping with a longer cord.
An extension cord may be used if care is
exercised. The marked electrical rating of the
extension cord should be at least as great as the
electrical rating of the Brewer. The extension
cord should be grounding type 3-wire cord. The
longer cord should be arranged so that it will not
drape over the countertop or tabletop where it
can be pulled on by children or tripped over. Do
not connect multiple extension cords in series.
If the Power Cord is damaged, it must be
replaced by the manufacturer, its service agent
or similarly qualified persons in order to avoid a
hazard.
To reduce the risk of fire or electric
shock, DO NOT remove any fastened
cover of the Pot or Base. Repairs
To protect against electric shock,
NEVER immerse the Pot, Base, Power
Cord or Plug in water or allow moisture
to come in contact with these parts
DO NOT wash the Pot exterior under
running water.
DO NOT move the Brewer while it is switched
on.
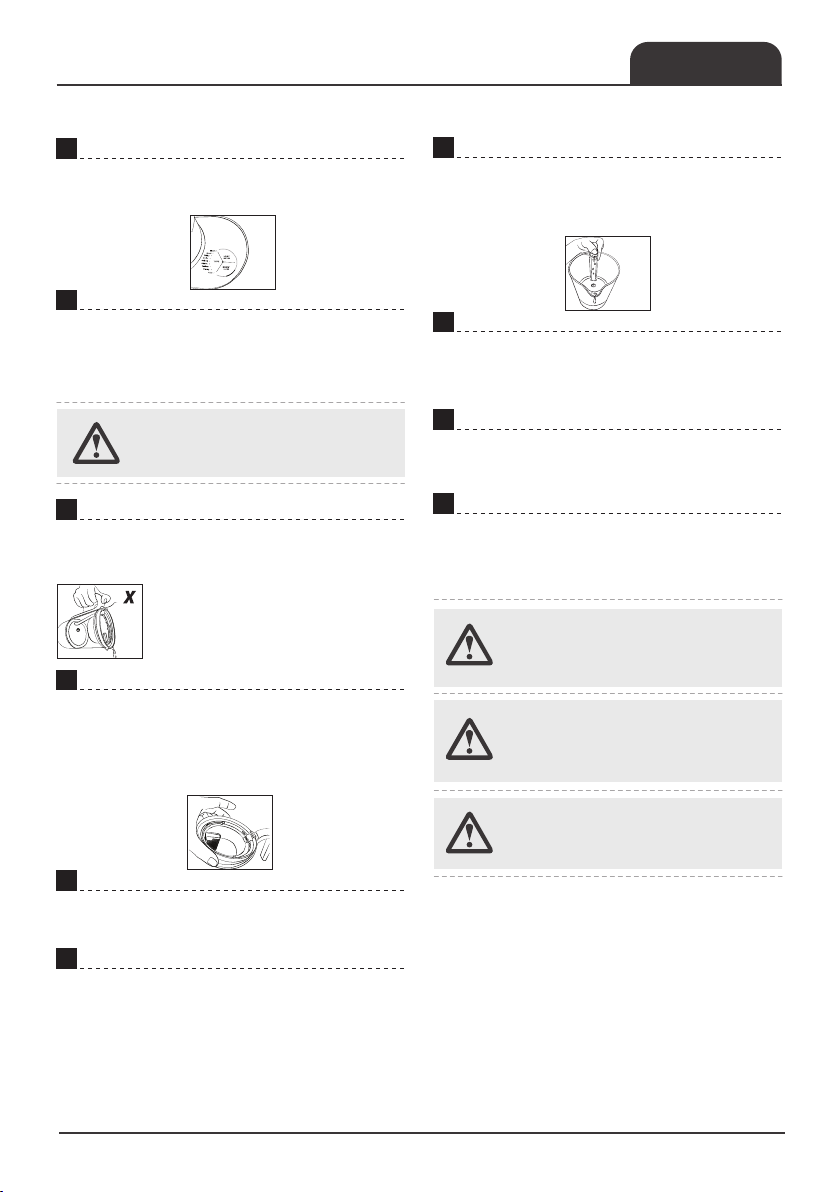
DO NOT fill and operate the Brewer over the
‘MAX' line marking on the Pot or below the ‘MIN’
line marking on the Pot. If the kettle is
overfilled, boiling water may be ejected.
DO NOT add fine or powdery tea leaves inside
the Brewer without using proper additional
filters or tea bags.
DO NOT excessively tilt the Brewer after filling
with water.
SHORT POWER CORD INSTRUCTIONS
should be done by authorized person-
nel only.
SAVE THESE INSTRUCTIONS
FOR HOUSEHOLD USE ONLY

www.qiaerista.com
PAGE 05
BREWER PARTS
Lid
Infuser Tab
Infuser
Silicone Rubber Rim
Infuser Handle
Filter
Pot
Spout
Spray Cap
Pot Handle
Flow Tube with Sheath (hidden)
Cavity
Temperature Sensor
Heating Plate
Base
Power Cord
Plug (may differ according to version)
Connector
Positioning Pin
Drainage Hole
TYPE Button:
Select brewing program by tea type. A
solid light will illuminate on the tea
type selected.
Multiple blinking lights will illuminate
when setting up app connection.
BREW (ON/OFF) Button:
Short press to start Brew mode (solid
light will illuminate) or stop all
operations.
Long press to turn on/off the Brewer.
Boil and Brew mode is on when fast
blinking light is shown (App only).
Reservation Timer mode is on when
slow blinking light is shown (App
only).
HEAT (KEEP WARM) Button:
Short press to start Heat mode (solid
light will illuminate) or stop
Heat/Keep Warm mode.
Long press to start Keep Warm mode
(slow blinking light will illuminate).
Boil and Cool mode is on when fast
blinking light is shown (App only).
1.
2.
3.
4.
5.
6.
7.
8.
9.
10.
11.
12.
13.
14.
15.
16.
17.
18.
19.
20.
21.
22.
23.
15
14
13
8
7
6
5
1
2
3
4
9
10
11
12
17
16
19
18
20
21
22
23

www.qiaerista.com
PAGE 06 BEFORE FIRST USE
Please read the ‘Important Safeguards’ section before using the Brewer. Please follow the below instruc-
tions on setup and cleaning to prepare the Brewer for tea infusion.
PREPARATION FOR FIRST CLEANING
TURNING BREWER ON
Remove and safely discard all packaging material and
label(s) on the Pot before using the Brewer for the
first time.
Remove the Lid, Infuser, Filter and Flow Tube gently
from the Pot.
Wash the Lid, Infuser, Filter, Flow Tube and inside of
the Pot with a soft sponge and warm fragrance-free
soapy water. Rinse them with clean water.
Ensure the Sheath is properly wrapped onto the
bottom end of the Flow Tube.
Ensure the Spray Cap is properly wrapped onto the
top end of the Flow Tube.
Re-insert the Flow Tube back into the Pot.
Re-attach the Filter onto the Infuser, ensuring the
clip on the Filter is properly clipped onto the sidewall
of the Infuser.
NEVER immerse the Pot, Base, Power
Cord or Plug in water or allow
moisture to come in contact with
these parts
Gently secure the Infuser on the Pot. Always ensure
the Spray Cap fits comfortably inside the Infuser
without deformation. Improper positioning of the
Spray Cap will diminish brewing results.
Fill the Pot up to the ‘MAX’ line marking on the Pot
with clean water.
01 08
09
Secure the Lid tightly to the Infuser. Always first
ensure the 2 stripes on the Lid align with Infuser Tab
and the Infuser Tab fits inside the Lid slot. Gently
press the Lid down and ensure it does not pop back
up.
10
Place the Pot on the Base. Ensure the Connector and
Positioning Pin are properly aligned with the bottom
of the Pot.
11
Insert the Plug into a grounded wall outlet. You will
hear a beep sound from the Brewer.
12
Turn on the Brewer by long pressing the ‘BREW’
button on the Base for 2 seconds until the light on
‘Black’ illuminates and a beep sounds. The Brewer is
now on standby.
13
02
03
04
05
06
07

Pot Handle and Lid may become very
warm during use.
www.qiaerista.com
PAGE 07
BEFORE FIRST USE
Press ‘BREW’ again to start the brewing cycle for
cleaning. A solid light will shine on the edge of
‘BREW’ button.
You will be alerted by 4 consecutive beeping sounds
when the brewing cycle is completed. The Brewer
will then enter Keep Warm mode. Press ‘BREW’ to
end the Keep Warm mode.
NEVER pour water/tea out with the
Lid open. When the Lid is open, the
Spray Cap and the edge of the Infuser
will drip water/tea that may cause
injury due to scalding.
Remove the Pot from the Base by firmly gripping the
Pot Handle. Completely discard the hot water.
Let the Brewer cool down for at least 10 minutes.
Remove the Lid and gently lift up the Infuser by the
Silicone Rubber Rim. Fillthe Pot again up to the ‘MAX’
line with clean water and re-attach the Lid and
Infuser on the Pot securely.
After the second brewing cycle is finished, press
‘BREW’ to end the Keep Warm mode. Remove the
Pot from the Base by firmly gripping the Handle.
Completely discard the hot water.
AUTOCLEANING THE BREWER
TURNING BREWER OFF
With the light at ‘Black’ on, press ‘BREW’ to start the
second brewing cycle.
The Brewer will shut off automatically when no
button is pressed within 15 minutes during standby.
To turn off the Brewer manually, long press ‘BREW’
for 2 seconds until a beep sounds and all lights are
off.
ALWAYS ensure the Lid and the Infuser
are securely attached to the Brewer
during operation and pouring.
DO NOT fill the Pot while hot with
chilled water. Allow the Pot to cool
before refilling.
Filling past the maximum water level
may result in serious burns or injuries
as a result of overflowing hot water.
14
15
16
17
18
19
Let the Brewer cool down for at least 10 minutes.
Remove the Lid and the Infuser and squeeze on the
Spray Cap to release any remaining water in the Flow
Tube.
20
Now, the Brewer is ready to brew tea.
21
22
23

Please read ‘Important Safeguards’ and ‘Before
First Use’ sections before proceeding with the
Usage Guide.
www.qiaerista.com
USAGE GUIDE
PAGE 08
BREW MODE
With preset temperature and time for different
types of tea, the Brewer can brew your favorite teas
with ease.
Remove the Lid and Infuser. Fill the Pot with clean
drinking water within the ‘MAX’ and ‘MIN’ water level
limits.
Secure the Infuser firmly on the top of
the Pot. Ensure the Spray Cap fits
comfortably inside the Infuser
without deformation. Improper
positioning of the Spray Cap will
diminish brewing results.
For best brewing results for Cold Brew
and brewing temperatures below
60oC/140oF, add between 2 to 3 cups
of water.
Place tea leaves inside the Infuser. As a general
guide, use 1 to 3 teaspoons of tea leaves per 1 cup
(230mL/8oz) of water.
Secure the Lid tightly to the Infuser. Always first
ensure the 2 stripes on the Lid align with Infuser Tab
and the Infuser Tab fits inside the Lid slot. Gently
press the Lid down and ensure it does not pop
backup.
Place the Pot on the Base. Ensure the Connector and
Positioning Pin are properly aligned with the
bottom of the Pot.
DO NOT add fine or powdery tea leaves
inside the Brewer without proper
additional filters or tea bags.
After brewing scented teas or teas with
distinctive flavors, DO ensure a more
thorough cleaning of the Brewer parts is
done to prevent leftover flavors.
DO NOT place spice or any foodstuff
inside the Pot orthe Infuser as the Brewer
is designed for heating water and brew-
ing tea only.
Note: If brewing stops prematurely, there
will be hot water gathered in the Infuser.
Before you open the Lid, DO always ensure
(a) there is no water dripping out from
the Infuser and (b) allow the Brewer to
cool down for at least 10 minutes.
Brewing will continue for the preset brewing
duration and ends with 4 beeps, unless it is stopped
due to any of the following conditions:
To serve, remove the Pot from the Base. Exercise
caution when pouring out the hot tea. NEVER open
the Lid and Infuser when pouring and DO NOT put
your hand under the Spout.
a) ‘BREW’ is pressed on the Base.
b) The ‘STOP’ button is pressed on the app.
Teas Preset Temperature Preset Time
Black
Green
White
Pu’er
Oolong
Herbal
Custom
Strong
Cold
3 mins
3 mins
3 mins
3 mins
3 mins
3.5 mins
2.5 mins
8 mins
10 mins
95oC/203oF
80oC/176oF
85oC/185oF
96oC/205oF
90oC/194oF
96oC/205oF
95oC/203oF
95oC/203oF
25oC/77oF
01
02
03
04
05
Insert the Plug into a grounded wall socket. You will
hear a beeping sound from the Brewer.
06
Press ‘TYPE’ to toggle the desired tea
type selection. A light will shine for
the tea type selected. Hold ‘TYPE’ for
more than 2 seconds to cycle through
the tea types automatically.
08
Press ‘BREW’ to start the brewing program. Water
will first be heated to the desired temperature. Then
the brewing cycle will begin.
09
10
11
For cleaning after use, please see the Cleaning and
Care section.
12
PRESET BREWING PARAMETERS
Turn on the Brewer by long pressing the ‘BREW’
button for 2 seconds until a light illuminates and a
beep sounds.
07

www.qiaerista.com
USAGE GUIDE PAGE 09
KEEP WARM MODE
HEAT MODE
With Keep Warm mode, the Brewer will maintain at a
preset keep warm temperature of 70oC/158oF for 60
minutes.
After brewing completes, the Brewer will automati-
cally switch to Keep Warm mode. A slow blinking
light on the edge of ‘HEAT’ on the Base will show.
Note: Keep Warm mode does not apply to Cold Brew.
The Keep Warm mode will continue for the preset
duration of 60 minutes and end with 2 beeps, unless
it is stopped due to any of the following conditions:
To reactivate the Keep Warm mode, long press the
‘HEAT’ Button for 2 seconds until a slow blinking
light appears and a beep sounds.
Remove the Lid and Infuser. Fill the Pot with clean
drinking water within the ‘MAX’ and ‘MIN’ water
levels.
Secure firmly the Lid and Infuser on the top of the
Pot. Ensure the Spray Cap fits comfortably inside the
Infuser.
Place the Pot properly onto the Base, ensure proper
alignment of the Connector and Positioning Pin.
Insert the Plug into a grounded wall socket.
Turn on the Brewer by long pressing ‘BREW’ on the
Base for 2 seconds until a light illuminates and a beep
sounds.
Before starting Keep Warm mode, always
ensure the fluids inside the Pot are within
the 'MAX' and 'MIN' levels.
The Heat mode and Keep Warm mode
share the same button on the Base.
The Pot Handle and Lid may become very
warm during and after the end of the
keep warm or heating cycle.
Press ‘TYPE’ to toggle the desired tea type selection.
A light will shine for the tea type selected.
Press ‘HEAT’ to start heating water.
Note: A solid light will illuminate on the edge of
‘Heat’ button. If instead the light is slowly blinking,
then it has entered Keep Warm mode. Switch back to
Heat mode by pressing ‘Heat’ twice.
The Brewer will beep 3 times when the heating cycle
is completed.
Remove the Pot from the Base and exercise caution
in pouring out the hot water. NEVER open the Lid
and Infuser when pouring and DO NOT put your hand
under the Spout.
To stop the Brewer during the Heat cycle, you can
apply either of the following procedures:
PRESET HEAT MODE PARAMETERS
Teas Preset Temperature
Black
Green
White
Pu’er
Oolong
Herbal
Custom
Strong
Cold
100oC/212oF
85oC/185oF
90oC/194oF
100oC/212oF
95oC/203oF
100oC/212oF
100oC/212oF
100oC/212oF
N/A
a) ‘BREW’ or ‘HEAT’ is pressed on the Base.
b) ‘STOP’ button is pressed on the app.
a) ’BREW’ or ‘HEAT’ is pressed on the base.
b) The ‘STOP’ button is pressed on the app.
The Brewer can function as a smart kettle to heat
water to the preset temperature according to tea
type. This option is optimal for teapot, gaiwan or
mug brewing. Note: Heat mode does not apply for
Cold Brew.
01
02
03
01
02
03
04
05
06
07
08
09
10

www.qiaerista.com
PAGE 10 CLEANING & CARE
Proper cleaning of the Brewer after every use is essential for maintaining the Brewer in its best condition
for tea brewing.
CLEANING THE EXTERIOR
CLEANING THE INTERIOR
Always ensure the Brewer is completely turned off,
the Plug is unplugged and the Brewer has cooled off
for at least 10 minutes before opening the Lid and
Infuser for cleaning.
Clean the exterior surface of the Pot (except for the
bottom of the Pot) with a damp cloth and then dry
with a soft cloth. DO NOT use steel wool pads or
harsh/abrasive cleaners on any parts of the Brewer.
To protect against electric shock,
NEVER immerse the Pot, Base, Power
Cord or Plug in water or allow
moisture to come in contact with
these parts.
DO NOT wash the Pot exterior under
running water.
Note: When pouring out the remain-
ing tea with the Lid opened, water
droplets may come out from the
Spray Cap.
Wash the Lid and Infuser in water and gently clean
them by soft sponge or cloth. Remove the Filter for
cleaning if necessary.
Rinse the inside of the Pot with warm
water and clean it gently with soft
sponge or cloth.When draining all the
water of the Pot, always ensure to
press on the Spray Cap to release any
remaining water in the Flow Tube.
Let the Pot dry naturally. DO NOT turn the Pot upside
down for drying as it may cause glass breakage.
Always ensure the Brewer is cooled off
before opening the Lid for cleaning.
Only the Infuser, Filter, Spray Cap,
Flow Tube, and Sheath are dishwasher
safe.
For a more thorough cleaning, remove the Flow Tube
and run water inside the tube. Squeeze the Spray Cap
to drain out any remaining water inside the Flow
Tube.
Ensure the Sheath is properly wrapped onto the
bottom end of the Flow Tube.
Ensure the Spray Cap is properly wrapped onto the
top end of the Flow Tube before re-inserting into the
Pot.
01
02
Open the Lid. Gently remove the Infuser by grabbing
by the Silicone Rubber Rim. Note: Always hold onto
the Pot Handle when lifting up the Infuser Handle to
prevent tumbling and breakage of the Pot.
03
Always discard wet tea leaves in the Infuser and any
left-over teas in the Pot within 30 minutes after
each brew.
04
05
06
07
08
09
10
Scale may build up in the Infuser, Flow Tube and
Heating Plate. Therefore it is very important that you
descale regularly using a commercially available
descaler to upkeep the appearance, maintain
functional efficiency and prevent appliance failure.
Always follow the manufacturer’s instructions
carefully when descaling.
11

www.qiaerista.com
PAGE 11
DOWNLOADING THE APP
MAIN SCREEN FEATURES
LOGIN/REGISTRATION
STEP 1
Scan this QR code
with your
smartphone.
STEP 2
Tap on iOS or Android button
and follow onscreen instructions
to install.
After installing the app, run the app and
you will land on the Main Screen. Tap on
any area to login/register (refer to the
steps in the next section). Key features on
the Main Screen include:
If you do not have an account, click ‘Create account’ and
follow the onscreen instructions to create one.
If you already have a Qi Aerista app account, enter your
email and password to log in.
If you have forgotten your password, click ‘Forgot
password’ and follow the onscreen instructions to
retrieve.
Search the Tea Library
QR Code Scanner
Notification Pane
Tea Menu
Tea List
Navigation Menu
APP GUIDE

www.qiaerista.com
PAGE 12
Ensure the Brewer and your smartphone are within range
of the same Wi-Fi network for proper connection and
operation. Ensure your smartphone is connected to this
Wi-Fi network. Note: Brewer onlyworks with 2.4GHz band
Wi-Fi networks.
BREWER SCREEN FEATURES
CONNECT BREWER
Click on the Brewer icon on the Main Screen to show the Brewer screen.
Connect Brewer
Brewer Settings
Mode Selector
QR Code Scanner
Reservation Timer
Status Display
Tea Type Selector
Preset Temperature
Preset Time
Start/Stop Button
STEP 1
Tap on icon.
STEP 2
Tap on
‘ADD BREWER’.
STEP 3
Enter your
Wi-Fi password
and tap on
‘NEXT STEP’.
STEP 4
Ensure the Brewer is
on. Press TYPE and
HEAT at the same time
on the Base for more
than 2 seconds until
you hear 2 quick
beeps. Do this 2 times
in total. All of the
Black, Green and
White lights will flash.
Then, tap ‘START
CONNECTING’.
To control the Brewer with the
app, please follow the below
instructions.
APP GUIDE
Ensure the Brewer has
been turned ON before
running any app-based
Brewer operation.

www.qiaerista.com
PAGE 13
APP GUIDE
You can customize the temperature and time for every tea type for each mode (Brew/Heat/
Keep Warm) except for Cold Brew. For Cold Brew, only the brew time can be customized.
Before starting operation, ALWAYS ensure you have read and follow the instructions in the User
Guide to have the Brewer properly set up for its intended use and operation mode.
CONNECT BREWER (CONT’D)
BREWER OPERATIONS OVERVIEW
STEP 5
After successful
connection, tap
‘FINISH’.
STEP 6
Tap on ‘Connected’ to
return to the Brewer
Screen. If the Brewer
Screen shows ‘Offline’,
restart your app again.
Now you are all set to
control your Brewer!
There are Brew, Heat and Keep Warm modes. The Brew mode is the automatic brewing function. The Heat
mode enables you to use the Brewer as a variable temperature kettle. The Keep Warm mode allows you to
maintain the tea at a specified temperature.
The Status Display shows the following:
Follow these 5 steps to brew tea with your app:
Current brewer operation status
Current or preset temperature
Current or countdown time
Swipe left or right to select the tea type.
Tap to select operation mode:
a) Brew: automatic brewing,
b) Heat: water heating, or
c) Keep Warm: temperature maintaining
Tap to customize temperature.
Tap to customize time.
Tap to start/stop operation.
CUSTOMIZE TEMPERATURE & TIME
Flip up and down the numbered wheel to select the desired
temperature or time for the tea type and operation.
Note: Before customization, ensure the Pot is on the Base and the
Brewer is in Standby mode as shown in the images here.
Note: Once the temperature or time has been changed for the tea
type, the values will be stored for future operations until the next
customization.
1.
2.
3.
4.
5.

www.qiaerista.com
PAGE 14
For proper functioning, DO NOT use the Brewer at places where water boils below 90oC/194oF
(e.g. >2800m/9200ft above sea level).
CUSTOMIZE BREWER SETTINGS
Tap on the ‘Settings’ icon of the Brewer Screen to access the Brewer Settings.
BREW LOG
BREW MODE
HEAT MODE
SET BOILING POINT
BUZZER
RENAME
RESET BREWER
DELETE BREWER
This keeps track of your brewing history.
Water boils at a lower temperature at higher elevations. Use this setting to
adjust the boiling point between 90oC (194oF) to 100oC(212 F) for proper
functioning of the Brewer at high elevation locations.
You can turn on or off the Brewer sounds with this setting.
You can rename your Brewer with this setting.
You can reset your Brewer to the default settings with this button.
You can delete your Brewer from the app with this button.
APP GUIDE
STEP 1
Tap on the
‘Settings’ icon.
STEP 2
Proceed
according to
the table
below.
You can choose between Normal Brewing or Boil and Brew.
How Boil and Brew works:
Boils water to the boiling temperature (default 100oC/212oF).
Waits until the water has cooled down to the preset temperature.
Starts automatic brewing.
To set, tap on ‘Brew mode’→‘Boil and Brew’ and then ‘CONFIRM’.
1)
2)
3)
You can choose between Normal Heating or Boil and Cool.
How Boil and Cool works:
Boils water to the boiling temperature (default 100oC/212oF).
Waits until the water has cooled down to the preset temperature.
Notifies you the heated water is ready for manual brewing.
To set, tap on ‘Heat mode’→‘Boil and Cool’ and then ‘CONFIRM’.
1)
2)
3)

www.qiaerista.com
PAGE 15
ALWAYS ensure the Pot is properly placed on the Base and is filled with clean drinking water
between the ’MAX’ and ‘MIN’ line before initiating reservation timer.
Before starting reservation timer, ALWAYS ensure the Brewer has been properly set up
according to the instructions in the Usage Guide.
Reservation timer is only available in Brew mode.
RESERVATION TIMER
STEP 1
You can set the reservation timer up to 24 hours in advance for your selected Brew mode.
Select tea type and tap
Reservation.
STEP 2
A clock menu should
appear, displaying your
current time, which is
14:25 in this case.
STEP 3
Set the desired start
time. Then tap
‘CONFIRM’. (Here 7:25
tomorrow has been
set as an example.)
STEP 4
The Status Display
shows the ‘Reserva-
tion Wait’ status with
the countdown time
to start of brewing.
(Here it shows 17 hours
as an example.)
STEP 5
Tap Reservation again
on the Brewer Screen to
make changes to the
reservation if needed.
STEP 6
Tap ‘Update’ or ‘Cancel’
the reservation as
desired.
APP GUIDE

www.qiaerista.com
APP GUIDEPAGE 16
PROFILE SCREEN FEATURES
USER INFO
RINGTONE Select your desired ringtone.
UNIT
LANGUAGE
Metric/Celsius is the default. Choose Imperial for displaying temperature in
Fahrenheit.
USER GUIDE
ABOUT
LOGOUT
Update your profile information (i.e. Profile Picture, Nickname, Gender, Region,
Reset Password).
NOTIFICATION
App version.
Access our online user guide for the Brewer and app.
System push notifications from Qi Aerista.
English is the default. Chinese is the option.
Log out of the app.
STEP 1
Tap on the Profile
icon.
STEP 2
Tap on the image to
update User Info.
For other changes,
proceed according to
the table below.

www.qiaerista.com
PAGE 17
APP GUIDE
TEA LIBRARY FEATURES
TEA LIST
SCAN
LET’S BREW
Select a tea from our Tea Library to learn more
about its information, brewing directions, and
reviews.
You can tap on the Scan icon on the top right of
the screen to scan the QR code on the Qi Aerista
tea packages and access the tea information.
Step 1 - Follow the Usage Guide to prepare the
Brewer with water and tea leaves for brewing.
Then place the Pot on the Base. Ensure the
Brewer is turned on at standby.
Step 2 - Tap ‘LET’S BREW’ on the Tea screen to
send the brewing settings to the Brewer. The light
on ‘Custom’ will illuminate on the Base.
Step 3 - Brewer Screen will appear with the
selected tea displayed. The existing temperature
and time settings for ‘Custom’ will be updated.
Step 4 – Select ‘Brew’ or ‘Heat’. Tap on ‘Start’ to
begin.
STEP 1
Tap on the
Library icon.
STEP 2
Proceed according to
the table below.

www.qiaerista.com
PAGE 18 TROUBLESHOOTING
I’ve already connected to my
Brewer, but it shows that the
Brewer is offline.
Ensure the Brewer is turned on. Restart the app and the app should
reconnect with the Brewer automatically.
The light has gone off
sometime after I switched on
the Brewer.
The Brewer is in standby mode right after it is turned on. If no button
has been pressed on the Base or it does not receive any operational
command from the app, the Brewer will automatically turn itself off
after 15 minutes in standby.
How do I change from Celsius
to Fahrenheit on the app?
You can switch to Fahrenheit on the Profile Screen via the Unit
setting. Please refer to App Guide on Profile Screen.
After brewing begins, there
are bubbles appear near the
Flow Tube.
Those are air bubbles created by our patented circulative infusion
process, which is driven by air. A small amount of air may escape into
the Pot during brewing, which is normal.
The Lid pops up during
brewing.
Ensure the contact surfaces between the Lid and Infuser are
clean and free of debris and oily substances.
Ensure the Lid has been properly aligned and securely attached
to the Infuser.
Ensure the Flow Tube, Spray Cap and Sheath are properly
installed inside the Pot.
Ensure you don’t overfill the Infuser with tea leaves. They may
expand during brewing and push open the Lid.
1)
2)
3)
4)
1)
2)
3)
4)
5)
1)
2)
Why is the Brewer not brewing
as it normally would, and the
tea brewed is weaker than
usual?
Ensure the Flow Tube, Spray Cap and Sheath are properly
installed within the Pot.
Ensure the Infuser and Filter are properly installed within the
Pot.
Ensure the Lid is securely closed during operation.
Ensure enough water has been added that is within the ‘MAX'
and ‘MIN’ levels.
For best brewing results for Cold Brew and brewing tempera-
tures below 60oC/140oF, we recommend adding between 2 to 3
cups of water.
There are tea leaves stuck in
the Filter. How do I clean it?
Remove the Filter, rinse it with water.
Re-attach the Filter, ensuring the clip goes outside of the
Infuser.
After brewing, I saw that the
Infuser has colored shades or
stains. What is it?
The stain is most likely water residue. Follow the Cleaning and Care
section to remove if desired.
I brewed green tea and I can
taste the flavor from my last
brew of black tea. What should
I do?
Always ensure that the instructions in the Cleaning and Care section
is followed. For a deeper cleaning, please follow the cleaning
procedures in the Before First Use section.
I would like to have the
Brewer’s default settings back.
On the app, go to Brewer setting → tap on Settings → tap on Reset
Brewer.
What smartphones does the
app support?
For any other questions
Android – 4.0 or above
iOS – iOS 7 or above; iPhone 5 or above

www.qiaerista.com
PAGE 19
WARRANTY POLICY
This warranty will be valid only if the email registration is completed within 30 days upon receiving the
Brewer as indicated by KIL’s shipment tracking records, failing which this warranty will be null and void.
The email registration is regarded as completed if the following information has been provided (a) name;
(b) email address; (c) mailing address; (d) contact number; (e) date of receiving the product; and (f)
invoice/order number.
This warranty covers the product repairs or replacement on any defects which in our judgment is caused
(a) due to faulty materials and workmanship; (b) under normal use and maintenance in a manner that is
strictly adhered to the instructions as described in the Qi Aerista Smart Tea Brewer User Guide.
This warranty does not cover product and/or product parts that are subject to wear, that can be consid-
ered as consumable parts by their nature or that are made of glass.
This warranty shall automatically be void if (a) the defect is due to damage caused by incorrect use and/or
poor maintenance (e.g. parts blocked by scale); (b) it has been explicitly or implicitly modified, opened,
tempered with altered or repaired in any way by persons not authorized by KIL; or (c) it has become
malfunctioned due to power interruption or abnormal voltage input.
For services, the user will be responsible for the transportation and customs duties of the product to and
from our service center for repair.
Thank you for your purchase of Qi Aerista Smart Tea Brewer. Keyway Innovations Limited (hereinafter
KIL) will offer one (1) year warranty service from the date of email registration through our email:
At the end of its service life, this product may not be disposed of in the normal household
waste, but rather must be disposed of at a collection point for recycling electrical and
electronic devices. The materials are recyclable according to their labelling. You make an
important contribution to protecting our environment by reusing, recycling or utilising old
devices in other ways. Please ask the municipal administration where the appropriate disposal
facility is located.

WWW.QIAERISTA.COM
TOUCHING HEARTS
WITH TEA
Keyway Innovations Limited
907, Tower 2, Silvercord, 30 Canton Road
Tsimshatsui, Kowloon, Hong Kong
v20180901
This manual suits for next models
1
Table of contents