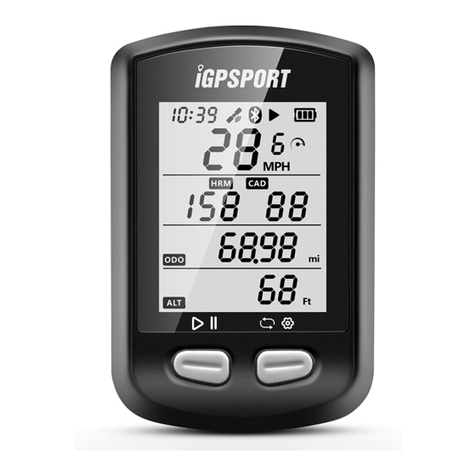
QIWU iGPSPORT iGS620 User manual

1/48
USER MANUAL
iGS620 GPS CYCLING COMPUTER
www.igpsport.com
WUHAN QIWU TECHNOLOGY CO., LTD

2/48
Getting started
...............................................................................................................................................
5
Buttons.......................................................................................................................................................... 5
Installation....................................................................................................................................................5
Personal setting......................................................................................................................................... 6
Setting up gps cycling computer
............................................................................................................
7
connect gps cycling computer............................................................................................................. 8
Setting up gps cycling computer........................................................................................................ 8
Set up WIFI...................................................................................................................................................9
Smart Notifications...................................................................................................................................9
Life track..................................................................................................................................................... 10
Set up interface
...........................................................................................................................................
11
Time format...............................................................................................................................................11
Set Altitude................................................................................................................................................11
Connecting with ANT+ sensors.........................................................................................................12
Screen display Indicator icons............................................................................................................13
Bike setting................................................................................................................................................13
Acquiring satellite signals....................................................................................................................15
Pause and continue................................................................................................................................ 17
Scroll pages............................................................................................................................................... 18
Lap.................................................................................................................................................................18
Stop recording..........................................................................................................................................19
Reviewing your ride............................................................................................................................... 19
Activity summary.................................................................................................................................... 20
Graph of Heart rate zones................................................................................................................... 23

3/48
Activity upload......................................................................................................................................... 25
Upload via BLE........................................................................................................................................25
Upload via USB cable........................................................................................................................... 25
Advanced setting
........................................................................................................................................
27
Customizing the data screens............................................................................................................ 27
Page selection.........................................................................................................................................27
Data Fields............................................................................................................................................... 28
Auto function............................................................................................................................................30
Auto Start.................................................................................................................................................30
Auto Pause...............................................................................................................................................31
Auto Lap................................................................................................................................................... 32
Auto Lap location:................................................................................................................................. 32
Auto Lap distance:.................................................................................................................................32
Auto Scroll............................................................................................................................................... 33
Display setting..........................................................................................................................................34
Color Mode................................................................................................................................................34
Height page...............................................................................................................................................35
Navigation
.....................................................................................................................................................
35
Creation line.............................................................................................................................................. 35
choose line................................................................................................................................................. 36
Location...................................................................................................................................................... 36
Road map................................................................................................................................................... 37
map download......................................................................................................................................... 37
Import map from USB...........................................................................................................................38
Navi Setting...............................................................................................................................................39
Customize Data-On /Off..........................................................................................................................39
Set Page.................................................................................................................................................... 39
Set up maps auto rotate......................................................................................................................39

4/48
North-upward on/off............................................................................................................................39
Turning indicator................................................................................................................................... 39
Route Elevation...................................................................................................................................... 39
Training
...........................................................................................................................................................
40
Zones............................................................................................................................................................40
Set Alerts.................................................................................................................................................... 41
More Setting
.................................................................................................................................................
42
Riding Mode..............................................................................................................................................43
Color Setting............................................................................................................................................. 43
Add New Bikes......................................................................................................................................... 44
Power Saving
................................................................................................................................................
44
Auto Functions......................................................................................................................................... 44
GPS Power Saving Mode......................................................................................................................44
Other Functions
...........................................................................................................................................
45
Manually Pause........................................................................................................................................ 45
Speed from sensor..................................................................................................................................45
auto-upgraded firmware......................................................................................................................46
Other setting.............................................................................................................................................46
Battery charging...................................................................................................................................... 46
iGPSPORT App Download
.......................................................................................................................
47
Product Specifications
..............................................................................................................................
47
Contact us
......................................................................................................................................................
48
Declaration :
..................................................................................................................................................
48

5/48
Getting started
Buttons
Left button: Power on/ Exit/Power off (hold for more than 2s) or Restart(hold for more than 10s)
Middle button: Confirm/Recording start/Lap/Recording pause/Recording continue)
Right button: Scroll down / Scroll Pages
For specific button function, please refer to the button prompts under the screen.
Installation

6/48
1. Standard bike mount installation
2. Out front bike mount installation (Optional accessory)
Personal setting
When using iGS620 for the first time, you can set the Language, Gender, Age, Weight, Height and
Time Zone as below:
While setting the numerical digits, select right button to choose the digit of number, select left/ middle
button to plus/minus the number, then select right button to enter the save page, select middle button to
confirm the saving.

7/48
It will enter the data display page once the setting finished.
For better using on iGS620, please complete more settings as below.
Setting up gps cycling computer

8/48
connect gps cycling computer
Open Bluetooth for both of phone and device, start App “iGPSPORT ”, clicks the icon '+' in the
upper right corner on the home page or the icon '+' in the middle of the page, choose the device model
iGS620 ,enters the search page, and choose the device iGS620 to connect, which will enter the
device management interface automatically。
Setting up gps cycling computer
By setting up device through APP, the operation convenience can be improved
setting up feature of device
category
Description
Ride model
Add, Set, Delete, Open and Close Cycling Mode
Page set up
Add name and delete name, open/close and
reorder on page
Life track
Power on/off life track, choose way to share the
link
Smart Notifications
Open incoming call and SMS reminder
map
Updated and deleted of maps; Whether set up
maps rotate always
User information
User's personal information, such as height,
weight, age, female/male, time zone, FTP, FTHR,
maximum heart rate, maximum oxygen uptake
Wi-Fi
Power on/off , search and connect Wi-Fi

9/48
Set up WIFI
In the device management interface, click the WIFI , enter the page of WIFI management, open the
WIFI function, the device will search for available WIFI nearby automatically, select the WIFI and input
password to complete the connection; if you want to connect to hiden WiFi, click the "other" at the
bottom to enter the WiFi name and password to complete the connection. Later, when in the range of
configurable WIFI, the device will connect to the matched WIFI network by itself; if the WIFI name is
replaced, it needs to be reconfigured.
Open the WIFI automatic data upload switch on the WIFI management page, the cycling data
uploaded automatically when the device is connected to the WIFI
Smart Notifications
Enter page of device management, power on Smart Notifications, device can receive incoming call and
SMS

10/48
Life track
Enter the device management interface, click on life track and share link to third-party applications, for
others to view life track .

11/48
Set up interface
Time format
There are 2 time formats for selection: 12 hour or 24 hour.
Enter SETTING-System-Day Time-Time Format
Set Altitude
The current altitude can be set manually as below:
SETTING—System-Other Functions--Set Elevation

12/48
Connecting with ANT+ sensors
If you have ANT+ sensors, for first time using, please search the sensors as below:
SENSORS-Search All (It may take some time to finish searching.)
Note: please make sure the sensors are in wake-up mode
1.Heart rate monitor should be worn directly on skin just around the chest.
2.Cadence sensor should be installed on the crank arm of no-drive side, then rotate the crank
arm.
3.Speed sensor should be installed on the top of front wheel hub, then rotate the front wheel.

13/48
Screen display Indicator icons
When sensors are connected, the indicator icons will be shown in the upper screen as below:
Bike setting
It is necessary to set the bike circumference if using ANT+ speed sensor.

14/48
Please enter the BIKE menu, choose the selected bike, set the circumference, save, and exit as
below:
Common wheel size and circumference:
Wheel Size
L (mm)
Wheel Size
L (mm)
12 × 1.75
935
27 × 1
2145
14 × 1.5
1020
27 × 1-1/8
2155
14 × 1.75
1055
27 × 1-1/4
2161
16 × 1.5
1185
27 × 1-3/8
2169
16 × 1.75
1195
27.5 x 1.50
2079
18 × 1.5
1340
27.5 x 1.95
2090
18 × 1.75
1350
27.5 x 2.1
2148
20 × 1.75
1515
27.5 x 2.25
2182
20 × 1-3/8
1615
650C Tubular26 x
7/8
1920
22 × 1-3/8
1770
650 x 20C
1938
22 × 1-1/2
1785
650 x 23C
1944

15/48
24 × 1
1753
650 x 25C 26 x
1(571)
1952
24×3/4 Tubular
1785
650 × 35A
2090
24 × 1-1/8
1795
650 × 38A
2125
24 × 1-1/4
1905
650 × 38B
2105
24 × 1.75
1890
700 × 18C
2070
24 × 2.00
1925
700 × 19C
2080
24 × 2.125
1965
700 × 20C
2086
26 × 7/8
1920
700 × 23C
2096
26 × 1(59)
1913
700 × 25C
2105
26 × 1(65)
1952
700 × 28C
2136
26 × 1.25
1953
700 × 30C
2170
26 × 1-1/8
1970
700 × 32C
2155
26 × 1-3/8
2068
700C Tubular
2130
26 × 1-1/2
2100
700 × 35C
2168
26 × 1.40
2005
700 × 38C
2180
26 × 1.50
2010
700 × 40C
2200
26 × 1.75
2023
700 × 42C
2224
26 × 1.95
2050
700 × 44C
2235
26 × 2.00
2055
700 × 45C
2242
26 × 2.10
2068
700 × 47C
2268
26 × 2.125
2070
29 x 2.1
2288
26 × 2.35
2083
29 x 2.2
2298
26 × 3.00
2170
29 x 2.3
2326
Acquiring satellite signals
iGS620 will search the satellite signals automatically when power on.
Please make sure iGS620 is outdoor and under a clear view of the sky.
Usually it may take 5 to 120 seconds to locate satellite signals.
Remain stationary when acquiring satellite signals.
The time and date will be calibrated automatically after satellite signals located.
Satellite signals icons:

16/48
Strong satellite signals
Normal satellite signals
No satellite
signals( position not fixed)
GPS closed
In main menu, select left button to enter the data display page, the icon in upper left screen also
shows the satellite signals intensity.
GPS satellite signals intensity
When motion detected, iGS620 will start count down automatically, wait till count down finished or
select the middle button to start recording, or select the left button to cancel the recording. To turn off
the auto recording function and choose manual recording, please refer to the Auto Functions

17/48
Under recording mode, the icon in upper right screen beside the battery icon will show recording
status too.
Recording status
Pause and continue
When you stop moving, , iGS620 will detect and pause the recording automatically. The icon will shift
between record and pause accordingly. You can also select middle button to pause while recording
manually.

18/48
Scroll pages
Scroll page down/up
In data display page, select right button to shift from selected pages. The red indicating bar at the
bottom of the screen shows the current page. For more setting on pages, please refer to the Advanced
Setting-MODE-Page Selection-Set Pages
Lap
If you want to analyze the data in one segment, select the middle button under recording mode to
start laps, it will notice a new lap and show the riding time of last Lap.

19/48
Stop recording
Select the left button to end a ride, select the middle button to save the ride. When the ride is ended,
the recording indicator icon on the upper right will disappear accordingly. Power off iGS620 under
recording mode, will also save the riding data automatically.
Reviewing your ride
Check the activities under MEMORY menu as below:

20/48
Activity summary
Choose an activity to check its activity summary.
Button function under activity summary page:
Left button: return to activities menu
Middle button: enter the extended menu(Laps/Graph/Delete)
Right button: page down
Note:
1. The invalid data will be ignored without display, for example, there will be no heart rate
or power data if you have not connect with heart rate sensor or power meter with iGS620
while cycling.
Table of contents
Other QIWU Bicycle Accessories manuals