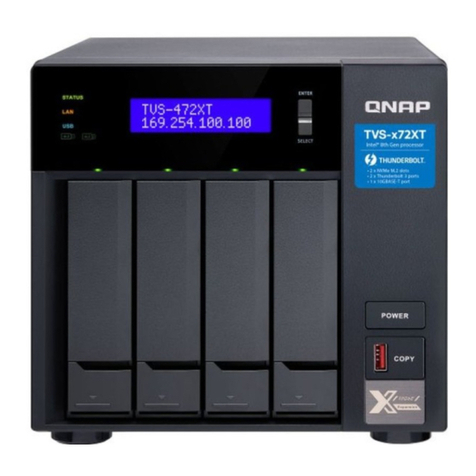
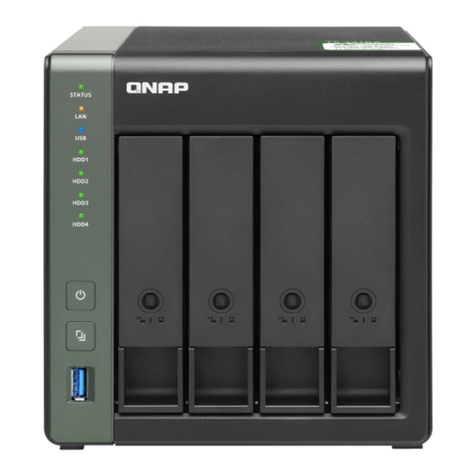
QNAP TS-431X2 User manual

TS-431X2
User Guide
Document Version: 1
20/06/2017

Contents
1. Preface
About This Guide.......................................................................................................................................... 3
Audience.......................................................................................................................................................3
Document Conventions................................................................................................................................ 3
2. Product Overview
About the TS-431X2..................................................................................................................................... 4
Hardware Specifications............................................................................................................................... 4
Package Contents........................................................................................................................................ 5
Components................................................................................................................................................. 5
Front Panel...............................................................................................................................................6
Back Panel............................................................................................................................................... 6
Left Panel................................................................................................................................................. 7
Drive Numbering.......................................................................................................................................8
Installation Requirements............................................................................................................................. 8
Setting Up the NAS.......................................................................................................................................8
3. Installation and Configuration
Hardware Installation.................................................................................................................................. 10
Installing Drives...................................................................................................................................... 10
Replacing Memory Modules...................................................................................................................14
QTS Installation.......................................................................................................................................... 23
Installing QTS Using Qfinder Pro........................................................................................................... 23
Installing QTS Using the Cloud Key....................................................................................................... 24
4. Basic Operations
Power Button.............................................................................................................................................. 27
Reset Button............................................................................................................................................... 27
USB One-Touch Copy Button..................................................................................................................... 27
LEDs........................................................................................................................................................... 28
Beep Alarm................................................................................................................................................. 29
5. Troubleshooting
Forcing Qfinder Pro or myQNAPcloud to Locate the NAS......................................................................... 30
Hot-Swapping Failed Drives....................................................................................................................... 30
Recovering Unintentionally Removed Healthy Drives................................................................................ 31
Support and Other Resources.................................................................................................................... 31
6. Glossary
CloudKey.................................................................................................................................................... 32
CloudLink....................................................................................................................................................32
myQNAPcloud............................................................................................................................................ 32
myQNAPcloud ID........................................................................................................................................32
Qfinder Pro................................................................................................................................................. 32
QTS.............................................................................................................................................................32
7. Notices
Limited Warranty.........................................................................................................................................33
Disclaimer................................................................................................................................................... 33
GNU Public License....................................................................................................................................33
TS-431X2 User Guide
1
FCC Notice................................................................................................................................................. 41
CE Notice....................................................................................................................................................41
SJ/T 11364-2006.........................................................................................................................................42
2

1. Preface
About This Guide
This guide provides information on the QNAP TS-431X2 NAS and step-by-step instructions on installing the
hardware. It also provides instructions on basic operations and troubleshooting information.
Audience
This document is intended for consumers and storage administrators. This guide assumes that the user has
a basic understanding of storage and backup concepts.
Document Conventions
Symbol Description
Notes provide default configuration settings and other supplementary
information.
Important notes provide information on required configuration settings and other
critical information.
Tips provide recommendations or alternative methods of performing a task or
configuring settings.
Warnings provide information, that when ignored, may result to potential loss,
injury, or even death.
TS-431X2 User Guide
Preface 3

2. Product Overview
This chapter provides basic information about the QNAP TS-431X2 NAS.
About the TS-431X2
The TS-431X2 supports four drives and comes with a built-in 10GbE SFP+ port to support 10GbE network
environments. Equipped with a strong encryption engine, the TS-431X2 provides a secure and reliable quad-
core NAS solution. The TS-431X2 is a cost-effective network storage solution designed for growing
businesses looking for backup, restoration, private cloud, storage for virtualization, and to future-proof their
IT infrastructure for 10GbE networks.
Hardware Specifications
Important
Modifying the hardware or software of your QNAP product invalidates the warranty. QNAP
is not responsible for any damage or data loss caused by unauthorized modifications and
installation of unsupported third-party applications.
Component TS-431X2
Ordering P/N • TS-431X2-2G
• TS-431X2-8G
Drive bays 4 x SATA 6Gb/s
Drive compatibility • 3.5-inch hard disk drives
• 2.5-inch hard disk drives
• 2.5-inch solid state drives
CPU AnnapurnaLabs Alpine AL-314 quad-core ARM® Cortex-A15 1.7 GHz
Encryption engine AES 256-bit
Memory TS-431X2-2G
• 2 GB DDR3 (1 x 2 GB)
TS-431X2-8G
• 8 GB DDR3 (1 x 8 GB)
Maximum memory 8 GB (1 x 8 GB)
Memory slots 1 x SODIMM DDR3
Flash memory 512 MB
10 gigabit Ethernet ports 1 x 10 Gigabit SFP+
Gigabit Ethernet ports 2 x Gigabit
USB ports • Front: 1 x USB 3.0 port
• Rear: 2 x USB 3.0 ports
Buttons • Power
• USB One Touch Copy
• Reset
TS-431X2 User Guide
Product Overview 4

Component TS-431X2
LED indicators • Status
• LAN
• USB
• Drives 1 to 4
Security slot Kensington security slot
Form factor Tower
Dimensions (H x W x D) 169 x 160 x 219 mm
6.65 x 6.3 x 8.62 inch
Net weight 3kg (6.61 lbs)
System fans 1 x 12 cm
Power supply unit 90W AC adapter, 100-240V
Operating temperature 0 to 40˚C (32 to 104˚F)
Relative humidity • Non-condensing relative humidity: 5 to 95%
• Wet-bulb temperature: 27˚C (80.6˚F)
Note
Model specifications are subject to change without prior notice. To see the latest
specifications, go to https://www.qnap.com.
Package Contents
Item Quantity
TS-431X2 NAS 1
AC power adapter 1
Power cord 1
Ethernet cable 2
Screws for 3.5-inch drives 16
Screws for 2.5-inch drives 12
Quick Installation Guide (QIG) 1
Components
TS-431X2 User Guide
Product Overview 5

Front Panel
No. Component No. Component
1 Status LED 6 Drive 3 LED
2 LAN LED 7 Drive 4 LED
3 USB LED 8 Power button
4 Drive 1 LED 9 USB One Touch Copy button
5 Drive 2 LED 10 USB 3.0 One Touch Copy port
Back Panel
TS-431X2 User Guide
Product Overview 6

No. Component No. Component
1 Reset button 4 USB 3.0 ports
2 10 gigabit SFP+ port 5 Power input
3 Gigabit ports 6 Kensington security slot
Left Panel
Note
The image does not include the chassis.
No. Component No. Component
1 Memory slot - -
TS-431X2 User Guide
Product Overview 7

Drive Numbering
Installation Requirements
Category Item
Environment • Room temperature: 0 to 40˚C (32 to 104˚F)
• Non-condensing relative humidity: 5 to 95%
• Wet-bulb temperature: 27˚C (80.6˚F)
• Flat, anti-static surface with no exposure to direct sunlight, liquids,
and chemicals
Hardware and peripherals • Storage drives
For details on compatible drives, go to https://www.qnap.com/
compatibility/.
• Network cable
Tools • Phillips #1 or #2 screwdriver
• Anti-static wrist strap
Setting Up the NAS
1. Place your NAS device in an environment that meets the requirements.
For details, see Installation Requirements.
2. Install the drives.
For details, see Installing 3.5-inch Hard Drives and Installing 2.5-inch Hard Drives or Solid State Drives.
3. Connect the power cord and all applicable cables.
4. Power on the NAS.
5. Install QTS.
For details, see QTS Installation.
TS-431X2 User Guide
Product Overview 8

6. Log on to QTS.
TS-431X2 User Guide
Product Overview 9

3. Installation and Configuration
This chapter provides specific hardware and firmware installation and configuration steps.
Hardware Installation
This section provides information on installing drives, memory modules, and expansion cards.
Installing Drives
The TS-431X2 is compatible with 3.5-inch and 2.5-inch hard drives, and solid state drives. All four drive bays
support SSD cache acceleration.
Installing 3.5-inch Hard Drives
Warning
• Installing a drive deletes all data on the drive.
• Observe electrostatic discharge (ESD) procedures to avoid damage to components.
1. Power off the NAS.
2. Remove drive tray.
a. Pull the tray handle forward.
b. Pull the tray out.
3. Install a drive on the tray.
a. Place the drive so that the SATA connector is exposed.
b. Attach the screws to lock the drive to the tray.
TS-431X2 User Guide
Installation and Configuration 10

4. Load the tray into the bay.
a. Slide the drive tray into the drive bay.
b. Push in the handle.
5. Power on the NAS.
TS-431X2 User Guide
Installation and Configuration 11

Installing 2.5-inch Hard Drives or Solid State Drives
Warning
• Installing a drive deletes all data on the drive.
• Observe electrostatic discharge (ESD) procedures to avoid damage to components.
1. Power off the NAS.
2. Remove drive tray.
a. Pull the tray handle forward.
b. Pull the tray out.
3. Install a drive on the tray.
a. Place the drive on the tray so that the holes on the bottom of the drive are aligned with the holes
on the bottom of the tray.
b. Attach the screws to lock the drive to the tray.
TS-431X2 User Guide
Installation and Configuration 12

4. Load the tray into the bay.
a. Slide the drive tray into the drive bay.
b. Push in the handle.
5. Power on the NAS.
TS-431X2 User Guide
Installation and Configuration 13

Replacing Memory Modules
The NAS has one memory slot. Depending on the model, you can increase the memory capacity of the NAS
by upgrading the memory module. Use only QNAP memory modules to maintain system performance and
stability. You can purchase QNAP memory modules from authorized resellers.
Warning
• Only qualified personnel should perform the following steps. Failure to follow
instructions can result in serious injury or death.
• Observe electrostatic discharge (ESD) procedures to avoid damage to components.
1. Power off the NAS.
2. Unplug the power cord from the electrical outlet.
3. Disconnect all cables and external attachments.
4. Remove the drive trays.
a. Pull the tray handle forward.
b. Pull the tray out.
Important
Remember the number of each drive. The drive trays will need to be returned to their original
bays.
5. Remove the case cover.
a. Remove the screws on the back of the NAS that connect the case cover to the chassis.
TS-431X2 User Guide
Installation and Configuration 14

Tip
The case cover screws are longer than the other screws that will be removed.
b. Place the NAS on its left side.
c. Slide the case cover to the right so that the triangle aligns with the unlock icon.
d. Pull the case cover up until it completely detaches from the chassis.
6. Remove the top and bottom screws on the back of the NAS.
TS-431X2 User Guide
Installation and Configuration 15

7. Place the NAS on its left side.
8. Remove the 6 screws that connect the drive tray chassis to the NAS.
TS-431X2 User Guide
Installation and Configuration 16

9. Carefully remove the drive tray chassis.
10. Remove an existing module.
a. Push the retention clips outward simultaneously to release the module.
TS-431X2 User Guide
Installation and Configuration 17

b. Verify that the module has tilted upward and is completely released from the slot.
Warning
Attempting to remove a module that is not completely released may damage the module and
the motherboard.
c. Hold the module by the edges and then carefully slide it out of the slot.
Warning
Do not touch the components, particularly the metal connectors.
Do not bend the module.
11. Install a new module.
a. Align the notch with the ridge in the slot.
TS-431X2 User Guide
Installation and Configuration 18

b. Insert the module into the slot.
c. Verify that the metal connectors are completely inserted into the slot.
d. Carefully press down on the module until the retention clips lock the module into place.
12. Place the drive tray chassis onto the NAS.
a. Line up the SATA connector on the drive tray chassis to the SATA socket on the motherboard.
b. Carefully insert the SATA connector into the SATA socket.
13. Attach the 6 screws that connect the drive tray chassis to the NAS.
TS-431X2 User Guide
Installation and Configuration 19
Table of contents
Other QNAP Network Hardware manuals

QNAP
QNAP TS 83XU Series User manual

QNAP
QNAP HS-453DX User manual

QNAP
QNAP TurboNAS User manual

QNAP
QNAP TS-269L User manual

QNAP
QNAP Turbo NAS Supplement

QNAP
QNAP TS-X31P Series User manual

QNAP
QNAP TVS-675 User manual

QNAP
QNAP VIOSTOR User manual

QNAP
QNAP TS-433 User manual

QNAP
QNAP QuCPE-303 Series User manual

QNAP
QNAP Turbo Station TS-201 User manual

QNAP
QNAP TS 53 DU Series User manual

QNAP
QNAP TS-231+ Instructions for use

QNAP
QNAP TS-431KX User manual

QNAP
QNAP Turbo Station TS-201 User manual

QNAP
QNAP TVS 72N Series User manual

QNAP
QNAP TS-h 77AXU-RP Series User manual

QNAP
QNAP TS-1283XU-RP User manual

QNAP
QNAP VioStor-5000 Series User manual

QNAP
QNAP TDS-16489U Series User manual