Read these instructions.
Keep these instructions.
Heed all warnings.
Follow all instructions.
Do not use this apparatus near water.
Clean only with dry cloth.
Do not block any ventilation openings. Install in
accordance with the manufacturer’s instructions.
Do not install nearany heat sources such as radiators, heat
registers, stoves, or other apparatus (including amplifiers)
that produce heat.
Do not defeat the safety purpose of the polarized or
grounding plug. A grounding plug has two blades and a
third grounding prong. The wide blade or the third prong
is provided for your safety. If the provided plug does not fit
into your outlet, consult an electrician for replacement of
the obsolete outlet.
Protect the power cord from being walked on or pinched
particularly at the plugs, convenience receptacles, and at
the point where they exit from the apparatus.
Use only with the cart, stand, tripod, bracket,
or table specified by the manufacturer, or
sold with the apparatus. When a cart or rack
is used, use caution when moving the cart/
apparatus combination to avoid injury from
tip-over.
Unplug this apparatus during lightning storms or when
unused for long periods of time.
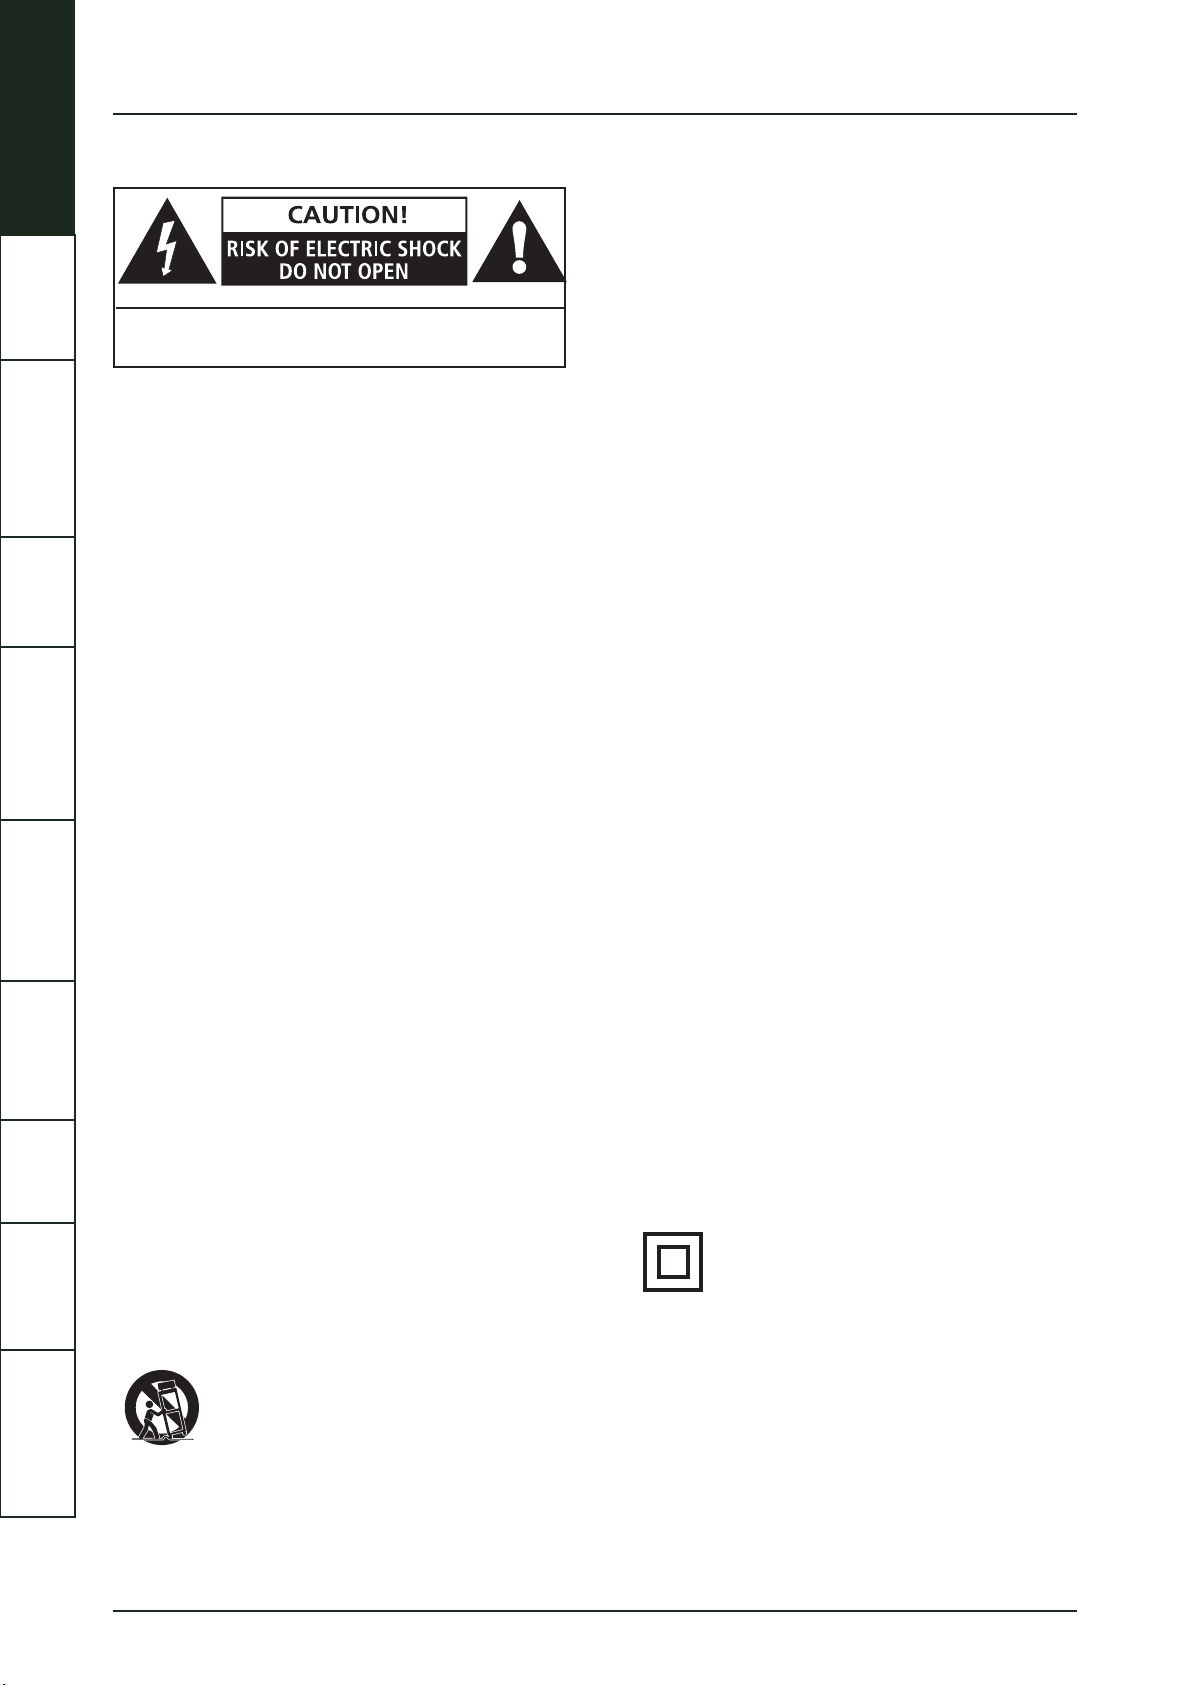
IMPORTANT SAFETY INFORMATION
This lightning flash with arrowhead symbol within an
equilateral triangle is intended to alert the user to the
presence of non-insulated “dangerous voltage” within the
product’s enclosure that may be of sufficient magnitude to
constitute a risk of electric shock.
Warning: To reduce the risk of electric shock, do not
remove the cover (or back) asthere are no user-serviceable
parts inside. Refer servicing to qualified personnel.
This exclamation point within an equilateral triangle is
intended to alert the user to the presence of important
operating and maintenance instructions in the literature
accompanying the appliance.
Refer all servicing to qualified service personnel. Servicing
is required when the apparatus has been damaged in any
way, such as power supply cord or plug is damaged, liquid
has been spilled or objects have fallen into the apparatus,
the apparatus has been exposed to rain or moisture, does
not operate normally, or has been dropped.
Mains Supply: The mains operating voltage of all QUAD
Artera series units is shown on the rear panel. If this
voltage does not match the mains voltage in your area,
consult your QUAD dealer about converting the unit.
The mains supply fuse on the rear panel is accessible
when the IEC mains plug has been removed. In the rare
event that it has broken, check for any obvious cause
before replacing the fuse with one of the correct rating and
type. The fuse values are:
Artera Pre
220~240V (UK,China, etc.) T500mAL 250V Slow Blow
100~120V (USA, Japan, etc.) T1AL 250V Slow Blow
WARNING: Only use attachments/accessories specified
or provided by the manufacturer (such as the exclusive
supply adapter ).
WARNING:The mains plug/appliance coupler/direct
plug-in adapter is used as disconnection device; the
disconnection device shall remain readily operable.
CAUTION: These servicing instructions are for use by
qualified service personnel only. To reduce the risk of
electric shock, do not perform any servicing other than
that contained in the operating instructions unless you are
qualified to do so.
Do not install this equipment in a confined or built-in
space such as a bookcase or similar unit, and keep well
ventilated in open space. The ventilation should not be
impeded by covering the ventilation openings with items
such as newspaper, table-cloths, curtains etc.
WARNING: To reducethe risk of fire or electric shock,
do not expose this apparatus to rain or moisture. The
apparatus shall not be exposed to dripping or splashing
and ensure that objects filled with liquids, such as vases,
shall not be placed on the apparatus. No naked flame
sources, such as lighted candles, should be placed on the
apparatus.
AVIS: RISQUE DE CHOC ELECTRIQUE-NE PAS OUVRIR
WARNING: SHOCK HAZARD-DO NOT OPEN
This equipment is a Class II or double
insulated electrical appliance. It has been
designed in such a way that it does not
require a safety connection to electrical earth.
IMPORTANT
SAFETY INFORMATION
REMOTE
HANDSET
CONTROLS AND
FUNCTIONS
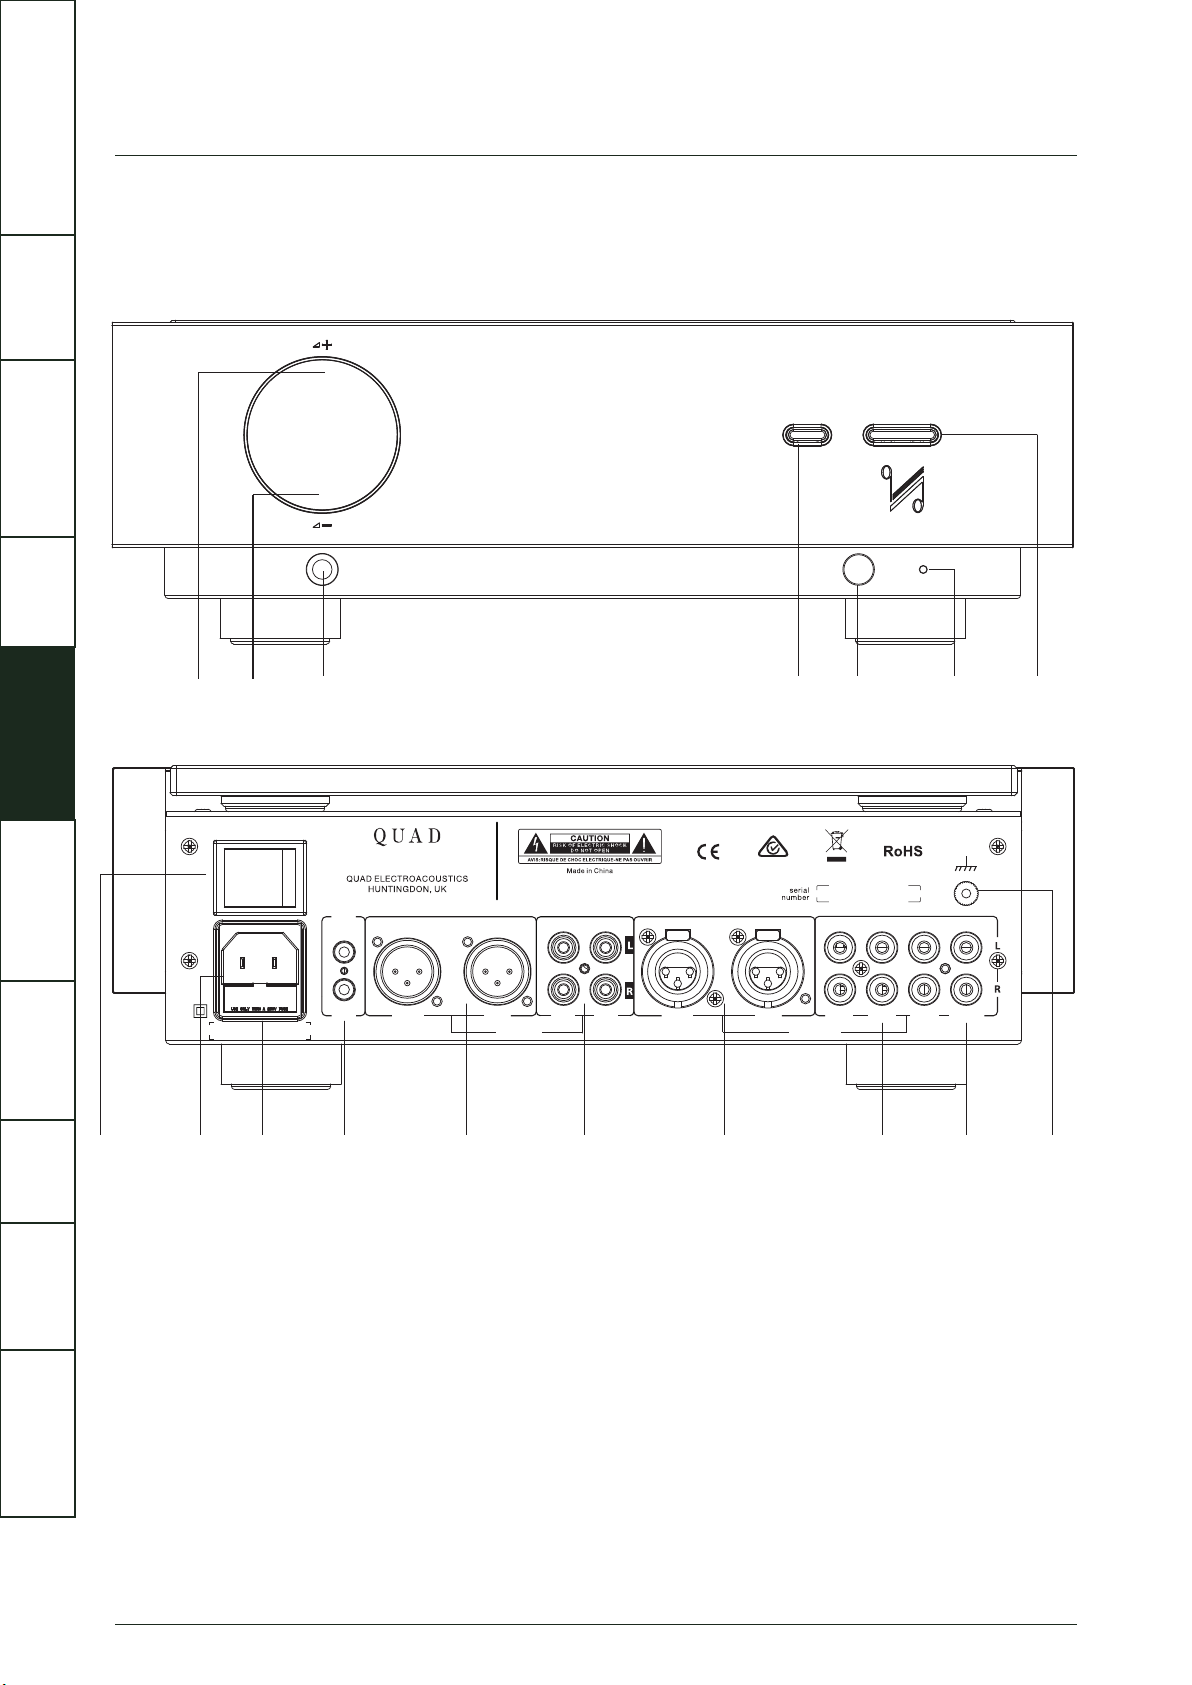
CONNECTIONS
SYSTEM
OPERATIONS
MENU
OPTIONS
SPECIFICATIONS CONTENTSINTRODUCTION
WARRANTY
COVERAGE