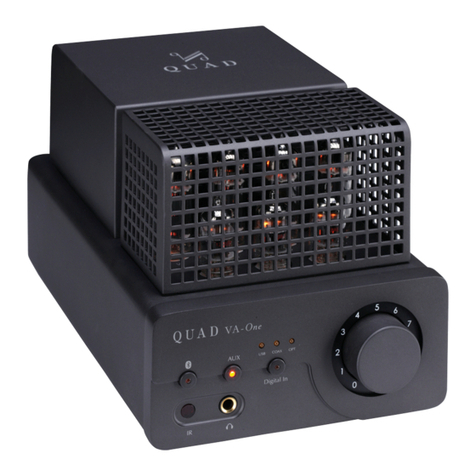
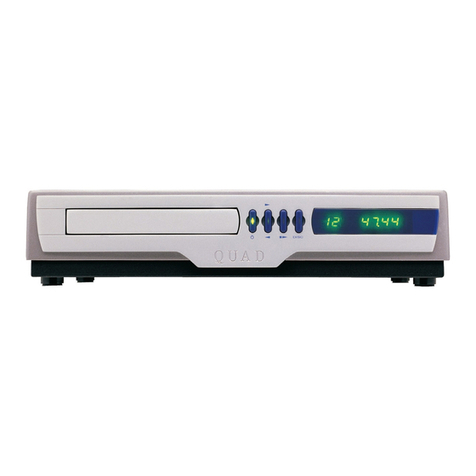
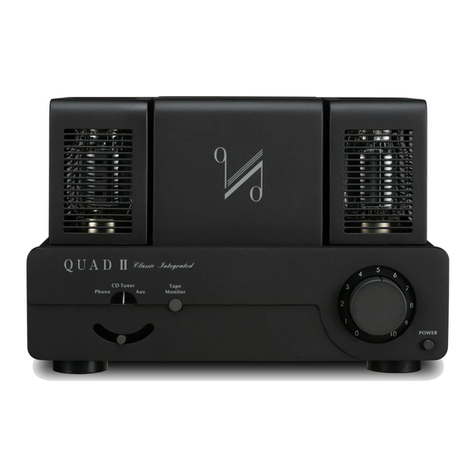
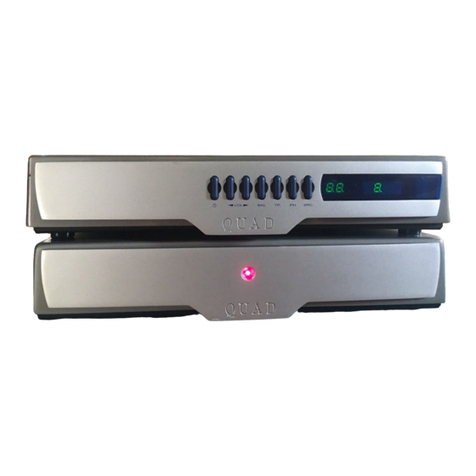
QUAD VA-One User manual


IMPORTANT
SAFETY
INFORMATION
TO
REDUCE
THE
RISK
OF
ELECTRIC
SHOCK
00
NOT
REMOVE
COVER
(OR
BACK)
NO
USER-REMOVEABLE
PARTS
INSIDE
REFER
SERVICING
TO
QUALIFIED
PERSONNEL
ADVERTISSEMENT
:
RISQUE
DE
CHOC
ELECTRIQUE-
NE
PAS
OUVRIR
This symbol indicates
that
there ore
important
operating
and
maintenan
ce
instructions in t
he
literat
ur
e
accompanying
this unit.
This symbol indicates t
hat
dangerous
voltage
constituting a risk
of
electric shock is present
within this unit.
Read
these instructions.
Keep these instructions.
Heed
all
warnings.
Follow all instructions.
Do
not
use
this apparatus
near
wa
ter
.
Clean only with dry cloth.
Do
not
blo
ck any ventilation
open
ings.
In
stall in
accordance
with the manufacturer's instructions.
Do
not
install
near
any heat sources such
as
radiators, heat
registers, stoves,
or
other
apparatus
(including
amplifie
r
s)
that
produc
e
heat
.
Do
not
d
efea
t
the
safe
ty
pu
rpos
e of
th
e
polari
zed or
ground
ing plug.
A
polari
zed
plug
has
tw
o
blades
with
one
wider
than
the othe
r.
A
gro
undin
g plug has
tw
o
blad
es
and
a
third
grounding
prong.
The
wider
blade
or
the
third
p
rong
is
provided
for
your
safety. If the
pro
vided
plug
does n
ot
f
it
into your outlet,
co
nsult
an
electrician
for
replacement
of
the
obsolete
ou
tlet.
Protect the
power
cord
fr
om being
walk
ed on or pinched
particularly
at
the plugs,
co
nvenie
nc
e receptacle
s,
and
at
t
he
point where they
ex
it from the
app
aratus.
Use
on
ly with the cart, stand,
tripod
, bracket,
or
table
specified by the manufacturer, or sold
•
~'
wi
th
the apparatus.
Wh
en a cart
or
ra
ck is
us
ed,
__l-l
use c
aut
ion when m
ov
i
ng
the c
art/apparat
us
com
bination to
avo
id injury from tip-over.
Unplu
g the
apparatu
s
during
li
gh
tnin
g st
orms
or
whe
n
unu
se
d f
or
l
ong
pe
ri
ods of time.
Ref
er
all serving to qualified service personne
l.
Se
rvicing is
r
eq
uired when the
appara
tus h
as
been
damaged
in any way,
such as power s
uppl
y cord
or
plug is
damag
e
d,
liquid has
been spilled
or
objects have fallen into the
apparatus
, the
app
aratus has been
ex
posed
to
r
ain
or
moi
s
tur
e, does not
ope
rate normally, or h
as
been
dr
opped
.
CAUTION
: These serv
in
g
in
st
ru
c
ti
ons
ar
e fo r use by
qualified service personnel only. To redu
ce
the
ri
sk
of electric
shoc
k,
do n
ot
perform any serving other than that
co
ntained
in the
operat
in
g instructions unl
ess
you are qualified to
do
so.
Do not install this e
quipment
in
con
fined or built-in space
such
as
a b
oo
kcase
or
s
imilar
unit,
and
keep well ventilated
this
equip
ment is a Class II
or
do
uble in
su
lated electrical
applianc
e. It has been d
es
igned in such a way that it does
not require a safety connection
to
electrical earth.
In
openin
g space. The ventilati
on
should
not
be i
mpe
ded
by
coveri
ng
the
ventilation
open
ings
with
items such as
newspaper, t
able-clo
ths, curtai
ns
et
c.
WARNING:
Only
u
se
attachmen
ts
/accessories specified
or
provided
by
the
manuf
ac
turer (such as
th
e exclusive supply
adapter
, battery etc.).
WARNING:
To
reduce the
ris
k of fire
or
electric sh
ock
,
do
not
expose th
is
apparatus
to
rain or moisture. T
he
appara
tus
shall
not
be exposed
to
dripping
or
splashing
and
obj
ects
filled
with li
quid
s,
such as va
ses
, shall
not
be pl
aced
on
appara
tus. No
nak
ed
flame
sou
rce
s,
such
as
ligh
ted
candles,
sh
ou
ld be placed on the
app
ar
atu
s.
WARNING:
Terminals marked with symbol
of
"
~
" may
hold
v
oltage
of
sufftctent magnttude
to
constitute a ri
sk
of
electric shock. The external wiring
co
nnected
to
t
he
terminals
requires inst
allation
by
qual
if
ied
personnel
or the
us
e
of
ready-made leads
or
cor
d
s.
WARNING
:
Dang
er
of
explosi
on
if
batt
ery is i
ncorrec
tly
replaced.
Rep
lace
on
ly with the same
or
equivalent type.
WARNING:
The battery (battery
or
batteries
or
batte
ry
pack)
shall
not
be exposed to excessive he
at
such as sunshi
ne
, fire
or
the like.
WARNING
:
Ex
cess
i
ve
sound p
re
ssu
re from earphones
and
headphones c
an
c
au
se
hear
ing loss.
WARNING:
Li
stening to music at high
volume
level
and
for
extended dur
ation
can
dama
ge
one's
hearing
. In or
der
to
reduce the
ri
sk
of
damage
to h
ear
ing,
one
should lower the
volume
to
a safe,
comfortab
le level,
and
reduce the
amo
unt
of time listening
at
high level. Headsets should
comp
ly
with
EN
S0332
-2 requirements (for GS
ce
rtification).
WARNING
:
Th
e mains
plug
is
us
ed
as
disconnect device;
the disconnect
de
vice s
hall
remain re
ad
ily
operab
l
e.
The
main
s switch
and
circ
uit
breakers
are
no
t
provide
d with
the
apparatus;
The
install
at
i
on
s
hall
be
carrie
d
ou
t in
accordan
ce
with all applicable insta
ll
ation
rule
s.
[g]
This eq
uipment
is a Class
II
or
doub
le insulated
electrical
app
lian
ce
.
It
has been d
es
igned in such
a way that tl
doe
s n
ot
re
quir
e a s
af
e
ty
connec
tion
to electrical earth.
IMPORTANT NOTICE TO UK
USERS
The
app
liance
cor
d is terminated with a UK
app
roved mains
plug
fitted with a SA fuse. If the
fu
se
needs
to
be replaced,
an
AS
TA
or
BSI approved
BS
1362
fuse rated
at
SA must be
used. If you need
to
change
th
e ma
in
s plug, remove the fu
se
and
di
spose
of
this plug s
af
ely i
mm
ediately aft
er
cutting it
fr
om the cord.
Co
nnecting a
Main
s Plug
Th
e wires
in
the mains lead are
colo
ured in accordance with
the
co
de: Blue: NEUTRAL; Br
ow
n:
LIVE;
Green
and
Ye
llow:
EART
H.
As
these colours may
not
corres
pond
to the c
olour
ed
mar
kings identifying the terminals in
your
plug,
proc
eed as
follows:
The
BLU
E
wir
e
mu
st
be
co
nn
ec
ted to
th
e term
in
als
marked
with
the
le
tt
er N or
co
l
our
ed
BLUE o r BLA
CK
.
The
BROWN
w
ir
e
mu
st be
co
nn
ected
to
th
e ter
mi
n
als
marked
with
th
e le
tt
er L
or
coloured
BROWN
or
RED.

CONTENTS
IMPORTANT
SAFETY
INFORMATION
............
.
.....................................................
Inside Front Cover
PRECAUTIONS
.....................................
...
......................
.
.........................................................
1
CONTROLS
AND
CONNECTIONS
..............................................................
.
............................
2
REMOTE
HANDSET
.........................................................................................
..
..................
.....3
USER
GUIDE
.....................
.
...................................................................
...
....................
.
..........
4
FURTHER
INFORMATION
...................
..
....
..
...................................
."
...........
.
..............................
5
USING THE
USB
SOURCE
...
..........................................
.......
.................
..
................
.
.................
6
SPECIFICATIONS
.................................................................................
.
................................
7
0
Bluetooth
®
The
Bl
uet
oo
th
® word
mark
and
logos
are
registered
trademarks,
ow
ned by
Bluetooth
SI
G,
I
nc
.
and
any use of such marks by l
AG
G ro
up
Ltd is
un
der licen
se
. O
th
er t
radem
ark
s
and
trade
n
am
es
ar
e
th
ose
of
th
e
ir
respective
ow
ner
s.
aptX® software is
copyright
C
SR
pic
.
or
its
gr
oup co
mpan
ies. All ri
gh
ts reserved.
The
apt
X®
mark
and
the
apt
X logo
ar
e
trad
e
ma
rks of C
SR
pic.
or one of its
gr
o
up
c
om
pa
nies
and
may
be registered in one
or
mo
re jurisdictions.

PRECAUTIONS
Installation location
Install this unit where good ventilation and heat. radiation are assured.
Do
not
install where the temperature
is
a
bn
ormally
high such
as
in direct sunlight,
or
where it
is
dusty or humid,
as
this could result in damage
to
this unit despite proper heat
radiation.
Do
not install this unit where it will create problems
for
driving the car.
Ventilation holes
The amplifier
has
many vacuum tubes, generating much heat. Never close t
he
ventilation holes located on the vacuum tube
cover
and
the bottom plate. If the amplifier
is
installed on a rack
or
the like, secure ample space
for
cooling and leave the
door
open.
Do
not pile up other things on the amplifier and never put articl
es
on it. This con cause malfunctioning.
Note:
For heat dispersal,
do
not install this equipment in a confined space such as a book
case
or
si
milar
unit.
Connection with other components
When connecting this unit with a
CD/DVD
player, tuner,
or
another input unit, turn off the power switches
of
this unit and
all other connected units. Otherwise, a very strong noise may be generated and destroy the speakers. In the worst case, this
can cause equipment malfunction. The pin-plug
to
be inserted in each input terminal
of
this unit shall be pushed in firmly. If
the earth side
is
inadeqwately inserted, humming and
such
noise may be generated, resulting in an Nadverse S/N
ra
tio.
Cautions for speaker connections
When making speaker
system
connections, be sure not to cause short-circuiting between
E8
and 8
of
the speaker terminals
and speaker input terminals
of
this unit. If signals are applied
to
the amplifier with
its
c
ir
cuit
le
ft shortcircuited, a large current
may be
carr
ied
in
the output circuit and cause malfunctioning.
The sound
is
not generated shortly after the power supply
is
turned on
This amplifier
is
equipped with a time muting circuit intended
for
the separation
of
the output circuit. For this reason, no
sound
is
generated shortly after the power supply
is
turned o
n.
If the volume control
is
moved
to
a high sound level before
this time muting circuit is canceled, a large sound
is
suddenly generated
as
a
re
su
lt.
We
therefore advise initially
se
tti
ng
th
e
volume control at a l
ow
level. After that, you may move the volume control to your favorite sound level after the initial
so
und
has
come
out
of
the speakers.
Repair
and
adjustments
When repair and adjustments are needed, please ask the store where you bought the
un
it.
Cleaning
For cleaning,
use
a piece
of
soft cloth.to wipe the unit such as cleaning c
lo
th available on the market. If the unit has become
very dirty, remove the dirt with soft cloth absorbing a small
amount
of
neutral detergent, and then wipe the unit with dry
cloth.
Do
not
use
a solvent like benzine
or
thinner because such a substance can often damage the exterior.

CONTROLS
AND CONNECTIONS
QU
AD
VA
-One
0 0 0
OigitaiSourcelndi
cam
HeadphoneOutp.Jt
Dig
it<~IButtonllED
F
~
-
-
~
--
~
i
I
I I
~
I
i
i
AUX In Digital In Output
fAcn
o-
240
V-
S0/6
0H
z9SW
1
I
@•0
l®J
@·;@ ! c
'"
"'"
'
"'"
~
I
@·
~
@
®
-
~
@
~
--
-
-
--·
_j
Ma
ins
Swi
tch
BT
Antenna
AUX Input
Ma
i
ns
Input
L\R
!ipe
akerTermir.al
D
igi
tal Input
2

REMOTE
HANDSET
Press
to
bring
product
in/out
of
standby
mode
Press
to
Mute/Unmute
the sound. In
Mute,
the selected source
indicator
on
front
panel will flash
on
and
off
Pr
ess
to
select previous source
Press
to
select next source
Press
to increase volume
Press
to decrease volume
The
selected source indicator
will
flash
when
Vena
responds
to
remote commands.
Standby Mode
VA-One
will be in standby
mode
when powered on. The Bluetooth
LED
indicator
on
front panel
is
slightly light.
Press
any button
on
front panel
or
the standby button on the remote con
tr
ol
to
bring
VA-One
out
of
standby. At this
point,
VA-One
will enter
a state
of
20
seconds
without
output,
potentiometer will
automatically
return
to
zero
and
Bluetooth/AUX/Digital
LED
will be
brighted cycle. VA-
One
will be switched
to
the Bluetooth source input when unit
is
activated
for
the First time,and switched
to
the
la
st
input source used after that.
Mute Mode
Users can press
Jilt'
on
remote control
to
bring VA-
One
in
or
out
of
Mute
mode
when playing music. When entering the
Mute
mode, the
LED
indicator will flash back.
3

USER
GUIDE
INTRODUCTION
The
QUAD
VA-One
is
designed
for
the music lover. We make
no
exaggerated performance claims and are content
to
let
the
results speak
for
themselves. Thank you
for
purchasing this
QUAD
equipment.
We
hope that it will bring you many years
of
listening pleasure, and that, like
its
illustrious predecessor,
it
will be a treasured possession
for
you and f
or
future generations
of
music lovers.
PRELIMINARIES
The
QUAD
V
A-One
carton
co
ntains:
• The
QUAD
VA-
One
integrated amplifier
•
On
e I
EC
mains cable with a plug
su
itable
for
your area
•
One
remote handset
•
One
battery
for
remote handset
•
One
antenna (metal enclosure on
ly)
•
Th
is owner's manual
Consult
the
deal
er
from
whom
you purchased the eq
uipm
ent
if
any item is
not
present.
Carefully
unpa
ck
the
unit
and
accessories, so
as
not
to
damage
the surface finish.
Re
tain .the packing materials
for
future
use
. Retain the
use
r manual and
information concerning the date
and
place
of
purchase
of
your equipment
fo
r future reference. If you transfer any unit
to
a third
party please pa
ss
on this instruction manual along with the equipment.
MAINS
SUPPLY
Th
e mains
operat
ing volt
age
of
the unit
is
indicated on the rating plate attached to the unit.
If
this volt
age
does not mat
ch
the
mains voltage in your area, consult your
QUAD
dealer
about
converting the unit. The fuse rating should be:
220
-
240V
Tl
.6AL
20mm
1
00-120V
T3.15AL
20mm
4

FURTHER
INTRODUCTION
Burn In
New
Equipment
Burn in
is
very important. Valve components work
at
high voltage and temperatu
re
and
when new th
ey
should spend an e
xt
ended
period
at
those temperatures
to
bed in. We recommend you burn in the amplifier
for
at
least four
or
preferably twelve hours
before you first using it. Ifyou run in your equipment
for
this extended period, make doubly sure that all the
sa
fe
ty conditions
covered in this manual are fully met. Supervise the equipment
for
the first
hour
or
so and
if
you have to leave the unit unattended
thereafter,
look
in occasionally
to
make sure all
is
well.
Warming
Up
Before Use
Allow
at
least fifteen minutes
for
the amplifier
to
'warm up' before
use
. If you play loud music while the
system
is
cold. The output
valves will
not
be fully
op
erated and the amplifier will be starved
of
voltage and current. The r
es
ulting
di
stortion
is
unpleasant
and potential damage to the amplifier's valves and your loudspeakers. Intensive use
of
the equipment before it has w
ar
med up
will shorten valve's life.
Valve Lifetimes
Valves contain a heating element. This heats up the valv
e's
cathode, which
is
coated
to
gi
ve off a steady stream
of
electrons.
After a few years this coating will begin
to
wear out
and
performan
ce
will gradually deteriorate. The KT66 output valv
es
are likely
to dete
ri
orate first but the driver valves will also eventually wear
out
.
As
the valves start to wear
out
the sound will become
les
s well defined and a lack
of
dynamics and power will become evident.
Replacing the valves with a new set will fully restore the audio performance
of
the amplifier. When replacing valves it is essential
to
use
the highest quality available. Poor quality valves will adversely affect the sound quality and may in extreme cases damage
the amplifier. When replacing the output valves,
use
matched
sets
for
be
st
resu
l
ts.
Do not leave the amplifier permanently switched on or you will
se
ri
ously shorten the lif
es
pan
of
yo
ur
valves!
Output Transformer
After installing
or
changing the wiring to your speakers, keep the volume control
at
zero, let the amplifier warm up and turn up
the main volume gradually.
If
you don't hear sound, switched
off
immediately and investigate.
The output transformer is
de
signed
to
match the high voltage, low c
urr
ent condi
ti
ons in w
hi
ch the output
va
l
ves
oper
at
e to the
low
vo
ltage high current requireme
nts
of a loudspeaker. Although robust,
an
output transformer can be
damag
ed and in
ex
treme
cases wrecked, by careless use. If you play a valve amplifier into a short circuit, the output transformer will soak
up
a
lot
of
energy before failing, but
if
the short persists the transformer could be damaged.
Operating
a valve amplifier
at
high output level
with loudspeaker connected can also
damage
an output transformer. .
The machine must be used on the connected lo
ad
conditions, otherwise
it
may cause damage to the output transformer.
5

USING
THE
USB
SOURCE
With the increased popularity
of
computers
as
source, this
VA-One
USB
D
/A
converter allows consumers to enjoy l
is
tening
to
digital music sources from a
computer
{Windows
or
Mac) via
USB
connection. This product
is
USB
1.1 and 2.0 compliant.
This
device supports sampling frequencies ranging from 35kHz
to
192kHz
and incorporates a high quality digital-to-analogue
converter
(DA~).
The factory default 48kHz input sampling frequency. With the computer in operation the VA-One
USB
DAC
converts will detect input data. The display screen will then indicate the presence
of
a digital signal and show the output sampling
frequency
of
the music filed in your computer.
Note:
Windows
does
not
support
192kHz
sampling
frequency.
Owners
of
computers
{Windo
w
s)
are
required
to
install
corresponding software provided in the accompanying
CD-ROM.
Simply
follo
w the software installation instructions contained.
6

SPECIFICATIONS
General description
Rated
power output
Peak
power output
Frequency response
Total harmonic distortion
Signal-to-noise ratio(S/N)
Input Impedance
Inputs
Outputs
Valve
Dimensions(mm)
Carton
size
Net weight
Gross weight
Power requirements
(depending on region)
Safety regulation conformity
Standard accessori
es
Integrated amplifier
2
X
15W
RMS(60) 2
X
12W
RMS(8Q I
40)
-3dB
20Hz-50KHz
+/-1
dB
20Hz-20KHz
0.
5%(1
KHz
rated output)
90dB(ref.15W)
50KQ
1 x
RCA
input 1 x Cocial input 1 x Optical input 1 x
USB
input Bluetooth x1
(AptX)
2 x Speaker, 1 x Headphone socket
1x ECC83 2 x ECC82 4 x
EL84EH
180(L)x335(W)x 179(H)
404(L)x311
(W)
x259(
H)
10.8KG
12.4KG
230V
(50 -60Hz),
etc.
CE, C Tick
power cord, remote control handset, batteries,user manual,antenna
for
Bluetooth etc.
INTERNATIONAL
SERVICE CENTRE ADDRESS
lAG House
13/14
Glebe
Road
Huntingdon
Cambridgeshire
PE29
7DL
UK
Tel :
01480
452561
Fa
x:
01480
413403
-
IAG·
QUAD
Co
rrect
Di
sposal of this product. This marking indicat
es
that this product should not be disposed with other household
wastes throughout the EU.
To
prevent possible harm to
th
e
en
vironment
or
human heal
th
from
un
controlled waste
disposal, recycle it responsibly to promote the sustainable reuse
of
material resourc
es.
To return y
our
us
ed
devi
ce
,
please
use
the return and collection
systems
or
contact the retailer where the product
was
purchased.
They
can take
this product for environmental safe r
ec
ycling.
7

Other manuals for VA-One
1
Table of contents
Other QUAD Amplifier manuals

QUAD
QUAD 66 User manual

QUAD
QUAD Platinum Series User manual

QUAD
QUAD Elite Stereo User manual

QUAD
QUAD 99 Stereo Power Amplifier User manual

QUAD
QUAD Vena User manual

QUAD
QUAD 303 Mounting instructions

QUAD
QUAD 2 User manual

QUAD
QUAD 99 Series User manual

QUAD
QUAD 77 User manual

QUAD
QUAD Artera Pre User manual

QUAD
QUAD 405 - annexe 1 User manual

QUAD
QUAD Vacuum Tuber Amplifier Systems II-FORTY User manual

QUAD
QUAD 303 User manual

QUAD
QUAD 33-303 User manual

QUAD
QUAD 606 User manual

QUAD
QUAD 50E User manual

QUAD
QUAD II Classic User manual

QUAD
QUAD QSP User manual

QUAD
QUAD Vena II User manual

QUAD
QUAD Artera Stereo User manual