1.Follow the information on the warning labelappearing on the upper bunk end structure
and on the carton... Do not removewarning labelfrombed.
2. Alway usethe recommended sizemattress or mattress support, or both, tohelpprevent
the likelihood of entrapment or falls.
3. Surfaceof mattress must be at least 5inches below the upper edge of guard rails.
4.Do not allow children under 6years tousethe upper bunk.
5. Prohibit more than one person on upper bunk.
6. Periodically check and ensure that the guardrail, ladder, and other components are in
theirproper position, free fromdamage,and that all connectors are tight.
7.Do not allow horseplay on or under the bed and prohibit jumping on the bed.
8. Always usethe ladder for entering and leaving upper bunk.
9.Do not usesubstitutepart. Contact the manufacturer or dealer for replacement part.
10.Use of night light may provide added safety precaution for achildusing the upper bunk.
11. If the bunk bed will be placed next toawall, the guardrail that runs the full lengthof the bed
shouldbe placed against the wall toprevent entrapment between the bed and the wall.
12.Always useguardrail on bothlong sides of the upper bunk.
13.The useof water or sleep flotation mattresses is prohibited.
14. Keep theseinstruction for future reference.
15. Strangulation Hazard -Never attachor hang items toany part of the bunk bed that are not
designed for usewiththe bed, for example, but notlimited tohooks, belts and jumprores.
16.Trundle: Only usefor mattress 6inch.
SAFETYWARNINGS
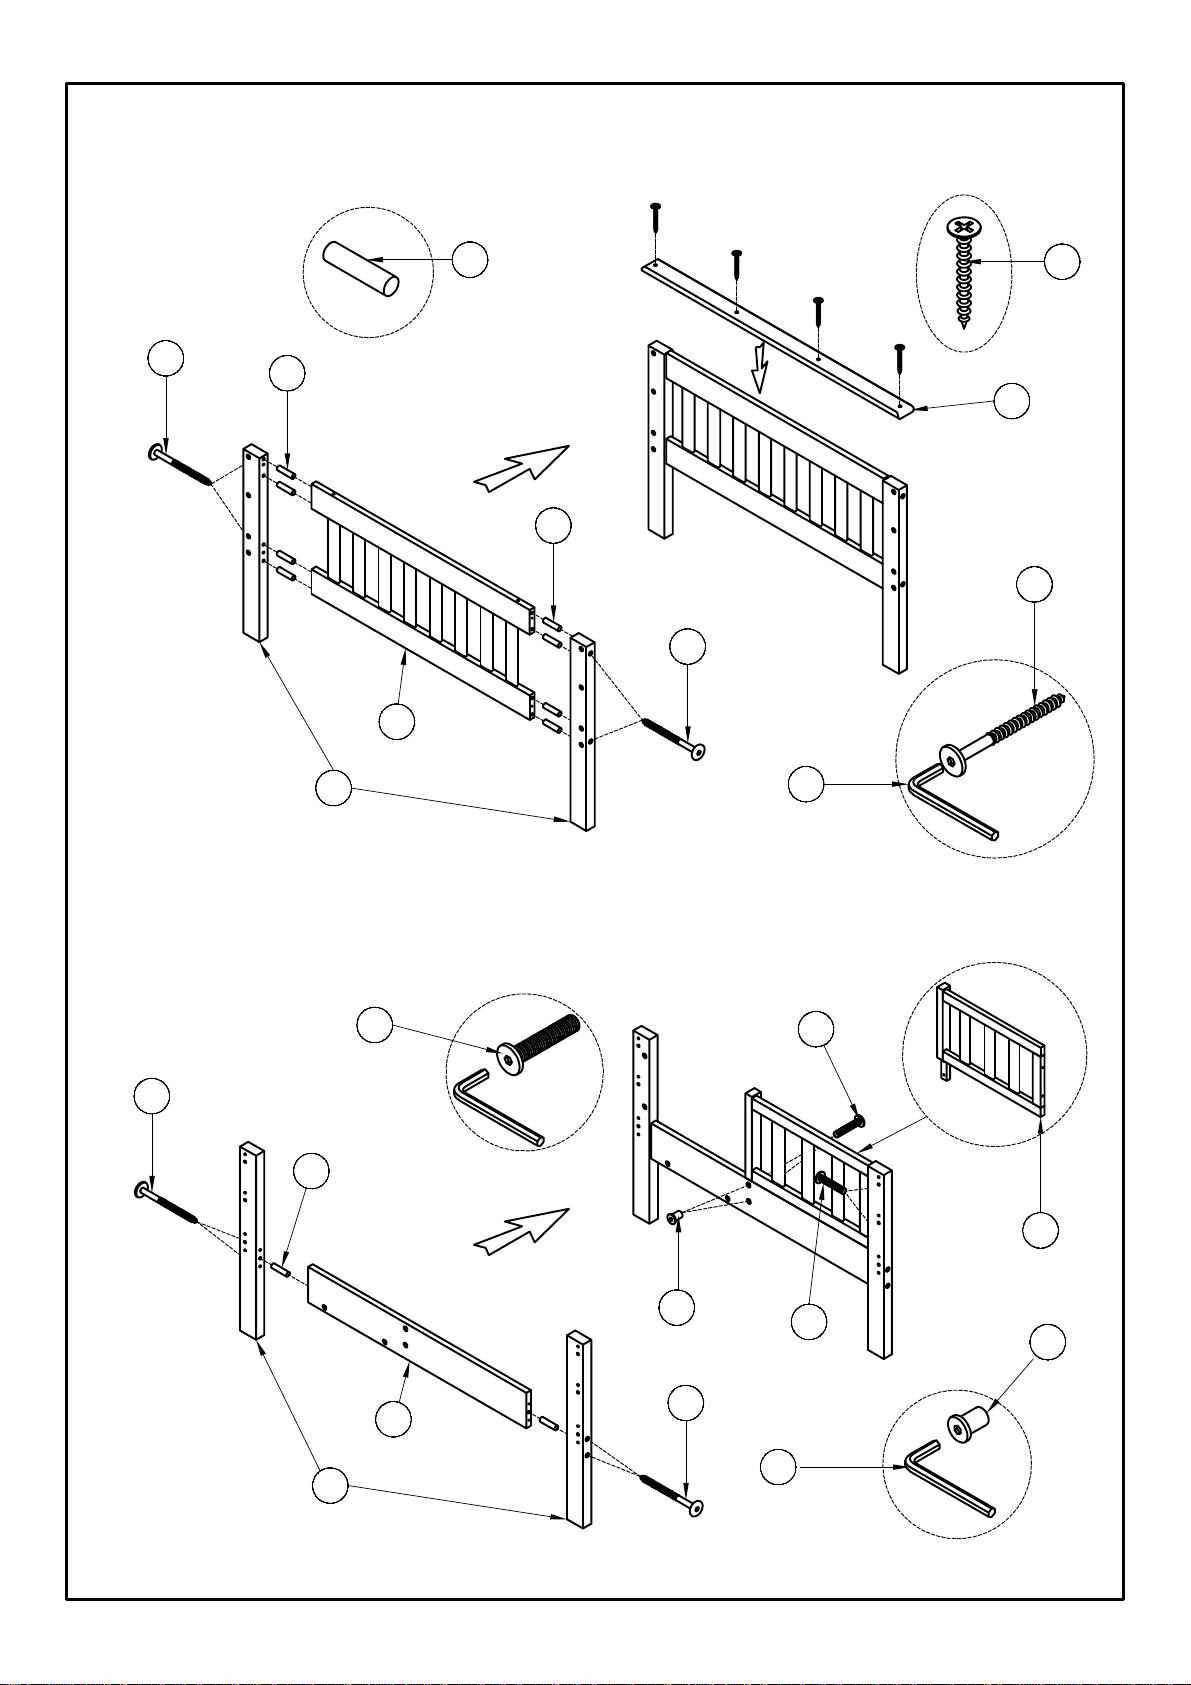
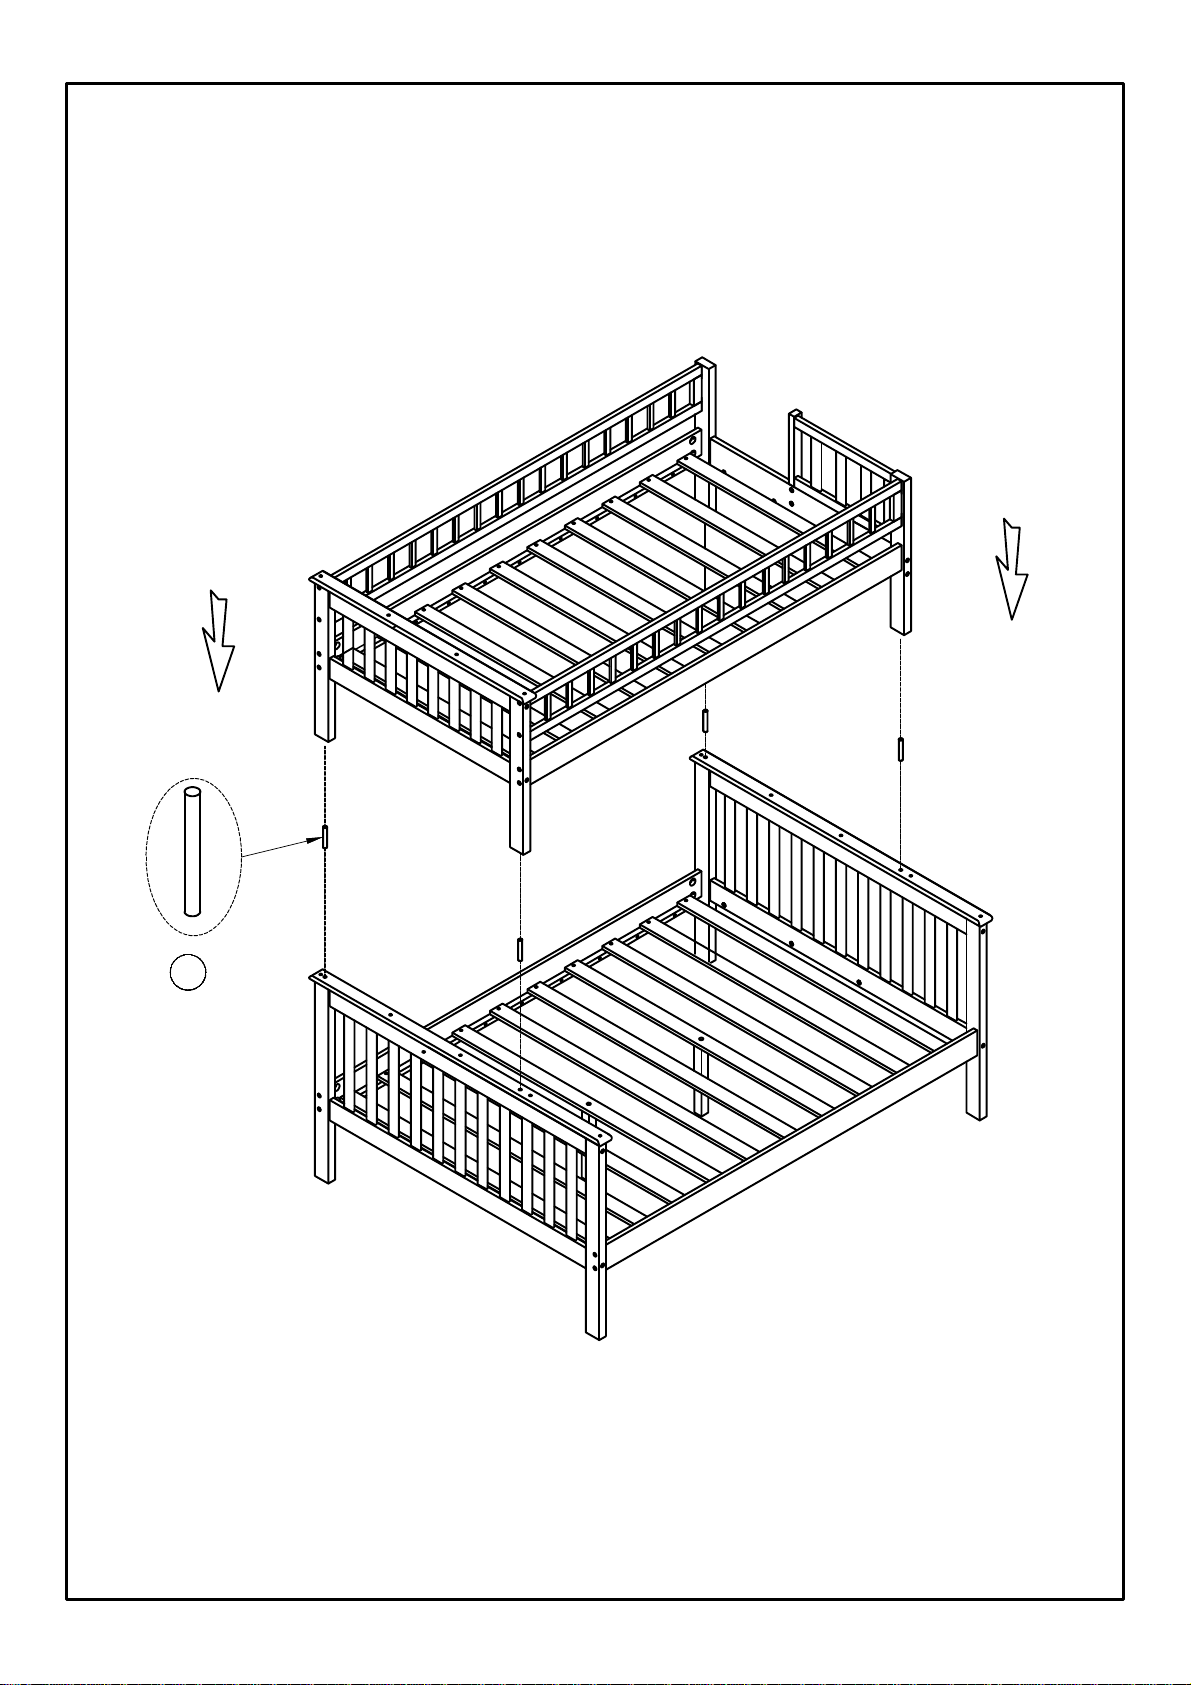
ASSEMBLYINSTRUCTION
SKU CODE:(WF194061/WF194062/WF194063) 1
Thissetisincluded 3boxs ifdon'treceive full 3
boxs please contactour customer service team
PLEASE DO NOTRETURN PRODUCTTO THESTORE
ityouhaveanyproblemorconcerns,pleasefeelfreetocontactourcustomer
servicedepartment.Wewillreplyyouassoon as possible.
E-Mail: hd.team@qualfurn.net
Tel:626-912-8886Ext.100