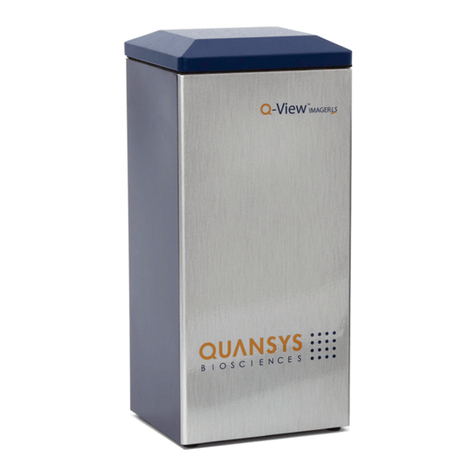
Quansys Q-View Imager Pro User manual

For Research Use Only Version 1.2
Operator’s Manual

IQuansys Biosciences
FCC and CE Marking
This product is an FCC and CE-marked product. For
more information regarding these markings, please
contact Quansys at:
http://www.quansysbio.com/contact-us.
Notes on Safety
The Q-View Imager Pro has been designed for safety
and will not cause any harm to persons or property
as long as the user operates the device correctly.
It is critical that the user read this manual in its
entirety and train on the device frequently to ensure
proper operation. If the device is used outside of the
instructions herein or modied, disassembled, or
altered, the safety of the device cannot be guaranteed.
Improper operation will lead to the following:
1. Void the manufacturer’s warranty
2. Void the regulatory certication
3. Create a potential safety hazard
Manual Markings
Indicates a warning: Warnings help prevent safety
issues or failures in performance.
Indicates an important notication: Important
notications alert the user to certain steps that are
critical for optimal performance.

II
Q-View Imager Pro
Notice of Warranty
THIS LIMITED WARRANTY COVERS NORMAL USE.
QUANSYS BIOSCIENCES DOES NOT WARRANT AND IS
NOT RESPONSIBLE FOR DAMAGES CAUSED BY MISUSE,
ABUSE, ACCIDENTS, VIRUSES, UNAUTHORIZED
SERVICE OR PARTS, OR THE COMBINATION OF
QUANSYS BIOSCIENCES BRANDED PRODUCTS
WITH OTHER PRODUCTS. THIS LIMITED WARRANTY
DOES NOT COVER NON-QUANSYS BIOSCIENCES
BRANDED PRODUCTS. ANY WARRANTY APPLICABLE
TO NON-QUANSYS BIOSCIENCES BRANDED
SOFTWARE OR PRODUCTS IS PROVIDED BY THE
ORIGINAL MANUFACTURER. QUANSYS BIOSCIENCES
ASSUMES RESPONSIBILITY FOR THE DELIVERY AND
INSTALLATION OF THE Q-VIEW IMAGER PRO TO THE
END USER.
Printing History
Version Number: Date:
1.0 August 2015
1.1 September 2015
1.2 November 2017
Contact Information
Mailing Address:
Quansys Biosciences
365 North 600 West
Logan, Utah 84321
Phone Numbers:
U.S. Toll Free: (888) 782-6797
Direct: (435) 752-0531
Fax: (435) 750-6869
Email Addresses:
General Information: Info@Quansysbio.com
Sales: [email protected]

1Quansys Biosciences
TABLE OF CONTENTS
FCC and CE Marking I
Notes on Safety I
Manual Markings I
Notice of Warranty II
Printing History II
Contact Information II
Chapter 1:
Installation and Safety Information 3
Safety Precautions 3
Automated Tray 3
Electricity 3
Person Protective Equipment 3
Placement in the Laboratory 3
Temperature and Humidity 3
Ventilation and Dust 4
Space 4
Vibration 4
Q-View Imager Pro Setup 5
Q-View Imager Pro Identication 6
Focusing the Q-View Imager Pro 6
Light leak Check 6
Acquire Dark Field 6
Setup Completion 7
Moving and Shipping the
Q-View Imager Pro 7

2
Q-View Imager Pro
Chemical Safety 8
Electrical Considerations 9
Power Cord 9
USB Cord 9
Power Switch 10
Fuse 10
Routine Maintenance 10
Cleaning 10
Chapter 2: System Overview 11
External Controls 11
Front 11
Back 12
Tray Operation 12
Optical Description 13
Computer Connection 13
Q-View Software Introduction 13
Chapter 3: Operation 15
Before you Begin 15
Cleaning the Tray Surface 15
Loading the Plate 15
Imaging the Plate 16
Using the Qualication Plate 17
Troubleshooting 17
Appendix 19
Q-View Imager Pro Specications 19
Operating Specications 19
Notes: 20

3Quansys Biosciences
Chapter 1: Installation
and Safety Information
SAFETY PRECAUTIONS
Automated Tray
Do not attempt to remove any plates from or insert any
plates into the automated tray while the tray is moving.
The operating button will turn red as the tray opens and
will remain red until the tray is closed. Only remove or
insert plates when the tray is fully extended and is no
longer in motion. The tray is controlled by motors, and
any body parts, clothing or other objects placed in the
path of tray travel may be damaged or injured.
Electricity
Since the Q-View Imager Pro has a 110V/220V power
supply, exercise typical precautions to ensure shocks
do not occur. Do not place liquids close to the Q-View
Imager Pro and do not cut cords that provide power
or connect the device to the PC.
Personal Protective Equipment
When handling biohazardous or infectious materials
the user should be wearing personal protective
equipment.
PLACEMENT IN THE
LABORATORY
Temperature and Humidity
The Q-View Imager Pro has a cooled CCD camera,
which has to maintain a temperature of 0° C. The
Q-View Imager Pro also has a fan at the bottom of the

4
Q-View Imager Pro
device to pass ambient air across the camera to assist
in cooling. If the lab temperature is too high, the
camera may be unable to maintain 0° C. Recommended
operating conditions are 15–35° C. Humidity can also
cause operation problems for the Q-View Imager Pro.
Ensure your laboratory environment does not exceed
a dew point of 20° C to prevent condensation.
Ventilation and Dust
The fan on the bottom of the device pulls ambient air
across the camera to keep it cool. Ensure the room
where the Q-View Imager Pro is placed has adequate
ventilation to ensure cooling can occur. Dust in high
levels can be pulled into the fan and adhere to the
camera cooling apparatus. Dust can also collect on the
glass on the tray deck and cause dust particles to be
visible in your image. Please take precautions to keep
the lab bench surface and oors clean of dust. It is
important to keep any objects, such as paper or other
at materials, away from the bottom of the Q-View
Imager Pro as these can block airow to the fan.
Space
The footprint of the Q-View Imager Pro is 26.7 W x
24.1 D x 45.7 H cm (10.5 x 9.5 x 18 inches). Ensure
the space around the Q-View Imager Pro is free of
chemicals that can spill or other equipment that can
fall and damage the Q-View Imager Pro.
Vibration
The exposure times of the Q-View Imager Pro can be
up to 5 minutes. It’s important that the location of the
Q-View Imager Pro is free of excessive vibration. Make
sure equipment that might cause vibrations such as
vortex mixers, shakers, centrifuges, etc. are not co-
located on the bench with the Q-View Imager Pro.
Also consider where the Q-View Imager Pro is placed
in the laboratory. For example, the Q-View Imager
Pro should not be placed on a bench near a door that
could be slammed or on a bench near a desk where
someone could bump it during exposures.
Note: Q-View
Software prevents
imaging when the
target temperature
cannot be reached
and turns off cooling
to protect the camera.

5Quansys Biosciences
Q-VIEW IMAGER PRO SETUP
The Q-View Imager Pro weighs approximately 13.6
kg (30 lbs). Use both hands and lift with your legs,
not with your back, when moving the Q-View Imager
Pro. To correctly setup the Q-View Imager Pro the
following steps should be followed:
1. Place the Q-View Imager Pro on a clean work
area.
2. Connect the wall cord to the Q-View Imager
Pro power supply.
3. Plug the wall cord into a surge protector.
4. Turn on the PC that will be running Q-View
Software.
5. Run the Q-View Imager Pro drivers installer.
6. Connect the USB cord to both the Q-View
Imager Pro and the PC.
7. Turn on the Q-View Imager Pro by pushing the
power switch on the back to the “|” position.
8. Install Q-View Software onto the computer
and follow the set up wizard prompts.
9. Once Q-View Software recognizes the Q-View
Imager Pro, green LED lights will turn on
around the tray button on the front of the
Q-View Imager Pro.
10. Press the tray button on the front of the
Q-View Imager Pro.
11. Once the tray is
opened, ensure the
enclosure where the
glass ts is clean of
debris and liquids.
12. Clean the Q-View
Imager Pro glass with
a lint-free cloth and
ethanol, rubbing alcohol,
or window cleaner.
13. Take the cleaned glass
and insert it into the
receptacle.
14. Then take the glass
cover and insert it on
the tray on top of the
glass with the A1 icon
positioned in the lower left hand corner.
15. Once the Q-View Imager Pro is connected,
click Continue on Q-View Software to scan for
imagers.
Note: Steps 5
and 8 only apply to
PCs NOT purchased
from Quansys.
PCs purchased
from Quansys are
precongured with
Q-View Software and
the required Drivers
to run the Q-View
Imager Pro.

6
Q-View Imager Pro
Q-View Imager Pro Identication
Once the Q-View Imager Pro has been recognized,
click Continue again, and a dialog box where the
Q-View Imager Pro can be named will appear. When
you are nished naming, click Continue to focus the
imager.
Focusing the Q-View Imager Pro
Open the Q-View Imager Pro tray by pressing the
button on the front of the device. Place the 96-well
focusing plate (included) on the plate tray and retract
the tray. Use the + and – buttons on the software
to bring the words printed on the focusing plate into
focus if needed. You can click on the image to zoom in
or out. When zoomed in, right-click and drag to scroll.
Light leak Check
Upon completing the Q-View Imager Pro installation it
may be necessary to ensure there are no light leaks.
To perform this test remove any plates from the
Q-View Imager Pro, ensure the tray is retracted, and
capture an image. The average pixel intensity of the
image should be less than 500 PI. If the pixel intensity
is above this specication, please contact customer
support at Quansys Biosciences 1-888-QUANSYS
Acquire Dark Field
Dark Field Image Acquisition minimizes background
noise in subsequent plate images. Remove any plates
from the Q-View Imager Pro, close the imager tray,
and click OK on the software. In the Settings menu
click on Administration, then select Manage Imagers.
Select the correct imager and press Acquire Dark Field.
The process will take approximately ve minutes.

7Quansys Biosciences
Setup Completion
Once the Q-View Imager Pro setup is nished, the
software opens with the Update Preferences dialog
box. Select your preferences and log in if user accounts
were enabled. If your Internet connection on any
computer running Q-View Software goes through a
proxy, specify these settings under Administration >
Network Settings. Your Q-View Software and Q-View
Imager Pro are now ready to use.
MOVING AND SHIPPING THE
Q-VIEW IMAGER PRO
Ensure there is no plate on the tray of the Q-View
Imager Pro and unplug all cords. The Q-View Imager
Pro weighs approximately 13.6 kg (30 lbs). Use both
hands and lift with your legs, not with your back,
when moving the Q-View Imager Pro.
In order to move or ship the Q-View Imager Pro,
there are several critical steps that should take place.
1. Ensure the new location meets the requirements
addressed in Placement in the Laboratory
(page 3)
2. Remove any remaining plates on the tray
3. Remove the glass cover
4. Remove the glass
5. Close Q-View Software
on the PC
6. Turn off the Q-View
Imager Pro using the
switch on the back of
the Q-View Imager Pro
7. Remove all cords from
the device
8. Insert the Q-View
Imager Pro into the
provided plastic sleeve
9. Insert the glass
cover and glass
into their respective
protective sleeves

8
Q-View Imager Pro
10. Take the cables and bundle and tie them
together
11. Insert the Q-View Imager Pro into the foam
insert and then into the Q-View Imager Pro
box
12. Place the glass cover, glass, and cords into
the box
13. If disposal of the Q-View Imager Pro is needed
contact Quansys Biosciences for assistance.
CHEMICAL SAFETY
The only chemicals used with the Q-View Imager Pro
are deposited within the wells of the plate, which is
placed on the tray. It is important to take precaution
that these chemicals do not spill onto the tray. If any
spillage occurs while the tray is open, clean the tray
immediately before closing it. If the tray is closed
with liquids present on the tray, glass, or glass cover,
they may drip onto the camera lens and damage the
Q-View Imager Pro.

9Quansys Biosciences
ELECTRICAL
CONSIDERATIONS
Power Cord
The power cord is a 3-wire grounding-type plug.
This cord will only t into a grounded outlet, which
is a requirement for the Q-View Imager Pro. Do not
remove the grounding leg of the plug. Doing so will
void all warranty on the Q-View Imager Pro.
The Q-View Imager Pro requires a maximum of
2 amperes at 100-240 volts AC. The power cord
provided with the Q-View Imager Pro is for 120-volt
service. If you have a different voltage supply or need
a different power cord for any reason, please contact
technical support. Do not use an extension cord for
the Q-View Imager Pro. Ensure that all equipment
plugged into the same circuit as the Q-View Imager
Pro does not exceed the amperes of service, or you
may experience a tripped breaker or power failure
that could result in the loss of your image.
Before unplugging the power cord, make sure Q-View
Software is closed on the PC. Make sure the USB cord
is unplugged and the device is powered off by the
switch on the back of the Q-View Imager Pro. At this
point, it is safe to remove the power cord.
USB Cord
The USB cord connects the Q-View Imager Pro to the
PC, which controls and operates the Q-View Imager

10
Q-View Imager Pro
Pro. This USB 2.0 cord should only be unplugged
from the Q-View Imager Pro once Q-View Software
is closed and the Q-View Imager Pro is powered off.
Power Switch
The power switch is located on the back of the device
above the power plug receptacle and the fuse box.
This switch controls the power to the Q-View Imager
Pro and NOT the PC. To turn on the Q-View Imager
Pro, push the power switch to the “|” position. To turn
off the Q-View Imager Pro, push the power switch to
the “O” position.
Fuse
The fuse is located on the back of the Q-View Imager
Pro in-between the power plug receptacle and the
power switch. The fuse is 250V/10A/T. If the device
is not powering up when the switch is turned on, the
user can check the fuse.
Carefully remove the fuse receptacle. Inside the
receptacle, there are two fuses; one is inline and the
other is a backup. If the main fuse, which is connected
to the circuitry, is broken, blown, or discolored, the
user can switch the fuses. If you run out of fuses,
please contact Quansys technical support.
ROUTINE MAINTENANCE
Cleaning
Cleaning is recommended before every use. Ensure
that the glass, glass cover, and tray are free from
dust and any chemicals. To clean the device, use 70
percent ethanol or warm water. Do not use scouring
cleaners or abrasive pads as this can scratch the
glass. Be careful not to spill any cleaning materials
inside the Q-View Imager Pro.
Regularly inspect all cables for fraying or loose
connections.

11 Quansys Biosciences
Chapter 2: System
Overview
EXTERNAL CONTROLS
Front
The only control on the front of the device is the
tray button. The tray button can glow three different
colors.
Green:
The Q-View Imager Pro is on,
connected to the Q-View Software,
and the tray can be opened.
Yellow:
The Q-View Imager Pro is acquiring
images, and the tray is locked.
Red:
The tray is either in motion or fully
extended.
Flashing Red:
The Q-View Imager Pro is alerting
the user to an abnormal condition,
such as overheating.

12
Q-View Imager Pro
Back
The only control on the back
of the unit is the power switch.
To turn on the Q-View Imager
Pro, push the power switch to
the “|” position. To turn off
the Q-View Imager Pro, push
the power switch to the “O”
position.
Tray Operation
The tray is opened by pressing
the tray button on the front
of the Q-View Imager Pro. The tray will not open if
Q-View Software is not running, the power is turned
off, or a plate is currently being imaged. Once the
button is pressed, the tray will extend to the point
where a plate can be placed on top of the glass and
within the glass cover. If there is something blocking
the tray’s movement, the tray may reverse or stop.
The user must remove the blockage and repress the
button to resume the tray’s movement.
Note: The label
is placed on the
back panel and
contains the serial
number along with
power specications
including voltage,
current, and
frequency.

13 Quansys Biosciences
OPTICAL DESCRIPTION
The camera is housed in the bottom of the Q-View
Imager Pro tower and is angled toward the bottom of
the plate. The camera has a customized lens attached
that is controlled by and can be adjusted for focus
through Q-View Software. The optical pathway passes
through the glass, which is housed in the bottom
of the tray. Once passed the glass, the camera will
image the bottom of the plate.
COMPUTER CONNECTION
The Q-View Imager Pro is connected to the PC via
a USB cable. Do not unplug either end of the USB
cable without powering down the Q-View Imager Pro
and closing Q-View Software on the PC. The user can
tell the Q-View Imager Pro is on and connected to
Q-View Software when the button glows green. From
within Q-View Software, the user can open Imager
Management and see an entry in a table for the
Q-View Imager Pro with one of the columns saying
“connected” or “disconnected.”
Q-VIEW SOFTWARE
INTRODUCTION
A copy of Q-View Software will accompany the
Q-View Imager Pro. To download and install Q-View
Software from online, you must request a license key
may also request a copy of Q-View Software from:
quansysbio.com/request-software.
Q-View Software is used to control and operate the
Q-View Imager Pro. To learn more about how to use
Q-View Software, visit the Quansys website to watch
multiple video tutorials. To navigate to the video
tutorials, go to www.Quansysbio.com, hover over
the Support menu, click on Video Library, and then
click on Q-View Imager and Software Tutorials. From

14
Q-View Imager Pro
a tablet or smartphone, use a QR reader and the QR
code to the right to be taken directly the to the Online
video tutorials.
These video tutorials cover the following topics:
Part 1: Introduction
Provides an overview of Q-View
Software, outlines the software’s
basic functions, and provides
denitions of common terms.
Part 2: Installation
Outlines the minimum computer
specications, the installation and
setup process, and how to uninstall
Q-View Software.
Part 3: Q-View Projects
Explains Q-View Software projects,
how to create new projects, and how
to work with multiplex projects at
once.
Part 4: Settings and Preferences
Shows how to change your
password, alter preferences, and
manage administration settings.
Part 5: Capturing an Image
Describes how to capture a new
image using Q-View Software.
Part 6: Importing and Image
Shows how to import an image into
Q-View Software.
Part 7: Managing and Adjusting Image
Options
Reviews how to manage and adjust
image options in Q-View Software.
Part 8: Placing the Plate overlay
Shows how to place the plate
overlay.
Please contact our technical support staff at
Q-View Software.

15 Quansys Biosciences
Chapter 3: Operation
BEFORE YOU BEGIN
The following procedure is recommended before
every use.
1. Wash the glass and glass cover within the
tray and ensure it is clean and free of debris.
2. Check within Q-View Software that the Q-View
Imager Pro is connected to the PC.
CLEANING THE TRAY
SURFACE
If any particulate, liquid, or dried salt residues or
smudges are left on the glass or the tray, it will
adversely affect the quality of the image and the
overall quality of your data. This can be cleaned with
70 percent ethanol using a lint-free cloth. Do not use
scouring cleaners or abrasive pads as this can scratch
the glass.
LOADING THE PLATE
When the user pushes the front button, the tray will
extend. Do not push or apply pressure on the tray
while it is in the opening or resting position. This will
adversely affect the performance of the tray as well
as the alignment with the lens and camera.

16
Q-View Imager Pro
The user then sets the Q-Plex plate in the tray with
the well A1 in the top left corner of the tray when
facing the Q-View Imager Pro. Make sure the plate
recesses into the glass cover and rests at on the
glass on all edges of the plate. Make sure there is no
lid on the plate and
there is only one
plate on the tray.
Then, push the
front button on the
Q-View Imager Pro.
The tray will then
retract within the
Q-View Imager Pro.
IMAGING THE PLATE
Within Q-View Software, the user will select Image
Processing. Then select the tab, Acquire Image and
under the title Imager, select Refresh. The name
of the Q-View Imager Pro will appear and connection
can be made.
At this point, the user can select the Image
Processing setting along with Exposure Time and
Image Name. Once these settings are made, click
on Capture Image and Q-View Software will image
the plate that has been inserted.
For a video tutorial, review these videos on the
Quansys website. Quansysbio.com > Support > Video
Library > Q-View Imager and Software Tutorials >
Part 4 Settings and Preferences and Part 5 Capture
an Image.

17 Quansys Biosciences
USING THE QUALIFICATION
PLATE
The optional Q-View
Qualication Plate
can be used to qualify
the performance of
the Q-View Imager
Pro over time. This
plate has built-in
LEDs that create a
constant signal that
can be imaged over
certain periods of time with Q-View Imagers. Parameters
can be imported or determined dynamically by Q-View
Software to determine acceptable levels of performance.
As an example of how to use the Q-View Qualication
Plate, for Quansys in-house purposes, 10 images are
taken of the Qualication Plate. Acceptable parameters
are established by taking the average of the 10 images,
plus or minus two times the standard deviation of each
window read by the Q-View Imager Pro.
To purchase or learn more about the Q-View Qualication
Plate, please contact Quansys sales or technical support.
TROUBLESHOOTING
To resolve any issue with the Q-View Imager Pro,
please contact Quansys Biosciences by calling
1-877-QUANSYS or send an email describing the
USA, please contact your Quansys distributor for
your area. Have your serial number available with a
detailed description of the issue. The serial number is
located on the label on the back of the device.
Note: The
qualication process
will take 50 minutes
to complete.
Table of contents
Other Quansys Laboratory Equipment manuals