1
3
Mount the RDX
Install RDX Utility
Connect Data and Power Cables
Load RDX Cartridge
•
•
•
Write
Protect
Keyed
Corner
•
SATA
•
•
•
•
•
•
•
•
Server
Front
RDX
4
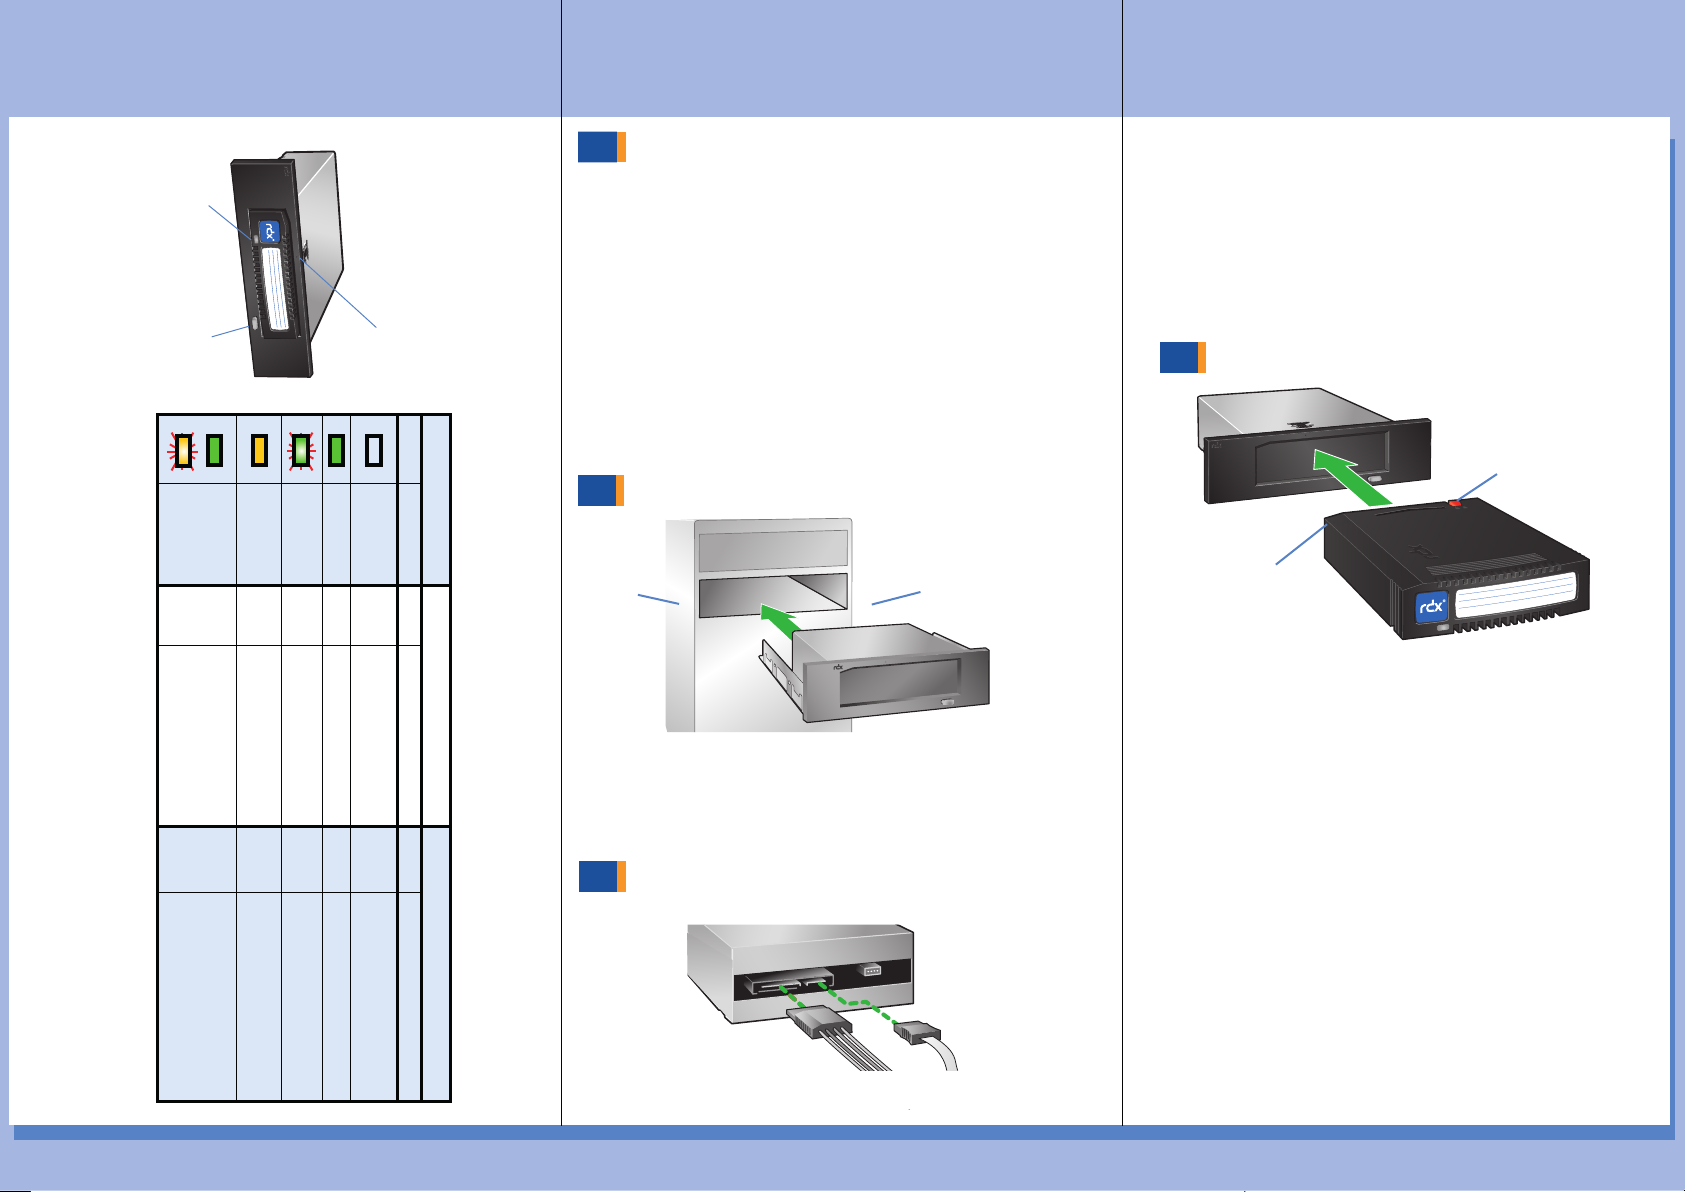
RDX Features
and LED Status
Emergency
Eject Hole
Eject Button/
Power LED
Activity LED
LED State Media LED Drive LED
Color Activity
Status Description
Status
Description
OFF
STEADY GREEN READY
READY
ACTIVITY
EJECTING
STEADY AMBER FAULT
FAULT
N/A
PREVENT
*
BLINKING
GREEN
STEADY GREEN
Blinking Amber
once eject button
is pres sed
Media is not inserted properlyor
is powered down due to low
power mode and host inactivity.
Media is ready
Reading,writing, seeking
RDX has detected a Media fault
condition. For more information,
run a diagnosticapplication.
RDX has detected a Drive fault
condition. For more information,
run a diagnosticapplication.
Drive is ejecting Media
RDX is ready and working properly
Drive does not have power.
NOT
READY
POWER
DOWN
Host com puter is access ing the
media and the user has press ed the
Eject Button. The drive will eject the
media after the Host acces s
completes.
P/N 66849101-A
START HERE
Note: The RDX Utility
installs only on Windows.
Go to www.quantum.com.
Choose “Support” from the main menu.
Click on “Download Software, Firmware, Drivers, and Documentation”.
Click on “Click here to view all Quantum products”.
Scroll down and choose “RDX”.
Choose “Diagnostics”.
Click the “DOWNLOAD” button near RDX Utility and accept the
license agreement.
Unpack the zip-file, start “setup.exe” and follow the installation
instructions.
Power off the computer and open the server cover.
Slide the RDX into the drive opening.
Secure the dock with the four supplied mounting screws.
Connect the data cable to motherboard or controller card and
then connect both data cable and power cable to the back of the
RDX. The Dock connections are keyed to ensure the correct fit.
SATA controller driver and BIOS support for AHCI is
required, please verify and enable AHCI before you install
the operating system on your computer device.
Reinstall the server cover and turn on the computer.
Download and install the latest RDX drive firmware.
•
•


