STEP 1
STEP 2
With three convenient ways to mount, you
can pick the one that works best for you.
Con tres formas convenientes de montar,
puedes elegir la que mejor se adapte a sus
necesidades.
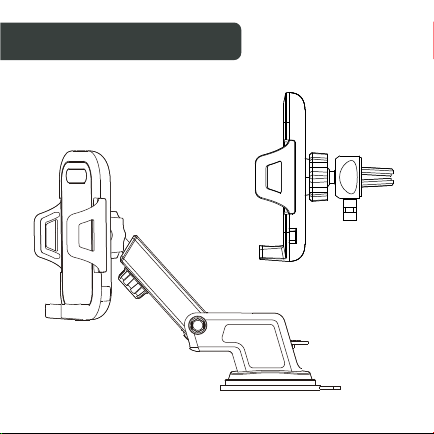
Vent: Screw your phone base into your
vent clip. Use the adjustment knobs to
tighten the vent clip to your phone base.
Insert your vent clip into the slots of your
car’s vent.
Ventilación: atornilla la base de tu teléfono en
el clip de ventilación. Usa las perillas de ajuste
para ajustar el clip de ventilación a la base de
tu teléfono. Inserta tu clip de ventilación en las
ranuras de la ventilación de tu automóvil.
3 PERFECT MOUNTING OPTIONS
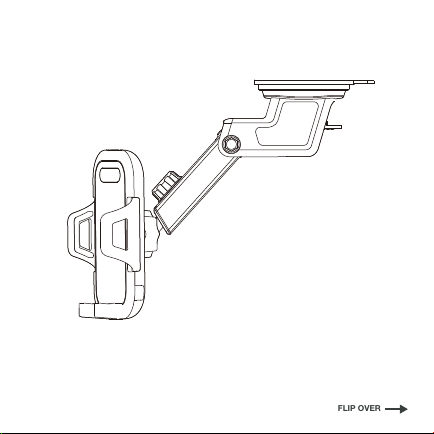
Dash/Window: Screw your phone base into
your dash/window mount using the
adjustment knobs. Make sure your suction
lock is pulled up. Remove plastic lm from
suction cup base and wipe down the area you
will be mounting your DriveDock. Place the
mount where you’d like it to sit on your dash
or window. Push the suction lock down and
your mount should now be secured in place.
Control de nivel/ventana: atornilla la base de tu
teléfono en el soporte de su tablero/ventana
usando las perillas de ajuste. Asegúrate que tu
bloqueo de succión esté levantado. Retira la
película plástica de la base de la ventosa y limpia el
área donde vas a montar tu DriveDock. Coloca el
soporte donde te gustaría que se sentara en tu
tablero o ventana. Presiona el seguro de succión
hacia abajo y tu soporte ahora debería estar
asegurado en su lugar.