2. Lock Nut 3. Tongue
1. Lock Barrel
Top Lock Bar (F)
G
H
MADE IN CHINA | DISTRIBUTED BY:
Zenexus (AUS) Ph. 1300 734 714 Zenexus (NZ) Ph. 0800 443 058 AUSTRALIA: RACK-IT.COM.AU NEW ZEALAND: RACK-IT.CO.NZ
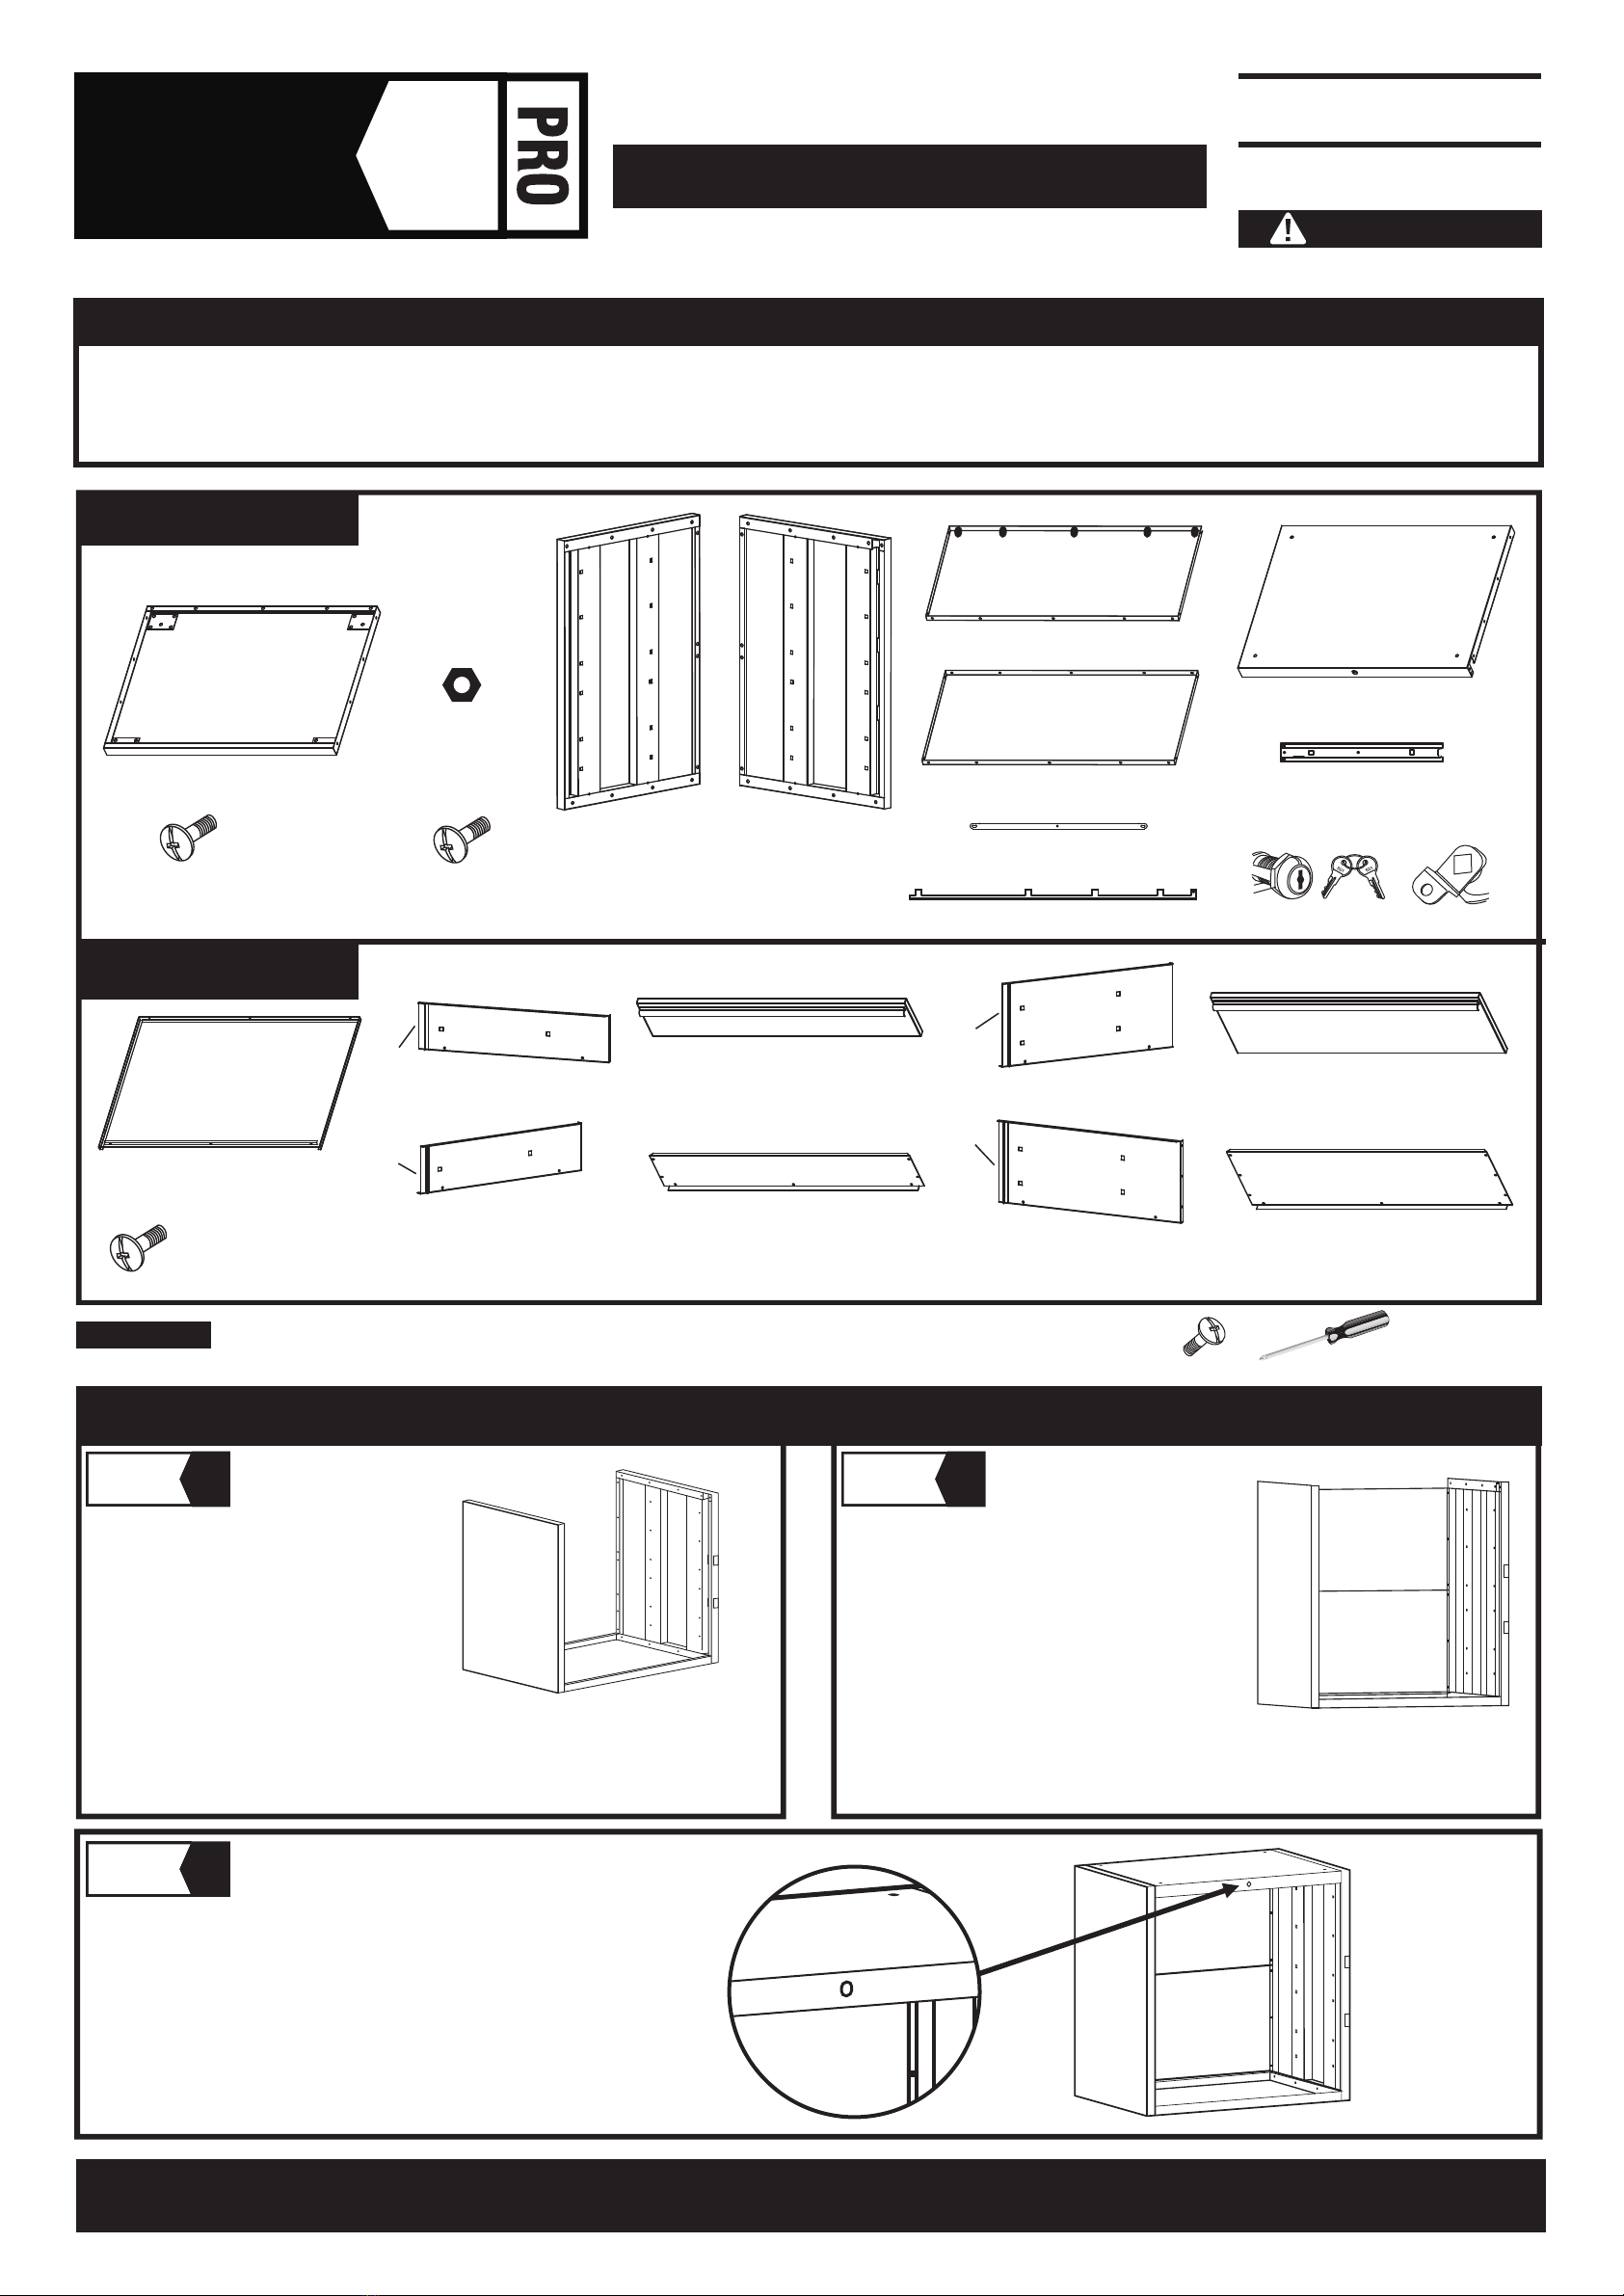
4 DRAWER CABINET
ASSEMBLY INSTRUCTIONS
ITEM CODE: 01904
RACK IT
STEP 1
STEP 2
STEP 1
STEP 3 STEP 4
STEP 2
STAGE 2: RAIL IT
STAGE 3: LOCK IT
1. The 12x Outer Runners fix to the
inside of your cabinet walls.
2. The 12x Inner Runners fix to the
outside of your Drawers.
Fix all the Outer Runners to the square fixing points
you diligently lined up way back in Stage 1. Slide the
back notch into back square fixing point, then hook
the front notch over the top of the front fixing
point so it hangs like a, um, hanger.
This Rack It 4 Drawer Cabinet will be home to your things. Precious things. And as
such, we need to secure it from hands that are likely to mess with your stuff.
Like those belonging to pesky kids. It’s time to make this thing lockable.
First, remove the Lock Nut and fit the Lock Barrel (1.) through the
hole in the Top Panel (the one you double checked was facing
outwards in Stage 1).
Then, get in your
box/cave. Don’t be shy.
This bit is fiddly and is
best done from within.
Fix the Barrel (1.) in place with
the Lock Nut (2.). Remove the
screw from the inside end
of the Barrel and carefully remove the washers.
Fit the Lock Tongue (3.) onto the Barrel, replace
the washers and screw back into place.
Place the Side Lock Bar on
the Pre-Fixed Bolts in the
channel on the inside of
your Right Side Panel (C).
Fix the Side Lock Bar
in place with
(you guessed it!) M5 Nuts.
Join Top Lock Bar and Side
Lock Bar with M5 Nut & Bolt
Fit Side Lock Bar on pre-fixed
bolt and secure with M5 Nut
Fit Side Lock Bar on pre-fixed
Bolt and secure with M5 Nut
Fit Side Lock Bar on pre-fixed
Bolt and secure with M5 Nut
Feel inside the Top Lip of the Top Panel. This channel is where your Top Lock
Bar (F) will be hidden. Place the Top Lock Bar on the pre-fixed bolt on the
central Pivot Point, and fasten in place with an M5 Nut (not too tightly).
Fix one end of the Top Lock Bar to the Lock Tongue with an M5 Nut and Bolt.
Connect your Top Lock Bar to the Side Lock Bar with another handy M5 Nut and
Bolt (using the socket spanner) and… Bingo-Bango! Your sneaky in-built
security system is operational.
Your box is assembled, and now it’s time to get all the secret inner-workings in place.
Get this part of the process right and you’ll enjoy smooth runnings for the lifetime of
your Cabinet (no pressure).
Grab your 12x Drawer Runners (H), and gently pull the Inner Runner out to full
extension. Push down on the black toggle and keep gently pulling until you feel the
catch release and each Runner will separate into 2 parts.
Congratulations, you’ve unlocked the secret
to your Runners’ assembly success:
each Runner has an Inner bit and an Outer bit.
Hot tips:
1. You can tell the Right Hand Outer Runners from the Left by the way they hang off the fixing points (if they don’t hang in place they’re meant for the other side).
2. Once all 12 Outer Runners are in place, check the Inner Runners slide in and out easily (like a Sunday morning).
Hot tip:
Pay close attention to the drawing here, as it shows from the inside of your box/cave
the angle at which your Top Lock Bar needs to be attached to the Lock Tongue.
Hot tip:
You may need to remove a thin plastic covering off the Pre-Fixed Bolts,
which is easy with a pair of pliers or even scissors.