manuals.online logo
Brands
  1. Home
  2. •
  3. Brands
  4. •
  5. Racking Solutions
  6. •
  7. Indoor Furnishing
  8. •
  9. Racking Solutions CRCU003 User manual

Racking Solutions CRCU003 User manual

Other Racking Solutions Indoor Furnishing manuals

Racking Solutions WD002 User manual

Racking Solutions

Racking Solutions WD002 User manual

Racking Solutions WD001 User manual

Racking Solutions

Racking Solutions WD001 User manual

Popular Indoor Furnishing manuals by other brands

Regency LWMS3015 Assembly instructions

Regency

Regency LWMS3015 Assembly instructions

Furniture of America CM7751C Assembly instructions

Furniture of America

Furniture of America CM7751C Assembly instructions

Safavieh Furniture Estella CNS5731 manual

Safavieh Furniture

Safavieh Furniture Estella CNS5731 manual

PLACES OF STYLE Ovalfuss Assembly instruction

PLACES OF STYLE

PLACES OF STYLE Ovalfuss Assembly instruction

Trasman 1138 Bo1 Assembly manual

Trasman

Trasman 1138 Bo1 Assembly manual

Costway JV10856 manual

Costway

Costway JV10856 manual

moss DESIGN Caisson Credenza Assembly instructions

moss DESIGN

moss DESIGN Caisson Credenza Assembly instructions

Aquaglide FULL DECK 15.0 owner's manual

Aquaglide

Aquaglide FULL DECK 15.0 owner's manual

AREBOS AR-HE-SW30 user manual

AREBOS

AREBOS AR-HE-SW30 user manual

Till-Hilft Fulda 87005.330 Assembly instructions

Till-Hilft

Till-Hilft Fulda 87005.330 Assembly instructions

Twoey Outside 2010 quick start guide

Twoey Outside

Twoey Outside 2010 quick start guide

Hettich Easys 200 operating instructions

Hettich

Hettich Easys 200 operating instructions

The bedboss RELAX 404 Series owner's manual

The bedboss

The bedboss RELAX 404 Series owner's manual

Oeseder Möbelindustrie Bern 991 720 Assembly instructions

Oeseder Möbelindustrie

Oeseder Möbelindustrie Bern 991 720 Assembly instructions

Costway HW68469 user manual

Costway

Costway HW68469 user manual

Next ALIX A27743 Assembly instructions

Next

Next ALIX A27743 Assembly instructions

BROSA Hans Assembly guide

BROSA

BROSA Hans Assembly guide

Prodigg MINIKA PBA015T-FUR installation manual

Prodigg

Prodigg MINIKA PBA015T-FUR installation manual

manuals.online logo
manuals.online logoBrands
  • About & Mission
  • Contact us
  • Privacy Policy
  • Terms and Conditions

Copyright 2025 Manuals.Online. All Rights Reserved.

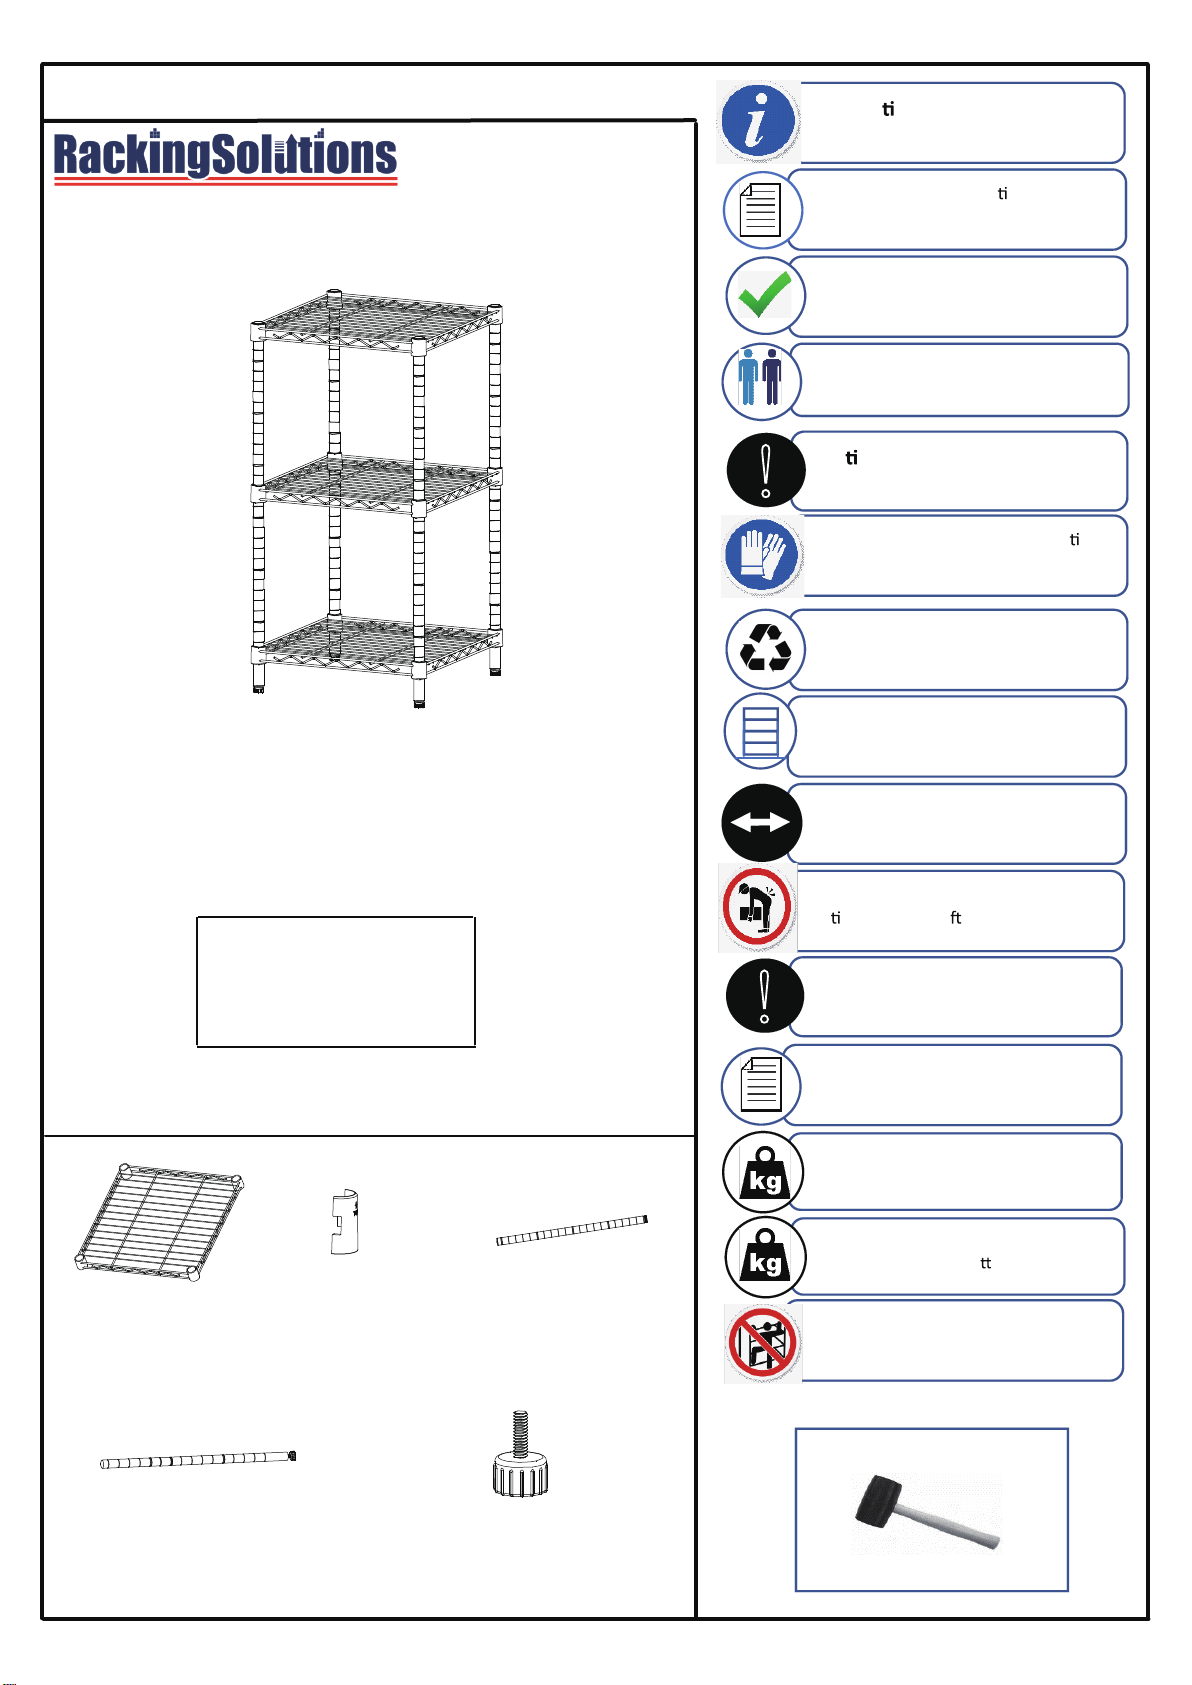
Household 3 Tier Chrome Shelving
CRCU003
PACKAGE CONTENTS
Please inspect box contents to ensure you have received all components.
Note: the black circular plastic tops in between the shelves are used only for
packaging purposes. They are NOT NEEDED. Please discard responsibly &
keep away from small children.
Each shelf holds up to 160 kg with equal weight distribution on
Total weight capacity of shelving rack is 480 kg on feet levelers.
leveling feet.
HELP LINE
01977 555007
ASSEMBLY INSTRUCTIONS
TOOLS REQUIRED
Never climb or stand on the shelves.
Informa on
if in doubt contact the supplier
Allow adequate working space and be
aware of others working around you
Inspect all packages for damage and
check that all components have been
supplied
Cau on
During Assembly
!
Warning
Rules for safe use of shelving
!
ENSURE THAT THE MAXIMUM LOAD
CARRYING CAPACITIES ARE NOT
EXCEEDED
Dispose of packaging materials
responsibly
Wear appropriate clothing -protec ve
gloves and footwear are
recommended
Make sure the floor is level
Take care when handling heavy items
par cularly when li ing or stretching
Please read these instruc ons
throughly before commencing
assembly.
Assembly should be undertaken by
at least two people
Not suitable for use in damp or wet
environments.
Shelves must be loaded evenly, and load
heavier items on the bo om shelves
Rubber Mallet
BX24+2
AX3
DX4
CX4
Shelf
Bottom Pole (with threaded insert
and feet leveler pre-installed)
Top Pole (with end cap and
pole connector pre-installed)
extra Slip sleeve
EX4
Feet Leveler
ASSEMBLY INSTRUCTIONS
STEP 1: SLIP SLEEVES
On the Pole (D), place 1 pair of slip sleeves (B) at the desired level.
Please make sure the arrow faces up and that the word “top” is right
side up. Do this for each Pole (D) and make sure that the heights are
identical for Pole (D)
Slide the pair of Slip Sleeves (B) until you hear a click to confirm the
pair is locked onto the Pole (D).Do not place more than one pair on
each Pole (D) at a time.
*For safety and stability, the lowest SHELF (A) should be lower than
the 3rd notch from the bottom.
**Note: There will be a very small gap in- between the Slip Sleeves
(B) -this is normal.
STEP 2 : INSTALLING BOTTOM SHELF
Place Shelf (A) on its side and slide the Pole (D) through the holes in
the Shelf (A ). Make sure that the shelf (A) corner cylinders are
positioned over the Slip sleeves (B).
Stand the unit upright.
*Note : The level side of the Shelf (A) is the Top side(the logo on the
corner cylinders should be right -side up.)
**Use a rubber mallet, if needed, to secure the Shelf (A).
STEP 4: INSTALLING REMAINNING SHELVES
Repeat step 1 & step 2 to install remaining Shelves (A) as desired.
D
A
D
A
A
STEP 5: FEET LEVELERS
The Feet Levelers (E) are already screwed into the Pole
(D) and you can adjust as needed to ensure your Shelving
Rack is level.
STEP 6: FINISH
AND ENJOY YOUR QUALITY
RACKING SOLUTION PRODUCT
B
STEP 3 : INSTALLING TOP POLES
Screw the Top Pole (C) into the Bottom Pole (D). The tops of these poles .
are indicated by the black end up.
D
C
E