Radal Technology CSA-POD24 User manual

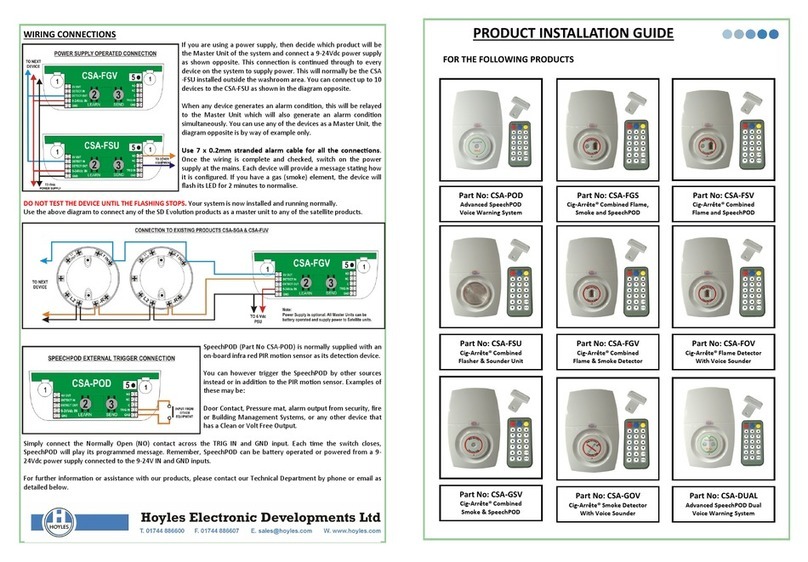
WIRING CONNECTIONS
If you are using a power supply, then decide which product will be
the Master Unit of the system and connect a 9-24Vdc power supply
as shown opposite. This connecon is connued through to every
device on the system to supply power. This will normally be the CSA
-FSU installed outside the washroom area. You can connect up to 10
devices to the CSA-FSU as shown in the diagram opposite.
When any device generates an alarm condion, this will be relayed
to the Master Unit which will also generate an alarm condion
simultaneously. You can use any of the devices as a Master Unit, the
diagram opposite is by way of example only.
Use 7 x 0.2mm stranded alarm cable for all the connecons.
Once the wiring is complete and checked, switch on the power
supply at the mains. Each device will provide a message stang how
it is congured. If you have a gas (smoke) element, the device will
ash its LED for 2 minutes to normalise.
DO NOT TEST THE DEVICE UNTIL THE FLASHING STOPS. Your system is now installed and running normally.
Use the above diagram to connect any of the SD Evoluon products as a master unit to any of the satellite products.
SpeechPOD (Part No CSA-POD) is normally supplied with an
on-board infra red PIR moon sensor as its detecon device.
You can however trigger the SpeechPOD by other sources
instead or in addion to the PIR moon sensor. Examples of
these may be:
Door Contact, Pressure mat, alarm output from security, re
or Building Management Systems, or any other device that
has a Clean or Volt Free Output.
Simply connect the Normally Open (NO) contact across the TRIG IN and GND input. Each me the switch closes,
SpeechPOD will play its programmed message. Remember, SpeechPOD can be baery operated or powered from a 9-
24Vdc power supply connected to the 9-24V IN and GND inputs.
For further informaon or assistance with our products, please contact our Technical Department by phone or email as
detailed below.
PRODUCT INSTALLATION GUIDE
FOR THE FOLLOWING PRODUCTS
Part No: CSA-POD24
Advanced SpeechPOD
Voice Warning System
Part No: CSA-FGS24
Cig-Arrête® Combined Flame,
Smoke and SpeechPOD
Part No: CSA-FSV24
Cig-Arrête® Combined
Flame and SpeechPOD
Part No: CSA-FSU24
Cig-Arrête® Combined
Flasher & Sounder Unit
Part No: CSA-FGV24
Cig-Arrête® Combined
Flame & Smoke Detector
Part No: CSA-FOV24
Cig-Arrête® Flame Detector
With Voice Sounder
Part No: CSA-GOV24
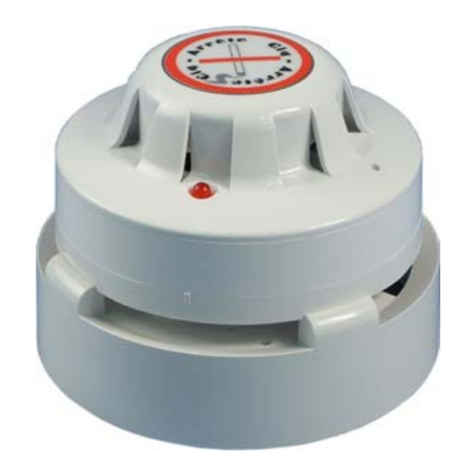
Cig-Arrête® Smoke Detector
With Voice Sounder
Part No: CSA-GSV24
Cig-Arrête® Combined
Smoke & SpeechPOD
Part No: CSA-DUAL24
Advanced SpeechPOD Dual
Voice Warning System

GENERAL OVERVIEW OF PRODUCTS
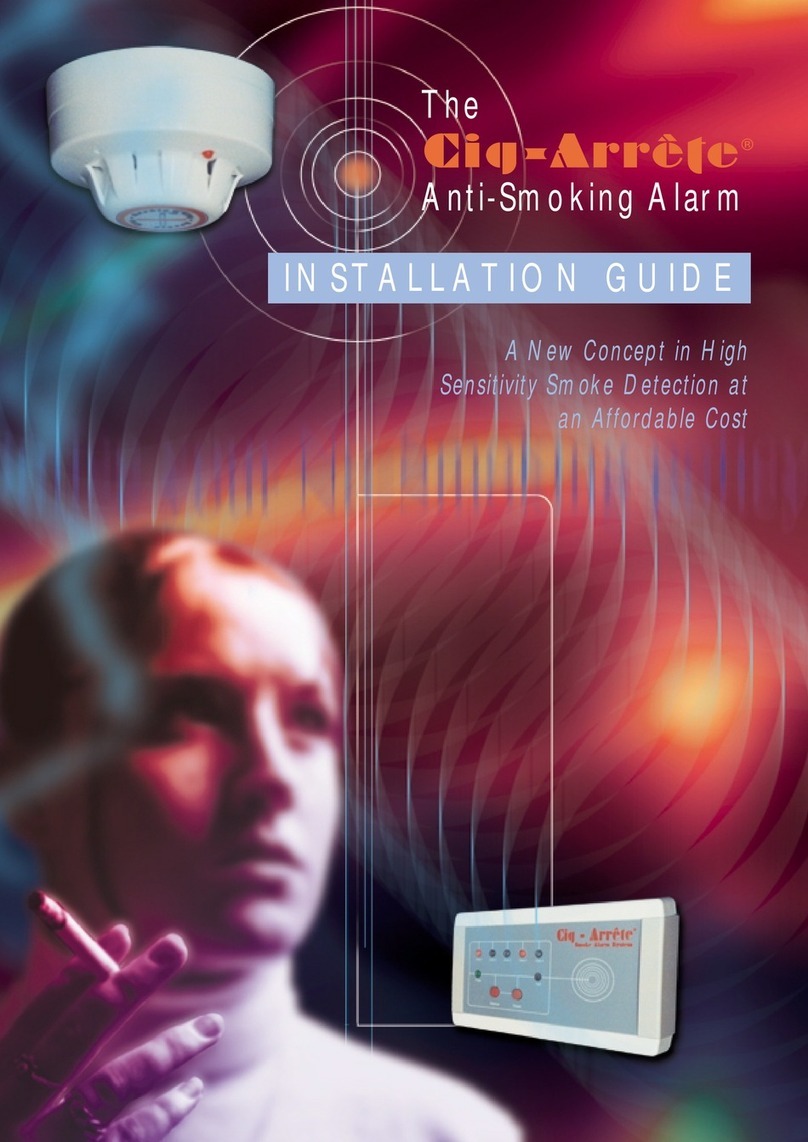
Congratulaons on your purchase of the most advanced smoking detecon system and voice warning system
available on the market today. All the Cig-Arrête and SpeechPOD products are compable with any PC running
Windows® Operang System using ‘Drag and Drop’ le programming. In this installaon guide, we will take you
through the various programming opons and also how to connect your products together to form a system.
All product models have the same basic layout although func-
onality will vary. The diagram opposite shows where the
various components are located.
1. OPENING THE FRONT COVER
Use the special key and insert the two prongs into the
holes on the top side of the product. Press down rmly
and pull the front cover away from the back plate. The
front cover is hinged and can be removed completely past
a certain point.
2. REMOVING THE SD FLASH CARD
Press the SD card into the holder and release. The SD card
will spring away from the holder allowing removal. Once
you have programmed the SD Flash Card, re-insert it into
the holder and push gently unl it clicks into posion.
3. INSERTING THE BATTERIES
Insert the baeries (4 x AA Alkaline) into the baery clips
and ensure that connecons are rmly made. Be sure to
observe the correct polarity as printed on the PCB.
4. CONNECTING TO AN EXTERNAL POWER SUPPLY
The products can be connected to an external 9-24Vdc
regulated power supply. The connecons are made on the
boom le hand corner of the PCB marked as 9-24Vdc and
GND. DO NOT INSERT BATTERIES WHEN OPERATING THE
UNIT ON A POWER SUPPLY.
GENERAL INSTALLATION REQUIREMENTS
1. Do not install Cig-Arrête® smoke detectors in outdoor areas or smoky atmospheres such as car parks,
loading bays, near gas operated fork trucks, or where welding or cooking may occur as fumes and gases
may cause unwanted alarms. Consider using ame detecon in these areas.
2. Do not exceed the coverage area of each smoke detector (3m x 3m x 3m)
3. Do not place installaon cabling close to mains voltage cables as they may cause interference. Always
use stranded mul-core cable.
4. Do not install ame detectors in direct sunlight of facing high frequency ballast lighng such as metal
halide lamps as the lighng frequency may trigger unwanted alarms.
5. For SpeechPOD installaons, if the number of message plays is expected to be high, consider using an
external 9-24Vdc power supply to avoid draining of baeries.
RADIO COMMUNICATION SETUP (Not applicable to 24Vdc models)
The radio communicaon modules (if ed) only transmit alarm condions from the Cig-Arrête® elements—ie.
Flame and smoke sensors. They do not transmit any PIR acvaons on the SpeechPOD product.
In order to congure the radio system communicaon you will need
to prepare two devices. For example, to connect a CSA-FGV Com-
bined Flame and Smoke Detector to a CSA-FSU Combined Sounder
Flasher Unit please follow these instrucons.
In this example, the CSA-FSU is the receiving unit and will operate
when it receives an alarm signal from the CSA-FGV.
Press the CIG-ARRETE buon on both products to enter
the Conguraon menu. The product will tell you how it is
congured.
On the CSA-FSU, press the LEARN buon (2). The product will then
ask you the following:
“PLEASE PRESS SEND ON THE DEVICE TO BE ADDED”
On the CSA-FGV, press the SEND buon (3). This acon sends a
transmission and unique address to all units. Only the product that is
in LEARN mode will accept the transmission. Once the CSA-FSU has
veried that the data is good, it will conrm the following:
“DEVICE ADDED”
You can repeat this process and add several devices to the same CSA-
FSU if required.
Once you have completed your radio set up, press the
CIG-ARRETE buon to exit Conguraon mode. The
product will conrm by saying “DEVICE CONFIGURED”
WIRING CONNECTIONS
If you are not using a power supply, then decide which prod-
uct will be the Master Unit of the system. This will normally be
the CSA-FSU installed outside the washroom area. You can
connect up to 10 devices to the CSA-FSU as shown in the
diagram opposite.
When any device generates an alarm condion, this will be
relayed to the Master Unit which will also generate an alarm
condion simultaneously. You can use any of the devices as a
Master Unit, the diagram opposite is by way of example only.
Use 7 x 0.2mm stranded alarm cable for all the connecons.
Once the wiring is complete insert 4 x AA baeries into each
device to power them. Each device will provide a message
stang how it is congured. If you have a gas (smoke) ele-
ment, the device will ash its LED for 2 minutes to normalise.
DO NOT TEST THE DEVICE UNTIL THE FLASHING STOPS.
Your system is now installed and running normally.

SPEECHPOD CONFIGURATION AND SETUP PROCEEDURE
Once you have accessed the conguraon menu by pressing the SpeechPOD buon, you have access to all the
funcons relevant to the SpeechPOD element.. All these funcons are shown below, but remember if you do not
have a parcular element (e.g. PIR Moon sensor) on the device you have purchased, you will not be able to set
the conguraon menu for this element.
Pressing the LANGUAGE buon UP or DOWN will scroll through the list of available languages and the
device will tell you which language is currently selected. The languages programmed by the factory are
as follows and once selected all the menu sengs will be spoken in the selected language.
“ENGLISH” ; “FRANCAIS” ; “DEUTSCHE” ; ESPAŇOL ; AMERICAN ; OTHER
Pressing the MESSAGE buon UP or DOWN will scroll through the list of available messages you have
programmed in the Cig-Arrête® folder on the SD Flash Card. You can program several messages in this
folder and use the MESSAGE buon to select the parcular message to be played in the event of a
smoking detecon. Please note that whichever message you select will be played for an alarm event
from either the ame detector, or the smoke detector.
Pressing the MODE buon UP or DOWN will scroll through the opons for the available SpeechPOD func-
ons. The opons are shown below with a brief descripon for each one. The MODE buon works together
with the TIME DELAY buon which selects the various opons or me delays for each MODE selected.
“CLEANER MODE—PLEASE SELECT TIME TO OFF”
Used by cleaning sta to change the normal operaonal mode to play a message alerng parally sighted
people that the oor may be wet and slippery. Use the TIME DELAY buon to select the me required for the
oor to dry (10 mins to 60 mins) Aer the me period SpeechPOD will return to its normal mode and me
delays etc.
“DELAY AFTER ACTIVATION—PLEASE SELECT TIME DELAY”
SpeechPOD will play the selected message immediately sensing moon, but will not play any message again
for a me period which is selected by pressing the TIME DELAY buon UP or Down. Typically this funcon is
used for infecon control messages to use hand gel prior to vising paents and relaves.
“DELAY BEFORE ACTIVATION—PLEASE SELECT TIME DELAY”
SpeechPOD will be acvated on sensing moon but will not play the selected message for a me period
which is selected by pressing the TIME DELAY buon UP or Down. Typically this funcon is used for hand
washing, where a person enters a washroom and the product waits for 60 seconds before reminding them
about the importance of hand hygiene.
“SEQUENTIAL MESSAGES—PLEASE SELECT ON OR OFF”
Press the TIME DELAY buon to switch this ON or OFF. When ON, at the rst detecon of moon SpeechPOD
will play the rst message in the SPOD folder, on subsequent acvaons, the next message in the folder will
be played and so on. This avoids any message fague and always makes the announcement fresh.
“MESSAGE REPEATS”
Once you have pressed the MODE buon above, you can press the TIME DELAY buon UP or DOWN to scroll
through the MESSAGE REPEATS (the number of mes that the device will play the message in alarm) The
factory default seng is ONE. The opons available are:
“OFF” ; “ONE” ; “TWO” ; “THREE”
Once you have congured the SpeechPOD® element present on your device, press the SPEECHPOD buon
again to return to ‘RUN MODE’ which makes the device run normally and ready to generate alarm condions.
On exing the conguraon mode the device will provide the following message:
“DEVICE CONFIGURED”
+
GENERAL OVERVIEW OF PROGRAMMING FUNCTIONS
The chart below provides at a glance all the programming funcons detailed in the next few pages of the guide.

GENERAL OPERATING PROCEEDURE
All our products whether Cig-Arrête® or SpeechPOD can only be operated by use of the CSA-IR2
Infra Red remote Control handset. The products have a number of advanced features to allow
the facility management team to change messages, ame and smoke sensivity, volume and
mer funcons when necessary. in addion, in SpeechPOD mode, the product can provide an
addional message to alert visually impaired personnel or visitors to potenal risk or hazards
such as wet and slippery oors.
All the products carrying the sux 24 are designed to be powered from a separate regulated 9-
24Vdc power supply. Once powered, the products will then immediately power up and begin
normal operaon.
On inial power up, your parcular product conguraon will provide a message, stang its current congura-
on, which will be one of the following:
PART No CSA-FGS24 “This device is congured as Flame Detector, Smoke Detector, SpeechPOD”
PART No CSA-FGV24 “This device is congured as Flame Detector, Smoke Detector”
PART No CSA-FOV24 “This device is congured as Flame Detector”
PART No CSA-GOV24 “This device is congured as Smoke Detector”
PART No CSA-GSV24 “This device is congured as Smoke Detector, SpeechPOD”
PART No CSA-FSV24 “This device is congured as Flame Detector, SpeechPOD”
PART No CSA-POD24 “This device is congured as SpeechPOD”
PART No CSA-DUAL24 “This device is congured as SpeechPOD Dual”
PART No CSA-FSU24 “This device is congured as Combined Sounder Beacon”
Whichever message is played depending on the model number, the device will then begin to inialise and power
up. In the case of a smoke detector forming part of the product, the blue LED will begin to ash to indicate that
the product is normalising (learning its environment). For both ame detectors and SpeechPOD there is no exter-
nal indicaon unl either a ame or moon is detected at which point the device will play its programmed mes-
sage.
GENERAL FUNCTIONS
Pressing the ON/OFF buon will cause the device to turn either ON or OFF. You cannot access any of the
conguraon menu or change any sengs unl you select the appropriate device type.
Pressing the SPEECHPOD buon will select the conguraon menu for the SpeechPOD element and the
device will list its current conguraon and allow access to funcon buons.
Pressing the CIG-ARRETE buon will select the conguraon menu for the Flame and Smoke Detecon
elements and the device will list its current conguraon and allow access to funcon buons.
Once you have selected either SPEECHPOD or CIG-ARRETE, the specic funcon buons are acvated.
Pressing the VOLUME control either UP or DOWN will scroll through the available opons. These are:
“Device Volume HIGH”
“Device Volume MEDIUM”
“Device Volume LOW”
CIG-ARRETE CONFIGURATION AND SETUP PROCEEDURE
Once you have accessed the conguraon menu by pressing and holding the Cig-Arrête® buon, you have access
to all the funcons relevant to your parcular device. All these funcons are shown below, but remember if you
do not have a parcular element (e.g. Flame detector) on the device you have purchased, you will not be able to
set the conguraon menu for this element.
Pressing the LANGUAGE buon UP or DOWN will scroll through the list of available languages and the
device will tell you which language is currently selected. The languages programmed by the factory are
as follows and once selected all the menu sengs will be spoken in the selected language.
“ENGLISH” ; “FRANCAIS” ; “DEUTSCHE” ; ESPAŇOL ; AMERICAN ; OTHER
Pressing the MESSAGE buon UP or DOWN will scroll through the list of available messages you have
programmed in the Cig-Arrête® folder on the SD Flash Card. You can program several messages in this
folder and use the MESSAGE buon to select the parcular message to be played in the event of a
smoking detecon. Please note that whichever message you select will be played for an alarm event
from either the ame detector, or the smoke detector.
Pressing the FLAME buon UP or DOWN will scroll through the FLAME SENSITIVITY opons to allow the
device to be set up for the parcular environment. Factory default seng is NORMAL. You can also
turn o the FLAME sensor by selecng OFF. The sengs are as follows:
“HIGH” ; “MEDIUM HIGH” ; “NORMAL” ; “MEDIUM LOW” ; “LOW” ; “OFF”
Pressing the SMOKE buon UP or DOWN will scroll through the SMOKE SENSITIVITY opons to allow
the device to be set up for the parcular environment. Factory default seng is NORMAL. You can also
turn o the SMOKE sensor by selecng OFF. The sengs are as follows:
“HIGH” ; “MEDIUM HIGH” ; “NORMAL” ; “MEDIUM LOW” ; “LOW” ; “OFF”
Pressing the TRANSIENT buon UP or DOWN will select either ON or OFF. The transient delay is nor-
mally used to lter out unwanted alarms due to lactose intolerance, which can upset the sensive
detecon elements. The factory default is OFF. The sengs are as follows:
“ON” ; “OFF”
Pressing the MODE buon UP or DOWN will scroll through the MODE opons which for Cig-Arrête®
elements are MESSAGE REPEATS (the number of mes that the device will play the message in alarm)
The factory default seng is ONE. The opons available are set by pressing the TIME DELAY buon.
Once you have pressed the MODE buon above, you can press the TIME DELAY buon UP or DOWN to
scroll through the MESSAGE REPEATS (the number of mes that the device will play the message in
alarm) The factory default seng is ONE. The opons available are:
“OFF” ; “ONE” ; “TWO” ; “THREE”
Once you have congured the Cig-Arrête® elements present on your device, press the CIG-ARRETE
buon again to return to ‘RUN MODE’ which makes the device run normally and ready to generate
alarm condions. On exing the conguraon mode the device will provide the following message:
“DEVICE CONFIGURED”
This manual suits for next models
5
Other Radal Technology Smoke Alarm manuals
Popular Smoke Alarm manuals by other brands

Ei Electronics
Ei Electronics Ei140RC Series instruction manual

Ei Electronics
Ei Electronics Ei 105C Optical Instruction leaflet

American Sensor
American Sensor 770LBX user manual

König Electronic
König Electronic SEC-SA110 manual

BeeSecure
BeeSecure BEE-SD quick start guide

AJAX
AJAX FireProtect 2 RB Heat Jeweller user manual