Radiforce MX242W User manual

English Русский 中文
Français
Deutsch
Instructions for Use
Important: Please read this “Instructions for Use”, and Installation Manual (separate
volume) carefully to familiarize yourself with safe and effective usage.
Please retain this manual for future reference.
• For monitor adjustment and settings, refer to the Installation Manual.
• The latest “Instructions for Use” is available for download from our web
site: http://www.eizoglobal.com
Gebrauchsanweisung
Wichtig: Bitte lesen Sie diese „Gebrauchsanweisung“ und das separate
Installationshandbuch sorgfältig durch, um sich mit dem sicheren und
sachgemäßen Gebrauch des Produkts vertraut zu machen. Bewahren
Sie dieses Handbuch zum späteren Nachschlagen auf.
• Informationen zur Anpassung und zu den Einstellungen des Monitors
nden Sie im Installationshandbuch.
• „Gebrauchsanweisung“ steht Ihnen auf unserer Website zum Download
zur Verfügung: http://www.eizoglobal.com
Notice d’instruction
Important: Veuillez lire attentivement ce « Notice d’instruction » ainsi que le Manuel
d’installation (tome séparé) an de vous familiariser avec ce produit et de
l’utiliser efcacement et en toute sécurité. Veuillez conserver ce manuel
pour référence ultérieure.
• Pour le réglage et les paramètres du moniteur, consultez le Manuel
d’installation.
• La dernière version du « Notice d’instruction » est à disposition pour
téléchargement sur notre site Web : http://www.eizoglobal.com
Инструкция по эксплуатации
Внимание: Внимательно прочтите настоящую «Инструкцию по эксплуатации»
и «Руководство по установке» (отдельный документ), чтобы
ознакомиться с правилами безопасной и эффективной
эксплуатации.
• Настройка монитора и параметры настройки описаны в Руководстве
по установке.
• «Инструкцию по эксплуатации» в последней редакции можно
загрузить с нашего веб-сайта: http://www.eizoglobal.com
使用说明书
重要事项: 请仔细阅读本“使用说明书”和“安装手册”(单独卷),熟悉安全和高
效使用。请保留本手册,以备日后参考。
• 有关显示器的调节和设定,请参考安装手册。
• 最新“使用说明书”可在我们的网站上下载:http://www.eizoglobal.com
Color LCD monitor

Instructions for Use
Color LCD monitor
English

2
SAFETY SYMBOLS
This manual and this product use the safety symbols below. They denote critical information. Please read
them carefully.
WARNING
Failure to abide by the information in a
WARNING may result in serious injury
and can be life threatening.
CAUTION
Failure to abide by the information in a
CAUTION may result in moderate injury and/or
property or product damage.
Indicates a warning or caution. For example, indicates an “electrical shock” hazard.
Indicates a prohibited action. For example, means “Do not disassemble”.
Indicates a mandatory action. For example, means “Ground the unit”.
This product has been adjusted specically for use in the region to which it was originally shipped. If
operated outside this region, the product may not perform as stated in the specications.
No part of this manual may be reproduced, stored in a retrieval system, or transmitted, in any form or by
any means, electronic, mechanical, or otherwise, without the prior written permission of EIZO Corporation.
EIZO Corporation is under no obligation to hold any submitted material or information condential unless
prior arrangements are made pursuant to EIZO Corporation’s receipt of said information. Although every
effort has been made to ensure that this manual provides up-to-date information, please note that EIZO
monitor specications are subject to change without notice.

3
PRECAUTIONS
English
PRECAUTIONS
●IMPORTANT
• This product has been adjusted specically for use in the region to which it was originally shipped.
If the product is used outside the region, it may not operate as specied in the specications.
• To personal safety and proper maintenance, please read carefully this section and the caution
statements on the monitor.
Location of the Caution Statements
AVERTISSEMENT
WARNING
WARNUNG
Symbols on the unit
Symbol This symbol indicates
Main Power Switch: Press to turn the monitor’s main power off.
Main Power Switch: Press to turn the monitor’s main power on.
Power button: Press to turn the monitor’s power on or off.
Alternating current
Alerting electrical hazard
CAUTION: Refer to “SAFETY SYMBOLS” (page 2).
WEEE marking: Product must be disposed of separately; materials may
be recycled.
CE marking: EU conformity mark in accordance with the provisions of
Council Directive 93/42/EEC and 2011/65EU.

4PRECAUTIONS
WARNING
If the unit begins to emit smoke, smells like something is burning, or makes strange noises, discon-
nect all power connections immediately and contact your EIZO representative for advice.
Attempting to use a malfunctioning unit may result in re, electric shock, or equipment damage.
Do not open the cabinet or modify the unit.
Opening the cabinet or modifying the unit may result in re, electric shock, or burn.
Refer all servicing to qualied service personnel.
Do not attempt to service this product yourself as opening or removing covers may result in re, electric
shock, or equipment damage.
Keep small objects or liquids away from the unit.
Small objects accidentally falling through the ventilation slots into the cabinet or spillage
into the cabinet may result in re, electric shock, or equipment damage. If an object or
liquid falls/spills into the cabinet, unplug the unit immediately. Have the unit checked by
a qualied service engineer before using it again.
Place the unit at a sturdy and stable place.
A unit placed on an inadequate surface may fall and result in injury or equipment
damage. If the unit falls, disconnect the power immediately and ask your local EIZO
representative for advice. Do not continue using a damaged unit. Using a damaged unit
may result in re or electric shock.
Use the unit in an appropriate location.
Otherwise, re, electric shock, or equipment damage may result.
• Do not place outdoors.
• Do not place in any form of transportation (ships, aircraft, trains, automobiles, etc.).
• Do not place in dusty or humid environments.
• Do not place in locations where water may be splashed on the screen (bathrooms, kitchens,
etc.)
• Do not place in locations where steam comes in direct contact with the screen.
• Do not place near heat generating devices or humidiers.
• Do not place in locations where the product is subject to direct sunlight.
• Do not place in environments with inammable gas.
• Do not place in environments with corrosive gases (such as sulfur dioxide, hydrogen sulde,
nitrogen dioxide, chlorine, ammonia, and ozone).
• Do not place in environments with dust, components that accelerate corrosion in the
atmosphere (such as sodium chloride and sulfur), conductive metals, and so on.
To avoid danger of suffocation, keep the plastic packing bags away from babies and children.
Use the enclosed power cord and connect to the standard power outlet in your country.
Be sure to use within the rated voltage of the power cord. Otherwise, re or electric shock may result.
Power supply: 100-240Vac 50/60Hz
To disconnect the power cord, grasp the plug rmly and pull.
Tugging on the cord may damage and result in re or electric shock.
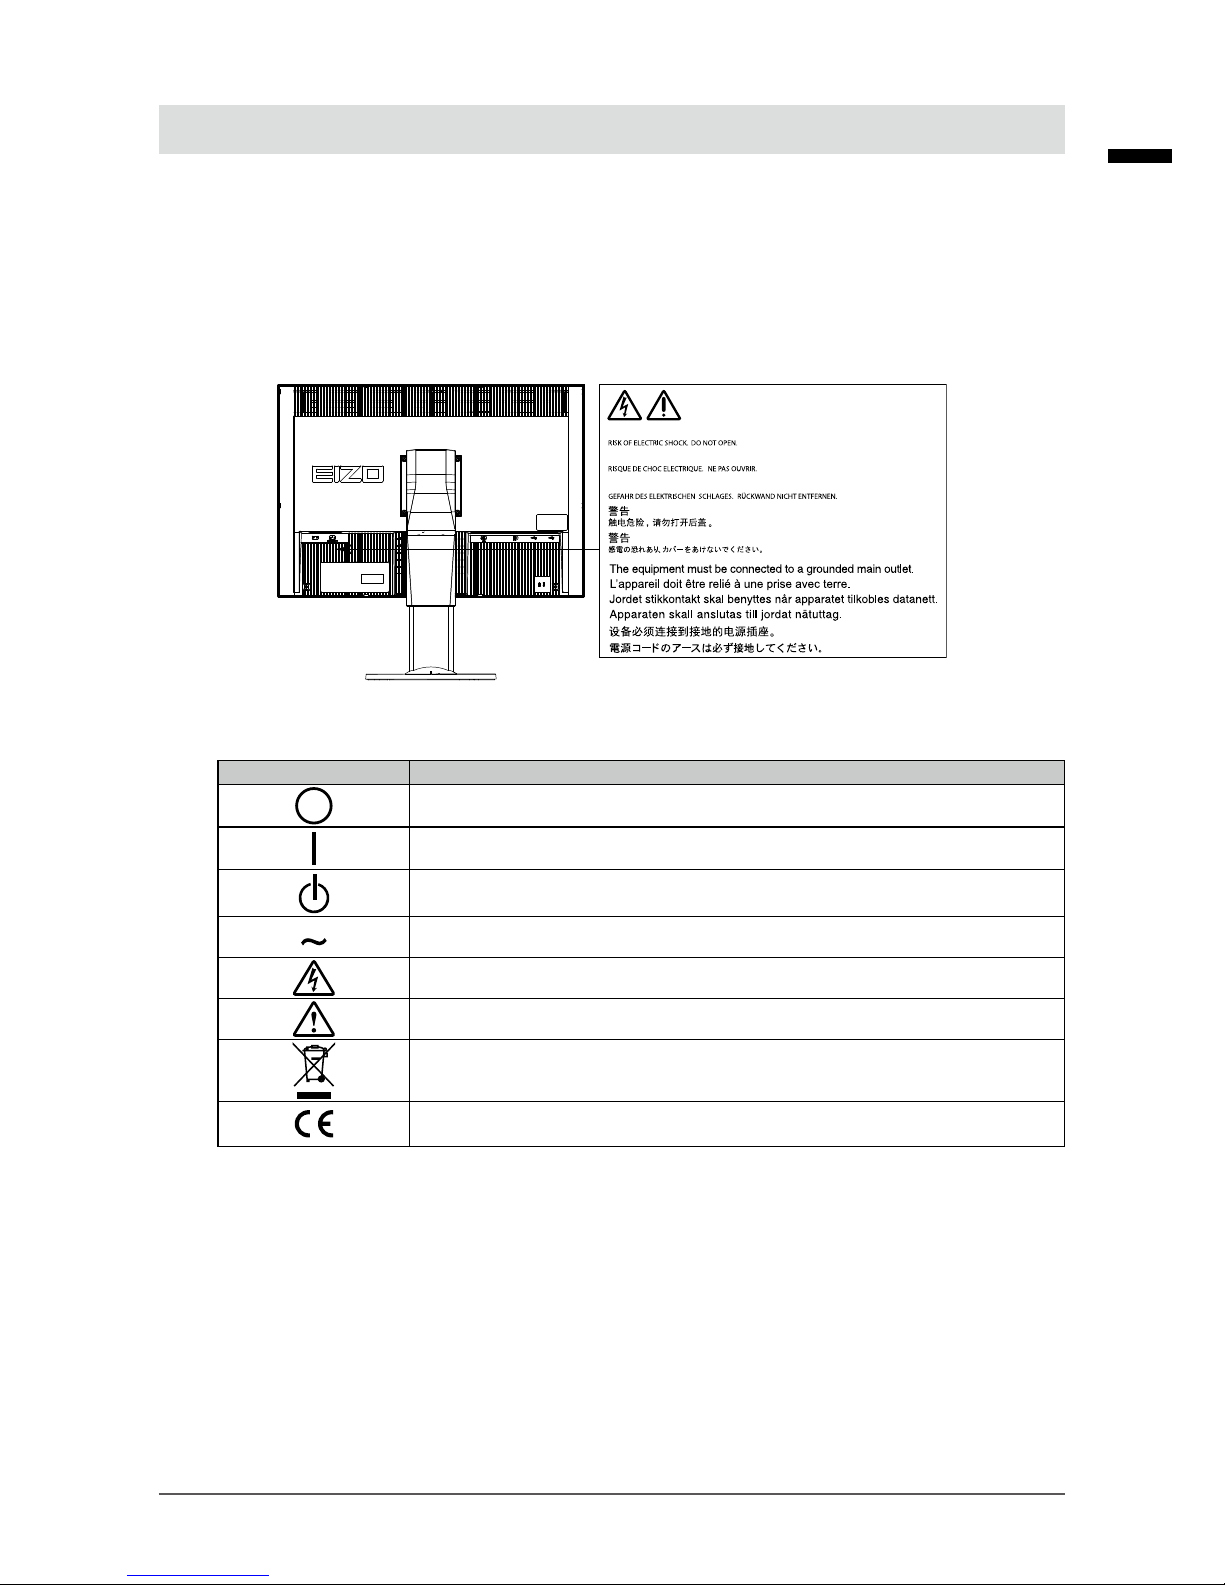
The equipment must be connected to a grounded main outlet.
Failure to do so may result in re or electric shock.

5
PRECAUTIONS
English
WARNING
Use the correct voltage.
• The unit is designed for use with a specic voltage only. Connection to another voltage than specied in this
“Instructions for Use” may cause re, electric shock, or equipment damage.
Power supply: 100-240Vac 50/60Hz
• Do not overload your power circuit, as this may result in re or electric shock.
Handle the power cord with care.
• Do not place the cord underneath the unit or other heavy objects.
• Do not pull on or tie the cord.
If the power cord becomes damaged, stop using it. Using of a damaged cord may result
in re or electric shock.
For electrical safety, do not connect or disconnect the power cord in the presence of patients.
Never touch the plug and power cord if it begins to thunder.
Touching them may result in electric shock.
When attaching an arm stand, please refer to the user’s manual of the arm stand and install the unit
securely.
Otherwise, the unit may become detached, resulting in injury and/or equipment damage. Before installation,
make sure that desks, walls, or any other installation surface has adequate mechanical strength. If the unit
falls, please ask your local EIZO representative for advice. Do not continue using a damaged unit. Using
a damaged unit may result in re or electric shock. When reattaching the tilt stand, please use the same
screws and tighten them securely.
Do not touch a damaged LCD panel directly with bare hands.
Liquid crystal is poisonous. If any part of your skin comes in direct contact with the
panel, wash thoroughly. If liquid crystal enters your eyes or mouth, immediately ush
with large amounts of water and seek medical attention.
Fluorescent backlight lamps contain mercury (the products that have LED backlight lamps contain
no mercury), dispose according to local, state or federal laws.
Exposure to elemental mercury can result in effects on the nervous system, including tremors, memory loss,
and headaches.

6PRECAUTIONS
CAUTION
Handle with care when carrying the unit.
Disconnect the power cord and cables when moving the unit. Moving the unit with the power cord or cables
attached is dangerous and may result in injury.
Carry or place the unit according to the correct specied methods.
• When carrying, grasp and rmly hold the unit as shown in the illustration below.
• Large-size units are heavy. Unpack or carry the unit with at least two people.
Dropping the unit may result in injury or equipment damage.
Do not block the ventilation slots on the cabinet.
• Do not place any objects on the ventilation slots.
• Do not install the unit in a place with poor ventilation or inadequate space.
• Do not use the unit laid down or upside down.
Blocking the ventilation slots prevents proper airow and may result in re, electric
shock, or equipment damage.
Do not touch the plug with wet hands.
Doing so may result in electrical shock.
Use an easily accessible power outlet.
This is to facilitate disconnecting the power in case of a problem.
Periodically clean the area around the power plug and the ventilation slot of the monitor.
Dust, water, or oil on the plug may result in re.
Unplug the unit before cleaning it.
Cleaning the unit while it is plugged into a power outlet may result in electric shock.
If you plan to leave the unit unused for an extended period of time, disconnect the power cord from
the wall socket after turning off the power switch for the safety and the power conservation.
This product is suitable for placing near patients, but not for direct contact with patients.

7
Notice for this monitor
English
Notice for this monitor
Intended use
This product is intended to be used in displaying and viewing digital images for review and analysis
by trained medical practitioners. It does not support the display of mammography images for
diagnosis.
Caution: Federal law (USA) restricts this device to sale by or on the order of a physician.
Attention
• This product may not be covered by warranty for uses other than those described in this manual.
• The specications noted in this manual are only applicable when the following are used:
- Power cords provided with the product
- Signal cables specied by us
• Only use optional products manufactured or specied by us with this product.
Installation Requirements
• Carefully read the “PRECAUTIONS” (page 3) and always follow the instructions.
• When installing the monitor in a rack, ensure that there is adequate space around the sides, back
and top of the monitor.
• Position the monitor so that there is no light to interfere with the screen.
• If you place this product on a lacquer-coated desk, the color may adhere to the bottom of the stand
due to the composition of the rubber.
Maintenance
• It takes about 30 minutes for the performance of electrical parts to stabilize. Please wait 30 minutes
or more after the monitor power has been turned on or the monitor has recovered from the power
saving mode, and then adjust the monitor.
• Monitors should be set to a lower brightness to reduce changes in luminosity caused by long-term
use and maintain a stable display. Periodically perform constancy tests. Calibrate if necessary. For
details, refer to the User Manuals for the RadiCS/RadiCS LE monitor quality control software.
• Otherwise, parts (such as the LCD panel or the fan) may deteriorate in the long-term. Periodically
check that they are operating normally.
• When the screen image is changed after displaying the same image for extended periods of time,
an afterimage may appear. Use the screen saver or power save function to avoid displaying the
same image for extended periods of time.
• If the monitor displays continuously over a long period of time, dark smudges or burn-in may
appear. To maximize the life of the monitor, we recommend the monitor be turned off periodically.
• The backlight of the LCD panel has a xed lifetime. When the screen becomes dark or begins to
icker, please contact your local EIZO representative.
• The screen may have defective pixels or a small number of light dots on the screen. This is due to
the characteristics of the panel itself, and is not a malfunction of the product.

8Notice for this monitor
• Do not press on the panel or edge of the frame strongly, as this may result in display malfunctions,
such as interference patterns, etc. If pressure is continually applied to the panel, it may deteriorate
or damage your panel. (If the pressure marks remain on the panel, leave the monitor with a black or
white screen. The symptom may disappear.)
• Do not scratch or press on the panel with any sharp objects, as this may result in damage to the
panel. Do not attempt to brush with tissues as this may scratch the panel.
• When the monitor is cold and brought into a room or the room temperature goes up quickly, dew
condensation may occur on the interior and exterior surfaces of the monitor. In that case, do not
turn the monitor on. Instead wait until the dew condensation disappears, otherwise it may cause
some damage to the monitor.
Cleaning
Periodic cleaning is recommended to keep the monitor looking new and to prolong its operation
lifetime.
Attention
• Do not use chemicals on a frequent basis. Chemicals such as alcohol and antiseptic solution may cause
gloss variation, tarnishing, and fading of the cabinet or panel, and also quality deterioration of the image.
• Never use any thinner, benzene, wax, and abrasive cleaner, which may damage the cabinet or panel.
• Do not let chemicals come into direct contact with the monitor.
Note
• The optional ScreenCleaner is recommended for cleaning the cabinet and panel surface.
Gently wipe off any dirt on the cabinet or panel surface with a soft cloth soaked in a small amount of
water or one of the chemicals listed below.
Chemicals that may be used for cleaning
Material name Product name
Ethanol Ethanol
Isopropyl alcohol Isopropyl alcohol
Chlorhexidine Hibitane
Sodium hypochlorite Purelox
Benzalkonium chloride Welpas
Alkyldiaminoethylglycine Tego 51
Glutaral Sterihyde
Glutaral Cidex Plus28
To use the monitor comfortably
• An excessively dark or bright screen may affect your eyes. Adjust the brightness of the monitor
according to the environmental conditions.
• Staring at the monitor for a long time tires your eyes. Take a 10-minute rest every hour.
• Look at the screen from a proper distance and from a proper angle.

9
CONTENTS
English
CONTENTS
PRECAUTIONS ...................................................... 3
●IMPORTANT ................................................... 3
Notice for this monitor ......................................... 7
CONTENTS............................................................. 9
Chapter 1 Introduction..................................... 10
1-1. Features ........................................................10
1-2. Package Contents........................................10
1-3. EIZO LCD Utility Disk...................................11
●Disk contents and software overview ............11
●Using RadiCS LE/ScreenManager Pro for
Medical ...........................................................11
1-4. Controls and Functions ..............................12
Chapter 2 Setting Up........................................ 13
2-1. Compatible Resolutions .............................13
2-2. Connecting Cables ......................................13
2-3. Adjusting the Screen Height and Angle....14
Chapter 3 Troubleshooting.............................. 15
Chapter 4 Specications ................................. 16
Chapter 5 Glossary .......................................... 18
Appendix.............................................................. 20
Trademark ............................................................... 20
License / Copyright.................................................21
Medical Standard ....................................................21
FCC Declaration of Conformity ............................ 22
EMC Information .................................................... 23
China Measures for RoHS Compliance in
ChinaRoHS.............................................................. 26
Recycling Information/
Informationen zum Thema Recycling/
Informations sur le recyclage/
Информация относно рециклиране................. i

10 Chapter 1 Introduction
Chapter 1 Introduction
Thank you very much for choosing an EIZO color LCD color.
1-1. Features
• 24.0″ wide format LCD
• Wide-gamut panel
• Supports a resolution of 2.3 M pixels (1920 dots × 1200 lines)
• IPS panel with 178˚ horizontal and vertical viewing angles
• Applicable to DisplayPort (applicable to 8 bit or 10 bit, not applicable to audio signals)
• The CAL Switch function allows the user to select the display mode optimum to the displayed
image.
Refer to the Installation Manual (on the CD-ROM).
• Selectable DICOM (page 18) Part 14 complied screen.
• The quality control software “RadiCS LE” used to calibrate the monitor and to manage the history is
included.
See “1-3. EIZO LCD Utility Disk” (page 11).
• The software “ScreenManager Pro for Medical” to adjust the screen using the mouse and keyboard
is included
See “1-3. EIZO LCD Utility Disk” (page 11).
• Power saving function
This product is equipped with power saving function.
- 0 W power consumption when the main power is off
Equipped with main power switch. When the monitor is not required, the power supply can be shut off
using the main power switch
• Stand with wide range of movement
The monitor can be adjusted to a position where it provides you with a comfortable and less tiring
work environment.
(Tilt: up 35˚/down 5˚, Swivel: 344˚, Adjustable height: 110 mm (Tilt: 35°), 130 mm (Tilt: 0°))
• Long service life LED backlight LCD panel
1-2. Package Contents
Check that all the following items are included in the packaging box. If any items are missing or damaged,
contact your local EIZO representative.
Note
• Please keep the packaging box and materials for future movement or transport of the monitor.
• Monitor
• Power cord
• Digital signal cable:
DisplayPort - DisplayPort (PP300)
• Digital signal cable: DVI-D - DVI-D (DD300-RI)
• USB cable: UU300
• Stand base
• Cable holder
• EIZO LCD Utility Disk (CD-ROM)
• Instructions for Use
• Assembling the Stand

11
Chapter 1 Introduction
English
1-3. EIZO LCD Utility Disk
An “EIZO LCD Utility Disk” (CD-ROM) is supplied with this product. The following table shows the disk
contents and the overview of the software programs.
●Disk contents and software overview
The disk includes application software programs for adjustment, and Installation Manual. Refer to
Readme.txt le on the disk for software startup procedures or le access procedures.
Contents Overview
Readme.txt le
RadiCS LE (for Windows) Quality control software for calibrating the monitor and managing the
calibration history.
ScreenManager Pro for Medical (for
Windows)
Software for adjusting the screen using the mouse and keyboard.
Installation Manual of this monitor (PDF le)
“Instructions for Use” of this monitor (PDF le)
●Using RadiCS LE/ScreenManager Pro for Medical
For the installation and use of “RadiCS LE/ScreenManager Pro for Medical”, refer to the respective
User’s Manual on the disk.
When using this software, you will need to connect a PC to the monitor with the supplied USB cable.
For more information, refer to the Installation Manual (on the CD-ROM).

12 Chapter 1 Introduction
1-4. Controls and Functions
5672 31
4
8 9 10 11 12
14
13
15
Adjustment menu*1
1. button Switches input signals for display.
2. button Switches the CAL Switch mode.
3. button Cancels the setting/adjustment and exits the Adjustment menu.
4. button Provides the menu selection as well as the adjustment and setting of a function.
5. button Displays the Adjustment menu, determines an item on the menu screen, and saves
values adjusted.
6. button Turns the power on or off.
7. Power Indicator
Indicates the monitor’s operation status.
Green: Operating
Orange: Power saving mode
OFF: Main power/Power off
8. Main power switch Turns the main power on or off.
9. Power connector Connects the power cord.
10. Input signal connectors Left: DVI-I connector / Right: DisplayPort connector
11. USB upstream port Connects the USB cable to use the software that needs USB connection, or to use
USB hub function.
12. USB downstream port Connects a peripheral USB device.
13. Stand Used to adjust the height and angle of the monitor screen.
14. Security lock slot Complies with Kensington’s MicroSaver security system.
15. Cable holder Covers the monitor cables.
*1 For instructions for use, refer to the Installation Manual (on the CD-ROM).

13
Chapter 2 Setting Up
English
Chapter 2 Setting Up
2-1. Compatible Resolutions
The monitor supports the following resolutions.
Resolution vertical scan frequency
640 × 480 60 Hz
720 × 400 70 Hz
800 × 600 60 Hz
1024 × 768 60 Hz
1280 × 960 60 Hz
1280 × 1024 60 Hz
1600 × 1200 60 Hz
1680 × 1050 60 Hz
1920 × 1200*1 60 Hz
*1 Recommended resolution.
2-2. Connecting Cables
Attention
• Check that the monitor and the PC are powered off.
• When replacing the current monitor with this monitor, be sure to change the PC settings for resolution and
vertical scan frequency to those that are available for this monitor. Refer to the compatible resolution table before
connecting the PC.
Note
• When connecting multiple PCs to this product, refer to the Installation Manual (on the CD-ROM).
1. Connect the signal cables to the input signal connectors and PC.
Check the shape of the connectors, and connect the cables.
After connecting the signal cable, tighten the screws of the connectors to secure the coupling.
Digital connection (DisplayPort)
Digital connection (DVI)
Signal cable: DisplayPort - DisplayPort (supplied)
Signal cable: DVI-D - DVI-D (supplied)
or
2.
Plug the power cord into a power outlet and the power connector on the
monitor.

14 Chapter 2 Setting Up
3.
Connect the USB cable when using RadiCS LE or ScreenManager Pro for
Medical.
Connecting to the Monitor Connecting to a Computer
4.
A cable holder is supplied with this product. Use the holder to organize the
cables connected to the monitor.
5.
Press to turn on the monitor.
The monitor’s power indicator lights up green.
6.
Turn on the PC.
The screen image appears.
If an image does not appear, refer to “Chapter 3 Troubleshooting” (page 15) for additional advice.
Attention
• Turn off the monitor and PC after using them.
• For the maximum power saving, it is recommended that the Power button be turned off. Turning off the main
power switch or unplugging the power cord completely shuts off power supply to the monitor.
Note
• In order to maximize the monitor life and to minimize luminance deterioration as well as power consumption,
proceed the following:
- Use the power saving function of the computer.
- Turn off the monitor and PC after using them.
2-3. Adjusting the Screen Height and Angle
Hold left and right edge of the monitor with both hands, and adjust the screen height, tilt and swivel of the
screen to the best condition for working.
Attention
• Be sure that the cables are correctly connected.

15
Chapter 3 Troubleshooting
English
Chapter 3 Troubleshooting
If a problem still remains after applying the suggested remedies, contact your local EIZO representative.
Problem Possible cause and remedy
1. No picture
• Power indicator does not light.
• Check whether the power cord is connected properly.
• Turn the main power switch on.
• Press .
• Turn off the main power, and then turn it on again a few
minutes later.
• Power indicator is lighting green. • Increase “Brightness”, “Gain” in the Adjustment menu.
• Power indicator is lighting orange. • Switch the input signal with .
• Move the mouse or press any key on the keyboard.
• Check whether the PC is turned on.
• Power indicator is ashing orange and green. • The device that is connected using DisplayPort have a
problem. Solve the problem, turn off the monitor, and then
turn it on again. Refer to the User’s Manual of the output
device for further details.
2. The message below appears. This message appears when the signal is not input correctly
even when the monitor functions properly.
• This message appears when no signal is
input.
Example:
• The message shown left may appear, because some PCs
do not output the signal soon after power-on.
• Check whether the PC is turned on.
• Check whether the signal cable is connected properly.
• Switch the input signal with .
• The message shows that the input signal is
out of the specied frequency range. (Such
signal frequency is displayed in magenta.)
Example:
fD: Dot clock (Displayed only during digital
signal input)
fH: Horizontal scan frequency
fV: Vertical scan frequency
• Check whether the PC is congured to meet the resolution
and vertical scan frequency requirements of the monitor
(see “2-1. Compatible Resolutions” (page 13)).
• Reboot the PC.
• Select an appropriate setting using the graphics board’s
utility. Refer to the manual of the graphics board for
details.

16 Chapter 4 Specications
Chapter 4 Specications
LCD Panel Type IPS (Anti-Glare)
Backlight LED
Size 61 cm (24.1 inch) (61.1 cm diagonal)
Native Resolution 2.3M pixels (1920 dots × 1200 lines)
Display Size (H x V) 518.4 mm × 324.0 mm
Pixel Pitch 0.27 mm
Display Colors 10-bit colors: 1.07 billion (maximum) colors
Viewing Angles
(H / V, typical)
178˚ / 178˚
Recommended
Brightness
180 cd/m2
Contrast ratio (typical) 1000:1
Response Time
(typical)
12 ms (Black-white-black)
Video Signals Input Terminals DVI-I × 1, DisplayPort × 1
Digital Scanning
Frequency (H / V)
31 kHz - 76 kHz / 59 Hz - 61 Hz (VGA TEXT: 69 Hz - 71 Hz)
Frame synchronous mode: 59 Hz - 61 Hz
Analog Scanning
Frequency (H / V)
26 kHz - 76 kHz / 49 Hz - 71 Hz (VGA TEXT: 69 Hz - 71 Hz)
Synchronous signal Separate, TTL, positive/negative
Dot clock 165 MHz (maximum)
USB Port Upstream port × 1, Downstream port × 2
Standard USB Specication Revision 2.0
Power Input 100 - 240 V ac ±10%, 50/60 Hz 0.70 A - 0.40 A
Maximum Power
Consumption
68 W or less
Power Save Mode 0.5 W or less (when only the DVI (analog) connector is connected, “Input
Selection” is set to “Manual”, no USB device is connected, and “DP
PowerSave” is set to “On”)
Standby Mode 0.5 W or less (when no USB device is connected, and “DP PowerSave”
is set to “On”)
Physical
Specications
Dimensions 575 mm × 423 - 553 mm × 245 mm ( W × H × D ) (Tilt: 0˚)
Dimensions
(Without Stand)
575 mm × 398 mm × 71 mm ( W × H × D )
Net Weight Approx. 8.7 kg
Net Weight
(Without Stand)
Approx. 6.0 kg
Height Adjustment
Range
110 mm (Tilt: 35˚)
130 mm (Tilt: 0˚)
Tilt Up 35˚, down 5˚
Swivel 344˚
Pivot 90˚ (clockwise)
Operating
Environmental
Requirements
Temperature: 0˚C to 35˚C (32˚F to 95˚F)
Humidity 20% to 80% R.H. (no condensation)
Air pressure 540 hPa to 1060 hPa
Transportation/
Storage
Environmental
Requirements
Temperature -20˚C to 60˚C (-4˚F to 140˚F)
Humidity 10% to 90% R.H. (no condensation)
Air pressure 200 hPa to 1060 hPa

17
Chapter 4 Specications
English
Outside Dimensions
Unit: mm
344°
575
518.4
398
324
(28.3)(28.3)
(28.3)
(45.7)
90°
(553)
(651)
71
11
φ245
51
363 (427)
(423)
371
35°
100
(237.5) (237.5)
100
(157.7) (140.3)
Accessories
Calibration Kit EIZO “RadiCS UX1” Ver. 4.3.2 or later
EIZO “RadiCS Version Up Kit” Ver. 4.3.2 or later
Network QC Management Software EIZO “RadiNET Pro” Ver. 4.3.2 or later
Cleaning Kit EIZO “ScreenCleaner”
Signal Cable (DVI - D-Sub) FD-C16
For the latest information about the accessories and information about the latest compatible graphics
board, refer to our web site.
http://www.eizoglobal.com

18 Chapter 5 Glossary
Chapter 5 Glossary
Clock
The analog signal input monitor needs to reproduce a clock of the same frequency as the dot clock
of the graphics system in use, when the analog signal is converted to a digital signal for image
display. This is called clock adjustment. If the clock pulse is not set correctly, some vertical bars
appear on the screen.
DDC (Display Data Channel)
VESA provides the standardization for the interactive communication of the setting information, etc.
between a PC and the monitor.
DisplayPort
This is the interface standard for image signals standardized in accordance with VESA. It was
developed with the aim of replacing the conventional DVI and analog interfaces, and it can transmit
high resolution signals and sound signals, which DVI does not support. The standard size and mini
size connectors have been standardized.
DICOM (Digital Imaging and Communication in Medicine)
The DICOM standard was developed by the American College of Radiology and the National
Electrical Manufacturer’s Association of the USA.
The DICOM compatible device connection enables to transfer the medical image and information.
The DICOM, Part 14 document denes the digital, grayscale medical image display.
DVI (Digital Visual Interface)
DVI is a digital interface standard. DVI allows direct transmission of the PC’s digital data without
loss.
This adopts the TMDS transmission system and DVI connectors. There are two types of DVI
connectors. One is a DVI-D connector for digital signal input only. The other is a DVI-I connector
for both digital and analog signal inputs.
DVI DMPM (DVI Digital Monitor Power Management)
DVI DMPM is a digital interface power saving function. The “Monitor ON (operating mode)” and
“Active Off (power saving mode)” are indispensable for DVI DMPM as the monitor’s power mode.
Gain
This is used to adjust each color parameter for red, green and blue. An LCD monitor displays the
color by the light passing through the panel color lter. Red, green and blue are the three primary
colors. All the colors on the screen are displayed by combining these three colors. The color tone
can be changed by adjusting the light intensity (volume) passing through each color’s lter.
Gamma
Generally, the monitor brightness varies nonlinearly with the input signal level, which is called
“Gamma Characteristic”. A small gamma value produces a low-contrast image, while a large
gamma value produces a highcontrast image.

19
Chapter 5 Glossary
English
HDCP (High-bandwidth Digital Content Protection)
Digital signal coding system developed to copy-protect the digital contents, such as video, music,
etc.
This helps to transmit the digital contents safely by coding the digital contents sent via the DVI or
HDMI connector on the output side and decoding them on the input side.
Any digital contents cannot be reproduced if both of the equipments on the output and input sides
are not applicable to HDCP system.
Phase
Phase means the sampling timing to convert the analog input signal to a digital signal. Phase
adjustment is made to adjust the timing. It is recommended that phase adjustment be made after
the clock is adjusted correctly.
Range Adjustment
Range adjustment controls the signal output levels to display every color gradation. It is
recommended that range adjustment be made before color adjustment.
Resolution
The LCD panel consists of numerous pixels of specied size, which are illuminated to form images.
This monitor consists of horizontal 1920 pixels and 1200 vertical pixels. At a resolution of 1920 ×
1200, all pixels are illuminated as a full screen (1:1).
Temperature
Color temperature is a method to measure the white color tone, generally indicated in degrees
Kelvin. The screen becomes reddish at a low temperature, and bluish at a high temperature, like
the ame temperature.
5000 K: Slightly reddish white
6500 K: White referred to as daylight-balanced color
9300 K: Slightly bluish white
VESA DPM (Video Electronics Standards Association - Display Power
Management)
VESA specications achieve increased energy efciency for computer monitors. This involves
standardization of signals sent from the computer (graphics board).
DPM denes the status of signals transmitted between the computer and monitor.
Other manuals for MX242W
1
Table of contents
Other Radiforce Monitor manuals

Radiforce
Radiforce RX350 User manual

Radiforce
Radiforce GS521-BL User manual

Radiforce
Radiforce mx210 User manual

Radiforce
Radiforce rx250 User manual

Radiforce
Radiforce RX350 User manual

Radiforce
Radiforce MX242W User manual

Radiforce
Radiforce RX440 User manual

Radiforce
Radiforce RS110 User manual

Radiforce
Radiforce rx250 User manual

Radiforce
Radiforce RX650 User manual