7 8 9 10 11 12
Limited Warranty
RadioSh ack warrants t his product aga inst defects in m aterials and
workma nship under nor mal use by the orig inal purchaser fo r ninety (90)
days afte r the date of purchase f rom a RadioShack-owned s tore or an
autho rized RadioShack fr anchisee or deal er. RADI OSHACK MAKES NO
OTHER EXP RESS WARRANTI ES.
This war ranty does not cover : (a) damag e or failure cause d by or attribut-
able to ab use, misuse, fail ure to follow instr uctions, imp roper install ation
or mainte nance, alterati on, accident, Ac ts of God (such as oo ds or light-
ning), or exces s voltage or cur rent; (b) improper or in correctly per formed
repairs by p ersons who are not a Rad ioShack Author ized Service Facili ty;
(c) consumabl es such as fuses or bat teries; (d) ordinar y wear and tear or
cosmetic da mage; (e) transpor tation, shi pping or insura nce costs; (f) cost s
of produc t removal, insta llation, set-up ser vice, adjustme nt or reinstall a-
tion; an d (g) claim s by persons other th an the origina l purchaser.
Shoul d a problem occur tha t is covered by this warra nty, take the produc t
and the Ra dioShack sales re ceipt as proof of purchas e date to any
RadioSh ack store in the U.S . RadioShack wil l, at its option , unless other-
wise provi ded by law: (a) repair the p roduct witho ut charge for part s and
labor; (b) rep lace the produc t with the same o r a comparable prod uct; or (c)
refund th e purchase price. A ll replaced par ts and produc ts, and produc ts
on which a ref und is made, becom e the propert y of RadioShack. N ew or
recondit ioned part s and product s may be used in the pe rformance of
warrant y service. Rep aired or replaced pa rts and prod ucts are warra nted
for the rema inder of the ori ginal warrant y period. You will b e charged for
repair or re placement of the p roduct made af ter the expirat ion of the
warrant y period.
RADI OSHACK EXPRESS LY DISCLA IMS ALL WARRANT IES AND CONDI-
TIONS N OT STATED IN TH IS LIMITED WARR ANTY. ANY IMPLIE D
WARRANT IES THAT MAY BE IMPOSED BY LAW, INCLUD ING THE IMPLI ED
WARRANT Y OF MERCHAN TABILIT Y AND, IF APPLICA BLE, THE IMPL IED
WARRANT Y OF FITNESS FO R A PARTICU LAR PURPOSE, SH ALL EXPIRE
ON THE E XPIRATION OF THE STATED WARRANT Y PERIOD.
EXCEPT AS D ESCRIBED ABOVE , RADIOSHACK SH ALL HAVE NO
LIABI LITY OR RESP ONSIBILIT Y TO THE PURCHASER O F THE PRODUCT
OR ANY OTHER P ERSON OR ENTIT Y WITH RESPECT TO ANY LIA BILITY,
LOSS OR DAMAGE CAUS ED DIRECTLY OR INDIRECTLY BY USE OR PER-
FORMAN CE OF THE PRODUCT O R ARISING OUT O F ANY BREACH OF
THIS WARR ANTY, INCLUDIN G, BUT NOT LIMIT ED TO, ANY DAM AGES
RESULTING FROM I NCONVENIEN CE AND ANY LOSS OF TIM E, DATA,
PROPERT Y, REVENU E, OR PROFIT AND A NY INDIRECT, SPECIAL,
INCID ENTAL, OR CON SEQUENTIAL DAMAGE S, EVEN IF RA DIOSHACK
HAS BEEN A DVISED OF THE POSSI BILITY OF S UCH DAMAGES.
Some st ates do not allow lim itations on how l ong an implied w arranty last s
or the exclu sion or limita tion of incident al or consequent ial damages, so
the above l imitations o r exclusions may not app ly to you. This war ranty
gives you sp ecic legal r ights, and you ma y also have other rig hts which
vary f rom state to state. You may cont act RadioShack a t:
RadioSh ack Customer Relat ions
300 Radi oShack Circle, For t Worth, TX 76102 04/08
www.RadioShack.com
IMPORTANTSAFETYINFORMATION
1. Rea d Instructi ons before operat ing the product .
2. Ret ain Instruc tions for future refe rence.
3. H eed all warnin gs.
4. Fol low all instru ctions.
5. V ENTILATION — Do not bl ock any ventilati on openings. For ex ample,
the app liance should n ot be situated on a bed , sofa, rug, or sim ilar
surf ace that may block t he ventilation o penings; or, placed in a b uilt-in
insta llation, such as a b ookcase or cabin et that may impede t he ow of
air throu gh the ventilat ion openings .
6. H EAT — Do not inst all near any heat s ources such as radiato rs, heat
register s, stoves, or other ap pliances that p roduce heat.
7. POW ER SOURCES — Use onl y the type of power s ource indicated o n
the lab el. If you are not sure of th e type of power supp ly to your home,
consult you r product deal er or local power com pany.
8. G ROUNDING OR PO LARIZATION — Th is product is equi pped with a
polarized a lternating-c urrent line plu g (a plug having one b lade wider
than th e other). This plug wi ll t into the power o utlet only one w ay.
Specifications
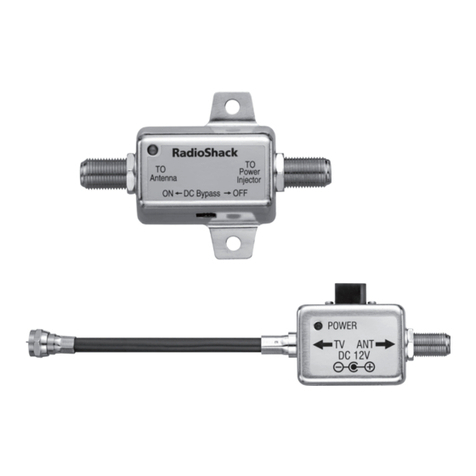
Power Adapter..................................................(Output) 12V DC, 20 0mA
Frequency ................................................................................... 54~806MHz
FM TRAP ...........................................................................>15dB at 100MHz
Gain .................................................................................. 15-33dB UHF/VHF
Noise Figu re ..............................................................................3.5dB typical
Speci cations are subje ct to change and imp rovement without n otice. Actual
product may v ary from the im ages found in thi s document.
FCC Information
This equ ipment has been te sted and found to com ply with the li mits
for a Class B di gital device, p ursuant to Part 15 of th e FCC Rules. These
limit s are designed to prov ide reasonable p rotection again st harmful
interf erence in a residenti al installat ion. This equi pment generate s, uses,
and can ra diate radio freq uency energy an d, if not instal led and used in
accordance w ith the instr uctions, may c ause harmful int erference to radi o
communi cations. Howeve r, there is no g uarantee that int erference wil l
not occur in a p articular i nstallatio n. If this equip ment does cause ha rmful
interf erence to radio or tel evision reception , which can be dete rmined by
turnin g the equipme nt o and on, the use r is encouraged to t ry to correct
the inter ference by one or mo re of the following m easures:
• Reorien t or relocate the rece iving antenna .
• Increase t he separation b etween the equi pment and receive r.
• Connec t the equipme nt into an outlet on a ci rcuit dierent from t hat
to which th e receiver is connec ted.
• Consult yo ur local RadioS hack store or an exper ienced radio/ TV
technic ian for help.
If you cann ot eliminate th e interference, t he FCC requires that you s top
using you r radio. Changes o r modicati ons not expressly app roved by the
part y responsible for com pliance could vo id the user’s aut hority to opera te
the equ ipment.
This devi ce complies wit h Part 15 of the FCC Rules. O peration is sub ject
to the foll owing two condi tions: (1) This device may not c ause harmful
interf erence, and (2) this dev ice must accept any inte rference receive d,
includ ing interfere nce that may cause un desired operat ion.
This is a safet y feature. If you are una ble to insert t he plug fully i nto
the out let, try reversi ng the plug. If yo u still are unab le to insert the
plug into t he outlet, cont act your elec trician to replac e your obsolete
outlet . Do not defeat the safet y purpose of the p olarized plug.
9. POW ER-CORD PROTECTION — Protect th e power cord from bein g
walked on o r pinched par ticularly at pl ugs, convenien ce receptacles,
and the p oint where they exi t from the apparat us.
10.
CLEAN ING — Unplug t his product from t he wall outlet b efore cleaning.
Do not liq uid cleaners or ae rosol cleaners. Cl ean only with d ry cloth.
11. ATTACHMENTS — Onl y use attachme nts specied by t he
manufacturer.
12. ACCESSORIES — Use on ly with the car t, stand, t ripod, bracket , or
table s pecied by the ma nufacturer o r sold with the pro duct. Only us e
accessori es specied by th e manufactu rer.
13.
POWER LIN ES — An outside an tenna system shou ld not be located in t he
vicini ty of overhead powe r lines or other ele ctric light o r power circuits ,
or where it c an fall into such pow er lines or circui ts. When inst alling an
outsi de antenna system , extreme care sho uld be taken to keep f rom
touchin g such power lines o r circuits as conta ct with them mi ght be fatal.
14. LIGHTNIN G — Unplug it from th e wall outlet an d disconnect th e
antenna o r cable system du ring lightni ng storms or when u nused for
long per iods of time.
15. OBJECT AND LIQ UID ENTRY — Never pus h objects or any k ind into
this prod uct through op enings as they may tou ch dangerous vol tage
point s or shortout pa rts that coul d result in a re or elec tric shock.
Never spi ll liquid of any kin d on the product .
16. CARTS AND STANDS — Exercis e caution when m oving any produc t
and car t combinatio n. Quick stops, exces sive force, and uneven
surf aces may cause the ap pliance and car t combinati on to overturn.
17. MOUN TING — The appl iance should be m ounted only as recom-
mended b y the manufac turer.
18. DAMAGE REQUIRIN G SERVICE — The app liance should b e serviced
by quali ed service p ersonnel when:
A. Th e power-suppl y cord or plug is damag ed.
B. Obj ects have fall en onto, or liquid h as been spilled i nto the product .
C. The ap pliance has been ex posed to rain.
Printed
in China
1500526
01A14
©2014 RadioShac k Corporati on.
All rig hts reserv ed. RadioSha ck is a registere d
trade mark used by Rad ioShack Corp oration.
Compl ies with the Eu ropean Unio n’s
“Rest riction of H azardous Subs tances
Direct ive,” which prote cts the
environ ment by restri cting spe cic
hazardou s materials a nd product s.
D. The appl iance has been drop ped; or the encl osure damaged.
E. Th e appliance doe s not appear to opera te normally or ex hibits a
marked cha nge in perfor mance.
F. The produ ct does not opera te normally by fol lowing the oper ating
instru ctions. Adj ust only those cont rols that are covered by the o per-
ating in struction s as an improper adj ustment of other con trols may
result in da mage and will of ten require exte nsive work by a quali ed
technic ian to restore the produ ct to its norma l operation.
19. SERVICING — Do n ot attempt to serv ice this product yo urself as
openin g or removing covers may e xpose you to dangero us voltage or
other haza rds. Refer all serv icing to quali ed service p ersonnel.
20. OVERLOADING — Do not over load wall outl ets and extensi on cords
as this ca n result in a risk of re or el ectric shock .
21. REPLACEMENT PARTS — Wh en replacement pa rts are require d, be
sure the se rvice technic ian has used replace ment parts sp ecied by
the man ufacturer or have t he same charac teristics as th e original
part . Unauthorized su bstitutions m ay result in re, elec tric shock or
other haza rds.
22. SAFETY CHECK — Up on completion of a ny service or repa irs to this
applia nce, ask the ser vice technician to p erform safet y checks to
determi ne that the appl iance is in proper o perating condi tion.
23. OUTDOOR ANT ENNA GROUNDI NG — If an outsid e antenna or cabl e
system is con nected to the app liance, be sure th e antenna or cabl e
system is gro unded so as to provid e some protection a gainst voltag e
Antenn a Lead In Wire
Antenn a Discharg e Unit
(NEC * Sect ion 810-20)
Ground ing Condu ctors
(NEC * Sect ion 810-21)
Ground C lamps
Power Ser vice Grou nding El ectrode Sys tem
(NEC * Art 250 Part H)
Elect ric Ser vice
Equipm ent
Ground C lamp
surges and b uilt-up static charg es. Section 810 of the Na tional Elect ri-
cal Code , ANSI/NFPA No. 70-1984, provides info rmation with res pect
to proper gro unding of the mas t and support ing struct ure grounding
of the lead-i n wire to an antenna dis charge unit, size of grou nding
conduc tors, location o f antenna-discharg e unit, connec tion to
groundi ng electrode s and requirement s for the groundi ng electrode.
See the gure below.
EXA MPLE OF ANTEN NA GROUNDIN G ACCORDING TO NATIONA L
ELECTRI CAL CODE INSTR UCTIONS CONTAIN ED IN ARTICLE 810 -
“RAD IO AND TELEV ISION EQUIPMEN T”
a Use No. 10 AWG (5.3 mm2) copper, No. 8 AWG (8.4 mm2) a luminum,
No.17 AWG (1.0 mm2) copp erclad steel or bronze wi re, or larger, as a
ground wi re.
b Se cure antenna lead-i n and ground wires to t he house with st and-o
insulato rs spaced from 4 - 6 feet (1.22 - 1.83 m) a part.
c Mount the ante nna discharge uni t as close as possibl e to where the
lead-in ente rs the house.
d Use a j umper wire not sma ller than No. 6 AWG (13.3 mm2) cop per, or
the equ ivalent, whe n a separate antenna- grounding ele ctrode is used.
See NEC Sec tion 810 - 21 (j).
1500526_UG_EN_012314.indd 7-12 1/23/2014 4:02:33 PM
