manuals.online logo
Brands
  1. Home
  2. •
  3. Brands
  4. •
  5. Radio Shack
  6. •
  7. Laptop
  8. •
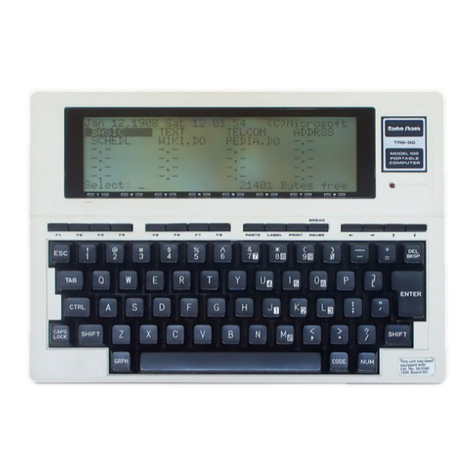
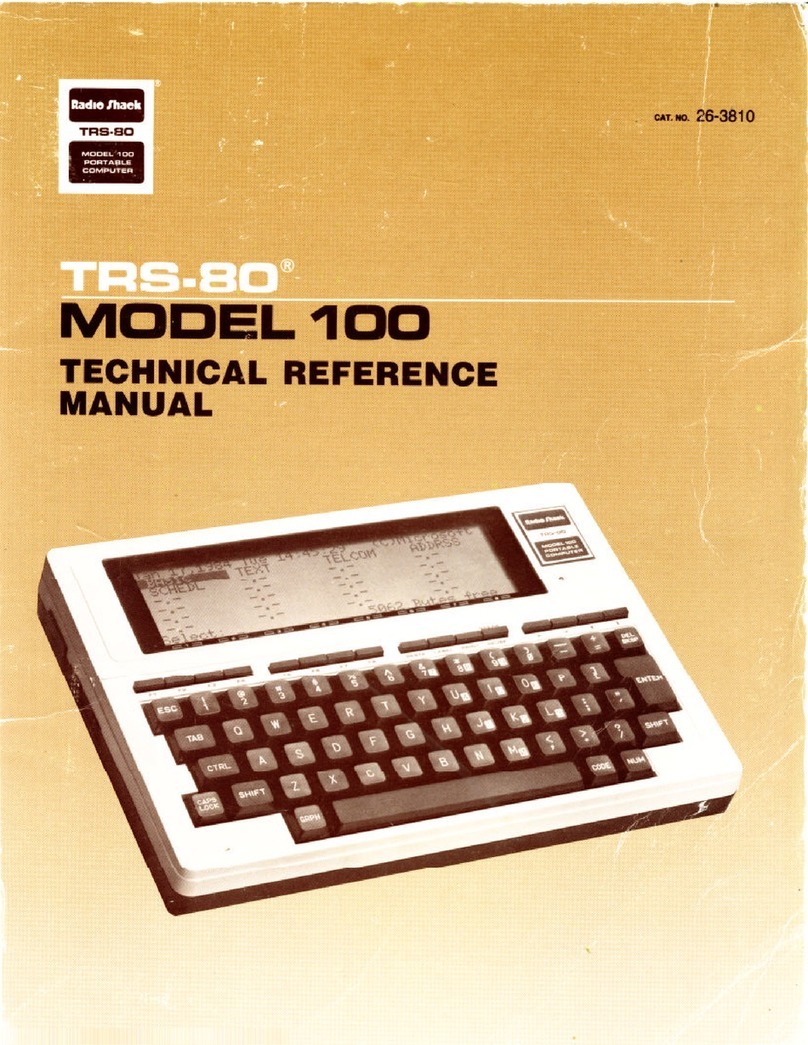
  9. Radio Shack TRS-80 Model 100 User manual

Radio Shack TRS-80 Model 100 User manual

.
MODEL
I
OO
PORTABLE
COMPUTER
Catalog
Numbers
26-3801/3802
CUSTOM
MANUFACTURED
FOR
RADIO
SHACK
H
A
DIVISION
OF
TANDY
CORPORATION
Radio
/hack
Service
Mmm
iD
26
-
3801/3802
TABLE
OF
CONTENTS
PAGE
NUMBER
I.
INTRODUCTION
GENERAL.
SPECIFICATIONS.
CONNECTORS,
SWITCHS
AND
CONTRAST
VR
II.
disassembly/reassembly
DISASSEMBLY.
REASSEMBLY
.
Ill
PREVENTIVE
MAINTENANCE
ADJUSTMENT
OF
THE
TRS-80
Model
100.
CLEANING
OF
THE
DOBY
AND
LCD
DISPLAY-
MODEM
TRANSMITTING
LEVEL
ADJUSTMENT
.
..
IV.
THEORY
OF
OPERATION
GENERAL.
CPU
(MSM80C85ARS)
.
MEMORY
.
ADDRESS
DECODING
AND
BANK
SELECTION
..
.
MEMORY
MAP.
I/O
MAP
AND
I/O
PORT
DESCRIPTION.
KEYBOARD
.
CASSETTE
INTERFACE
CIRCUIT
.
PRINTER
INTERFACE
CIRCUIT.
BARCODE
READER
INTERFACE
CIRCUIT.
BUZZER
CONTROL
CIRCUIT.
SYSTEM
BUS
.
LCD
INTERFACE
CIRCUIT.
CLOCK
CONTROL
CIRCUIT.
SERIAL
INTERFACE
CIRCUIT.
LIQUID
CRYSTAL
DISPLAY.
POWER
SUPPLY
AND
AUTO
POWER
OFF
CIRCUIT
RESET
CIRCUIT.
V.
TROUBLE
SHOOTING
HOW
TO
MAKE
USE
OF
THIS
SECTION.
TROUBLE
SHOOTING
GUIDE.
CHECK
LIST.
VI.
EXPLODED
VIEW
AND
PARTS
LIST
EXPLODED
VIEW.
PARTS
LIST
.
VII.
DIAGRAMS
SCHEMATIC
DIAGRAM.
P.C.B.
VIEW.
1-
3
1-
4
1
-
6
2
-
1
2
-
2
3-
1
3-
1
3-
1
4-
1
4-
2
4-
2
4-
3
4-
6
4-
7
4-
8
4-
9
4-10
4-11
4-11
4-12
4-13
4-15
4-17
4-26
.4-32
.4-34
5-
1
5-
2
5-12
6
-
1
6-
3
7-
1
7-
3
appendix
a/
installation
OF
OPTIONAL
RAMs
AND
ROM
appendix
b/character
code
table
.
APPENDIX
C/
LSI
DESCRIPTION
MSM80C85ARS
(CPU)
MSM81C55RS
(PIO)
.
C
'
1
IM6402
(UART)
C11
MPD1990AC
(TIMER)
...
.
015
MC14412
(MODEM)
..
C-19
TC5518BF-25
(RAM)
...
C
'
24
LH-535618
(ROM)
C-28
.
C-31
FIGURE
NUMBER
DESCRIPTION
PAGE
NUMBER
1-1
1-2
2-1
4-1
4-2
4-3
4-4
4-5
4-6
4-7
4-8
4-9
4-10
4-11
4-12
4-13
4-14
4-15
4-16
4-17
4-18
4-19
4-20
4-21
4-22
4-23
4-24
4-25
4-26
4-27
4-28
4-29
4-30
4-31
4-32
4-33
4-34
4-35
4-36
4-37
4-38
6-1
6-2
7-1
7-2
7-3
7-4
7-5
7-6
Front
View.
Keyboard
Layout.
Disassembly
Procedure.
System
Block
Diagram.
Internal
Wiring
Diagram
of
RAM
Pack
Address
Decoding
for
RAM
Chip.
Standard
and
Optional
ROM
Selection
....
Memory
Map.
I/O
Address
Decoder.
Condition
of
Pressing
“T"
Key.
Modulation
Circuit
of
Cassette
Interface
..
Demodulation
Circuit
of
Cassette
Interface
Remote
Circuit
of
Cassette
Interface.
Printer
Interface
Circuit.
Bar
Code
Reader
Interface
Circuit.
Buzzer
Control
Circuit.
LCD
Interface
Circuit.
LCD
Interface
Timing
Chart.
Data
Input
Condition
of
mPD1990AC
....
Time
Set
Condition
of
/uPD1990AC.
Time
Read
Condition
of
/iPD1990AC.
Data
Output
Condition
of
/iPD1990AC
Control
Register
Load
Condition
of
IM6402
Status
Read
Condition
of
IM6402
.
Data
Transmission
Condition
of
IM6402
.
..
Data
Reception
Condition
of
IM6402
.
MODEM/RS-232C
Exchange
Circuit.
RS-232C
Interface
Circuit.
MODEM
LSI
and
Peripheral
Circuit.
Transmission
Filter
Circuit.
Reception
Filter
and
Comparator
Circuit
...
MODEM
Connector
Interface
Circuit.
Construction
of
LCD
Panel
.
Operation
Theory
of
LCD
Panel.
LCD
Electrodes.
LCD
View
Angle
.
HD44103
Internal
Block
Diagram.
HD44102
Internal
Logic
Diagram
.
LCD
Waveform.
Power
Supply
and
Reset
Circuit.
Oscillation
Waveform.
Exploded
View.
Bottom
View.
MAIN
P.C.B.-Schematic
Diagram.
LCD
P.C.B.-Schematic
Diagram.
MAIN
P.C.B.
MAINP.C.B.
LCD
P.C.B.
.
.
.
.
!
.
!
.
LCD
P.C.B.
.
1
-
1
.
1
-
2
.
2-
1
.4-
1
.4-
3
.4-
4
.4-
5
.
4-
6
.
4-
7
.
4-
8
.
4-
9
.4-
9
.
4-10
.
4-10
.4-11
.
4-12
.4-13
.
4-14
.4-15
.4-16
.
4-16
.4-17
.4-18
.4-19
.
4-19
.
4-20
.4-21
.4-22
.4-23
,
4-24
4-24
4-25
4-26
4-27
4-28
4-28
4-29
4-30
4-31
4-33
4-33
6-
1
6
-
2
7-
1
7-
2
7-
3
7-
4
7-
5
7-
5
.
A-
1
A-1
C-1
C
9
80C85
Functional
Block
Diagram.
.
C-
1
.
C-
1
U‘4
.
C-
6
.
C-
8
0-4
.
C-
8
0-0
n
a
.
C-9
r
7
.
C-10
.
C-10
O-o
C-9
81C55
Pin
Configuration
and
Block
Diagram
...
.
C-11
.
C-13
O-1
u
.
C-14
o
-1
i
.
C-14
O-1
z
C-13
81C55
Timer
Output
Waveform
Countdown
from
5
to
1
.
.
C-15
.
C-15
O-
14
.
C-16
0-1
O
.
C-20
O*
ID
.
C-21
O-
1
/
C-18
C-19
A/PD1990AC
Command
Input
Timing
Diagram.
/iPDI
990AC
Data
Input/Output
Timing
Diagram.
.
C-22
.
C-23
.
C-26
O-ZU
.
C-26
.
C-26
.
C-27
w"Zo
TPRR1
RRF-9R
Pin
1
avnut
..
.
C-28
r
ok
.
C-29
U“Z
J
.
C-29
u'Zu
.
C-30
o-z
/
.
C-31
.
C-32
C-30
LH-53518
Timing
Diagram.
.
C-32
TABLE
NUMBER
DESCRIPTION
PAGE
NUMBER
I/O
Man
.
.4-
7
.4-8
4-Z
.4-12
.4-13
4-4
.4-21
4-0
.4-22
4-D
C-1
80C85
Interrupt
Priority,
Restart
Address
and
Sensitivity
.
.
C-
5
.
C-7
u-z
..
C-7
U-o
.
C-
8
0-4
.
C-15
v‘0
.
C-28
0-0
C-7
LH-535618
Pin
Assignment.
.
C-31
SECTION
I
INTRODUCTION
FRONT
VIEW
1-1
INTRODUCTION
GENERAL
This
manual
is
prepared
for
the
TRS-80
Model
100
technicians
working
in
field
or
in
repair
centers.
The
user
of
this
manual
should
be
acquainted
with
Z-80
and
80C85
(8085)
microprocessors
and
also
with
81C55
PIO
and
IM6402
UART
LSIs.
Detailed
technical
information
for
those
microprocessors
and
LSIs
is
provided
in
APPENDIX
C
of
this
manual.
This
manual
consists
of
seven
sections
and
three
appendices:
•
Section
I
This
section
gives
general
information
on
the
TRS-80
Model
100
such
as
specifications,
switch
functions
connectors
and
special
features.
•
Section
11
This
section
describes
the
disassembly
and
reassembly
procedures.
•
Section
III
This
section
describes
preventive
maintenance
and
adjustment
of
the
TRS-80
Model
100.
•
Section
IV
This
section
describes
general
theory
of
the
TRS-80
Model
100
operation,
including
operational
theory
of
main
P.C.
Board
assembly,
LCD
Board
assembly
and
keyboard
assembly.
•
Section
V
This
section
describes
how
to
troubleshoot
the
TRS-80
Model
100.
•
Section
VI
This
section
provides
a
part
list
and
an
exploded
view
of
the
TRS-80
Model
100.
•
Section
VII
This
section
provides
schematics,
P.C.
Board
diagrams
and
silk
screen
views
of
P.C.
Boards
of
the
TRS-80
Model
100.
•
Appendix
A
provides
instructions
for
installing
the
optional
ROM
and
additional
RAMs.
•
Appendix
B
provides
character
code
chart
of
the
Model
100.
•
Appendix
C
provides
technical
information
of
microprocessors
and
UART
LSIs.
The
Model
100,
a
portable
computer
that
fits
easily
into
a
regular
sized
briefcase,
has
many
special
features
and
functions
for
home
and
business
use.
Its
five
built-in
Application
Programs
offer
various
uses:
•
BASIC
BASIC
lets
you
write
and
run
your
own
programs.
Also,
BASIC
provides
various
mathematic
functions
(as
described
in
PART-1
II
of
owner's
manual).
•
TEXT
TEXT
Lets
you
create
new
files
containing
memos,
documents
or
text
of
any
kind.
•
ADDRSS
ADDRSS
lets
you
get
information
such
as
addresses
and
telephone
numbers
from
the
ADRS
file.
•
SCHEDL
SCHEDL
lets
you
get
information
concerning
appointments,
meetings,
etc.,
from
the
NOTE
file.
•
TELCOM
TELCOM
lets
you
use
the
TRS-80
Model
100
as
an
auto-dialer
or
for
computer-to-computer
communi¬
cations.
1-3
In
addition
to
Application
Programs,
you
can
connect
the
following
peripherals
to
the
Model
100:
•
Cassette
recorder
to
store
programs
or
data
on
cassette
tape.
•
Printer
to
print
copies
of
documents,
programs
or
data.
•
Bar
code
reader
to
identify
the
product
marking
codes
of
various
marchandises.
(Optional/extra
soft¬
ware
required.)
•
Communication
interface
to
transfer/receive
data
to/from
the
Model
100
and
another
computer
(Acous¬
tic
Coupler
or
Modem
Cable
required).
SPECIFICATIONS
(1)
Main
Components
(a)
Keyboard
71
keys
(9x8
matrix)
•
Alphabet
keys
.
•
Number
keys.
•
Picture-control
keys
.
•
Function
keys
.
•
Special
symbol
keys
.
•
Mode
keys
....
•
Other
special-use
keys
(b)
LCD
display
•
Display
panel.
27
10
7
8
8
5
6
240
x
64
Full-dot
matrix
(c)
(d)
(e)
1/32
Duty
1/6.66
Bias
•
Dot
pitch.0.8
x
0.8
mm
•
Dot
size
.
0.73
x
0.73
mm
•
Effective
display
area.191.2x50.4
mm
Operation
batteries
•
Batteries....
Four
type
AA
Alkaline-manganese
batteries
•
Operation
time.
Five
days
(At
four
hours/day)
Twenty
days
(At
one
hour/day)
(Note:
With
I/O
disconnected)
Memory
protection
battery
(On
main
P.C.B.)
•
Battery.
Rechargeable
battery
•
Protection
time
.About
40
days
(8
KB)
About
10
days
(32
KB)
•
Recharge
method.Trickle
charge
by
AC
adapter
or
operation
batteries
LSIs
•
CPU.80C85
Code
and
pin
compatible
with
8085
•
ROM
.Maximum
64
KB
(2
Banks
of
32
KB)
Standard
32
KB
Option
32
KB
1-4
•
RAM
.Maximum
32
KB
Standard
8
KB
RAM
PACK
Incremental
8
KB
RAM
pack
on
P.C.B.
•
Clock/Calender./iPD1990AC
No
leap
year/No
February
29
(f)
Dimensions.11-4/5"(L)
x
8-4/9"(D)
x
2"(H)
(g)
Weight
.3
lbs.
13.5oz.
(2)
I/O
Interface
(a)
R
S-232C
Conforms
to
El
A
Standard
Signal.
TXR
(Transmit
Data)
RXR
(Receive
Data)
RTS
(Request
to
Send)
CTS
(Clear
to
Send)
DSR
(Data
Set
Ready)
DTR
(Data
Terminal
Ready)
Communications
Protocol
•
Word
length.6,
7
or
8
bits
•
Parity.NON,
EVEN
or
ODD
•
Stop
Bit
Length.1
or
2
bits
.
Baud
Rate
.
75,
110,
300,
600,
1200,
2400,
4800,
9600,
19200
BPS
•
Maximum
Transmission
Distance
....
5
meters
•
Driver
maximum
voltage
output.±5
volts
•
Driver
minimum
voltage
output.±3.5
volts
•
Receiver
maximum
voltage
input
....
±18
volts
•
Receiver
minimum
voltage
input
....
±3
volts
(b)
M
odem/Coupler
Conforms
to
BE
LI
03
Standards
•
Baud
Rate
.
300
BPS
•
Programmable
Items
*
Data
length.6,
7
or
8
bits
*
Parity.NON,
EVEN
or
ODD
*
Stop
bit
.1
or
2
bits
•
Full
Duplex
.Answer
mode/Originate
mode,
Switchable
•
Other
functions.Hang-up
function
Auto
dialer
function
(c)
Audio
cassette
interface
•
Data
Rate.
1500
BPS
(MARK:
2400
Hz,
SPACE:
1200
Hz)
(d)
Printer
interface
Conforms
to
Centronics
Interface
Standards
•
Handshake
Signal.STROBE,
BUSY,
BUSY
1-5
(3)
Special
functions
Automatic
power
OFF
When
there
is
no
program
operation
(awaiting
command)
for
ten
minutes,
the
power
is
automatical¬
ly
cut
off.
To
start
again,
the
power
switch
must
be
switched
OFF
and
then
ON,
thus
releasing
the
automatic
power
OFF
condition.
(The
display
will
be
the
same
as
before
the
power
was
cut
off)
CONNECTORS,
SWITCHES
AND
CONTRAST
VR
(1)
Connectors
RS-232C.25
pins
(DB-25S)
Printer.26
pins
(FRC2-C26-L13-ON)
Modem.
8
pins
(TCS-4490)
Cassette.
8
pins
(TCS-4480)
Bar
Code
Reader
.
9
pins
(A-7224)
System
Bus.40
pins
(1C
socket)
AC
Adapter.5.5
mm
diameter
(center-minus)
(2)
Switches
(a)
P
OWER
Switch
Move
this
switch
towards
the
front
to
turn
the
power
ON.
To
conserve
the
batteries,
the
Model
100
automatically
turns
the
power
off
if
you
do
not
use
it
for
10
minutes.
When
an
automatic
power-off
occurs,
the
switch
will
still
be
in
the
ON
position
even
though
the
power
is
OFF.
To
turn
the
power
ON,
move
the
switch
to
the
OFF
position,
then
back
ON.
(b)
A
NS/ORIG
Selector
If
you
are
originating
a
phone
call
to
another
computer,
set
this
switch
to
ORIG.
If
another
computer
is
calling
your
Model
100,
set
to
ANS.
ANS
ORIG
(c)
D
IR/ACP
Selector
This
selector
allows
you
to
select
either
direct
or
acoustic
coupler
connection.
If
you
are
communicating
with
another
computer
over
the
phone
lines
via
the
built-in
Direct
Connect
Modem,
set
this
switch
to
DIR
position.
If
you
are
using
the
optional/extra
Model
100
Acoustic
Coupler
(26-3805),
set
this
selector
to
ACP
position.
DIR
ACP
1-6
(d)
M
EMORY
POWER
Switch
This
switch
is
for
preventing
discharge
of
the
Ni-Cad
battery
for
RAM
back-up.
The
Model
100
will
not
operate
regardless
of
the
setting
of
the
power
switch
unless
this
switch
is
ON.
Set
this
switch
to
OFF
position
if
the
Model
100
is
not
to
be
used
for
a
long
time.
Note
that
the
RAM
will
not
be
backed
up
when
this
switch
is
set
to
the
OFF
position.
ON
OFF
(e)
RESET
Switch
If
the
Model
100
"lock-up"
(ie.,
the
display
will
"freeze"
and
all
keys
seem
to
be
inoperative),
press
this
button
to
return
to
the
Main
Menu
(start-up)
screen.
It's
highly
unlikely
that
the
Model
100
will
lock-up
when
you
are
using
the
built-in
Application
Programs.
However,
this
situation
may
occur
with
customized
programs.
(f)
DISPLAY
ADJUSTMENT
DIAL
This
control
is
for
adjusting
the
contrast
of
the
LCD
display
relative
to
the
viewing
angle.
1-7
SECTION
II
DISASSEMBLY/REASSEMBLY
DISASSEMBLY
/
REASSEMBLY
DISASSEMBLY
CASE:
(1)
Disconnect
the
cables
from
the
unit.
Taking
care
not
to
scratch
any
key
top,
turn
the
unit
over
and
remove
the
four
screws
®
from
the
upper
and
lower
cases.
(2)
Remove
the
upper
case;
it
opens
to
the
right
side.
Note
that
the
upper
and
lower
cases
are
secured
by
snaps.
Also,
do
not
apply
too
much
force
when
pulling
open;
the
LCD
and
keyboard
connectors
are
attached.
(3)
Remove
the
LCD
and
key
board
connectors
from
the
main
P.C.B.
(4)
Remove
the
buzzer
connector
from
LCD
P.C.B.
K/B
P.C.B.:
(1)
Remove
the
five
screws
©
and
then
remove
the
K/B
P.C.B.
and
K/B
supports.
LCD
P.C.B.:
(1)
Remove
the
four
screws
©
and
then
remove
the
LCD
P.C.B.
MAIN
P.C.B.:
(1)
Remove
the
seven
screws
©.
*
(2)
Remove
the
MAIN
P.C.B.
upward,
taking
care
when
removing
the
RESET
switch
and
battery
contact
spring.
REASSEMBLY
MAIN
P.C.B.:
(1)
Align
the
screw
positions
of
the
lower
case
with
the
MAIN
P.C.B..
Gently
insert
the
MAIN
P.C.B.
from
the
rear
and
place
the
reset
switch
knob
in
the
proper
notch.
(2)
Secure
the
battery
contact
spring.
(3)
Attach
the
MAIN
P.C.B.
to
the
lower
case
by
using
the
seven
M3
x
8
screws.
LCD
P.C.B.:
(1)
Attach
the
LCD
P.C.B.
to
the
upper
case
by
using
the
four
M3
x
3
screws.
(2)
Insert
the
buzzer
connector
in
the
LCD
P.C.B.
K/B
P.C.B.:
(1)
Align
the
two
K/B
supports
with
the
holes
in
the
P.C.B.
and
attach
them
so
that
they
fit
to
the
P.C.B.
edge.
(2)
Align
the
K/B
supports
and
K/B
P.C.B.
holes
with
the
upper
case
screws.
(3)
Attach
the
K/B
supports
and
K/B
P.C.B.
to
the
upper
case
by
using
the
five
M3
x
8
screws.
CASE:
(1)
Position
the
upper
case
to
the
risght
side
of
the
lower
case,
taking
care
not
to
scratch
the
key
top.
(2)
Attach
the
LCD
and
K/B
connectors
to
the
MAIN
P.C.B.
(3)
Place
the
upper
case
over
the
lower
case,
taking
care
that
the
cable
is
not
pulled
out
of
place.
(4)
Align
the
upper
and
lower
cases
so
that
the
tabs
fit
well.
(5)
Turn
the
cases
over,
and
secure
them
together
by
using
the
four
M3
x
8
screws.
2-2
SECTION
III
PREVENTIVE
MAINTENANCE
PREVENTIVE
MAINTENANCE
ADJUSTMENT
OF
THE
TRS-80
Model
100
The
TRS-80
Model
100
is
completely
aligned
and
adjusted
at
the
factory
during
production.
Therefore
no
electrical
adjustments
will
be
required.
CLEANING
OF
THE
BODY
AND
LCD
DISPLAY
(1)
To
avoid
operational
trouble,
keep
the
TRS-80
Model
100
clean
always.
(2)
To
clean
the
body
and
LCD,
use
soft,
dry,
lint-free
cloth.
(3)
For
tough
stains,
clean
the
body
or
LCD
using
benzol.
Do
not
use
any
other
solvents
except
for
benzol.
MODEM
TRANSMITTING
LEVEL
ADJUSTMENT
(1)
Set
the
DIR/ACP
switch
to
DIR
position.
(2)
Connect
a
600
Ohm
dummy
Load
between
Pin-1
(RXMD)
and
Pin-7
(TXMD)
of
the
MODEM
CON¬
NECTOR
(CN4).
(3)
Connect
a
AC
Voltmeter
between
RXMD
and
TXMD.
(4)
Set
the
TRS-80
MODEL
100
in
BASIC
mode
and
enter
following
commands
to
generate
carrier.
OUT
178,
47
(ENTER)
OUT
168,
02
(ENTER)
(5)
Adjust
VR2
so
as
to
read
—14
to
—17
dBm
on
the
AC
Voltmeter
both
for
ANS/ORIG
modes.
3-1
SECTION
IV
THEORY
OF
OPERATION
Fig.
4-1
System
Block
Diagram
GENERAL
The
TRS-80
Model
100
has
three
principal
LSIs:
•
80C85
CPU
This
is
the
Central
Processing
Unit
which
control
all
functions.
•
81C55PIO
This
is
the
Parallel
Input/Output
interface
controller
which
controls
the
parallel
printer,
key
board,
buzzer,
clock
and
LCD.
•
IM6402
UART
This
is
the
Universal
Asyncronous
Receiver
Transmitter
which
controls
the
serial
interface
(RS-232C
or
MODEM).
The
Input/Output
for
a
cassette
recorder
and
the
Input
of
the
BCR
are
controlled
by
CPU
directly
through
its
SOD,
SID
and
RST
5.5
terminals.
ROM
and
RAMs
are
connected
to
the
system
bus.
ROM
is
available
only
for
alternative
selection
of
Stan¬
dard
or
Optional.
NOTE:
On
the
figure
in
this
section,
the
solid
line
shows
high-level
active
line
and
the
broken
line
shows
low-level
active
line.
4-1

Other manuals for TRS-80 Model 100

5

This manual suits for next models

2

Other Radio Shack Laptop manuals

Radio Shack 60-2632 User manual

Radio Shack

Radio Shack 60-2632 User manual

Radio Shack TRS-80 User manual

Radio Shack

Radio Shack TRS-80 User manual

Radio Shack TRS-80 Model 100 Product manual

Radio Shack

Radio Shack TRS-80 Model 100 Product manual

Radio Shack TRS-80 Model 100 User manual

Radio Shack

Radio Shack TRS-80 Model 100 User manual

Radio Shack TRS-80 Model 100 User manual

Radio Shack

Radio Shack TRS-80 Model 100 User manual

Radio Shack Tandy 200 Product manual

Radio Shack

Radio Shack Tandy 200 Product manual

Radio Shack TANDY 102 User manual

Radio Shack

Radio Shack TANDY 102 User manual

Radio Shack TRS-80 4P Gate Array Reference manual

Radio Shack

Radio Shack TRS-80 4P Gate Array Reference manual

Radio Shack 60-2642 User manual

Radio Shack

Radio Shack 60-2642 User manual
Popular Laptop manuals by other brands

MSI Modern 15 A11SBL-456IT user guide

MSI

MSI Modern 15 A11SBL-456IT user guide

Fujitsu LifeBook T4210 Bios guide

Fujitsu

Fujitsu LifeBook T4210 Bios guide

Sony VAIO PCG-R505TS Specifications

Sony

Sony VAIO PCG-R505TS Specifications

Samsung NP-R439E user guide

Samsung

Samsung NP-R439E user guide

Toshiba A30-C quick start

Toshiba

Toshiba A30-C quick start

Toshiba L505D-S5994 Specifications

Toshiba

Toshiba L505D-S5994 Specifications

Sony VGN-S550P Safety information

Sony

Sony VGN-S550P Safety information

Sony VGNNW226F/B - VAIO NW Series 15.5" Widescreen... Safety information

Sony

Sony VGNNW226F/B - VAIO NW Series 15.5" Widescreen... Safety information

Dell Dimension 5100 owner's manual

Dell

Dell Dimension 5100 owner's manual

Clevo C5100Q Service manual

Clevo

Clevo C5100Q Service manual

Sony VAIO VGN-SZ150P/C Specifications

Sony

Sony VAIO VGN-SZ150P/C Specifications

Toshiba L505-S6946 Specifications

Toshiba

Toshiba L505-S6946 Specifications

Dell Latitude 2110 Setup & features

Dell

Dell Latitude 2110 Setup & features

Dell Inspiron 15 3537 Specifications

Dell

Dell Inspiron 15 3537 Specifications

Toshiba Satellite 1800 SERIES Replacement guide

Toshiba

Toshiba Satellite 1800 SERIES Replacement guide

Toshiba A135S4527 - Satellite - Pentium Dual Core 1.73... Specifications

Toshiba

Toshiba A135S4527 - Satellite - Pentium Dual Core 1.73... Specifications

LG 15Z970 Easy guide

LG

LG 15Z970 Easy guide

Sony Vaio PCG-GRT100 Series Setting-up guide

Sony

Sony Vaio PCG-GRT100 Series Setting-up guide

manuals.online logo
manuals.online logoBrands
  • About & Mission
  • Contact us
  • Privacy Policy
  • Terms and Conditions

Copyright 2025 Manuals.Online. All Rights Reserved.