Radio Shack SSM-60 User manual

Owner’s Manual
Please read before using this equipment.
SSM-60 Stereo Sound Mixer
with Tone Controls
32-1214.fm Page 1 Friday, March 10, 2000 1:39 PM

2Features
ˆ
Features
Your RadioShack Stereo Sound Mixer is
a sophisticated control center, perfect
for mixing sound from up to seven audio
input sources (such as a microphone,
tuners, CD players, turntables, or the
audio outputs from VCRs or camcord-
ers). It is ruggedly constructed for home
or professional use. Its wide-range vol-
ume controls let you adjust sound levels
to achieve the right mix for playing
through your speaker system or for re-
cording. The mixer's many features give
you almost limitless sound combina-
tions. Its features include:
Stereo Line Inputs — let you connect
most high-level audio sources such as a
CD player, tape deck, tuner, a VCR's or
camcorder's audio, and up to two mag-
netic cartridge turntables.
Low-Noise Tape Out Jack — give you
high-quality tape recording.
Slide Volume Controls — give you fin-
gertip control of sound mixing and fad-
ing.
Fader Control — lets you quickly and
smoothly switch between two playing in-
put sources, such as a turntable and a
microphone.
Monitor Control — lets you monitor the
line inputs using headphones so you
can adjust them before mixing them in.
Multiple Microphone Jacks with Ste-
reo/Mono Switch — let you connect
three microphones at the same time, in-
cluding one for a DJ (disc jockey), and
select stereo or mono input for each
one.
Bass/Treble Boost Controls — let you
adjust the bass and treble of the primary
microphone (MIC 1) to improve the DJ's
sound.
To get the best performance from your
stereo sound mixer, please read this
manual fully and carefully before you
connect it to other audio components.
WARNING: To reduce the risk of fire or
shock hazard, do not expose this product to rain
or moisture.
CAUTION
RISK OF ELECTRIC SHOCK.
DO NOT OPEN.
CAUTION: TO REDUCE THE RISK OF
ELECTRIC SHOCK, DO NOT REMOVE
COVER OR BACK. NO USER-SERVICE-
ABLE PARTS INSIDE. REFER SERVICING
TO QUALIFIED PERSONNEL.
This symbol is intended to alert
you to the presence of uninsu-
lated dangerous voltage within
the product’s enclosure that might
be of sufficient magnitude to con-
stitute a risk of electric shock. Do
not open the product’s case.
This symbol is intended to inform
you that important operating and
maintenance instructions are
included in the literature accom-
panying this product.
!
!
©2000 Tandy Corporation.
All Rights Reserved.
RadioShack and RadioShack.com are trademarks used by Tandy Corporation.
32-1214.fm Page 2 Friday, March 10, 2000 1:39 PM
3Preparation
ˆ
Preparation
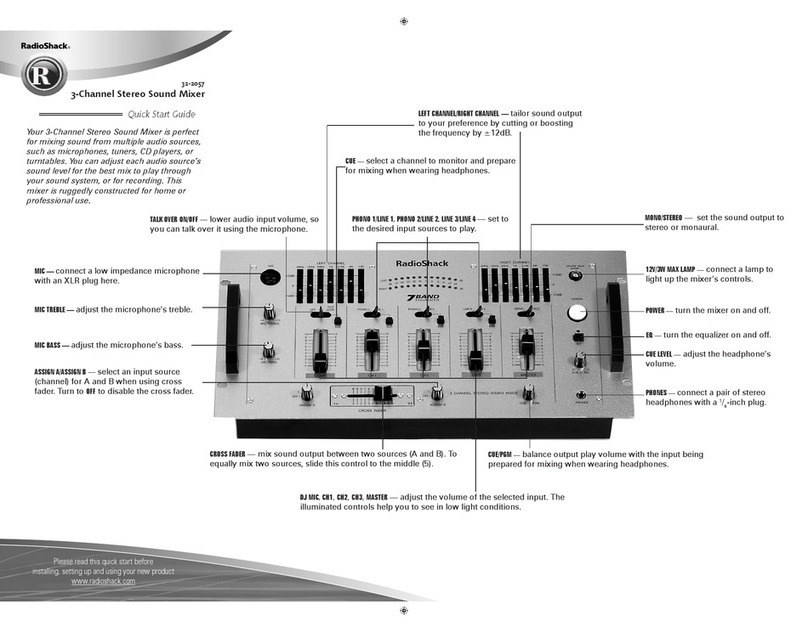
PRESETTING THE
CONTROLS
Warning: A sudden high output from the
mixer could damage the audio devices
connected to the mixer's output and
your hearing, especially if you use head-
phones.
To avoid accidentally overdriving a
channel or prematurely mixing in an au-
dio input, adjust the mixer's controls to
these settings before you connect the
AC power cord or turn on power.
Control Setting
POWER ON/OFF OFF
TONE CONTROL:
BASS and TREBLE 0
MONO/STEREO STEREO
MIC, SOURCE 1, SOURCE 2,
SOURCE 3, SOURCE 4 0
CROSS FADER Center
MONITORING:
SOURCE
Volume LEVEL MIC
0
32-1214.fm Page 3 Friday, March 10, 2000 1:39 PM

4Preparation
CONNECTING THE
OUTPUTS
To avoid sudden and unusable sound
outputs from the audio devices, adjust
the audio devices' controls to these set-
tings before you connect the mixer's out-
put jacks to the audio devices' input
jacks.
To play the mixer's output signal through
your speaker system (for events such as
parties, dances, and conferences), con-
nect an audio patch cord (not supplied)
from the mixer's OUTPUT R and Ljacks
to your receiver/amplifier's left and right
auxiliary input jacks.
To record the mixer's output signal, con-
nect an audio patch cord (not supplied)
from the mixer's REC R and Ljacks to
your tape deck's left and right input
jacks.
Note: Your local RadioShack store car-
ries a wide variety of cords and cables.
CONNECTING THE
INPUTS
To mix up to seven audio input sources
(such as a microphone, tuner, tape
deck, CD player, magnetic-cartridge
turntable, camcorder, or VCR), connect
them to the input jacks, one on the front
panel and six on the back of the mixer.
Only four inputs can be mixed at the
same time.
Caution: Do not connect an audio
source with a high-level output into the
low-level MIC, MIC 1, MIC 2, PHONO 1, or
PHONO 2 audio input jacks. An audio
source's output is high-level if you can
raise or lower its volume with its volume
control.
1. Connect a microphone (not sup-
plied) with a 1/4-inch plug into MIC on
the top left corner of the front panel.
This is the DJ's microphone.
2. Connect up to two low-level output
audio sources (such as two addi-
tional stereo microphones, not sup-
plied) with a 1/4inch plug to MIC 1
and MIC 2 on the back of the mixer.
These are the performance micro-
phones.
Note: Your local RadioShack store
carries a wide selection of micro-
phones.
3. Connect up to two low-level output
audio sources (such as magnetic-
cartridge turntables) to PHONO 1
and
PHONO 2.
Notes:
• If you connect magnetic-cartridge
turntables, connect their ground
wires (usually black or green) to
GND.
• You can connect any audio
source's low-level output to either
PHONO 1 or PHONO 2.
4. Connect up to two high-level output
audio sources (such as a tuner, cas-
Audio
Device Control Setting
Tape Deck Power OFF
Amplifier/
Receivers Power
Tone OFF
FLAT
32-1214.fm Page 4 Friday, March 10, 2000 1:39 PM

5Operation
sette tape deck, CD player, cam-
corder, or VCR) to VIDEO/CD 1 and
LINE/CD 2.
Note: You can connect any high-
level output audio source to either
VIDEO/CD 1 and LINE/CD 2.
5. Power the mixer using the supplied
18V, 300-mA AC adapter.
Cautions:
You must use a Class 2
power source that sup-
plies 18V AC and deliv-
ers at least 300 mA. Its center tip
must be set to negative and its
plug must fit the mixer's AC 18V
jack. The supplied adapter meets
these specifications. Using an
adapter that does not meet these
specifications could damage the
mixer or the adapter.
• Always connect the AC adapter to
the mixer before you connect it to
AC power. When you finish, dis-
connect the adapter from AC
power before you disconnect it
from the mixer.
Connect the small end of the sup-
plied AC adapter to AC 18V on the
back of the mixer and connect the
other end to a standard AC outlet.
ˆ
Operation
USING HEADPHONES
To listen in privacy or monitor the audio
source inputs so you can locate an ex-
act passage or section before mixing it,
plug a pair of stereo headphones (not
supplied) with a 1/4-inch plug into
PHONES on the mixer's lower right front
corner. Your local RadioShack store
carries a wide selection of headphones.
Listening Safely
To protect your hearing, follow these
guidelines when you use headphones.
• Set the volume to the lowest setting
before you begin listening. After you
begin listening, adjust the volume to
a comfortable level.
• Do not listen at extremely high vol-
ume levels. Extended high-volume
listening can lead to permanent
hearing loss.
• Once you set the volume, do not
increase it. Over time, your ears
adapt to the volume level, so a vol-
ume level that does not cause dis-
comfort might still damage your
hearing.
Caution: As you begin to mix, be careful
not to get into the habit of always in-
creasing volume levels to achieve the
proper balance. You can bring high lev-
els down just as easily as you can bring
low levels up. Listening at excessive vol-
ume levels will soon give you “tired ears”
and you will not be as pleased with your
finished product later.
!
32-1214.fm Page 5 Friday, March 10, 2000 1:39 PM

6Operation
USING THE CONTROLS
Turning on the Mixer
1. Set POWER ON/OFF to ON to turn on
the mixer's power. The meters’ light
turns on.
Note: To avoid a possible popping
sound, always turn on the mixer
before you turn on the amplifier.
2. Turn on the output amplifier and
temporarily set its volume to the
minimum setting.
3. To monitor the audio input sources
so you can decide when to mix in
each input, see “Monitoring the
Inputs.”
To mix the audio input sources so you
can play them through your amplifier
system or record them on your tape
deck, see “Mixing the Inputs.”
Monitoring the Inputs
You can monitor the audio input sources
so you can decide when to mix in each
input.
Follow these steps to monitor the audio
input sources.
1. Set POWER ON/OFF to ON to turn on
the mixer's power. The meters’ light
turns on.
2. Turn on the output amplifier and
temporarily set its volume to the
minimum setting.
3. Put on the headphones.
4. Set MONITORING SOURCE to the
audio input source (MIC, 1, 2, 3or 4)
you want to monitor.
5. Set the desired audio input source's
volume to its minimum setting, turn
it on, and set it to play (or continu-
ously talk into the microphone).
6. Slowly turn MONITORING LEVEL
until you hear the signal through the
headphones at the desired volume
level.
7. Repeat Steps 4–6 to select and
adjust the volume level of the other
audio input sources, one at a time.
Mixing the Inputs
Follow these steps to mix the audio in-
put sources.
1. Set POWER ON/OFF to ON to turn on
the mixer's power. The meters’ light
turns on.
2. Turn on the output amplifier and
temporarily set its volume to the
minimum setting.
3. Set the selected audio input
source's volume to its minimum set-
ting, turn it on, and set it to play (or
continuously talk into the micro-
phone).
32-1214.fm Page 6 Friday, March 10, 2000 1:39 PM

7Operation
4. Set these controls as desired.
5. Set the corresponding MIC, SOURCE
1, SOURCE 2, SOURCE 3, or SOURCE
4volume level control to between 8
and 10.
6. When adding an audio input source,
adjust the corresponding volume
level control so you get a reading of
about 0on both output level meters.
Note: The output level meters indi-
cate the combined output signal
level of:
• All the input sources being mixed.
• Both the left and right stereo
channel outputs.
7. Adjust the output amplifier's volume
level control to the desired volume.
8. When finished mixing, turn off all the
audio input sources.
9. To turn off the mixer, set POWER ON/
OFF to OFF. The meters’ light turns
off.
Using the Cross Fader
When two channels are playing at the
same time, slide CROSS FADER:
• to the left to fade in SOURCE 1 (or 3)
and fade out SOURCE 2 (or 4)
• to the center to mix the SOURCE 2
(or 4) and SOURCE 1 (or 3) levels
equally
• to the right to fade in SOURCE 2 (or
4) and fade out SOURCE 1 (or 3)
Note: This lets you quickly and smoothly
change from playing SOURCE 1 (or 3) to
playing SOURCE 2 (or 4).
Using the Tone Controls
You can tailor the microphone's high-
and low-frequency sounds processed
through the mixer to fit the acoustic sur-
roundings and your personal taste using
the BASS and TREBLE TONE CON-
TROLS.
To enhance the sounds, rotate BASS or
TREBLE toward +12dB. To reduce them,
rotate BASS or TREBLE towards –12dB.
To resume normal sound, set them to 0.
Control Setting Audio
Source
PHONO 1/
MIC 1 PHONO 1 To mix the
micro-
phone con-
nected to
the PHONO
1input jack.
MIC1 To mix the
turntable
connected
to the MIC 1
input jack.
PHONO 2/
MIC 2 PHONO 2 To mix the
micro-
phone con-
nected to
the PHONO
2input jack.
MIC 2 To mix the
audio
source con-
nected to
the MIC 2
input jack.
32-1214.fm Page 7 Friday, March 10, 2000 1:39 PM

8Troubleshooting
Using MONO/STEREO
When you set MONO/STEREO to MONO,
the mixer combines the left and right
channels then sends the signals to the
OUTPUT R and Ljacks. The combined
output signals can be used by a monau-
ral amplifier, such as a PA amplifier.
When you set MONO/STEREO to STE-
REO, the mixer keeps the left and right
stereo channels separated, then sends
the signals to the OUTPUT R or Ljacks.
The stereo output signals can be used
by a stereo amplifier or tape deck.
ˆ
Troubleshooting
Your mixer should require very little maintenance. If you have problems, refer to this
chart for possible solutions. If you cannot solve the problem, contact your local Ra-
dioShack store for assistance.
Problem Solution
Nothing works. Check the AC power connection. Make sure the AC outlet is “live.”
Check the power connections to the rest of the system (such as the
amplifier or receiver).
No signal from an
audio input source. Check the control setting.
Check the connections between the mixer and the input source.
Hum from PHONO. Connect the turntable's ground wire (usually black or green) to the
GND screw on the back of the mixer.
Hum from other
inputs. Make sure there are no low-level inputs connected to CD 1 or CD 2.
Feedback “squeals.” Move the microphone further away from the output speakers or use
a directional microphone.
32-1214.fm Page 8 Friday, March 10, 2000 1:39 PM

9Care and Maintenance
ˆ
Care and Maintenance
Your RadioShack Stereo Sound Mixer is an example of superior design and crafts-
manship. The following suggestions will help you care for your mixer so you can en-
joy it for years.
Keep the mixer dry. If it gets wet, wipe it dry immediately. Liquids might
contain minerals that can corrode the electronic circuits.
Use and store the mixer only in normal temperature environments. Tem-
perature extremes can shorten the life of electronic devices and distort or
melt plastic parts.
Keep the mixer away from dust and dirt, which can cause premature wear
of parts.
Handle the mixer gently and carefully. Dropping it can damage circuit
boards and cases and can cause the mixer to work improperly.
Wipe the mixer with a damp cloth occasionally to keep it looking new. Do
not use harsh chemicals, cleaning solvents, or strong detergents to clean
the mixer.
Modifying or tampering with the mixer’s internal components can cause a malfunction
and might invalidate its warranty. If your mixer is not performing as it should, take it to
your local RadioShack store for assistance.
32-1214.fm Page 9 Friday, March 10, 2000 1:39 PM

10 Specifications
ˆ
Specifications
Input Sensitivity/Impedance:
MIC (DJ) ................................................................................................... 3 mV, 600 Ohms
MIC 1, 2 ................................................................................................... 3 mV, 600 Ohms
PHONO 1, 2 .............................................................................................. 3 mV, 50 kohms
CD 1, 2 .................................................................................................. 150 mV, 50 kohms
VIDEO ................................................................................................... 150 mV, 50 kohms
LINE ...................................................................................................... 150 mV, 50 kohms
Output Level:
MASTER .......................................................................................................... Rated: 1.5V
Maximum: 6V
RECORD ...................................................................................................... Rated: 0.775V
Maximum: 5V
S/N Ratio:
MIC ........................................................................................................................... 60 dB
PHONO ..................................................................................................................... 70 dB
CD, LINE, VIDEO ...................................................................................................... 75 dB
Distortion:
MIC .................................................................................................... 0.5% @ 3 mV/1 kHz
PHONO .............................................................................................. 0.2% @ 3 mV/1 kHz
CD, LINE, VIDEO ......................................................................... 0.02% @ 150 mV/1 kHz
Tone Control:
Treble ...................................................................................................................... 100 Hz
Bass ......................................................................................................................... 10 kHz
Boost/Cut Range ..................................................................................................... ±12 dB
AC Adapter:
Input .......................................................................................................... 120 V AC 60 Hz
Output ...................................................................................................... 18 V AC 300 mA
Dimensions (HWD) .................................................................................. 11/2×143/8×8 Inches
(38 ×365 ×203 mm)
Weight .......................................................................................................................... 4 lb 6 oz
(2 kg)
Specifications are typical; individual units might vary. Specifications are subject to change and
improvement without notice.
32-1214.fm Page 10 Friday, March 10, 2000 1:39 PM

11Notes
ˆ
Notes
32-1214.fm Page 11 Friday, March 10, 2000 1:39 PM

32-1214
03A00
Printed in Taiwan
RadioShack
A Division of Tandy Corporation
Fort Worth, Texas 76102
Limited One-Year Warranty
This product is warranted by RadioShack against manufacturing defects in material and workman-
ship under normal use for one (1) year from the date of purchase from RadioShack company-owned
stores and authorized RadioShack franchisees and dealers. EXCEPT AS PROVIDED HEREIN, Ra-
dioShack MAKES NO EXPRESS WARRANTIES AND ANY IMPLIED WARRANTIES, INCLUDING
THOSE OF MERCHANTABILITY AND FITNESS FOR A PARTICULAR PURPOSE, ARE LIMITED
IN DURATION TO THE DURATION OF THE WRITTEN LIMITED WARRANTIES CONTAINED
HEREIN. EXCEPT AS PROVIDED HEREIN, RadioShack SHALL HAVE NO LIABILITY OR RE-
SPONSIBILITY TO CUSTOMER OR ANY OTHER PERSON OR ENTITY WITH RESPECT TO ANY
LIABILITY, LOSS OR DAMAGE CAUSED DIRECTLY OR INDIRECTLY BY USE OR PERFOR-
MANCE OF THE PRODUCT OR ARISING OUT OF ANY BREACH OF THIS WARRANTY, IN-
CLUDING, BUT NOT LIMITED TO, ANY DAMAGES RESULTING FROM INCONVENIENCE, LOSS
OF TIME, DATA, PROPERTY, REVENUE, OR PROFIT OR ANY INDIRECT, SPECIAL, INCIDEN-
TAL, OR CONSEQUENTIAL DAMAGES, EVEN IF RadioShack HAS BEEN ADVISED OF THE
POSSIBILITY OF SUCH DAMAGES.
Some states do not allow limitations on how long an implied warranty lasts or the exclusion or limita-
tion of incidental or consequential damages, so the above limitations or exclusions may not apply to
you.
In the event of a product defect during the warranty period, take the product and the RadioShack
sales receipt as proof of purchase date to any RadioShack store. RadioShack will, at its option, un-
less otherwise provided by law: (a) correct the defect by product repair without charge for parts and
labor; (b) replace the product with one of the same or similar design; or (c) refund the purchase
price. All replaced parts and products, and products on which a refund is made, become the prop-
erty of RadioShack. New or reconditioned parts and products may be used in the performance of
warranty service. Repaired or replaced parts and products are warranted for the remainder of the
original warranty period. You will be charged for repair or replacement of the product made after the
expiration of the warranty period.
This warranty does not cover: (a) damage or failure caused by or attributable to acts of God, abuse,
accident, misuse, improper or abnormal usage, failure to follow instructions, improper installation or
maintenance, alteration, lightning or other incidence of excess voltage or current; (b) any repairs
other than those provided by a RadioShack Authorized Service Facility; (c) consumables such as
fuses or batteries; (d) cosmetic damage; (e) transportation, shipping or insurance costs; or (f) costs
of product removal, installation, set-up service adjustment or reinstallation.
This warranty gives you specific legal rights, and you may also have other rights which vary from
state to state.
RadioShack Customer Relations, 200 Taylor Street, 6th Floor, Fort Worth, TX 76102
We Service What We Sell
12/99
32-1214.fm Page 12 Friday, March 10, 2000 1:39 PM
This manual suits for next models
1
Table of contents
Other Radio Shack Music Mixer manuals

Radio Shack
Radio Shack 32-2057 User manual

Radio Shack
Radio Shack 32-2058 User manual

Radio Shack
Radio Shack SSM-1750 User manual

Radio Shack
Radio Shack 3-Channel Headphone Volume Booster User manual

Radio Shack
Radio Shack 32-2057 User manual

Radio Shack
Radio Shack 32-3001 User manual

Radio Shack
Radio Shack 3-Channel Headphone Volume Booster User manual

Radio Shack
Radio Shack 32-2058 User manual

Radio Shack
Radio Shack 32-1218 User manual

Radio Shack
Radio Shack 4-CHANNEL STEREO SSM-1750 User manual