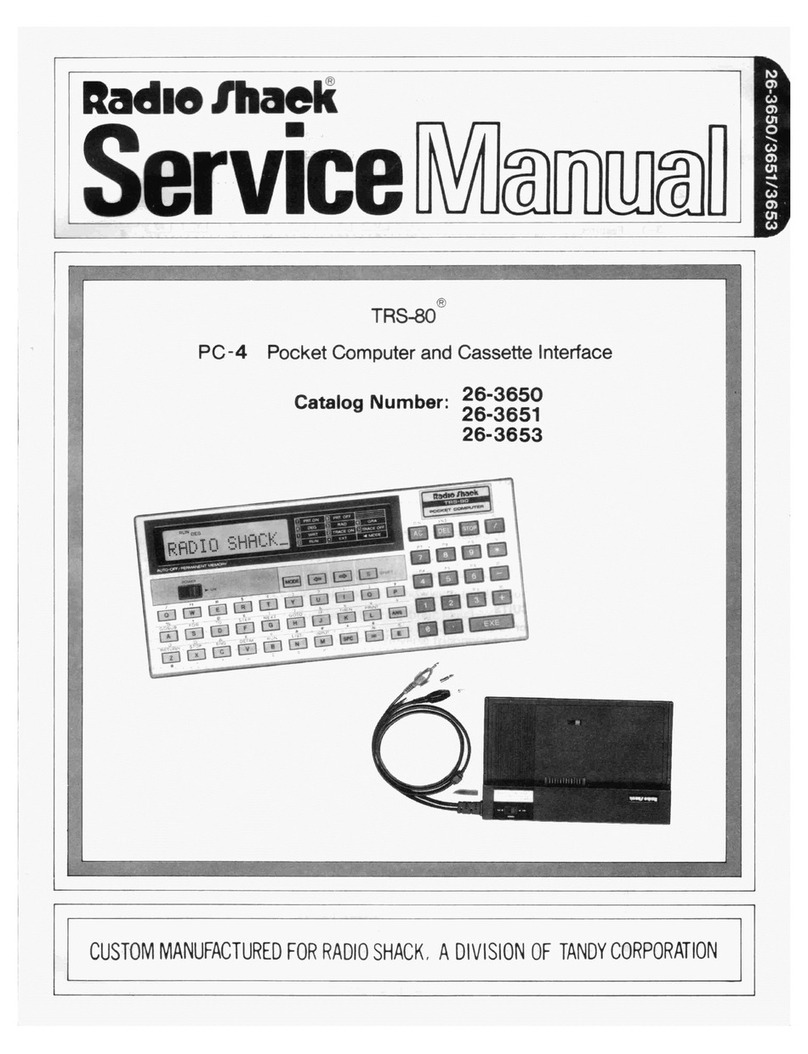
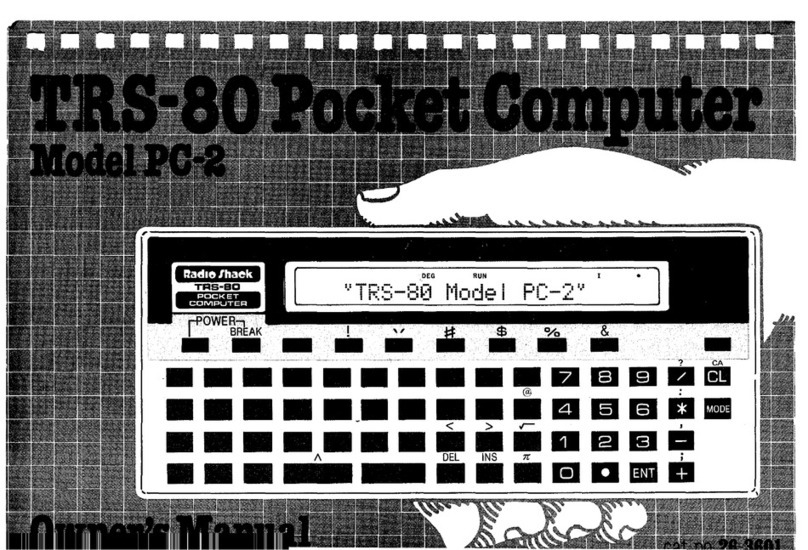
Radio Shack PC-2 TRS-80 User manual

CUSTOM MANUFACTURED FOR RADIO SHACK
ADIVISION OF TANDY CORPORATION
RADIO SHACK, ADIVISION
OF
TANDY CORPORATION
U.SA
FORT WORTH, TEXAS
76102
CANADA: BARRIE, ONTARIO
L4M
4W5
AUSTRALIA
<)1
KURRAJONG
ROAD
MOUNT
DRUITT
N S W
2170
3A3
TANDY
CORPORATION
BELGIUM
PAHC INDUSTHIEL
DE
NANINNE
5140
NANINNE
U K
BllSTON
HOAD
WEDNESBUHY
WEST MIDLANDS WSI 0
7JN
PRI~,rFD
IN
JAPAN

TERMS
AND
CONDITIONS
OF
SALE
AND
LICENSE
OF
RADIO
SHACK
COMPUTER
EOUIPMENT
AND
SO>TWARE
PURCHASED
FROM
A
RADIO
SHACK
COMPANY-OWNED
COMPUILR
CENTER
RETAIL
STORE
Oil
FROM
A
RADIO
SHACK
FRANCHISEE
OR
DEALER
AT
ITS
AUTHORIZED
LOCATION
LIMITED
WARRANTY
CUSTOMER
OBLIGATIONS
A
CUSTOMER
assumes
tull
responslbrlity
thaI
thiS
Radio
Shack
computer
hardware
purchased
(trle
EqUipmenl)
and
any
copies
01
Radio
Shack
software
Included
with
the
Equipment
or
licensed
separately
(Ir,e
·Software")
meets
the
sPecltlC3110ns.
capacity.
capabilities
versatility
and
other
requirements
of
CUSTOMER
CUSTOMER
assumes
full
responsloility
for
the
condition
aM
eflectlveness
01
the
opera.ling
envlronmenl
In
which
the
EqUipment
and
Sottware
are
10
function.
and
for
Its
installation
11_
RADIO
SHACK
LIMITED
WARRANTIES
AND
CONDITIONS
OF
SALE
A
For
a
penod
of
nmety
(90)
calendar
days
from
tM
date
althe
RadiO
Shack
sales
document
received
upon
Qurchase
01
!tIe
EqUipmenl
RADIO
SHACK
warrants
to
the
original
CUSTOMER
that
the
EQUIpmenl
and
the
medium
upon
whlcn
the
Software
IS
stored
IS
free
from
manufactUring
detects
THIS
WARRANTY
IS
ONLY
APPLICABLE
TO
PURCHASES
OF
RADIO
SHACK
EQUIPMENT
BY
THE
ORIGINAL
CUSTOMER
mOM
RADIO
SHACK
COMPANY-OWNED
COMPUTER
CENTERS
RETAIL
STDllES
AND
FROM
RADIO
SHACK
FRANCHISEES
AND
DEALERS
AT
ITS
AUTHORIZED
LOCATION
The
warranty
is
VOid
II
the
EQulpments
case
or
cabinet
has
been
opened
or
If
the
EqUipment
or
Software
nas
been
sublected
10
Improper
or
abnormal
use
If
a
rnanulacturmg
defect
is
discovered
during
Ine
stated
warranty
period.
the
defeClIve
EqUipment
must
be
returrled
to
a
RadiO
Shack
Computer
Center,
a
RadiO
Snack
relail
STOre.
participating
RadiO
Shack
franchisee
or
RadiO
Shack
dealer
for
repa'r
along
With
a
copy
of
the
sales
document
or
lease
agreement
The
original
CUSTOMER'S
sole
and
exclUSive
remedy
In
the
event
of
a
delect
IS
limited
to
the
correction
of
n1e
defect
by
repair
replacement
or
relund
of
the
purchase
price,
al
RADIO
SHACK
S
election
and
sale
expense
RADIO
SHACK
has
no
obligation
to
replace
or
repall'
expendable
Items
RADIO
SHACK
makes
no
warranty
as
to
Ihe
deSign
capabiliTY
capaCity
or
su!tability
for
use
ot
tne
SofTware
except
as
pr'ovided
In
thiS
paragraph
Software,
is
licensed
on
an
AS
IS"
baSIS
withoui
warranty
The
original
CUSTOMER'S
exclUSive
rernedy
In
Ihe
eveni
01
a
Software
manufacturing
defecl
IS
ItS
repair
or
replacement
Within
thirty
130)
calendar
days
of
tne
dale
of
the
RadiO
Snack
sales
document
received
upon
license
01
the
Software
The
defective
Sof1ware
shall
be
returned
to
a
RadiO
Shack
Computer
Center
a
Radio
Shack
retatl
store
panlClpallng
RadiO
ShaCK
franchisee
or
RadiO
SnacK
dealer
along
wlih
ttle
sales
documenl
Except
as
proVided
herein
noemCloyee
agent
Iranchlsee,
dealer
or
other
person
Isauthorll€(ltugive,wywarrantresofany na!ureon
behalf
01
RADIO
SHACK
Except
as
proVided
herein
RADIO
SHACK
MAKES
NO
WARRANTIES,
INCLUDING
WARRANTIES
OF
MERCHANTABILITY
OR
FITNESS
FOR
A
PARTICULAR
PURPOSE
Some
states
do
not
allow
limitations
on
hOw
long
an
Implied
warranty
lasts
so
the
above
Ilrnltatlon(sl
may
not
apply
to
CUSTOME8
III.
L1MITATI3N
OF
LIABILITY
A
EXCEPT
AS
PROVIDED
HEREIN
RADIO
SHACK
SHALL
HAVE
NO
LIABILITY
OR
RESPONSIBILITY
TO
CUSTOMER
Of'
ANY
OTHER
PERSON
DR
ENTITY
WITH
IlESPECT
TO
ANY
LIABILITY,
LOSS
OR
DAMAGE
CAUSED
DR
ALLEGED
TO
BE
CAUSED
DIRECTLY
DR
INDIRECTLY
BY
'EOUIPMENT"
ORSO>TWARE'
SOLD,
LEASED,
LICENSED
DR
FURNISHED
BY
RADIO
SHACK
INCLUDING,
BUT
NOT
LIMITED
TO,
ANY
INTERRUPTION
OF
SERVICE,
LOSS
OF
BUSINESS
OR
ANTICIPATORY
PROFITS
OR
CONSEQUENTIAL
DAMAGES
RESULTING
FROM
THE
USE
DR
OPERATION
OF
THE
'EQUIPMENT'
ORSO>TWARE
IN
NO
EVENT
SHALL
RADIO
SHACK
BE
LIABLE
FOR
LOSS
OF
PROFITS,
DR
ANY
INDIRECT
SPECIAL,
OR
CONSEQUENTIAL
DAMAGES
ARISING
OUT
OF
ANY
BREACH
OF
THIS
WARRANTY
OR
IN
ANY
'AANNER
ARISING
OUT
OF
OR
CONNECTED
WITH
THE
SALE
LEASE,
LICENSE,
USE
OR
ANTICIPATED
USE
OF
THE
'EQUIPMENT'
OR
'SO,IWARE
NOTWITHSTANDING
THE
ABOVE
LIMITATIONS
AND
WARRANTIES,
RADIO
SHACK
S
LIABILITY
HEREUNDER
FOR
DAMAGES
INCURRED
BY
CUSTQMER
OR
OTHERS
SHALL
NOT
EXCEED
THE
AMOUNT
PAID
BY
CUSTOMER
FDR
THE
PARTICULAR
EOUIPMENT
DR
SOFTWARE'
INVOLVED
RADIO
SHACK
silall
not
De
liable
jor
any
damages
call
sed
by
delay
In
dellverrng
or
lurnlsiwlg
EqUipment
and
or
Software
No
action
ariSing
out
of
any
claimed
breact1
ot
thiS
Warranty
or
trail5acllDns
under
thiS
Warranty
may
be
brought
more
than
two
m
years
after
the
cause
of
acllOn
has
accrued
or
more
than
lour
!41
years
after
the
dale
of
the
RacIlO
Shack
sales
document
for
the
EqUipment
or
Software
whichever
[rrst
occurs
Some
slates
do
n01
allOW
the
IImlta1lOn
or
e~cluslon
at
InCidental
0'
consequential
damaQes
so
the
above
Ilmlta1l0n(s)
or
excluslOn(S)
may
not
apply
10
CUSTOMER
IV,
RADIO
SHACK
SOFTWARE
LICENSE
RADIO
SHACK
grants
to
CUSTOMER
a
nQn·e~cILJslve
paid-up
license
to
use
the
RADIO
SHACK
Software
un
one
computer
sublecT
to
Ihe
follOWing
prDvlslons
A
Except
as
otherWise
proIJlded
In
thiS
Software
License,
applicable
cooynght
laws
51"',all
aoply
to
the
Software
B
Tille
to
the
medium
on
which
the
Software
IS
recorded
(cassette
and
or
diskette)
or
S10rea
(ROMIIS
transferred
10
CUSTOMER,
bul
not
title
10
the
Software
CUSTOMER
may
use
Software
on
one
hOst
compuTer
and
access
that
Software
through
one
or
more
terminals
II
the
Software
permits
thiS
function
CUSTOMER
shall
not
use,
make.
manufacture
or
reproduce
caples
of
Software
except
for
use
on
one
computer
and
as
IS
speCifically
proVided
In
thiS
Software
License
Customer
is
expreSSly
prohibited
from
disassembling
Ihe
Software
CUSTOMER
IS
permrned
to
make
addlllOnal
copies
of
the
Software
only
for
baCkup
or
archival
purposes
or
II
adOillonal
copies
are
reqUired
in
the
operation
of
one
computer
With
the
Software
bUl
only
10
the
extenl
file
Software
allows
3
backup
copy
to
be
made
However
tor
TRSDOS
Software.
CUSTOMER
IS
permitted
to
make
a
Ilmlled
number
of
additional
copies
for
CUSTOMER'S
own
use
CUSTOMER
may
resell
or
distribute
unmodified
copies
of
the
Software
proIJlded
CUSTOMER
~laS
purchased
one
copy
of
the
Software
lor
eactl
one
sold
or
distributed
The
prOVISions
01
this
Software
License
shall
alSD
be
applicable
to
third
parties
receiving
copies
01
the
Software
from
CUSTOMER
All
copytlghf
nollces
shall
be
retained
on
all
copies
Of
the
Sottware
V_
APPLICABILITY
OF
WARRANTY
A
The
terms
and
conditIOns
01
thiS
Warranty
are
applicable
as
between
RADIO
SHACK
and
CUSTOMER
to
either
a
sale
01
the
EQUipment
and
or
Software
License
to
CUSTOMER
or
10
a
transaction
Whereby
RADIO
SHACK
sells
or
conveys
such
EQUipment
to
a
third
party
lor
lease
to
CUSTOMER
The
Ilmllations
01
liability
and
Warranty
prOVISions
herem
shall
mure
to
the
beneflr
of
RADIO
SHACK
the
author
owner
and
or
licensor
of
the
Software
and
any
manutacturer
of
the
EqUipment
sold
by
RADIO
SHACK
VI.
STATE
LAW
RIGHTS
The
warranties
granted
herein
give
the
original
CUSTOMER
SOCCI/IC
legal
rights.
and
the
original
CUSTOMER
may
nave
other
rights
which
vary
from
state
to
state
4

SERVICE POLICY
Radio Shacl(s nationwide network of service faalitles provides qUick. convenIent.
and reliable repair services for all of
Its
computer products.
In
most Instances
Warranty service will be performed
In
accordance
With
RadiO
Shack's Limited
Warranty. Non-warranty service will be provided
at
reasonable parts and labor
costs.
Because of the sensitivity of computer equipment. and the problems which can
result from improper servICing. the followmg limitations also apply to the services
offered by Radio Shack
If
any of the warranty seals on any Radio Shack computerproducts are broken.
Radio Shack reserves the right to refuse to service the eqUipment or to
VOid
any
remaining warranty on the equipment.
2.
If
any Radio Shack computer equipment has been modified so that
it
IS
not
within manufacturer's specifications. Including. but not limited
to,
the Installation
of any non-Radio Shackparts. components, or replacement boards. then
RadiO
Shack reserves the right to refuse to service the equipment.
VOid
any remaining
warranty. remove and replace any non-RadiO Shack part found
In
the
eqUiP-
ment. and perform whatever modifications are necessary to return the
eqUiP-
ment to original factory manufacturer's specificationS.
3.
The cost for the labor and parts reqUired to retum the Radio Shack computer
equipment to onginal manufacturer's specifications
Will
be charged to the
customer
In
addition to the normal repair charge
»»
0)
CJ1
-!'>
W
!'J
~
3"
n
't:l 't:l
---
---
---
---
---
---
....
't:l 't:l
en
--l
(")
C
en
0
i3
0
'" '"
't:l
'"
Q)
!!!.
'"
'"
::J
::J
'"
n
....
--l
....
V> Cl.
::s
Cl. Cl. n::T
'"
C:J
::J
~.
nC
..."
::J
Q)
'"
»
<0
::J
....
n
r+
x x ::J
....
en
....
<0
....
CD
nn3't:l
o'
co
»
Q) Q)
Cl.
::::r
C:
....
::s
---
---
....
-
::J
(")
'"
0::J
o'
:s:
't:l
r+
3"
Q)
"'tl
"'tl
::J
mr::J
Q)
-
i3
(")
....
fit
....
Q)
V>
..."
::J
"'tl N::T 0
i3
::J
0
....
i3
<0
'"
..."
<0
3
'"
....
"'tl
....
....
C::J
<0
Q)
::0 ::T
(")
Q) Q) Q)
....
3
en
(")
'"
0
<0
....
::J
Q)
NN
Cl.
'"
0n33
"'tl
'"
::J
'"
3w::0
(")
V> ::0 ::J
!'J
en
N
'"
3'
<0
(")
..."
N
'"
<0
(")
3"
::0
....
(")
0w
en
'"
3
....
!'J
N
::J
0
'"
(")
n33
....
w
'"
..."
3
Q) Q)
3"
!'J
en
::J
n
....
(")
c
Q)
Cl.
'"
'"
3
::J
V>
....
3"
Cl.
..."
3
Q)
....
V> n
'"
Q)
'"
....
..."
-<
Q)
n
:0
~
CJ1
CJ1
~ ~
-!'>
W
co
O)!'J
~
~
CJ1
w
!'J
Introduction
Congratulations
on
selecting
the
PC-2 RS-232C Interface.
This
unit
allows
your
PC-2 (26-3601)
to
communicate
with
other
computers
and
computer
equipment
via an
RS-232C
channel.
With this Interface,
you
can
connect
the
PC-2
to
and
establish
data
communications
with:
•
Computers
that
have RS-232C capabilities
•Modems
and
Acoustic Couplers
•Printers
or
plotters
equipped
with Serial Interfaces
This manual will:
•Describe
the
RS-232C Interface.
•
Show
how
to
connect
the
RS·232C
Interface
to
your
PC-2.
•Provide
you
with BASIC
and
Terminal
commands
that
let
you
do
your
own
programming.
2
1/
Description of the
PC-2
RS-232C Interface
Before doing
anything,
be sure
the
following accessories
are
included
in
the
package:
RS-232 Interface
Two
Metal
Support
Brackets
Two
Long Screws
to
attach
the
Metal
Support
Bracket
to
the
Printer/Plotter/Dual
Cassette Interface
AC Power
Supply
Adapter
Printer/Plotter/Dual
Cassette
Interface
Choke
Cord
(For
U.S.A.
only)
r----';-
Power
ON/OFF
Switch
L
__
-~
Figure 1. PC-2 RS-232C
Interface
and
Accessories.
(1) Power
ON/OFF
Switch
To
turn
the
Interface's
power
on,
set
this
switch
to
the
ON position.
Set
to
OFF
to
turn
the
power
off.
3

(2) RS-232C
Connector
Connect
one
end
of
an appro-
priate RS-232C cable
to
th
is
connector.
Connect
the
other
end
of
the
cable
to
the
device with which
you
wish
to
communication.
(3)
PC
Interface
Connector
Plug this
connector
into
the
connector
on
the
left side
of
the
PC-2
or
on
the
rear
panel
of
the
PC-2
Printer/Plotter/Dual
Cassette Inter-
face.
(4) AC
Adapter
To use an external
power
supply
or
to
recharge, plug
the
AC
Adapter
into
the
Interface
Power
Supply
Jack.
(See recharging instructions
before
attempting
to
use
the
PC-2 RS-232C Inter-
face.)
(5) Choke Cable. (U.S.A.
only)
Plug this cable
into
the
Printer/Plotter/Dual
Cassette Interface's External
Power
Supply
Jack.
(6) Metal
Support
Bracket
A.
Protects
the
connection
between
the
PC-2
and
the
PC-2 RS-232C Interface.
(7)
Printer/Plotter/Dual
Cassette Interface Metal
Support
Bracket
B.
Protects
the
connection
between
the
Printer/Plotter/Dual
Cassette Interface
and
the
PC-2
RS-232C Interface. Requires
two
screws
for
attach-
ment
(included
in
the
package).
4
2/
Setting-Up the
PC-2
RS-232C
Interface
The PC-2 RS-232C Interface can be used with
or
without
a
Printer/Plotter/Dual
Cassette Interface.
For
this reason,
there
are
two
sets
of
diagrams which illustrate
how
to
set-up
the
system.
Be
sure
to
turn
all
equipment
OFF
before
attempting
to
connect
the
PC-2 RS-232C Interface.
Connecting the PC-2 to the RS-232C Interface
If
you
are using
the
PC-2
without
a
Printer/Plotter/Dual
Cassette Interface, follow these steps:
1. Slide Metal
Support
Bracket A
into
the
slots located on
the
base
of
the
PC-2 (Figure 2).
Bracket A
Figure 2. Connecting Metal Support Bracket A
to the PC-2.
2. Remove
the
Interface Covers from
both
the
PC-2
and
the
RS-232C Interface. Locate
the
notch
on
the
underside
of
the
PC-2 and slide it
into
the
tab
of
Metal
Support
Bracket A.
5

3. Slide
the
RS-232C Interface
onto
Metal
Support
Bracket Aso
that
the
RS-232C 60-Pin
connectors
are
connected.
(See Figure
3.)
Bracket B
'ii!----~
Long Screws
Figure
3.
Connecting the
PC-2
to
the RS-232C
Interface.
4.
If
you
are using
the
AC
Adapter,
plug it
into
the
PC-2
RS-232C Power
Supply
Jack.
Connecting
the
PC-2 Printer/Plotter/Dual Cassette
Interface
to
the
PC-2 RS-232C Interface
1.
At
the
bottom
of
the
PC-2
Printer/Plotter/Dual
Cas-
sette
Interface, remove screws A
and
B.
Position Metal
Support
Bracket Bso
that
the
Interface
cI
ips
to
the
slot
of
the
bracket.
To
secure
the
metal
bracket,
use
the
long screws included with
the
package. (See Figure
4.)
6
Figure 4. Connecting Metal
Support
Bracket B
to
the
PC-2 Printer/Plotter/Dual Cassette Interface.
2. Slide
the
RS-232C Interface
onto
Metal
Support
Bracket Bso
that
the
Interface's male 60-Pin Plug con-
nects with
the
Printer/Plotter/Dual
Interface's female
60-Pin Plug. (See Figure 5.)
RS-232C
connector
Figure
5.
RS·232C Interface
to
Printer/Plotter/Dual
Cassette Interface.
7

3.
Connect
one
end
of
the
RS-232C Cable
to
the
PC-2's
RS-232C
Connector
and
the
other
end
to
the
device
with which
you
are
communicating.
If
you
are
not
able
to
determine
which cable
you
will
need
to
connect
with a
particular
peripheral,
contact
your
nearest Radio
Shack
Computer
Center
for
advice.
4.
(For
U.S.A.
only)
If
you
are using an
external
power
supply
for
Printer/Plotter/Dual
Cassette Interface,
plug
the
Choke
Cable
into
the
external
power
supply
connector
of
the
Printer/Plotter/Dual
Cassette Inter-
face. (See Figure 6.)
Powering-Up the
PC-2
RS-232C Interface
The
PC-2 RS-232C Interface has abuilt-in rechargeable
battery
pack
available
as
a
power
source. Also,
the
PC-2
RS-232C Interface can also be
connected
directly
to
an
AC
Outlet
via
the
AC
Adapter
included with
the
package.
1.
Be
sure
the
power
switch
of
the Interface
is
OFF.
2.
Connect
the
plug
of
the
adapter
(included with this
package)
to
the
Interface
power
supply jack.
3. Plug
the
Adapter
into
awall
outlet.
When
you
receive
the
RS-232C Interface,
the
battery
pack
is
not
"charged"
up. Charge
the
batteries before using
the
unit.
When
the
battery
pack
weakens
and needs
to
be recharg-
ed,
the
Computer
will tell
you
so by displaying
one
of
these
messages:
The
charging
time
will be
about
15
hours.
How
to
connect
the
AC
adapter
and
the
connecting
cable.
PC-2
AC
adapter
~"--
1"CC>l\o0l-n_n-,"t;02:~
=-
,~OOJ
printer/Plott~r/
~
~~
Dual Cassette J
-1
1
~
Interface
Connecting
~
AC
adapter
cable
((
~
-
"-
Figure 6. Using
the
AC
Adapter
with
the
Printer/Plotter/
Dual Cassette Interface.
Connecting the Assembled Interface
to
aCom-
munication Device
To
connect
the
RS-232C Interface
to
a
communication
device (i.e., a
modem
or
another
TRS-80),
you
will need
an DB-25 cable such
as
the
Model
III
RS-232C Cable
(26-1408). (If
you
use
the
PC-2
to
communicate
with
another
TRS·80,
you'll
also need aNull Modem
Adapter,
26-1494).
For
connection
to
aserial
printer,
use
the
PC·2 Serial
Printer cable (26-1327).
89

Message: Meaning:
:CHECK 8Check
the
RS-232C Interface
for
proper
connection
or
possible
recharging.
NEW0?
Check
the
system
for
proper
con-
nection
or
possible recharging.
:CHECK
68
RS-232C
and
Printer/Plotter/
Dual Cassette
Interface
battery
packs are low.
ERROR
5(,1
Low
power
during
BASIC pro-
gramming.
LOW
BATTERY
Low
power
during
Terminal
Mode
operation.
Table 1
When
one
of
the
above messages
is
displayed, recharge
the
battery
pack.
Using AC Power
To
use
the
RS-232C Interface with
AC
power,
connect
the
Adapter
(See
"Powering-up
the
PC-2 RS-232C Inter-
face")
and
turn
the
power
on.
Once
connected
to
the
PC-2
and
powered
up,
the
power
to
the
RS-232C Interface can be
controlled
by
the
Computer.
•
After
turning
the
RS-232C's
power
ON,
turn
the
PC-2
ON.
(:
CHECK 8will be displayed if
you
don't
follow
this
order.)
Power
is
then
supplied
to
the
unit.
•When
you
turn
the
PC-2
off,
the
RS-232C
power
is
also
turned
OFF.
•When
not
using
the
RS-232C Interface,
set
the
unit's
power
switch
to
OFF.
10
3/
Using
the
PC-2
RS-232C
Interface
The
RS-232C Interface has its
own
set
of
commands
and
functions
("software")
which
control
data
communica-
tions
with
other
devices. However,
the
execution
of
commands
and
functions
will
not
be successful unless
"hardware"
is
properly
configured.
Specifically, this
means
that
the
input
signals:
•CTS (Clear
To
Send)
•CD (Carrier Detect)
•DSR (Data
Set
Ready)
must
all be
"ready."
•Use
the
INSTAT
command
(described later)
to
check
the
status
of
these
signals.
•Use
the
output
signals
commands
RTS and DTR
to
tell
the
status
of
Interface
to
the
other
device, are
OFF
at
initial
power
on.
(See OUTSTAT.)
Important
Note:
The
PC-2
must
always be
connected
to
the
Interface
when
programming
with
the
RS-232C
commands
and
functions.
Also,
the
Interface
must
be
connected
to
the
PC-2
when
you
list
or
execute
such
programs;
otherwise,
an
error
message
or
-(tilde) will
be
displayed.
The
RS-232C Interface provides
extensions
to
PC-2
BASIC as well as a
smart
terminal program
in
ROM.
These new
commands
fall
into
four
general categories:
•
Control
statements
for
the
RS-232C
hardware.
This
group
allows
you
to
configure
the
RS-232C
hardware
and
built-in terminal
software
for
communication
with
various devices.
11

•
Enhancements
to
BASIC
not
related
to
communica-
tions.
These
commands
are
not
directly
related
to
communications
functions
but
they
do
add
power
and
flexibility
to
the
existing
PC-2 BASIC language.
•
Enhancements
to
BASIC
related
to
communications.
This
group
of
commands
allows BASIC
to
interact
with
external
devices, utilizing
the
RS-232
communica-
tions
hardware.
•
Terminal
Mode
Commands.
These
commands
allow
you
to
configure
and
control
the
machine-language
smart
Terminal
Program.
In
this
section,
we'll
describe
all
of
the
BASIC Mode
commands
first.
These
will be listed in
alphabetical
order
for
your
convenience.
Control and Status Commands
Control
and
status
commands
provide
control
over various
RS-232C
protocols
and
configurations.
All are imple-
mented
as
new
BASIC
commands.
Since
the
RS-232C
Interface
lets
you
control
many
types
of
input
and
output
devices, we'll use
the
following
abbreviations
when
referring
to
them.
See
Table
2.
KI
--
Keyboard
Input
DO
--
Display
Output
(LCD)
PO
--
Printer
Output
CI
--
Cassette
Input
CO
--
Cassette
Output
Table
2
12
CLOADa
Load an ASCII
Format
Program
from
RS-232C
CLOADa
CLOAOa
reads an ASCII
format
program
from
the
RS-
232C.
This
means:
•Each line
must
start
with
aline
number.
•Each line
is
ended
with
acarriage
return
(DOH).
•
Maximum
length
of
line
is
160
characters,
including
line
number
and
the
carriage
return.
•Leading
blanks
(after
acarriage
return
and
before
a
line
number)
are ignored.
•File
is
ended
with
anull line (carriage
return
only).
•
After
compression,
a
maximum
of
80
bytes
are
allowed.
CLOAOa
functions
only
when
the
cassette
input
is
routed
from
the
RS-232C.
Except
for
its
characteristic
of
read-
ing
the
program
in
ASCII
format,
it
functions
identically
to
CLOAO.
It
should
be
noted
that
the
sending
device
must
pause
two
seconds
between
lines
(after
each
carriage
return)
to
allow
BASIC
time
to
insert
the
new
line
into
memory.
To
load a
program
in ASCII
format
through
the
RS-232C,
use
the
following
sequence:
SETDEV
CI
CLOADa
Note:
A
program
loaded
via
CLOADa
must
not
contain
the
Pi
symbol
or
the
square
root
symbol
within
quoted
text.
13

CLOADr
Load Reserve Program from RS-232C
CLOADr
"filename"
filename
is
a
standard,
previously assigned file
name.
CLOADr loads
the
set
of
function
key
definitions
and
menus
(a
"reserve
program")
from
the
RS-232C.
CLOADr
functions
only
when
cassette
input
is
routed
from
the
RS-232C (as with
SETDEV
CIl.
The
syntax
for
CLOADr
is
identical
to
that
for
CLOAD.
For
example,
to
load a
set
of
function
key
definitions
and
menus
via
the
RS-232C, use
the
following
command
sequence:
SETDEV
CI
CLOADr
COM$
Fetch
Communications
Parameters
COM$ provides a
way
for
you
to
examine
the
current
RS-232C settings. COM$
may
be used in
either
the
RUN
or
PRO Mode as a
direct
command
or
part
of
aprogram.
This
function
returns
astring
of
characters
defining
the
current
RS-232C setting, in
format
"baud,
word,
parity,
stop."
(This
is
the
same
format
SETCOM uses
to
set
the
parameters.)
As with
any
function,
COM$
must
be used
in
conjunction
with a
command
(such as PR INT COM$)
or
variable (as
in
Z$
=COM$).
14
It
should
be
noted
that
COM$ always
returns
astring no
longer
than
16
bytes;
therefore,
it can be used safely
with
undimensioned
string variables.
For
example,
if
the
RS-232C
is
currently
set
at
2400
Baud, 7Bit Words,
Odd
Parity,
and
2
Stop
Bits,
type:
PRINT
COM$
(ENTER)
and
the
Display will
show:
2400,7,0,2
During
execution
of
aBASIC program, reset
communica-
tion
parameters
to
300
baud, 8
bit
words, even
parity,
and
2
stop
bits,
execute
subroutine
1000,
then
restore
to
original settings.
100
A$
=COM$
110
SETCOM
300,8,
E,
2
120
GOSUB
1000
130
SETCOM
A$
CONSOLE
Set
End-of-Line
Protocol
CONSOLE x.
Y.
z
xsets
the
number
of
characters
sent
and
is
either
0
or
a
number
between
16
-
255.
Y.
zspecifies
to
send acarriage
return,
line
feed,
or
both.
y, z
is
a
combination
of
0
and
1. See Table 3
for
details.
CONSOLE
is
used
to
specify
the
combination
of
line
feeds
and
carriage
returns
transmitted
as
an end-of-line
symbol.
15

The
general
syntax
for
th
is
statement
is
CONSO
LE
x,
y,
z.
Both y
and
zare
optional,
but
if y
or
z
is
specified
the
preceding
parameter
must
also have
been
specified.
x
is
either
0
or
16
~
255,
and
controls
the
number
of
characters
allowed
in
asingle
block
of
data
sent
from
the
RS-232C. Acarriage
return
and/or
line feed
sequence
is
automatically
transmitted
each
x
characters.
If
x =
0,
this
automatic
blocking
of
records
is
disabled.
y
and
zare
each
either
0
or
1,
and
each
specifies
either
a
carriage
return
(0)
or
line feed (1)
to
be
sent
at
the
end
of
a
data
record.
If
only
y
is
specified,
only
one
carriage
return
(y =
0)
or
line feed (y =1)
is
sent
at
the
end
of
a
record.
If
y
and
zare
both
specified,
then
two
characters
are
sent
as
defined
by y
and
z, respectively.
If
y=
and
z=
,
Characters
Sent
00CR
CR
01CR LF
10LF CR
11LF LF
Table
3
For
example,
to
set
maximum
data
line length
to
80
bytes
and
end-of-line
protocol
to
carriage
return
only,
type:
CONSOLE
80,0
(ENTER)
To
set
maximum
data
line length
to
no
limit
and
end-of-
line
protocol
to
carriage
return
only,
type:
CONSOLE
0,0
(ENTER)
16
CSAVEa
Save
Program
to
RS·232C
in ASCII
Format
CSAVEa
startline,
endline
startline
is
the
first line
of
the
program
you
want
to
save.
startline
is
optional;
if
omitted,
the
first line
of
the
program
is
used.
endline
is
the
last line
of
the
program
you
want
to
save.
endline
is
optional;
if
omit-
ted,
the
last Iine
of
the
program
is
used.
CSAVEa
saves
the
current
program
to
the
RS-232C in
ASCII
format.
This
means:
•Each line
must
start
with
aline
number.
•Each line
is
ended
with
acarriage
return
(ODH).
•
Maximum
length
of
line
is
160
characters,
including
line
number
and
the
carriage
return.
•Leading
blanks
(after
acarriage
return
and
before
aline
number)
are
ignored.
•File
is
ended
with
anull line (carriage
return
only).
•
After
compression,
a
maximum
of
80
characters
are
allowed.
CSAVEa
functions
only
when
cassette
output
is
routed
to
the
RS-232C.
Its
syntax
is
slightly
different
from
CSAVE's,
and
is
used
in
the
form
CSA
VEa
x,
y
where
x
and
yare
both
optional
and
specify
the
line
numbers
of
the
first
and
last
lines
to
be saved -
just
like
the
LLiST
x, y. This lets
you
save a
portion
of
the
program
if
desired.
Note:
CSAVEa
pauses
two
seconds
between
lines.
17

For example,
to
save
the
current
program
through
the
RS-232C
in
ASCII
format,
use
the
following
command
sequence:
SETDEV
CO
CSAVEa
"PROGRAM"
CSAVEr
Send Reserve Program
to
RS-232C
CSAVEr
"filename"
CSAVE rsaves
the
current
function
key definitions and
menus
(a
"reserve
program")
from
the
RS-232C. CSAVEr
functions
only
when
the
cassette
output
is
routed
to
the
RS·232C
(as
with
SETDEV
COl.
For
example,
to
save
the
function
key
definitions and
menus (the "reserve
program")
through
the
RS-232C,
use
the
following
command
sequence:
SETDEV
CO
CSAVEr
"RESRVPRG"
OEV$
Fetch
Current
Device Routings
DEV$
DEV$ does
for
the
PC-2's
current
device setting
what
COM$
does
for RS-232C settings. DEV$ may
be
used
in
either
the
RUN
or
PRO
mode.
18
DEV$
returns
astring
of
up
to
14 characters listing
the
names
of
the
input
devices which are
currently
disabled
and
whose
functions
are being
handled
by
the
RS-232C.
It
is
used with
the
same
syntax
as
any
other
function
which
returns
astring.
For
example,
PRINT
DEV$ and
Z$
=DEV are
both
valid uses.
For
example,
to
display
route
settings from within a
BASIC program, use
the
following string:
100
PRINT
DEV$
To
route
cassette
input
from
the
RS-232C
without
alter-
ing
any
other
routings, use asimilar
command
sequence
to
the
following:
100
A$
=DEV$ +
",
CI"
110
SETDEV
A$
To
route
the
printer
to
the
RS-232C,
execute
a
subroutine
1000,
then
return
to
the
original settings, use a
command
sequence similar
to
the
following:
100
A$
=DEV$
110
SETDEV
PO
120
GOSUB
1000
130
SETDEV
A$
ERL
Return Line
Number
of
Error
ERL
ERL
is
used with ON
ERROR
GOTO
in
error
trapping.
ERL
returns
the
line
number
of
the
statement
which
caused
the
current
error.
If
an
error
is
not
present, ERL
returns
O.
19

ERL has same
syntax
as
any
other
function
which
returns
a
number
in
that
a
statement
or
variable
must
be used.
For
example,
PRINT
ERL
and
I=
ERL
are
both
valid
uses.
To
display
error
and
end
error
line
numbers
if
errors
occur
in
aBASIC
program,
use
the
following
sequence:
100
ON
ERROR
GOTO
9000
9000
PRINT
"ERROR";
ERN;"
IN
LINE";
ERL
ERN
Return Error Code
ERN
ERN
is
for
use in
error
trapping
in
conjunction
with
ON
ERROR
GOTO. ERN
returns
the
number
(i.e.,
code)
of
the
current
error,
or
0if an
error
has
not
occurred.
ERN has
the
same
syntax
as
any
other
function
which
returns a
numeric
quantity.
For
example,
PRINT
ERN
and B=ERN are
both
val
id
uses. (See
example
for
ER
L.)
FEED
Transmit
Carriage
Return/Line
Feed
Sequences
FEED
n
n
is
number
from 1
to
65535
n
is
optional;
if
omitted,
0
is
used.
20
FEED
transmits
aspecified
number
of
end-of-line
sequences (as
defined
by
CONSOLE).
FEED
interacts
with
the
RS-232C
just
as LF
interacts
with
the
printer.
For
example,
to
transmit
six
end
of
line groups,
enter:
FEED
6
(ENTER)
To
list
the
current
contents
of
an
array
A$
(10) with
three
carriage return/Iinefeed groups
at
the
end
of
each string,
use a
command
sequence
similar
to
the
following:
100
CONSOLE
0,0,
1
110
FOR I
=0
to
10
120
PRINT
#-8,
A$(I)
130
FEED
2
140
NEXT
I
Note
that
FEED
2will generate
three
end-of-line
sequences because
the
first
is
automatically
sent
at
the
end
of
the
PR INT
statement.
INPUT$
Input
aString
of
Characters from
the
RS-232C
INPUT$
"prompt";
variable
prompt
is
the
message
you
want
displayed.
prompt
is
optional;
if
omitted,
a
question
mark
(?) will be displayed.
variable represents
the
data
to
be
typed
in.
INPUT$
is
avariant
of
BASIC's INPUT
function,
differing
from
that
function
in
two
ways.
•INPUT$ requests its
data
from
the
RS-232C, instead
of
the
keyboard.
21

•INPUT$
does
not
attempt
to
evaluate
input
as an
arithmetic
expression
but
treats
it
strictly
as a
charac-
ter
string.
INPUT$
is
effective
if,
and
only
if.
KI
has been
routed
to
the
RS-232C via a
SETDEV
command
(that
is,
SETDEV
KI
has been specified so
that
data
requests
normally
filled
from
the
keyboard
are filled
from
the
RS-232C).
It
is
used
with
the
same
general
syntax
as INPUT,
the
only
restriction being
that
the
I
NPUT$
variable
must
be a
string variable.
If
INPUT$ has a
quotated
string
prompt,
as
in
INPUT$
"LOAD
DATA";
A$,
the
prompt
is
handled
in
accord-
ance
with
any
current
display
output
(DO)
routing.
For
example,
enter
a
command
sequence
similar
to
the
following:
100
SETDEV
KI
110
INPUT$
A$
INPUT%
Fill aString Array
with
RS-232C
Data
INPUT%
"prompt";
variable
prompt
is
the
message
you
want
displayed.
prompt
is
optional;
if
omitted,
a
question
mark
(7)
will be
displayed.
variable
represents
the
data
to
the
typed
in
and
must
be a
dimensioned
string variable.
INPUT%
is
another
variant
of
BASIC's INPUT
function.
Its sole
function
is
to
load an
entire
array
of
non-numeric
data
from
the
RS-232C.
22
INPUT%
is
effective
if,
and
only
if,
KI
has been
routed
to
the
RS-232C via a
SETDEV
command
(that
is,
SETDEV
KI
has been specified so
that
data
requests
normally
filled
from
the
keyboard
are filled
from
the
RS-232C).
The
syntax
of
an INPUT%
statement
takes
the
same
form
as
for
BASIC's
normal
INPUT,
with
the
single
exception
that
the
variable
must
be a
dimensioned
string variable
in
the
form
A$
(*).
Any
prompt
supplied
with
INPUT%
is
not
processed
according
to
the
current
DO
routing,
but
is
always dis-
played.
When INPUT%
is
executed,
consecutive
characters
receiv·
ed
from
the
RS-232C
port
are placed
in
consecutive
array
elements
in
row-major
order,
with
each
array
element
being filled
to
its
maximum
dimensioned
length
from
left
to
right.
INPUT%
execution
stops
when:
• a carriage
return
is
received
•
the
array
is
full.
Array
elements
which are
not
filled
during
INPUT% are
nulled (set
to"
H).
For
example,
to
declare
astring
array
Z$
as
having
three
rows
and
four
columns
of
two-character
elements,
then
fill
that
array
from
RS-232C
input,
enter
a
command
sequence
similar
to
the
following:
100
DIM
Z$
(4,3)
*2
110
SETDEV
KI
120
INPUT%
"RECEIVING
ARRAY";
Z$
23

As
an
another example, suppose
that
array P$ (1, 2) *3
has
already been
properly
dimensioned,
that
SETDEV
KI
is
in effect, and
that
the RS-232C
has
been
properly
con-
figured via SETCOM; then, INPUT%
P$
(*)
is
executed.
The data string received at the RS-232C
port
is
"ABCDEFGH
IJLKMN".
First, all elements in array
P$
are
nulled,
or
set
to
"
".
NEXT,
P$
(0,0)
is
filled
from
left
to
right
with
RS-232C
input
characters
to
its
maximum
length (determined by
the
DIM
statement
which
is
in this
case
three characters).
Thus,
P$
(0,0)
is
set
to
"ABC".
Next,
P$
(0, 1)
is
filled
in the
same
manner.
P$
(0, 1)
winds
up
as
"DEF".
Then,
P$
(0, 2)
is
filled
with
"GHI".
Next,
progressing
through
the array in row-major order,
P$
(1,0)
is
filled
with
"JKL".
Then, P$
(1,1)
is
filled,
but
since
input
stops
at
"MN",
P$
(1,
1)
is
set equal
to
"MN"
and INPUT% stops.
INPUT#-8,
Input
Data
from
the RS-232C.
INPUT
#-8,
"prompt";
variable
prompt
is
the
message
you
want
displayed.
prompt
is
optional;
if
omitted,
aquestion
mark
(?)
will
be
displayed.
variable represents the data
to
the
typed
in.
INPUT#-8,
differs
from
INPUT
only
in
that
it
requests
data
from
the RS-232C instead
of
the keyboard. What-
ever character string
is
received
is
evaluated in precisely
the
same
manner
as
for
INPUT
(specifically including
evaluation
of
arithmetic
expressions).
Use
INPUT$
if
this expression evaluation
is
not
desired.
24
The
syntax
of
an
INPUT#-8,
statement takes
exactly
the
same
form
as
BASIC's normal INPUT.
If
a
quoted
string
prompt
is
provided,
as
in
INPUT#-8,
"SEND
DATA
";
X, the
prompt
is
displayed in all
cases.
For
example,
to
input
astring value
from
the RS-232C
port,
use
acommand similar
to
the
following:
100
INPUT#-8,
X$
To
input
Y
from
the keyboard (where the
input
is
equal
to
0), then
input
Yagain
from
the RS-232C,
use
a
command sequence similar
to
the
following:
100
INPUT
"ENTER
Y
";
Y
110 IF Y=0
INPUT#-8,
Y
MERGEa
Merge
an
ASCII
Format
Program
MERGEa
The files
to
be
merged must
be
saved
with
the
A
("ASCII")
option.
MERGEa
is
to
MERGE
as
CLOADa
is
to
CLOAD.
MER
G
Ea
functions
only
when cassette
input
is
routed
from
the RS-232C. MERGEa
functions
precisely the
same
as
does
MERGE
except
that
the
PC-2
will
expect
ASCII
format
input
from
the RS-232C. This means:
•Each line
must
start
with
aline number.
•Each line
is
ended
with
a carriage return (ODH).
•
Maximum
length
of
line
is
160 characters, including
line
number
and the carriage return.
•Leading blanks (after a carriage return and before a
line number)
are
ignored.
25

I
•File
is
ended
with
anull line (carriage
return
only).
•
After
compression,
a
maximum
of
80
characters
are
allowed.
To
merge ASCII
format
program
with
the
resident
program,
through
the
RS-232C, use a
command
sequence
similar
to
the
following:
SETDEV
CI
MERGEa
"PROGRAM"
INSTAT
Input
Statuts
INSTAT
INST
AT
reads
the
current
RS-232C
status
and
returns
it
as an integer from 0
to
31.
To
interpret
the
status,
con-
vert th
is
integer
to
its binary
equivalent
(O's
and
1's).
A 1 will mean
the
line
is
"ready;"
a 0 will mean
the
line
is
"not
ready."
This
number
is
abinary
bit
image
of
the
RS-232C's hand-
shake signal whose bits are
defined
as follows:
Bit Signal
0(write) DTR (Data Terminal Ready)
1(write) RTS
(Request
To
Send)
2(read) CTS (Clear
To
Send)
3(read) CD (Carrier Detect)
4(read) DTR (Data Terminal Ready)
5
and
up
not
used
26
For
instance,
if
you
type
INSTAT
(ENTER)
and
10
appears
on
the
Display,
you
should
convert
this
number
to
its
binary
equivalent:
00001010
Since
bit
counting
starts
at
the
right, Bit 0(DTR)
is
"not
ready,"
Bit 1(RTS)
is
"ready,"
Bit 2(CTS)
is
"not
ready,"
Bit 3(CD)
is
"ready,"
and Bit 4(DTR)
is
"not
ready."
Note
that
this
means
the
device
the
PC-2
is
communicat-
ing
with
should
have
the
opposite
status.
INSTAT can be used
in
either
R
UN
or
PRO
mode
and
should
be used with
the
same
syntax
as
any
function
which
returns
numeric
information.
For
example,
A=
INSTAT
and
PRINT
INSTAT are
both
valid.
The
following
program
would display
whether
or
not
a
"clear
to
send"
status
is
present
(bit 2
is
set)
during
execu-
tion
of
aBASIC
program:
100
WAIT 0
110
CLS
120
A=INSTAT
130
IF
(A AND
4)
=0
PRINT
"NOT
";
140
WAIT
150
PRINT
"CLEAR
TO
SEND."
27

OUTSTAT
Output
Status
OUTSTAT n
n
is
a
number
from
0
to
31
whose
binary
bit
configuration
represents
the
desired
RS-
232C
output
status.
The
OUTSTAT
command
forces a
certain
status
to
be
output
at
the
RS-232C
port.
OUTSTAT
may
be used
in
either
RUN
or
PRO
mode.
Bit Signal
0(write) DTR (Data Terminal Ready)
1(write) RTS
(Request
To
Send)
2(read) CTS (Clear
To
Send)
3(read) CD (Carrier Detect)
4(read) DTR (Data Terminal Ready)
5
and
up
not
used
For
example,
to
force
output
status
to
data
terminal
ready and clear
to
send
(set bits 0
and
4),
type:
100
A =
INSTAT
110
B=A
OR
5
120
OUTSTAT
B
PRINT#-8,
Send Data
to
the
RS-232C
PRINT#-8,
28
PRINT#-8,
differs
from
PRINT
only
in
that
it
sends
data
to
the
RS-232C instead
of
the
display.
Whatever list
of
data
is
sent
is
formatted
exactly
as
it
would
be
for
PRINT.
The
syntax
of
a
PRINT#-8,
statement
takes
exactly
the
same
form
as BASIC's normal
PRINT.
For
example,
to
list
the
contents
of
an
array
U
(3,2)
to
a
remote
terminal
via
the
RS-232C, use a
command
sequence
similar
to
the
following:
100
FOR
1=0
TO 3
110FORJ=OT02
120
PRINT
#-8,
U(I,J)
130
NEXT
J
140
NEXT
I
PRINT
and
LPRINT
Enhancements
The previously existing BASIC
statements
PR INT
and
LPR INT are
both
given
extra
capabilities
with
the
addi-
tion
of
the
RS-232C accessory
when
their
output
is
routed
to
the
RS-232C
channel.
First,
multiple
commas
may
be used
in
one
print
list as
delimiters.
For
example,
PRINT
A,
B,
C, D
is
an accept-
able
statement.
Second,
with
the
same
results as normal
comma
and semi-
colon
statements,
delimiters
may
be
mixed
randomly
within
a
print
list.
For
example,
LPRINT
A$;
B,
C$; D
is
an
acceptable
statement.
29

RINKEY$
Fetch
Current
Character from
the
RS-232C
RINKEY$
RINKEY$
is
used
to
fetch asingle
character
from
the
RS-
232C. RINKEY$ interacts with
the
RS-232C
in
exactly
the
same way
as
IN
KEY$
interacts
with
the
keyboard:
if
a
character
is
available, it
is
fetched
as
asingle
character
string; otherwise null
("
")
is
returned.
It
is
used with
the
same
syntax
as
any
other
function
which
returns
astring.
For
example,
Z$
=RINKEY$
is
avalid use.
To pause run
of
aBASIC program until acarriage
return
(CHR$ 13)
is
received from
the
RS-232C
port,
use a
command
sequence similar
to
the
following:
100
A$ =
RINKEY$
110
IF
A$
<>
CHR$
13 THEN
100
The following
short
BASIC program will
further
demon-
strate
RINKEY$. It will
check
the
RS-232C
port
twice a
second and if
any
character
is
present
at
the
RS-232C
port,
it will be displayed:
100
WAIT
32
110
A$
=
RINKEY$
120
IF
A$
="
"
PRINT
"NO
CHARACTER":
GOTO
110
130
PRINT
A$:
GOTO
110
30
j
SETCOM
Set
Communications
Parameters
SETCOM
baud,
word
length,
parity,
stop
bits
baud
is
the
baud rate and
is
50,
100, 110,
200,
300,600,
1200,
or
2400.
On power-up,
300
baud
is
used.
word
length
is
the
word length
or
number
of
bits
used
to
transmit
aword 5, 6, 7,
or
8. On
power-up, 8
is
used.
parity
is
odd,
even,
or
none. On power-up,
none
is
used.
stop
bits
is
the
number
of
stop
bits
per
byte
and
is
either
1
or
2. On power-up, 1
is
used.
The SETCOM
command
is
used
to
set
the
RS-232C's
communications
parameters -baud rate, parity,
word
length, and
number
of
stop
bits. SETCOM may be used
in
either
the
RUN
or
the
PRO mode.
Typing SETCOM
(ENTER)
resets
the
RS-232C
to
their
power-up
status:
SETCOM Power-Up
Status
300
Baud
8Bit Words
No Parity
1
Stop
Bit
This
is
the
same
as
typing:
SETCOM
300,8,
N,
1
31

I
SETCOM may be used
to
reset
only
some
of
the
com-
munications
paramters
by specifying null
parameters
for
the
settings
not
to
be
changed.
For
example,
to
change
only
the
parity
to
ODD,
you
could
enter
SETCOM,
,0
(ENTER)
To
reset
only
the
baud rate, use
the
command:
SETCOM
1200
To
reset
the
baud rate
to
600
and
the
parity
to
even, use
the
command:
SETCOM 600" E
To
change
the
communications
parameters
from
within
a
BASIC program,
enter:
100
INPUT
"Enter
new
commu
params
";
A$
110
SETCOM
A$
SETDEV
Route
I/O Devices
To/From
the
RS-232C
SETDEV
device, device,
...
device
is
two-letter
name which specifies a
PC-2 I/O device. devices are:
KI--
Keyboard
Input;
DO
--
Display
Output
(LCD); PO
--
Printer
Output;
CI
--
Cassette
Input;
CO
--
Cassette
Output
The
SETDEV
command
is
used
to
route
the
PC-2's I/O
devices
(keyboard,
LCD,
printer,
tape)
to
or
from
the
RS-232C
communication
channel.
SETDEV
is
anew
BASIC
word,
and
may
be used
in
either
the
RUN
or
PRO
modes as a
direct
command
or
as a
part
of
aprogram.
32
Each device specified
in
the
SETDEV
command
is
disabled
and
its
input
(or
output)
is
filled from (or
sent
to)
the
RS-232C
channel.
If
the
command
SETDEV
is
used alone,
all
device routings
are cleared
and
all
devices are
enabled.
As
an
example,
output
from
the
LPR INT
statement
normally
is
handled
by
the
printer/plotter.
If
SETDEV
PO
is
specified,
anything
that
would
have been
handled
by
the
printer
(LPRINT, LLlST, etc.) will
now
be
sent
to
the
RS-232C
channel.
For
example,
to
route
all
printer
output
to
the
RS-232C,
enter:
SETDEV
PO
(ENTER)
To
route
all
tape
input
and
output
to
(or from)
the
RS-
232C,
enter:
SETDEV
CI, CO
(ENTER)
To
clear all device routings,
enter:
SETDEV
(ENTER)
To
route
cassette
input
from
the
RS-232C
without
alter-
ing
any
other
routings during
execution
of
aBASIC
program,
use a
command
sequence similar
to
the
following:
100
A$ =DEV$ +",
CI"
110
SETDEV
A$
To
route
the
printer
to
the
RS-232C,
execute
subroutine
1000,
then
restore
to
original settings wh
ile
executing
a
BASIC
program,
use a
command
sequence
similar
to
the
following:
33

100
A$ =DEV$
110
SETDEV PO
120
GOSUB
1000
130
SETDEV
A$
Note: When
SETDEV
DO
and/or
SETDEV
KI
are
in
effect, display
output
and
keyboard
input
are
routes
only
when
the
PC-2
is
running aprogram.
They
have
no
effect
in
Immediate Mode,
in
which requests for
keyboard
input
and display are always handled normally.
SPACE$
Generate aString
of
ASCII Spaces
SPACE$ n
n
is
a
number
from 0
to
31 which specifies
the
number
of
spaces
you
wish
to
generate.
SPACE$ n
returns
astring
of
nspaces.
For
example,
the
string
DF$="#"+SPACE$
3+"
*"
would
set
DF$="#~~~*"
To
print
fifteen spaces,
type:
PRINT
SPACE$ 15
(ENTER)
To
print
S$,
then
a
number
of
spaces equal
to
the
length
of
S$,
enter:
100
S=LEN
S$
110
PRINT
S$;
SPACE$
S
34
TRANSMIT
BREAK, n
Send Long Space
TRANSMIT
BREAK n
n
is
avalue from 0
to
255
and represents
n/64
of
asecond. n
must
be specified.
TRANSM IT
BR
EAK, n
is
used
to
send a
"long
space"
over
the
RS-232C.
For
example,
to
transmit
atwo-second long space, use a
command
string similar
to
the
following:
100
TRANSMIT BREAK,
128
ZONE
Adjust Print
Zone
Formatting
ZONE n
nsets
the
data
zones and
is
a
number
from 1
to
31.
If
omitted,
1
is
used.
ZONE
is
used
to
modify
LPRINT
output
when
that
out-
put
is
routed
to
the
RS-232C (via SETDEV PO). Commas
must
be used
as
delimiters
in
the
list
of
data
to
be
printed.
When a
comma
separates
two
items
to
be
printed
on
the
PC-2 Display,
the
Display
is
spl it
in
half with
one
item
displayed
on
each side. This allotts
to
a
"zone"
of
13
characters.
For
example,
ZONE 10 followed by LPRINT 2,
3.45
would result
in
the
following character sequence being
sent
to
the
RS-232C:
.2
3.45
(" . " represents aspace)
35
Other manuals for PC-2 TRS-80
1
Table of contents
Other Radio Shack PDA manuals

Radio Shack
Radio Shack TRS-80 26-3501 User manual

Radio Shack
Radio Shack TRS-80 User manual

Radio Shack
Radio Shack TRS-80 User manual

Radio Shack
Radio Shack PC-2 TRS-80 User manual

Radio Shack
Radio Shack TRS-80 User manual

Radio Shack
Radio Shack EC-291 User manual

Radio Shack
Radio Shack TRS-80PC-4 User manual