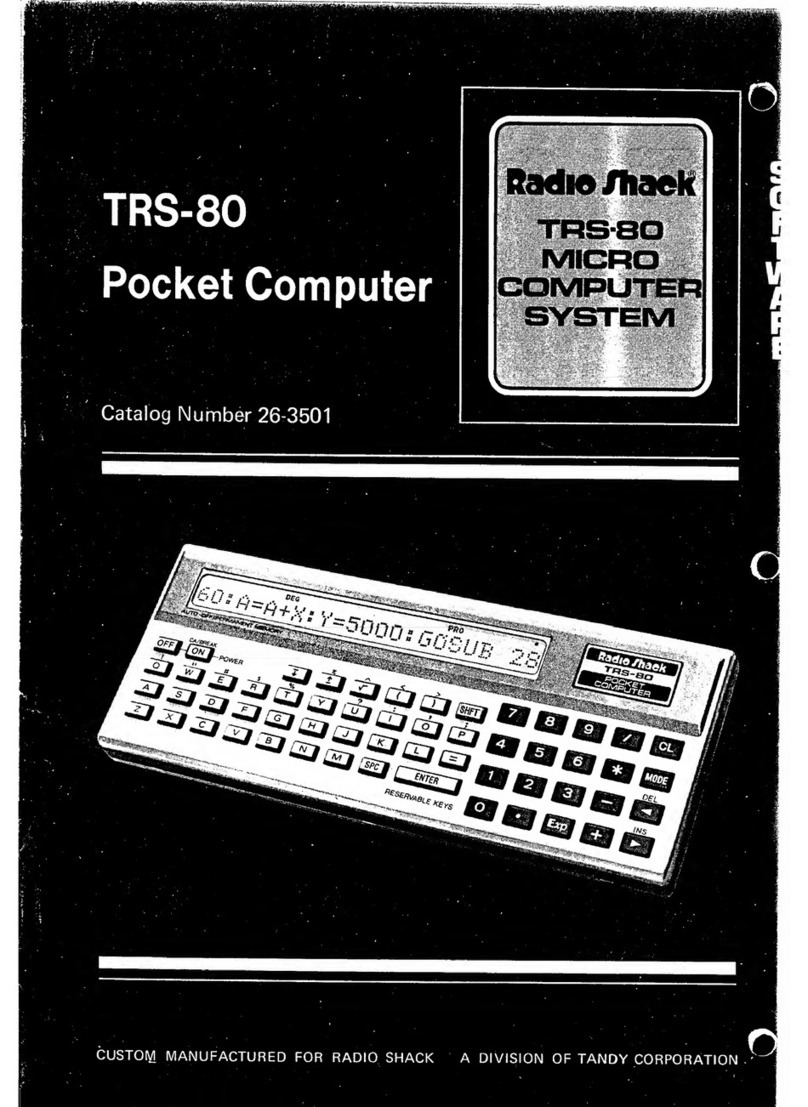
Radio Shack TRS-80 User manual

CAT. NUMBER
26-2101
USER'S MANUAL
Rsdie/haek
CUSTOM MANUFACTURED IN U.S.A. BY RADIO SHACK MADIVISION OF TANDY CORPORATION

LIMITED WARRANTY
Radio Shack warrants for aperiod of 90 days from the date of delivery to customer that the computer hardware
described herein shall be free from defects in material and workmanship under normal use and service. This
warranty shall be void if the computer case or cabinet is opened or if the unit is altered or modified. During this
period, if adefect should occur, the product must be returned to aRadio Shack store or dealer for repair.
Customer's sole and exclusive remedy in the event of defect is expressly limited to the correction of the defect
by adjustment, repair or replacement at Radio Shack's election and sole expense, except there shall be no
obligation to replace or repair items which by their nature are expendable. No representation or other affirma-
tion of fact, including but not limited to statements regarding capacity, suitability for use, or performance of the
equipment, shall be or be deemed to be awarranty or representation by Radio Shack, for any purpose, nor give
rise to any liability or obligation of Radio Shack whatsoever.
EXCEPT AS SPECIFICALLY PROVIDED IN THIS AGREEMENT, THERE ARE NO OTHER WARRANTIES,
EXPRESS OR IMPLIED, INCLUDING, BUT NOT LIMITED TO, ANY IMPLIED WARRANTIES OF MER-
CHANTABILITY OR FITNESS FOR APARTICULAR PURPOSE AND IN NO EVENT SHALL RADIO
SHACK BE LIABLE FOR LOSS OF PROFITS OR BENEFITS, INDIRECT, SPECIAL, CONSEQUENTIAL OR
OTHER SIMILAR DAMAGES ARISING OUT OF ANY BREACH OF THIS WARRANTY OR OTHERWISE.
IMPORTANT NOTICE
ALL RADIO SHACK COMPUTER PROGRAMS ARE DISTRIBUTED ON AN "AS IS" BASIS WITHOUT
WARRANTY
Radio Shack shall have no liability or responsibility to customer or any other person or entity with respect to
any liability, loss or damage caused or alleged to be caused directly or indirectly by computer equipment or
programs sold by Radio Shack, including but not limited to any interruption of service, loss of business or
anticipatory profits or consequential damages resulting from the use or operation of such computer or computer
programs.
NOTE: Good data processing procedure dictates that the user test the program, run and test sample sets of
data, and run the system in parallel with the system previously in use for aperiod of time adequate to
insure that results of operation of the computer or program are satisfactory.

APersonal Note from the Author
1pntv of good conventional
,-u vThere are plenty or &u
books, and plenty that ^anything
T---^3 riSf^o^j- rrnSr;rk
^dio Shack TRS-80 counter an ^faun ^air ^.^
acompetent P^^^oyant and ridiculous technique ^
and unconventional, £la**°y*fun with your computer.
Swas used. 1want you to have ^^^.^ to £e«.
you to be afraid of it, &M
,« out on this book were good tas contains no
The only «Stra^"fyourintelligence. Beyond that ^attempt
attempt not to insult.your ^intimidate you >^&u
-. snow jobs", no effor P.dea that computers
to sell you anything excep
that bard to learn to use. ^above
,ii, as though savoring agoon rout ine
Sit back, relax, ^fj^JjV. I'll supply you £**!*
all, let your imaSxn3t*°n*d.The real enjoyment begin becomeB
facts and -^^s
eS
thrcr
n
eative juices ^f^Vot the other way
imagination starts the c^tM master »° into an
at0°
dVtStToi- Uevolves fro, just abo, P
S-siofofyour personality
Enjoy your new computer!
Dr. David A- Lien
San Diego -1977

FIRST EDITION
SECOND PRINTING —1978
All rights reserved. Reproduction or use, without
express permission, of editorial or pictorial con-
tent, in any manner, is prohibited. No patent
liability is assumed with respect to the use of the
information contained herein. While every pre-
caution has been taken in the preparation of this
book, the publisher assumes no responsibility
for errors or omissions. Neither is any liability
assumed for damages resulting from the use of the
information contained herein.
©Copyright 1977, Radio Shack,
ADivision of Tandy Corporation,
Fort Worth, Texas 76102, U.S.A.
Printed in the United States of America

Table of Contents
This User's Manual and You 4
Part A: Chapter 1Computer Etiquette. PRINT, NEW, and RUN 7
Chapter 2Expanding aProgram. LIST, REM, END, LET, WHAT?, HOW? 11
Chapter 3Math Operators 17
Chapter 4Scientific Notation 23
Chapter 5Order of Operations. Use of Parentheses 25
Chapter 6Relational Operators. IF-THEN, GOTO '
[29
Chapter 7INPUTting Data 33
Chapter 8Calculator Mode. MEM, SORRY '..'.'.'. '.37
Chapter 9Using Cassette Tape for Mass Storage. CLOAD, CSAVE 41
Chapter 10 Loops. FOR-NEXT, STEP, CLS, Break Key 45
Chapter 11Timer Loops. LIST ###, RUN ###, STOP, CONT 53
Chapter 12Formatting Output with TAB 61
Chapter 1
3
Nested Loops 65
Chapter 14 INT Function 69
Chapter 15 More Branching Statements. Subroutines. ON-GOTO, GOSUB
ON-GOSUB, RETURN 77
Chapter 16 READ, DATA, RESTORE. String Variables A$ and B$ 85
Chapter 17ABS Function 93
Chapter 18 Level IShorthand Dialect. Multiple-Statement Lines 95
Chapter 19Generating Random Numbers with RND 99
Chapter 20 Video Display Graphics. SET, RESET 105
Chapter 21 Arrays Using A(X) 123
Chapter 22 Advanced Graphics. PRINT AT, POINT 133
Chapter 23 Flowcharting 141
Chapter 24 Logical Operators. *(AND), +(OR) !.T47
Chapter 25 Advanced Subroutines 155
Chapter 26 Debugging Programs 165
Part B: Sample Answers to Programming Exercises in Chapters 3through 25 177
Part C: Prepared User's Programs 201
Appendix:
Appendix A: Prepared User Subroutines 216
Appendix B: Cassette Data Files 221
Appendix C: Combined Function and ROM Test 225
SUMMARY OF LEVEL IBASIC 232

This User's Manual and You
This Manual has been written for the average person who has no
experience with aComputer. We've deliberately kept our style
light and humorous (some may even say it's corny!) ... we think
this will make your learning experience fun.
(And why shouldn't learning be fun ...?)
The Manual is organized in three basic sections:
A. 26 Chapters which introduce you to various capabilities of
the Computer; in small enough bites so you won't choke.
These Chapters include numerous little check points and
examples (as we get deeper into the book the examples get
deeper).
At the end of the Chapters we've given some Exercises -to
give you achance to try out your knowledge ON YOUR
OWN.
B. Asection with sample answers to the Exercises in each
Chapter. You can see how you make out with your attempts
at programming.
C. Asection with some User's Programs -some good
examples of interesting and practical programs (some for
fun, some for business, some for education, etc.).
We've also included some helpful information in an APPENDIX.
The Manual is written in astyle where the Computer assists you in
learning (educators might like to call it "Computer Assisted
Instruction" ...we'll try to avoid trying to impress you with that
type of fancy wording).
So, on you go -and we hope you have as much fun with this book
as we did preparing it (we had some headaches too . . . hope you
don't have any of those).
4

SETTING UP THE SYSTEM
Carefully unpack the system. Remove all packing material. Be sure you
locate all cables, papers, tapes, etc. Save the packing material in case
you need to transport the system.
Connecting the Video Display and Keyboard:
1. Connect the power cord from the Video Display to asource of 120
volts, 60 Hz AC power. Note that one prong of the AC plug is wider
than the other —the wide prong should go into the widest slot of
the AC socket.
NOTE: If you use an AC extension cord, you may not be able to
plug the Display's power cord in. Do not attempt to force
this wide prong into the extension cord; use awall outlet
if at all possible.
Connect the power cord of the Power Supply to asource of 120
volts, 60 Hz AC power.
Connect the gray cable from the front of the Video Monitor to the
VIDEO jack on the back of the Keyboard Assembly. Take care to
line up the pins correctly (the plug fits only one way).
NOTE: Before the next step, be sure the POWER switch on the
back of the Keyboard is off (button out).
Connect the gray cable from the Power Supply to the POWER
jack on the back of the Keyboard Assembly. Again, take care to
mate the connection correctly.
2.
3.
4.
POWER BUTTON
POWER POWER VIDEO TAPE
BUTTON
(ON REAR)
Connecting the Cassette Recorder:
NOTE: You do not need to connect the Cassette Recorder unless you
plan to record programs or to load taped programs into the TRS-80.
1.
2.
Load batteries into the CTR-41 as described in the Manual. Or
make connections for 120 volt AC power.
Connect the short cable (DIN plug on one end and 3plugs on the
other) to the TAPE jack on the back of the Keyboard Assembly.
Be sure you get the plug to mate correctly.
The 3plugs on the other end of this cable are for connecting to
the CTR-41.
A. Connect the black plug into the EAR jack on the side of the
CTR-41. This connection provides the output signal from the
CTR-41 to the TRS-80 (for loading Tape programs into the
TRS-80).
Connect the larger gray plug into the AUX jack on the CTR-41.
This connection provides the recording signal to record pro-
grams from the TRS-80 onto the CTR-41 's tape.
Also, plug the Dummy Plug (provided with the CTR-41) into
the MIC jack (this disconnects the built-in Mic so it won't pick-
up sounds while you are loading tapes).
NOTE: Be sure you always use the Dummy Plug when loading
programs onto tape (Recording).
B
Dummy Plug
C. Connect the smaller gray plug into the REM jack on the
CTR-41. This allows the TRS-80 to automatically control the
CTR-41 's motor (turn tape motion on and off for recording
and playing tapes).
Notes On Using The Recorder
There are anumber of things you should be aware of as you use the
Cassette Tape System: (Some of this will be covered in greater detail
in Chapter 9...but some of you can't wait till then ...can you!)
1. To Play atape (load ataped program into the TRS-80), you must
have the CTR-41 's Volume control set to 7to 8. Then press the
CTR-41
'
sPLAY key and then type CLOAD on the TRS-80 and
I3i?fcl3;l this command. This will start the tape motion. An *will
appear on the top line of the Monitor; asecond *will blink, indi-
cating the program is loading. When loading is done, the TRS-80
will automatically turn the CTR-41 off and flash READY on the
screen. You are then ready to RUN the program (type in
and hit 021133).

TURNING THE SYSTEM ON
2. To Record aprogram from the TRS-80, press the CTR-41's
RECORD and PLAY keys simultaneously. Then type CSAVE on
the TRS-80 and Hflhfrfclthis command. When the program has
been recorded, the TRS-80 will automatically tum the CTR-41 off
and flash READY on the screen. Now you have your program on
tape (it still is in the TRS-80 also). Many computer users make a
second or even athird recording of the tape, just to be sure they
have agood recording.
NOTE: To load the full 4K of RAM in the TRS-80 takes less than
3minutes of tape. Short programs will take only afew
seconds of tape.
3. Use the CTR-41 's Tape Counter to aid you in locating programs on
tapes.
4. For best results, use Radio Shack's special 10 minute Computer
Tape Cassettes (especially designed for recording computer pro-
grams). If you use standard audio tape cassettes, be sure to use top
quality, such as Realistic SUPERTAPE. Keep in mind that audio
cassettes have lead-ins on both ends (blue non-magnetic mylar
material) —you can not record on the leader portion of the tape.
Advance the tape past the leader before recording aprogram.
5. When you are not going to use a CTR-41 for loading or recording
programs, do not leave RECORD or PLAY keys down (press
STOP).
6. To REWIND or FAST-Forward acassette, you must disconnect the
plug from the REM jack (with REM jack connected, the TRS-80
controls tape motion).
7. If you want to save ataped program permanently, break off the
erase protect tab on the cassette (see CTR-41 Manual).
8. Do not expose recorded tapes to magnetic fields. Avoid placing
your tapes near the Power Supply.
9. To check if atape has aprogram recorded on it, you can disconnect
the plug from the EAR jack (also disconnect the REM plug so
you can control the CTR-41 with the keys) and Play the tape;
you'll hear the program material from the speaker.
Turn on the Video Display by pressing the POWER button. Tum on
the TRS-80 Keyboard by pressing the POWER button on the back
(next to the POWER jack); the red LED just to the right of the Key-
board should light up and the screen should show READY .Adjust C
(contrast) and B(brightness) controls on the front of the Display for
the sharpest display. Set Brightness so the background is gray and the
words are white. Do not set Brightness too high.
If Display does not show READY ,press the Keyboard's POWER
switch off and on again,
NOTE: There is aReset button inside adoor at the left rear of the
Keyboard assembly. This Reset button can be used to unlock aloop-
ing program or if the TRS-80 does not turn off acassette or in other
such abnormal program situations.
One More Thought -', .-' ')".; :
You're all ready now, right? Well, maybe. But let's just prepare you
for the TRS-80 and Manual with one more thought ...
How do you "talk" to a Computer? In Binary Numbers? In Elec-
tronics (is there such alanguage ..,)? In English ...?
Well, we use asimplified form of English —it's called the BASIC
Language (Beginners All-purpose Symbolic Instruction Code). (There
are lots of other "computer languages", but this is the easiest.) This
Manual covers Radio Shack's LEVEL IBASIC.
As you go through this Manual you'll learn the different words of this
simple computer language —and how to punctuate (VERY IMPOR-
TANT) —and how to apply all of it for fun and practical benefit. It's
an easy language to learn —but remember, you've got to use the
language that the TRS-80 understands (well be giving you some
examples of wrong language use and you'll see what happens).
6
Chapter 1
Computer Etiquette
From the moment you turn it on, the TRS-80 follows awell-defined set of rules for coping
with you, the "master," This makes it an especially easy computer to use. To alarge extent,
all you have to do is say the right thing (via the keyboard) at the right time. Of course, there
are lots of "right things" to say; putting them together for apurpose is called programming.
In this chapter we're going to start aconversation with the TRS-80 by teaching it afew
simple social graces. At the same time, you'll be learning the fundamentals of computer
etiquette. You'll even write, wonder of wonders, your first TRS-80 computer program!
Getting READY
1. Connect the keyboard-computer, Video Display and Power Supply as explained in the
previous section. Plug Video Display and Power Supply into 120-volt AC outlets.
2. Press POWER button on Video Display and the back of the Keyboard. Give the video
tube afew seconds to warm up.
3. READY ____
>— should appear in the upper left corner of the screen. Press the QQQ|Q key
several times to produce acolumn of READY messages. The Computer is trying to tell
you something: "I'm ready —it's your turn to do something!
"
To make sure you start off withaclean slate —erasing all traces of prior programs or tests —
type NEW and press |3fllia;| ,The Computer will respond by erasing the screen and print-
ing
READY
>—
at the top of the screen.
Now type in p.M.and I3i?na;l .This is atest to see that the Computer powered up proper-
ly. The display should read:
P.M.
3583
This set of rules is permanently stored in the
Computer in two programs, called the monitor
and the interpreter.
is amonitor command. It tells the Com-
puter to take alook at whatever you've typed on
the screen. In step 3, you didn't type anything,
so the Computer just comes back with another
READY .
Hit Ekey, (Tj key, [M] key and Qkey.
Don't use shift key —letters are always capital for
TRS-80.
If you have 8K of memory, the number should
be 7679. With 16K of memory, it should be
15871.

If the number is not 3583, turn the Computer off, using the pushbutton on the right rear
corner of the keyboard. Wait about 10 seconds and turn it on again. Repeat the test and
verify that the number is 3583.
Just What Is aComputer Program?
Aprogram is asequence of instructions that the Computer stores until we command it to
follow (or "execute") those instructions. Programs for the TRS-80. are written in alanguage
called BASIC —and that should give you an idea of how easy it is to learn!
Let's write asimple one-line program to let the TRS-80 introduce itself. First be sure the
last line on the screen shows a>, which we call the "prompt". This is the Computer's way of
saying, "Go ahead —do something! "Now type the following line, exactly as shown
:
10 PRINT "HELLO THERE. IAM YOUR NEW TRS-80 MICROCGMPUTER !"
Do not hit QZQ1D key yet!
If you made amistake, don't worry —it's much easier to correct typing errors on the
TRS-80 than it is on aregular typewriter. No rubber erasers or white paint to fuss with! Just
use the backspace key *. Each time you press this key, the rightmost character will be
erased. If your error was at the beginning of the line, you'll have to erase your way back to
that point and then retype the rest of the line.
Now go back and examine VERY CAREFULLY what you have typed:
1. Did you enclose everything after the word PRINT in quotation marks?
2. Are there any extra quotation marks?
If everything's okay, you can press l^ll^jp .The >prompt will reappear. The Computer is
telling you, "Fine —what's next?"
If It's Too Late
If you find an error after you've typed aline and pressed la^il^jj ,you cannot use the*
backspace key to correct it. Instead, retype the entire line correctly. As soon as you
1^113.11 the line, it will replace the incorrect one. This is because both of them share the
same starting number (in this case, 1(8).
It's good practice fa* perform this simple test
whenever you turn on the TRS-80. Always type
N£W and r^h^il befor* performing the test.
.As for what the test tests —we'll wait a'few
chapters for that!
"EXTRA CAREFUL'
You don't have to use the ishift jkey to get a
capital letter —that's the only kind of letter'theV; :
:
TRS-80 uses. However, some of the keys do
have two characters printed on them. Use the ,.,';'/. >}
.iSHift\key to get the upper cha?facters-—,\
\
j£e ,'the
"marks and the exclamation pomt(!>.
See- the little "dash" (—)that moves across th*--
screen as you type in aletter? This is the "cursor".
It lets you know exactly where the next character
you type will be printed oh the screen. Pushing the
space bar moves the cursor along one space, with-
i>ttt printing anything. :
If you; press ^i?»3:l asecond time,the screen
''Wffl"'»e&i.;.l.-'-r; felifO .[''-L-':
.~:,"yz:$:?,
READY
This is reassuring/hut riotheeessaty —as long as
the bottom item on the screen is the>pfompt,
you know it's "yoor turn."

"Allow me to introduce myself."
Now we'll tell the Computer to execute our program. The BASIC command for this is
simple; RUN. So type RUN and press l^m:l .If you made no mistakes, the display will
read:
HELLO THERE. IAM YOUR NEW TRS-80 MICROCOMPUTER!
If this isn't what you got, go back and try it again. If HUN still doesn't produce the greeting,
there's something wrong in your program. Type NEW to clear it out and type in the one-line
program again.
If it did work —let out ayell! "HEY MA, IT WORKS!" This is very important, because now
that you have tasted success with acomputer, it may be the last you are heard from in some
time.
Note that the word PRINT was not displayed, nor were the quotation marks. They are part
of the program's instructions and we didn't intend for them to be printed.
Type the word RUN again and hit IJt'Md;! ,
Type RUN to your heart's content, watching the magic machine do as it's told, over and
over. When you feel you've really got the hang of all this, get up and stretch, walk around
the room, look out the window —the whole act. Because you'll soon get hooked and you
won't want to take time for such things later on.
—Learned in Chapter 1
ComftlarKte -Statements
PRINT
Miscellaneous
>prompt
—cursor
IBREAKI
WU4A
NEW -* backspace key
RUN " " quotation marks
We'll put alist like this at the end of each chapter. Use it as acheckpoint to make sure you
didn't miss anything.
Maybe you're wondering what's the difference between BASIC commands and BASIC
statements. Commands are executed as soon as you type them in and press IJ^fct3;l .State-
ments are put in to programs and are only executed after you type the command RUN .
i
I
"HEY MA, iT WORKS.'"
Whether you're typing in aprogram;.or:giving
direct commands like RUN, you've got to hit
ldhi£1j to tell the Computer to take alook at
what you've typed and act accordingly.
Special message for people who can't resist the
urge to play around with the computer and skip
around in this book. (Viere always are afew!) It's
possible to "lose Control" of the Computertso
that ifwoti't give you aREADY message when
you press la^Maii. To regain control, just press
.M.1MI .t4e"j|'3JliJja Jf^atdoesn't.:w6rk;:
find the Reset button inside the left rear corner
of rSe :TRS-S« and pus;h it. There)
As youexercise your TRS-80, you11 note that
with SHIfl] you get some symbol Characters
that are not used with LEVEL f(Eg^[ 1)
although they can be inside a print statement.

Notes:
10

Chapter 2
How To Expand AProgram
You now have aprogram in the Computer, (If you turned it off between lessons, fire it up
again and type in line 10 from Chapter 1.) It's only aone-liner, but let's expand it by adding
asecond line. In BASIC, every line in the program must have anumber, and the program is
executed in order from the smallest number to the largest. Type:
20 PRINT "YOU CALLED, MASTER. DD YOU HAVE ACOMMAND?"
Check it carefully —especially the quote marks, then
RUN wim;i
If all was correct, the screen will read:
HELLO THERE. IAM YOUR NEW TRS-80 MICROCOMPUTER!
YDU CALLED, MASTER. DO YOU HAVE ACOMMAND?
If it ran OK, answer the question by typing
yes BSED
Oh —sorry about that! It "bombed", didn't it? The screen said,
WHAT?
This error message is the result of abuilt-in troubleshooter which lets you know when
you've said the wrong thing {or the right thing at the wrong time), The WHAT? message on
the screen says, "No-no, dummy —the program you wrote doesn't have any way for me to
accept an answer just because it asked aquestion" or words to that effect.
Alater lesson will cover another error message. Meanwhile, if you get aWHAT? ,HOW?
or SORRY ,go back and examine the program for an error. Your "YES" answer here was
used purposely to show an error message. Later on, we'll program the Computer to accept a
"YES" or "NO" answer and act on it.
Have you noticed that we use for the h&niber
;zero —so you can distinguish between the letter:
m& number. The Video Display does it this way
so well do the same throughout the Manual.
'WHAT?'
n

And the Program Grows
It is customary, traditional (and all that) to space the lines in aprogram 10 numbers apart.
Note that your two-line program has the numbers 10 and 20. The reason ,. . it's much easier
to modify aprogram if you leave room to insert new lines in-between the old ones. There is
no henefit to numbering the lines more closely (like 1,2,3,4). Don't do it.
Look at the Video Display. Let's decide we'd rather not have the two lines so close together,
but would like to have space between them. Type in the new line:
is print nana
Then
run Bgjga
it should now read:
HELLO THERE. IAM YOUR NEW TRS-80 MICROCOMPUTER!
YOU CALLED, MASTER. DO YOU HAVE ACOMMAND?
Looks neater, doesn't it? But what about line 15??? It says PRINT. PR INT what???? Well
-print nothing. That's what followed PRINT ,and that's just what it printed. But in the
process of printing nothing it automatically activated the carriage return, and inserted a
space between the printing ordered in lines 10 and 20. So that's how we insert aspace.
Another important statement is REM, which stands for REMARK. It is often convenient to
insert REMarks into aprogram. Why? So you or someone else can refer to them later, to
help you remember complicated programming details, or even what the program's for and
how to use it. It's like having ascratch-pad or notebook built-in to your program.
When you tell the Computer to execute the program by typing RUN and I3im:l ,it will
skip right over any numbered line which begins with the statement REM. The REM state-
ment will have no effect on the program. Insert the following:
5REM *THIS IS MY FIRST COMPUTER PROGRAM* jiJJh J=f;f
then
run BZBa
The run should read just like the last run, totally unaffected by the presence of line 5. Did
it?
12
Didn't that room 'between lines 19 and 20 conte'm
handy'?
You might be wondering why the asterisks^) in
line #5? The answer is ,..they're just for decora-
tion :let 's give this operation, some etwsf Remem-
ber, anything that is typed on aline following REM
;is ignored by the Computer- ...

Well, this programming business is getting complicated and I've already forgotten what is
in our "big" program. How can wc get alisting of what our program now contains? Easy. A
new BASIC command. Type
list nana
The screen should read
:
5REM *THIS IS MY FIRST COMPUTER PROGRAM*
10 PRINT "HELLO THERE. IAM YOUR NEW TRS-80 MICROCOMPUTER!"
15 PRINT
20 PRINT "YOU CALLED, MASTER. DO YOU HAVE ACOMMAND?"
You can call for a LIST any time the prompt appears on the screen.
Where is the END of the program?
The end of aprogram is, quite naturally, the last statement you want the Computer to
execute. Most computers require you to place an END statement after this point, so the
computer will know it's finished. But with your TRS-80, an END statement is optional —
you can put it in or leave it out. Remember though, if you want to run your BASIC pro-
grams on fussier computers, you'll probably need the END statement.
Let's take aclose look at END. By the rules governing its use, most dialects of BASIC which
require END insist that it be the last statement in aprogram, telling the computer "That's
all, folks." By tradition, it is given the number 99, or 999, or 9999 (or larger), depending on
the largest number the specific computer will accept. Your RADIO SHACK computer
accepts Line numbers up to 32767.
Let's add an END statement to our program.
Type in:
99 END EZJH3
then
run sasa
The sample run should read:
HELLO THERE. IAM YOUR NEW TRS-80 MICROCOMPUTER!
YOU CALLED, MASTER. DO YOU HAVE ACOMMAND?
When "we get into more complex programs, youTI
want to use £NB statements to force the Com-
puter to:stop at specified points +- so actually,
END comes in very handy even WietheMlS-Su-
13

"Why didn't the word END print?" Answer: Because nothing is printed unless it is the
"object" of aPRINT statement. So how could we get the Computer to print THE END at
the end of the program execution? Think for a minute before reading on.
98 PRINT "THE END "
Erasing Without Replacing
Just for fun, let's move the END statement from line 99 to the largest usable line number,
32767. This requires two steps.
The first is to erase line 99. Note that we're not just making achange or correcting an error
in line 99 —we want to completely eliminate it from the program. Easier done than said:
Type:
99
Then nana
The line is erased. How can we be sure? Think about this now. Got it??? Sure —"pull" a
LIST of the entire program by typing
list BZQ3D
The screen should show the program with lines 5, 10, 15, 20 and 98. .99 should be gone.
Any entire line can be erased the same way.
The second step is just as easy. Type
32767 END MJHHil
...and the new line is entered. Pull alisting of the program to see if it was. Was it??? Now
RUN the program to see if moving the END statement changed anything. Did it??? It
shouldn't have.
Other Uses for END
Move END from #32767 to line #17, then RUN. What happened? It ENDed the RUN after
printing line 10 and aspace. RUNit several times.
Now moveENDto line 13 and RUN .Then to line 8and RUN. Do you see the effect END
has, depending where it is placed (even temporarily) in aprogram?
14
This will work if line #98 is th& last PEINT
statement in yautprc^raKi.

Another Error Message
Let's cause adifferent error message to appear. Move the optional END statement from line
8to line 50000. The Computer should come back with an error message
H0W7
It is saying "I am very patient with you humans and will obey your every command as
long as it is within my ability. Line numbers above 32767 are beyond my ability, so just
HOW do you expect me to obey?" Pretty smart, this computer.
Commands
Learned in Lesson 2
Statements Miscellaneous
LIST PRINT (Space) Error Messages
REM WHAT?
END HOW?
Line Numbering
\lk general;;a'HOW? message means* "I m*der$ftihd
'your instruction?, but they're asJoag/ltte to 4o i.
something tfeatV impossible. !*The WHAT? error;'
message, on the other hand, means, "1 dont
understand yourinstruction —either th« grammar
isjsrong or you're using words that aren't in m>
.voea&ulary." :;\"'." ._" _- ",;*. ";
15

Notes:
16

Chapter 3
"But Can It Do Math?"
Yes, it can. Basic arithmetic is asnap for the TRS-80. So are highly complex math calcu-
lations —when you write special programs to perform them. (More on this later.)
LEVEL IBASIC uses the four fundamental arithmetic operations, plus afifth which is just
amodifications of two of the others.
1. Addition, using the symbol +
2. Subtraction, using the symbol
—
(See -nothing to this. Just like grade school. !wonder whatever happened to old
Miss ...Well, ahem -anyway)
3. Multiplication, using the special symbol *
(Oh drat, Iknew this was too easy to he true!)
4. Division, using the symbol /
(Well, at least it's simpler than the old -v symbol)
5. Negation (meaning "multiply-times-minus-one"), using the symbol —
Now that wasn't too bad, was it? Be careful. You cannot use an "X" for multiplication.
Unfortunately, a long time ago amathematician decided to use "X", which is aletter, to
mean multiply. We use letters for other things, so it's much less confusing to use a"*" for
multiplication. Confusion is one thing acomputer can't tolerate.
So, to computers, "*" is the only symbol which means multiply. After using it awhile, you,
too, may feel we should do away with Xas asymbol for multiplication.
Putting all this together in aprogram is not difficult, so let's do it. First, we have to erase
the "resident program" from the Computer's memory.
Type the command
then type
list Bgjga
to check that there's nothing left in memory. The Computer should come back with a
simplex
Of bourse, we £Iko need that old favorite, the
eqaifesigrj (:">.- 8u$ wait--the BASIC language
.is particular about how we use ibis ai^il J&tit
expressions (like 1+2*5) can only go on the
right-hand side of tfe:equals sign; i|ie.left-aand :":
sioW is reserved for the "variable ti&me". This is
thg name we give to tfce result of the math ex-
pression. {This all may seem alittle strange^ hut...
it's really quite simple, as you11 discover in the
next few. pages.) -----
"Resident program" ^computer talk tor "what's
already in there".
17

Putting the Beast to Work
We will now use the Computer for some very simple problem-solving. That means using
equations —oh -panic. But then, an equation is just alittle statement that says what's
on one side of the equals sign amounts to the same as what's on the other side.
That can't get too bad (it says here).
We're going to use that old standby equation,
"Distance traveled equals Rate of travel times Time spent traveling."
If it's been afew years, you might want to sit on the end of alog and contemplate that for
awhile.
To shorten the equation, lets choose letters (called variables) to stand for the three quan-
tities. Then we can rewrite the equation as aBASIC statement acceptable to the TRS-80:
40 D=R*T
What's that 40 doing there? That's the program line number. Remember, every step in apro-
gram has to have one. We chose 40, but another number would have done just as well. The
extra spaces in the line are there just to make the equation easier for us to read; the TRS-80
ignores them. Later, when you write very long programs, you'll probably want to eliminate
extra spaces, because they take up memory space. For now, they may be helpful, so leave
them in.
We can use any of the 26 letters from Athrough Zto identify the values we know as well as
those we want to figure out. Whenever you can, it's agood idea to chose letters that remind
you of the things they stand for —like the D, R, and Tof the Distance, Rate, Time equation.
To further complicate this very simple example, we will point out now that there's an
optional way of writing the equation, using the BASIC statement LET:
40 LET D=R*T
This use of LET reminds us that making Dequal Rtimes Twas our choice, rather than an
eternal truth like 1+1=2, Some computers are fussy, and always require the use of LET
with programmed equations. Your TRS-80 says, "Have it your way".
Okay —let's complete the program.
Assume:
Distance (in miles) =Rate (in miles per hour) multipled by Time (in hours). How far is it
from Boston to San Diego if ajet plane traveling at an average speed of 500 miles per
hour makes the trip in 6hours?
18
Remember, we have to use the *for multqriica-
tton. .,' ."/.
Here's what line 40 meansto t&e Computer;
"Tate the value^of Rand T^ multiply mem
together^ arul assign the resulting value to the vari-
able IX So until further notice, 5fe equalto the
result of Rtimes T."
Wecould not reverse the equation and write,
f^T^ p. This would have no meaning for the;
Computer. Hemember, the left hand side of the 1
equation is reserved for variable names (which-
:;eyer'tetter we choose). The right hand side iatihe--.
piaee to put math expressions involving numbers,
operators, and known variables.
'(Yes, Iktiow^ybu aim'd^'ttiat'oheln your.':hS
hut that's not the point!)
Other manuals for TRS-80
46
Table of contents
Other Radio Shack PDA manuals

Radio Shack
Radio Shack TRS-80 User manual

Radio Shack
Radio Shack EC-291 User manual

Radio Shack
Radio Shack PC-2 TRS-80 User manual

Radio Shack
Radio Shack PC-2 TRS-80 User manual

Radio Shack
Radio Shack TRS-80 User manual

Radio Shack
Radio Shack TRS-80 26-3501 User manual

Radio Shack
Radio Shack TRS-80PC-4 User manual