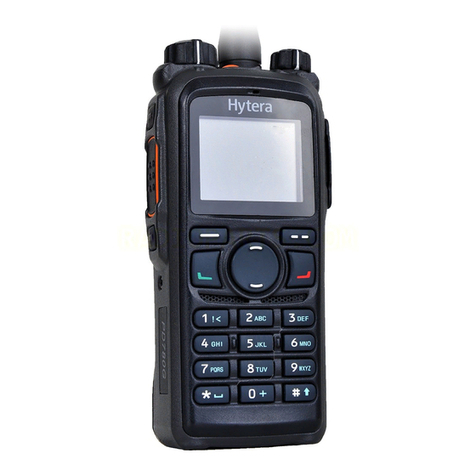
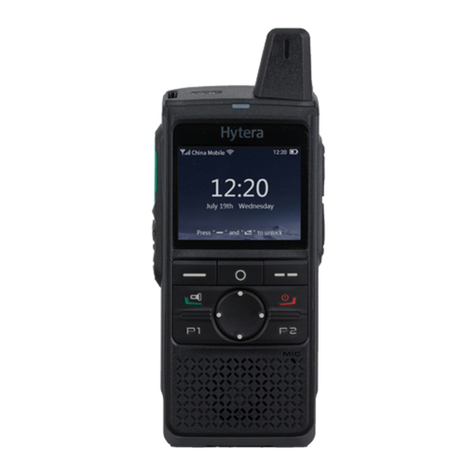
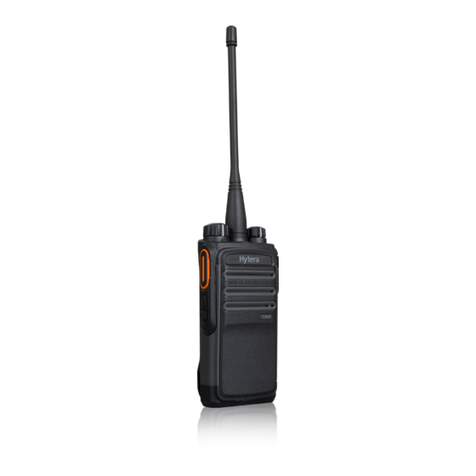
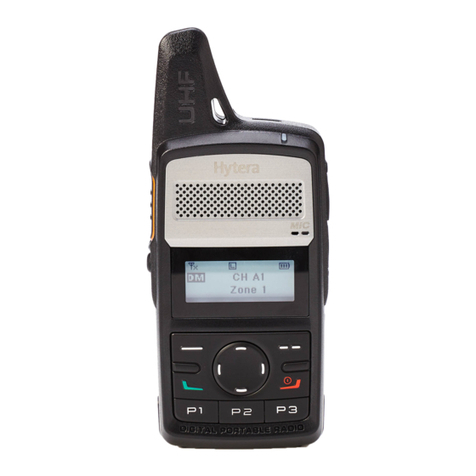
Hytera PT350 User manual

0 PT35
User Manual
is the trademark or registered trademark of Hytera Communications Corporation Limited.
2019 Hytera Communications Corporation Limited. All Rights Reserved.
Address: Hytera Tower, Hi-Tech Industrial Park North, 9108# Beihuan Road, Nanshan District, Shenzhen, People's Republic of China
Postcode: 518057
http:// www.hytera.com

Preface
Welcome to the world of Hytera and thank you for purchasing this product. This manual includes a description of the
functions and step-by-step procedures for use.
To avoid bodily injury or property loss caused by incorrect operation, please carefully read the Safety Information
Booklet before use.
This manual is applicable to the following product:
PT350 Portable Terminal

Copyright Information
Hytera is the trademark or registered trademark of Hytera Communications Corporation Limited (the Company) in the
People's Republic of China (PRC) and/or other countries or areas. The Company retains the ownership of its
trademarks and product names. All other trademarks and/or product names that may be used in this manual are
properties of their respective owners.
The product described in this manual may include the Company's computer programs stored in memory or other media.
Laws in PRC and/or other countries or areas protect the exclusive rights of the Company with respect to its computer
programs. The purchase of this product shall not be deemed to grant, either directly or by implication, any rights to
the purchaser regarding the Company's computer programs. The Company's computer programs may not be copied,
modified, distributed, decompiled, or reverse-engineered in any manner without the prior written consent of the
Company.
Disclaimer
The Company endeavors to achieve the accuracy and completeness of this manual, but no warranty of accuracy or
reliability is given. All the specifications and designs are subject to change without notice due to continuous
technological development. No part of this manual may be copied, modified, translated, or distributed in any manner
without the prior written consent of the Company.
We do not guarantee, for any particular purpose, the accuracy, validity, timeliness, legitimacy or completeness of the
third-party products and contents involved in this manual.
If you have any suggestions or would like to receive more information, please visit our website at:
http://www.hytera.com.
FCC Statement
This equipment has been tested and found to comply with the limits for a Class B digital device, pursuant to part 15
of FCC Rules. These limits are designed to provide reasonable protection against harmful interference in a residential
installation. This equipment generates and can radiate radio frequency energy. If not installed and used in accordance
with the instructions, it may cause harmful interference to radio communications. However, there is no guarantee that
interference will not occur in a particular installation. Verification of harmful interference by this equipment to radio
or television reception can be determined by turning it off and then on. The user is encouraged to try to correct the
interference by one or more of the following measures:
Reorient or relocate the receiving antenna. Increase the separation between the equipment and receiver.
Connect the equipment into an outlet on a different circuit to that of the receiver's outlet.
Consult the dealer or an experienced radio/TV technician for help.

Operation is subject to the following two conditions:
This device may not cause harmful interference.
This device must accept any interference received, including interference that may cause undesired operation.
Note: Changes or modifications to this unit not expressly approved by the party responsible for compliance could void
the user's authority to operate the equipment.
Compliance with RF Exposure Standards
The radio complies with the following RF energy exposure standards and guidelines:
United States Federal Communications Commission, Code of Federal Regulations; 47 CFR § 1.1307, 1.1310 and
2.1093
American National Standards Institute (ANSI)/Institute of Electrical and Electronic Engineers (IEEE) C95.
1:2005; Canada RSS102 Issue 5 March 2015
Institute of Electrical and Electronic Engineers (IEEE) C95.1:2005 Edition
RF Exposure Compliance and Control Guidelines and Operating
Instructions
To control your exposure and ensure compliance with the occupational/controlled environmental exposure limits,
always adhere to the following procedures.
Guidelines:
Do not remove the RF Exposure Label from the device.
User awareness instructions should accompany device when transferred to other users.
Do not use this device if the operational requirements described herein are not met.
Operating Instructions:
Transmit no more than the rated duty factor of 50% of the time. To transmit (talk), press the Push-to-Talk (PTT)
key. To receive calls, release the PTT key. Transmitting 50% of the time, or less, is important because the radio
generates measurable RF energy only when transmitting (in terms of measuring for standards compliance).
Keep the radio unit at least 2.5 cm away from the face. Keeping the radio at the proper distance is important as
RF exposure decreases with distance from the antenna. The antenna should be kept away from the face and eyes.
When worn on the body, always place the radio in an approved holder, holster, case, or body harness or by use of
the correct clip for this product. Use of non-approved accessories may result in exposure levels which exceed the
FCC's occupational/controlled environmental RF exposure limits.
Use of non-approved antennas, batteries, and accessories causes the radio to exceed the FCC RF exposure
guidelines.

controlée des limites d'exposition aux rf.
Communiquez avec votre distributeur local pour
peuvent entrainer des fac qui dépassent les niveaux
termes de mesure de la conformité aux
que la radio génère de
moins, est important parce que
à parler (ptt). Pour recevoir des
pousse le pousse
devraient Sensibilisation des utilisateurs instructions
controlé, toujours professionnelle / environnement
Pour controler l'exposition et s'assurer de la
Contact your local dealer for the product's optional accessories.
EU Regulatory Conformance
As certified by the qualified laboratory, the product is in compliance with the essential requirements and other relevant
provisions of 2014/53/EU.
Please note that the above information is applicable to EU countries only.
ISEDC Statement
The device has been tested and complies with SAR limits, users can obtain Canadian information on RF exposure
and compliance
Après examen de ce matériel aux conformité aux limites DAS et/ou aux limites d’intensité de champ RF, les
utilisateurs peuvent sur l’exposition aux radiofréquences et la conformité and compliance d’acquérir les
informations correspondantes
This device complies with Innovation, Science and Economic Development Canada Compliance license-exempt
RSS standard(s). Operation is subject to the following two conditions:
This device may not cause harmful interference.
This device must accept any interference received, including interference that may cause undesired operation.
Le présent appareil est conforme aux CNR d'Industrie Canada applicables aux appareils radio exempts de licence.
L'exploitation est autorisée aux deux conditions suivantes: (1) l'appareil ne doit pas produire de brouillage, et (2)
l'utilisateur de l'appareil doit accepter tout brouillage radioélectrique subi, même si le brouillage est susceptible d'en
compromettre le fonctionnement
conformité avec les limites d'exposition
respecter les procédures suivantes.
Lignes directrices:
Ne pas enlever l'étiquette de l'appareil d'exposition aux radiofréquences.
accompagner dispositif lorsque transférés à d'autres utilisateurs.
Ne pas utiliser cet appareil si les exigences opérationnelles décrites ci - après ne sont pas remplies.
Les instructions de fonctionnement:
Transmettre non plus que le facteur d'utilisation nominal de 50% du temps.à transmettre (parler),
appels, les ptt.50% du temps de transmission, ou
l'énergie rf seulement lors de la transmission des (en
normes). Ie groupe de la radio continue d'au moins 2,5 cm de la surface.garde la radio à la bonne distance est
important, car l'exposition aux champs rf diminue avec la distance de l'antenne.l'antenne doit se tenir
loin du visage et des yeux.
Quand portés sur le corps, toujours place de la radio dans un étui, hytera approuvé titulaire, ou un
harnais ou par l'utilisation de la vidéo pour ce produit.utilisation des accessoires non approuvés
d'exposition professionnelle et environnementale
Non approuvé des antennes, les piles et les accessoires causes la radio à dépasser les lignes
directrices sur l'exposition aux radiofréquences de fac.
les accessoires facultatifs du produit.

1
Contents
Documentation Conventions ................................................................................................................... 5
1. Packaging List....................................................................................................................................... 6
2. Product Overview.................................................................................................................................. 7
2.1 Product Layout................................................................................................................................... 7
2.2 Programmable Keys.......................................................................................................................... 8
3. Before Use ........................................................................................................................................... 10
3.1 Charging the Battery........................................................................................................................ 10
3.2 Attaching the Battery ....................................................................................................................... 10
3.3 Attaching the Antenna ..................................................................................................................... 11
3.4 Attaching the Belt Clip ..................................................................................................................... 11
3.5 Attaching the Audio Accessory........................................................................................................ 12
4. Basic Operations................................................................................................................................. 13
4.1 Turning the Terminal On or Off........................................................................................................ 13
4.1.1 Turning the Terminal On ........................................................................................................ 13
4.1.2 Turning the Terminal Off ........................................................................................................ 13
4.2 Adjusting the Volume....................................................................................................................... 13
4.3 Locking or Unlocking the Keypad .................................................................................................... 13
4.4 Switching the Operation Mode......................................................................................................... 13
4.5 Managing the PhoneBook ............................................................................................................... 14
4.5.1 Viewing Contact Information.................................................................................................. 14
4.5.2 Deleting a Contact or All Contacts......................................................................................... 14
4.5.3 Deleting a Number Type........................................................................................................ 14
4.5.4 Checking Space .................................................................................................................... 14
4.6 Viewing Device Information ............................................................................................................. 15
5. Status Indications ............................................................................................................................... 16
5.1 LCD Icons........................................................................................................................................ 16
5.1.1 Basic Status Icons................................................................................................................. 16
5.1.2 Short Data and Call Icons...................................................................................................... 16
5.1.3 Accessory Icons..................................................................................................................... 17
5.2 LED Indicator................................................................................................................................... 17
5.2.1 Battery Status Indicator ......................................................................................................... 17
5.2.2 Operation Status Indicator..................................................................................................... 18
6. Call Services........................................................................................................................................ 19
6.1 Group Call ....................................................................................................................................... 19
6.1.1 Initiating a Group Call............................................................................................................ 19
6.1.2 Receiving a Group Call.......................................................................................................... 19
6.1.3 Ending a Group Call .............................................................................................................. 19
6.2 Individual Call .................................................................................................................................. 19

2
6.2.1 Initiating an Individual Call..................................................................................................... 20
6.2.2 Receiving an Individual Call................................................................................................... 20
6.2.3 Ending an Individual Call....................................................................................................... 21
6.3 All Call ............................................................................................................................................. 21
6.4 PABX/PSTN Call (TMO Only).......................................................................................................... 21
6.4.1 Initiating a PABX/PSTN Call.................................................................................................. 21
6.4.2 Receiving a PABX/PSTN Call................................................................................................ 21
6.4.3 Ending a PABX/PSTN Call .................................................................................................... 21
6.5 Broadcast Call (TMO Only).............................................................................................................. 21
6.5.1 Initiating a Broadcast Call...................................................................................................... 22
6.5.2 Receiving a Broadcast Call.................................................................................................... 22
6.5.3 Ending a Broadcast Call........................................................................................................ 22
6.6 2nd PTT Call.................................................................................................................................... 22
6.6.1 TMO....................................................................................................................................... 22
6.6.2 DMO...................................................................................................................................... 22
7. Message Services ............................................................................................................................... 23
7.1 Status Message............................................................................................................................... 23
7.2 Templates........................................................................................................................................ 24
7.2.1 Sending a Template............................................................................................................... 24
7.2.2 Saving as a Template ............................................................................................................ 24
7.3 Flash Message ................................................................................................................................ 24
7.3.1 Sending a Flash Message..................................................................................................... 24
7.3.2 Forwarding a Flash Message ................................................................................................ 24
8. General Features................................................................................................................................. 26
8.1 Terminal Settings............................................................................................................................. 28
8.1.1 Basic Settings........................................................................................................................ 28
8.1.2 Favorite Functions................................................................................................................. 28
8.2 Network setting................................................................................................................................ 29
8.3 Audio Setting ................................................................................................................................... 29
8.3.1 Audio Profile .......................................................................................................................... 29
8.3.2 Multi Audio............................................................................................................................. 30
8.4 VOX................................................................................................................................................. 30
8.4.1 Enabling the VOX Feature..................................................................................................... 30
8.4.2 Setting the Threshold............................................................................................................. 31
8.4.3 Selecting a Microphone......................................................................................................... 31
8.5 Talkgroup......................................................................................................................................... 31
8.5.1 Folder Type............................................................................................................................ 31
8.5.2 Talkgroup Type ...................................................................................................................... 32
8.5.3 Setting the Selected Folder ................................................................................................... 33
8.5.4 Setting the Default Group...................................................................................................... 33

3
8.5.5 Setting the 2nd PTT Group.................................................................................................... 33
8.5.6 Managing a Normal Folder.................................................................................................... 34
8.5.7 Managing a Favorite Folder................................................................................................... 34
8.5.8 Managing a Scan List............................................................................................................ 34
8.6 DGNA.............................................................................................................................................. 35
8.7 Voice Feedback............................................................................................................................... 35
8.8 Power .............................................................................................................................................. 35
8.9 Work Type ....................................................................................................................................... 36
8.10 Energy Saving Mode ..................................................................................................................... 36
8.11 Group Call Detector....................................................................................................................... 37
8.12 Positioning..................................................................................................................................... 37
8.12.1 Viewing Position .................................................................................................................. 37
8.12.2 Updating Time ..................................................................................................................... 37
8.12.3 Sending Position Messages ................................................................................................ 38
8.12.4 Setting the Positioning Feature............................................................................................ 38
8.12.5 Uploading Position Data...................................................................................................... 38
8.13 BT.................................................................................................................................................. 38
8.13.1 Enabling the BT Feature...................................................................................................... 39
8.13.2 Connecting to a BT Device.................................................................................................. 39
8.13.3 Setting Visibility ................................................................................................................... 39
8.14 Emergency Call ............................................................................................................................. 39
8.14.1 Initiating an Emergency Call................................................................................................ 40
8.14.2 Answering an Emergency Call............................................................................................. 40
8.14.3 Ending an Emergency Call.................................................................................................. 40
8.14.4 Emergency Call Type in DMO ............................................................................................. 40
8.14.5 Emergency Cycle ................................................................................................................ 40
8.14.6 Emergency Status Message................................................................................................ 41
8.15 Security.......................................................................................................................................... 41
8.15.1 Overspeed Alarm................................................................................................................. 41
8.15.2 TxI........................................................................................................................................ 41
8.15.3 Covert Mode........................................................................................................................ 41
8.15.4 Man Down ........................................................................................................................... 42
8.15.5 Lone Worker........................................................................................................................ 42
8.15.6 Temporary Disable, Permanent Disable, and Enable .......................................................... 42
8.15.7 Delete Security Data Urgently ............................................................................................. 42
9. Troubleshooting.................................................................................................................................. 44
10. Product Cleaning............................................................................................................................... 46
10.1 Product Care.................................................................................................................................. 46
10.2 Product Cleaning ........................................................................................................................... 46
11. Optional Accessories........................................................................................................................ 47
5
Documentation Conventions
Icon Conventions
Icon Description
Indicates references that can further describe the related topics.
Indicates situations that could cause data loss or equipment damage.
Indicates situations that could cause major personal injury or even death.
Notation Conventions
Item Description Example
Boldface
Denotes menus, tabs, parameter names,
window names, dialogue names, and
hardware buttons.
To save the configuration, click Apply.
The Log Level Settings dialogue box appears.
Press the PTT key.
" "
Denotes messages, directories, file names,
folder names, and parameter values.
The screen displays "Invalid Battery!".
Open "PDT_PSS.exe".
Go to "D:/opt/local".
In the Port text box, enter "22".
> Directs you to access a multi-level menu. Go to File > New.
Italic Denotes document titles.
For details about using the DWS, refer to
Dispatch Workstation User Guide.
Courier New
Denotes commands and their execution
results.
To
set the IP address, run the following
command:
vos-cmd - m name IP

6
1. Packaging List
Please unpack carefully and check that you have received the following items. If any item is missing or damaged,
contact your dealer.
Item Quantity (PCS) Item Quantity (PCS)
Terminal 1 Antenna 1
Battery 1 Belt Clip 1
Charger 1 Documentation Kit 1
Power Adapter 1 / /
Figures in this manual are for reference only.
Check whether the frequency band marked on the antenna label matches that on the terminal label. If not,
contact your dealer.

7
2. Product Overview
2.1 Product Layout
No. Part Name No. Part Name
1 Push-to-Talk (PTT) Key 14 Build-in Microphone
2 Side Key 1 (SK1) 15 Accessory Connector Cover
3 Side Key 2 (SK2) 16 Speaker
4 Emergency Key 17 Menu Key
5 Group Selector Knob 18 Cancel/Back Key
6 Volume Control Knob 19 Power On-Off/End Key
7 Operation Status Indicator 20 Navigation Keys (Up, Down, Left, and Right)
8 OLED Display 21 P3 Key
9 OK Key 22 P2 Key

8
No. Part Name No. Part Name
10 Answer/Call Key 23 Battery Latch
11 P1 Key 24 Strap Hole
12 Antenna 25 Belt Clip
13 Battery Status Indicator 26 Battery
2.2 Programmable Keys
For enhanced convenience, you can set the following keys as shortcuts to assignable terminal features: Up key, Down
key, Answer/Call Key, SK1, SK2, P1 key, P2 key, and P3 key.
To set or cancel a shortcut, on the home screen, press the Menu key, and then go to Settings > Radio > Keypad >
Shortcuts.


10
3. Before Use
3.1 Charging the Battery
Use the approved charger to charge the battery.
Read the Safety Information Booklet before charging.
The remaining lithium-ion battery power is limited to 30% pursuant to the new lithium battery shipment
regulation approved by International Air Transport Association (IATA). Before initial use, charge the
battery.
Before initial use, make sure to charge the battery. You can charge either the standalone battery or the terminal with
battery attached. It is recommended that the terminal remain powered off during charging.
The LED indicator on the charger shows the charging status, as described in the following table:
Indicator Charging Status
Glows red The battery is being charged.
Glows orange The battery is charged to 90% or above.
Glows green The battery is fully charged.
Flashes red rapidly The battery fails to be charged.
Flashes red slowly No battery is placed on the charger.
3.2 Attaching the Battery
Use the approved battery to avoid explosion during battery replacement.
Dispose of the used battery according to "Precautions for Disposal" in the Safety Information Booklet.
Insert the tabs at the battery’s top part into the slots at the terminal’s top part, and then press the battery latch and
push the battery into the terminal until a click is heard.

11
3.3 Attaching the Antenna
Do not hold the terminal by the antenna and swing it. This may affect the antenna performance and shorten
the life span of the antenna.
3.4 Attaching the Belt Clip
1. Make sure the arc end of the metal rotating component of the belt clip is vertical to the ground.
2. Insert the component into the fastener of the terminal’s rear cover until a click is heard.

12
3.5 Attaching the Audio Accessory
To avoid short circuit or corrosion, close the accessory connector cover and fasten the screw after removing
the accessory.
1. Loosen the screw on the accessory connector cover, and then open the cover.
2. Plug the accessory into the accessory connector, and then rotate the screw on the accessory plug clockwise
until hand tight.

13
4. Basic Operations
4.1 Turning the Terminal On or Off
4.1.1 Turning the Terminal On
1. Long press for two seconds.
2. Press the Emergency key.
3. If configured, the terminal automatically starts up when you attach the battery.
4.1.2 Turning the Terminal Off
1. Long press for 2 seconds.
2. When the OLED display shows "Power off?", press the OK key.
4.2 Adjusting the Volume
To increase the volume, rotate the Volume Control Knob clockwise.
To decrease the volume, rotate the Volume Control Knob anticlockwise.
4.3 Locking or Unlocking the Keypad
When the keypad is not in use, it is recommended that you lock it to avoid unintended operations.
Auto Lock
On the home screen, press the Menu key, go to Settings > Radio > Keypad > Auto Lock, and then select On.
With the Auto Lock feature enabled, if no operation is made or no call or message is received within the preset
time, the keypad will be locked automatically.
Manual Lock or Unlock
On the home screen, press the OK key and then the P1 key.
4.4 Switching the Operation Mode
The terminal can operate in DMO or TMO.
Manual Switch
On the home screen, press the Menu key, go to Mode, and then select the mode.
On the home screen, press the OK key, go to Mode, and then select the mode.
Press the preprogrammed TMO&DMO Switch key.
Auto Switch

14
The Auto Mode Switch feature allows the terminal to switch the operation mode automatically, so as to
guarantee the normal communication of the terminals in no-signal coverage areas or when the system fails.
If the Auto Mode Switch feature is programmed, you can enable it as follows:
On the home scree, press the Menu key, go to Settings > Function > Auto Mode Switch, and then select On.
4.5 Managing the PhoneBook
You can save private, PABX, and PSTN numbers to the PhoneBook, and view or call contacts in the PhoneBook.
If configured, you can also delete contacts in the PhoneBook and check the space of the PhoneBook.
4.5.1 Viewing Contact Information
1. On the home screen, press the Menu key, and then go to PhoneBook.
2. Select the contact, and then press the OK Key.
The name, number, and number type of the contact are displayed on the screen.
3. (Optional) To switch the number type of the contact, press the Left or Right key.
4.5.2 Deleting a Contact or All Contacts
1. On the home screen, press the Menu key, and then go to PhoneBook.
2. Do one of the following:
To delete a specified contact, select the contact, press the Menu key, select Delete, and then confirm the
deletion.
To delete all contacts, press the Menu key, select Delete All, and then confirm the deletion.
4.5.3 Deleting a Number Type
A contact can be configured with seven number types.
To delete a number type, do as follows:
1. On the home screen, press the Menu key, and then go to PhoneBook.
2. Select the contact and the number type.
3. Press the Menu key, select Delete, and then confirm the deletion.
4.5.4 Checking Space
1. On the home screen, press the Menu key, and then go to PhoneBook.
2. Press the Menu key.
3. Select Space.

15
The used and free space of the PhoneBook are displayed on the screen.
4.6 Viewing Device Information
On the home screen, press the Menu key, and then go to Settings > DeviceInfo.
The model, version, and ISSI of the device are displayed on the screen.
Other manuals for PT350
1
Table of contents
Other Hytera Two-way Radio manuals

Hytera
Hytera X1e User manual

Hytera
Hytera PD79X Ex User manual

Hytera
Hytera PNC370 User manual

Hytera
Hytera PD405 User manual

Hytera
Hytera DMR User manual

Hytera
Hytera PD40X User manual

Hytera
Hytera PT580 User manual

Hytera
Hytera TC-508 User manual

Hytera
Hytera TM-600 User manual

Hytera
Hytera X1p User manual

Hytera
Hytera X1p Service manual

Hytera
Hytera HYT TC-310 User manual

Hytera
Hytera PD782 User manual

Hytera
Hytera PD702 User manual

Hytera
Hytera PD365 User manual

Hytera
Hytera TC-508V2 User manual

Hytera
Hytera TETRA User manual

Hytera
Hytera HYT TC-500 User manual

Hytera
Hytera TC-700 User manual

Hytera
Hytera BD612i User manual