Using up/down key to select the code;
Press TALK button to confirm the desired code and go
back to normal mode.
Note: RT388 can only work together when the units are
tuned to the same channel and have the same
CTCSS code on that channel.
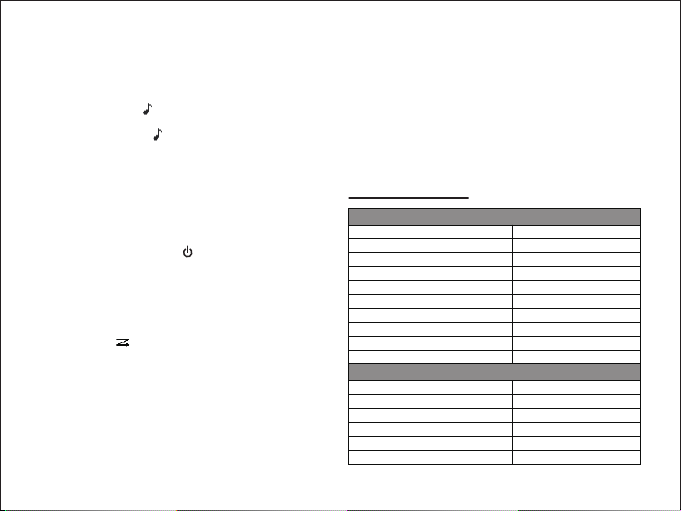
VOX for Hands-free
When VOX is activated, there is no
need to press TALK button to talk.
Tap MENU button three times, then
“VOX” and VOX sensitivity level
(OF,01,02,03) will be displayed on
the screen.
You can adjust VOX sensitivity level by pressing up/
down key.
Note: OF means VOX function is inactivated; 03 is the
highest sensitivity setting and 01 the lowest.
Therefore, level 03 is recommended when the
radio is used in quiet surroundings and 01 for
noisy environment.
Select Call Tone
To inform other radio users in your
group that you want to talk or you
have finished talking by transmitting
a tone to their radios.
Press MENU button four times, then
“CA” and call tone number (01, 02, 03, 04, 05, 06, 07,
08, 09, 10) will blink on the screen;
Using up/down key to select the tone you prefer;
Press TALK button to confirm the desired tone and go
back to normal mode.
As to how to send the desired call tone to another party,
please go and check “ Call another party” on Page.
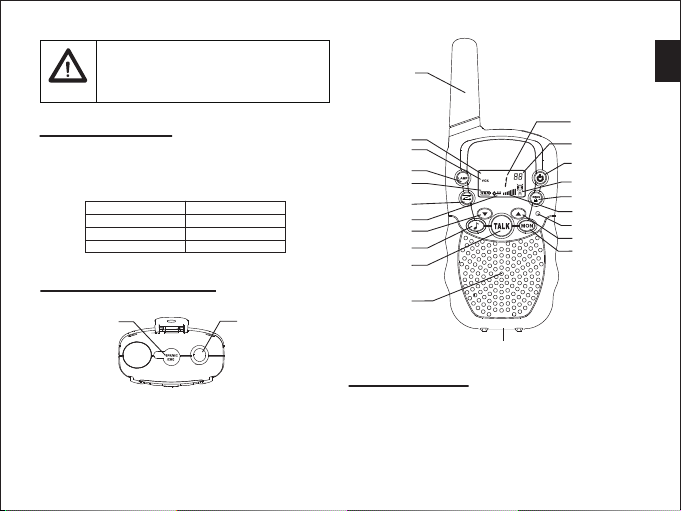
Channel Scan
Convenient to detect channels with
activities.
When button is tapped, the radio
will automatically scan for channels
with activities. The scanning will
stop when channels with activities are found, and the
radio will play what it detects on that channel.
To continue the scan, just press button .
Note: When a channel with activities is detected, you
can join the conversation and back away from the
scan by pressing TALK button.
Call Another Party
Press button to transmit a call tone to
other radios in your group so that they
can be prepared when you want to talk
or you have finished talking. (See how
to select call tone on Page)
Note: Another party can only receive the call tone when
the following requirements are met at the same
time.
1.The receiving unit is on the same channel and shares
the same CTCSS code as the unit that sends the call
tone;
2. The receiving unit is within the communication range.
Monitor
To receive weak signals from other radios in your group,
all you need to do is press MON button.
vox
5