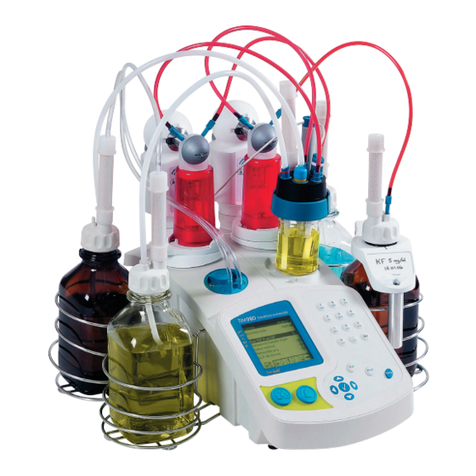
Radiometer Analytical TitraLab TIM960 User manual

Contents 1
TIM960, TIM965 and TIM980
Titration Workstations
User’s Guide
D21T078

2Contents
D21T078 • Printed by Radiometer Analytical SAS • 2006-07B

Contents 3
ContentsContents
ContentsContents
Contents
General information...............................................................5
1. Introduction ........................................................................7
Readme! ........................................................................................... 7
Workingin Supervisormode .............................................................. 7
Workingin Routinemode ................................................................... 10
Reagenthandling usingRFID technology ........................................... 11
2. Getting started....................................................................15
Keyboard............................................................................................ 15
Basic principles ................................................................................. 16
Mainwindow ...................................................................................... 18
Reagentswindow ............................................................................... 19
Electrodeswindow ............................................................................. 21
Cellwindow ........................................................................................ 23
Systemconfiguration ......................................................................... 25
3. Programming guidelines ...................................................33
Create anelectrode ............................................................................ 34
Editelectrodescreen ......................................................................... 37
Programmingelectrodeparameters.................................................... 39
Createareagent ................................................................................ 40
Editreagentscreen............................................................................ 41
Programmingreagentparameters ...................................................... 43
Createa method ................................................................................ 44
Editmethodscreen ............................................................................ 45
Programmingmethodparameters ...................................................... 47

4Contents
4. Running analyses...............................................................49
Runelectrode calibration.................................................................... 50
Runreagentcalibration....................................................................... 50
Runmethod ....................................................................................... 51
Rundirect measurement .................................................................... 51
Runmanual dosing ............................................................................ 52
5.Viewing data........................................................................53
How to access? ................................................................................. 53
Sampleresults................................................................................... 54
Reagentcalibration results ................................................................. 55
Electrodecalibrationresults ............................................................... 56
Globalvariables ................................................................................. 57
6. Printing data .......................................................................59
Manualprintouts ................................................................................ 60
Automaticprintouts............................................................................ 62
7. Connection of peripherals.................................................63
8. Maintenance........................................................................65
Cleaning............................................................................................. 65
Transportingthe instrument ................................................................ 65
Servicing............................................................................................ 65
International Standards.........................................................66

Introduction 5
General inforGeneral infor
General informationmation
mationmation
mation
Safety InformationSafety Information
Safety Information
Please read this entire manual before unpacking, setting up, or operating
this equipment. Pay attention to all danger and caution statements.
Failure to do so could result in serious injury to the operator or damage
to the equipment. To ensure that the protection provided by this
equipment is not impaired, do not use and do not install this equipment in
any manner other than that specified in this manual.
Precautionary LabelsPrecautionary Labels
Precautionary Labels
Read all labels and tags attached to the instrument. Personal injury or
damage to the instrument could occur if not observed.
This symbol, if noted on the instrument, references the
instruction manual for operation and/or safety information.
Electrical and electronical equipment marked with this
symbol may not be disposed of in European public
disposal systems after 13 August of 2005. In conformity
with European local and national regulations (EU
Directive 2002/96/EC), European electrical equipment
users must now return old or end-of life equipment to the
Producer for disposal at no charge to the user.
Note: For equipment supplied or produced by
"Radiometer Analytical", please contact www.hach-
lange.com and select your country for instructions on how
to return your equipment for proper disposal."
This symbol, when noted on the product, identifies the
location of a fuse or current limiting device.

6Chapter 1
Warning !
The TitraLab system has been developed to meet the requirements of
volumetric titration applications. It is therefore aimed at experienced
users who have the knowledge required to operate the instrument and
implement the security instructions enclosed. Please remember that the
TitraLab system must not, under any circumstances, be used to perform
tests on living beings.
We accept no responsibility for using the TitraLab system and its
peripheral devices under conditions that are not specified in this
Reference Manual and its associated User’s Guide (part no. D21T078).
Compliance with FCC rules, part 15Compliance with FCC rules, part 15
Compliance with FCC rules, part 15
Information to the userInformation to the user
Information to the user
NOTE: This equipment has been tested and found to comply with the
limits for a Class B digital device, pursuant to part 15 of the FCC Rules.
These limits are designed to provide reasonable protection against
harmful interference in a residential installation. This equipment
generates, uses and can radiate radio frequency energy and, if not
installed and used in accordance with the instruction, may cause harmful
interference to radio communications. However, there is no guarantee
that interference will not occur in a particular installation. If this
equipment does cause harmful interference to radio or television
reception which can be determined by turning the equipment off and on,
the user is encouraged to try to correct interference by one or more of
the following measures:
- Reorient or relocate the receiving antenna.
- Increase the separation between the equipment and receiver.
- Connect the equipment into an outlet on circuit different from that to
which the receiver is connected.
- Consult the dealer or an experienced radio/TV technician for help.
Warning!!
Changes and modifications that are not expressly approved by the party
responsible for compliance could void the user's authority to operate the
equipment.

Introduction 7
1. Intr1. Intr
1. Intr1. Intr
1. Introductionoduction
oductionoduction
oduction
Read me!Read me!
Read me!Read me!
Read me!
The interface of the Titration Manager has been specially designed to
clearly guide you through every step of the programming and running of
the analyses, whether you are a supervisor or a routine user.
An important part of this interface is to check and control the presence of
different elements necessary to run the defined application.
Thanks to a RFID tag attached to each burette stand, the Titration
Manager is able to know at any moment which reagent is installed on
which burette stands. Handling burettes and reagents is easier and more
secure. See "Titrant management using RFID tags" at the end of this
chapter.
WW
WW
Working in Supervisor modeorking in Supervisor mode
orking in Supervisor modeorking in Supervisor mode
orking in Supervisor mode
The Supervisor has access to all parameter edition screens for
creation
and edition
purposes.
When programming in “SUPERVISOR” mode, it is recommended to work
in stages. These stages
should
be carried out in the order described
below:
1. Define your electrode(s)
Identify electrodes (including temperature sensors) to be used for the
analysis.
Electrodes can be created from the following lists, Catalogue, Other or
Copy from. When creating the electrode, define if electrode calibration is
required (or not), if yes specify the “periodicity” of the calibrations and the
pH standards to be used. Refer to chapter 3.
2. Define reagent
Identify reagents to be used for the analysis.
Reagents can be created from the following lists, Catalogue, Other, Copy
from. When creating the reagent, define if reagent calibration is required
(or titre entered manually), if yes specify the “periodicity” of the calibra-
tions and the calibration method. Refer to chapter 3.
If you are to perform a calibration, make sure that the electrode(s)
used for the calibration are the same as those used in the method.

8Chapter 1
3. Create a new method or Edit a pre-programmed one
Create the measurement or titration method to be used for the analyses.
Enter the parameters required to calculate the results, refer to chapter 3.
When you have finished programming, select the method or pre-
programmed application, refer to Short-Form Reminder no. 3.
If a sample changer is to be used, define the sample changer in the
Configuration menu before selecting Working mode = SAC
sequence in the main window.
4. Check icons
The following icons indicate the exact state of your working system.
Sunny icon:
Everything is OK. Run the method or sequence.
Sunny icons are required to run the method
.
Cloudy icon:
Action required within 12 or 24 hours. For example calibra-
tion and/or reagent bottle exchange.
Stormy icon:
Electrode/reagent calibration date elapsed or electrode(s)/
reagents(s) not installed.
Question mark:
It is a programming error, reagent and/or electrode is/are
not defined in the selected method. Revise the method
programming.
Calculator icon:
Reprocessing mode (Working mode = Reprocessing) is set
on the instrument.
Refer to Reagent and Electrode windows.

Introduction 9
When Cloudy/Stormy/Question mark icons appear, press 1 to run
the “Check” command.
Depending on the icons displayed, the Titration Manager will
automatically guide you through the steps necessary to run the
analysis
.
a. Connect/install the electrode(s)
Connect/install electrodes and temperature sensors, Refer to
Short Form Reminder no. 1.
b. Install reagents(s)
If the burette is not installed, the Titration Manager will
automatically guide you to the Install burette procedure.
Refer to Short Form Reminder no. 2 and "Reagent
management using RFID tags" at the end of this chapter.
c. Calibrate electrode(s)
Refer to chapter 4 and Short Form Reminder no. 4.
d. Calibrate reagent(s) or Enter titre
Run the reagent calibration (refer to chapter 4 and Short Form
Reminder no. 5) or enter the titre manually.
e. Run the method or the sequence, when Sunny icons are
displayed,
Refer to Short Form Reminder no. 6 and 7.

10 Chapter 1
WW
WW
Working in Routine modeorking in Routine mode
orking in Routine modeorking in Routine mode
orking in Routine mode
In “ROUTINE” mode you are guided at every step, thanks to the clear-
text messages and the icons present on the large graphic display.
A Routine operator has access to all the displays for
checking
purposes.
Running methods
When working in “ROUTINE” mode, it is necessary to install your
titration system according to the selected method or sequence, prior to
running a method or sequence.
1. Select the method or sequence
Refer to chapter 4.
2. Check icons and run the method or sequence
Refer to page 8.

Introduction 11
Reagent handling using RFID technologyReagent handling using RFID technology
Reagent handling using RFID technology
What’s RFID means and how does it work?What’s RFID means and how does it work?
What’s RFID means and how does it work?
Radio Frequency IDentification (RFID) is a generic term that is used to
describe a system that transmits the identity (in the form of a unique serial
number) of an object or person wirelessly, using radio waves. It's grouped
under the broad category of automatic identification technologies.
It’s the combination of a “tag” and a “reader”. A typical RFID tag consists
of a microchip attached to a radio antenna mounted on a substrate. The
chip can store data. The reader is used to retrieve the data stored on an
RFID tag. A typical reader is a device that has one or more antennas that
emit radio waves and receive signals back from the tag. The reader then
passes the information in digital form to a computer system.
In our assembly an RFID tag is attached inside the sleeve of the burette
stand. This tag is clearly visible.
The RFID reader is mounted inside the burette tap block at the back of
the titrator and located with a small RFID graphic icon.When the burette
is installed, the tag and the reader are face to face.
RFID tag placed on the burette stand
RFID reader mounted inside the burette tap block

12 Chapter 1
Which data contains a burette stand RFID tag?Which data contains a burette stand RFID tag?
Which data contains a burette stand RFID tag?
All identification or location information concerning the burette stand and
its associated reagent (if a reagent is installed on that stand). The tag also
supports the reagent GLP data.
For the burette stand:
.burette ID and burette volume: this information is present in the tag
as a factory setting and cannot be erased and changed,
.burette first installation date.
For the reagent:
.reagent identification parameters entered by the user while creating
the reagent: Reagent ID, target titer, expiry date, batch number and
calibration method parameters (if a calibration is requested),
.reagent last calibration date and results.
The Burette ID, Burette volume, Reagent ID and Reagent target titer are
read on starting the following user actions:
.burette installation, replacement and removal,
.reagent installation, replacement (reagent of 2 different IDs), bottle
exchange and reagent removal.
At the end of these actions, new data is saved in the RFID tag of the
burette stand.

Introduction 13
Benefits of using RFID technology on burette standsBenefits of using RFID technology on burette stands
Benefits of using RFID technology on burette stands
The Titration Manager knows at any moment which reagent is installed
on which burette stands.
.Handling burettes and reagents is easier.
For example, no need to enter data on burette installation. The
Titration Manager reads automatically the burette and install
reagent identification data (burette ID and volume),
.RFID tag prevents the operator from using wrong reagents.
On installing a reagent, the Titration Manager detects automatically
if a reagent is already installed or not. If a reagent with a different ID
is already installed, a reagent replacement is initiated. If a reagent
with a same ID is already installed, no installation is performed and
a reagent check data screen is displayed instead.
On removing a burette, the Titration Manager detects automatically
if a reagent is already installed or not. If a reagent is installed, the
Titration Manager removes the reagent before removing the
burette.
.RFID tag supports the complete reagent GLP data.
By this way, you ever use updated reagents data and traceability of
result is ensured. There is no possible permutation of identification
data from one reagent to another.

14 Chapter 1

Gettingstarted 15
2. Getting star2. Getting star
2. Getting startedted
tedted
ted
KeyboardKeyboard
KeyboardKeyboard
Keyboard
1. Alphanumerickeypad toenter dataand parameterson thesame
principle as mobile telephones. These keys can also be used for
quick access to the different menus; refer to the display on the
followingpage.
2. Del: deletes the character on which the cursor is positioned.
Operator may end the analysis before the max. titration time or the
max. volume have been reached, if he considers his analysis
finished.Calculationsareperformed.
3. Esc: returns to the previous screen. During analysis, this key allows
you to enter the method, electrode and titrant menu.
4. Print: prints the data concerning the screen displayed.
5. Stop: stops an analysis or a burette function. Press this key for 3
seconds in the Main window to gain access to the setup
parameters.
6. RIGHT, LEFT, UP, DOWN arrow keys are used to move to different
options within the menus.
7. ✓: confirms a data entry, a message or a function asked for by the
user.
1
2
3
4
5
6
7

16 Chapter 2
BasicprinciplesBasicprinciples
Basicprinciples
When the instrument is switched on, the Main window is displayed.
When the instrument is switched on for the first time the screen will be
as follows:
Title bar
Selected line
Menuoptions.
Press the
corresponding number
for quick access to the
different menus. For
example, press 4 to
enter the Method library
Method tab Reagent tab Electrode tab Cell tab
If required, you can adjust the contrast of the display by:
• pressing 0 to increase the brightness,
• pressing 7 to decrease the brightness.
The title bar in the menu indicates the instrument name (TIM960 for
example) and the actual time. You will be shown how to personalise the
name and adjust the time further on in the manual.
The RIGHT and LEFT arrow keys allow you to move from one tab to the
other and enter the Reagent, Electrode and Cell menus.
• Work your way through the 4 tabs, then back to the Main window.
The UP and DOWN keys allow you to select a line. To enter an option,
select the line, and press ✓. You can also press the corresponding
numerical key.

Gettingstarted 17
1. Press 4 or select the line Method library and press ✓to enter the
Method library screen. Press Esc to return to the Main window.
2. Selectthe lineWorking mode andpress ✓.The following
options are available:
Method: to run a single method.
Sequence: to create or run a sequence of methods. Beakers are
manually changed between two method runs.
SAC Method: to run a single method to be performed using a
sample changer.
SAC Sequence: to create or run a sequence of methods to be
performedusingasamplechanger.
Reprocessing: toreprocessthe lastcurve withdifferentparameters
from the original method and thus recalculate a result.
If you select a Reprocessing working mode, the Method, Reagent
and Electrode tabs display a calculator icon as shown below:
Note: the working mode selected will have no effect on the type of
method you wish to create.
Donotforget to definethe sample changerinthe Configuration
menubeforeselecting SACMethodor SACSequence.
3 Press ✓to confirm your selection.

18 Chapter 2
MainwindowMainwindow
Mainwindow
When the instrument is switched on the Main window is displayed.
1. Title bar: indicates the instruments name and the current time.
2. Working mode: Select the way in which you want to work. Choose
fromMethod,SAC Method,Sequence,SAC Sequence,
Reprocessing;refertopreviouspage.
3. Check or Run: check or run the selected method /sequence. The
method can be run when 2 sunny icons are displayed in the
Reagents and Electrodes tabs.
If 2 cloudy/stormy icons are
displayed,activatethe"Check"command.TheTitration
Managerwillautomatically guideyou throughthe necessary
operationsrequiredtosolvetheproblem(s)
.
4. Sequence/samplestack:ifSAC SequenceorSac Method
has been selected in step 2 above. Program the sample stack.
Select or edit the method sequence.
5. Select method: select method to be used for the analyses.
6. Method library:supervisor use only: create, edit, reset and delete
methods to correspond to your specific needs.
Or Display methods - routine use only : display the main
parameters of the selected method.
7. GLP-Archives: access GLP tables and visualise the stored method
sample results and global variables.
8. Method tab: Animated icon indicates when a method/sequence is
running.
8
1
2
3
4
5
6
7

Gettingstarted 19
ReagentswindowReagentswindow
Reagentswindow
Use the RIGHT arrow key to move to this window.
1
2
4
5
7
9
3
8
1. Title bar: indicates the name of the window.
2. Calibrate/Entertitre:determinetheconcentrationofthetitrant
(titre) by running a calibration or a calibration sequence or by
enteringthe titremanually.
3. Install reagents: install or replace reagents in a method or se-
quence.
4. Check reagents: verify the identification parameters of the
reagentsused intheworking methodorsequence.
5. Reagent library- supervisor use only: create, edit, reset and delete
reagents to correspond to your specific needs.
6. Manual dosing: delivers a reagent at a given speed and measures
a signal at a connected electrode.
7. GLP-Archives: access GLP tables and visualise the stored reagent
calibrationresults.
8. Burette functions: fill, empty, flush, rinse and burette service
position. Global flush of all installed burettes simultaneously.
9. Reagent tab: Reagent status icon indicates the state of the reagent
system. Five types of icons can be displayed.
6

20 Chapter 2
Sunny icon. The reagent calibration or manual entry of the
titre has been performed for all the reagents present in the
system. Everything is just right!
Cloudy icon. The reagent calibration of one of the reagents in
the system should be performed within 12 or 24 hours.
The expiry date of one of the reagents in the system will
elapse in less than one week.
Stormy icon. The reagent calibration or the expiry date of
one of the reagents in the system has elapsed.
If acceptance limits have been set for the calibration: at
leastonecalibrationresultlies outsidethe programmed
acceptance limits.
At least one of the reagents present in the system has not
beeninstalled.
Check the sequence or method, (press 1in the Main
window). The instrument prompts you to do the necessary
operations. You are guided step by step.
Question mark. There is a problem in the editing of the
reagent system. You need to be in Supervisor mode to solve
theproblem.Checkthesequence/method
parametersofthereagent ortheelectrode.
Check the sequence or method, (press 1in the Main
window).Theinstrumentindicatesthepossibleerrorsand
prompts you to correct them until ?disappears.
Calculatoricon.Reprocessingmode(Workingmode=
Reprocessing) is set on the instrument. This icon is
displayed irrespective of the status of the reagent system
used.
This manual suits for next models
2
Table of contents
Other Radiometer Analytical Laboratory Equipment manuals
Popular Laboratory Equipment manuals by other brands

Leica
Leica RM2125RTS Instructions for use

Leica
Leica FlexLine Frequently asked questions

Endress+Hauser
Endress+Hauser Analytik Jena Biometra TRIO installation instructions

Cellbox
Cellbox Flight 2.0 Technical manual

YOKOGAWA
YOKOGAWA 701977 user manual

Fritsch
Fritsch ANALYSETTE 28 IMAGESIZER operating manual