9
the desired position – fig. – 1, simultaneously pulling the seat forward – fig. – 2. Lower
the lever in the desired position and wait until a distinct click is heard.
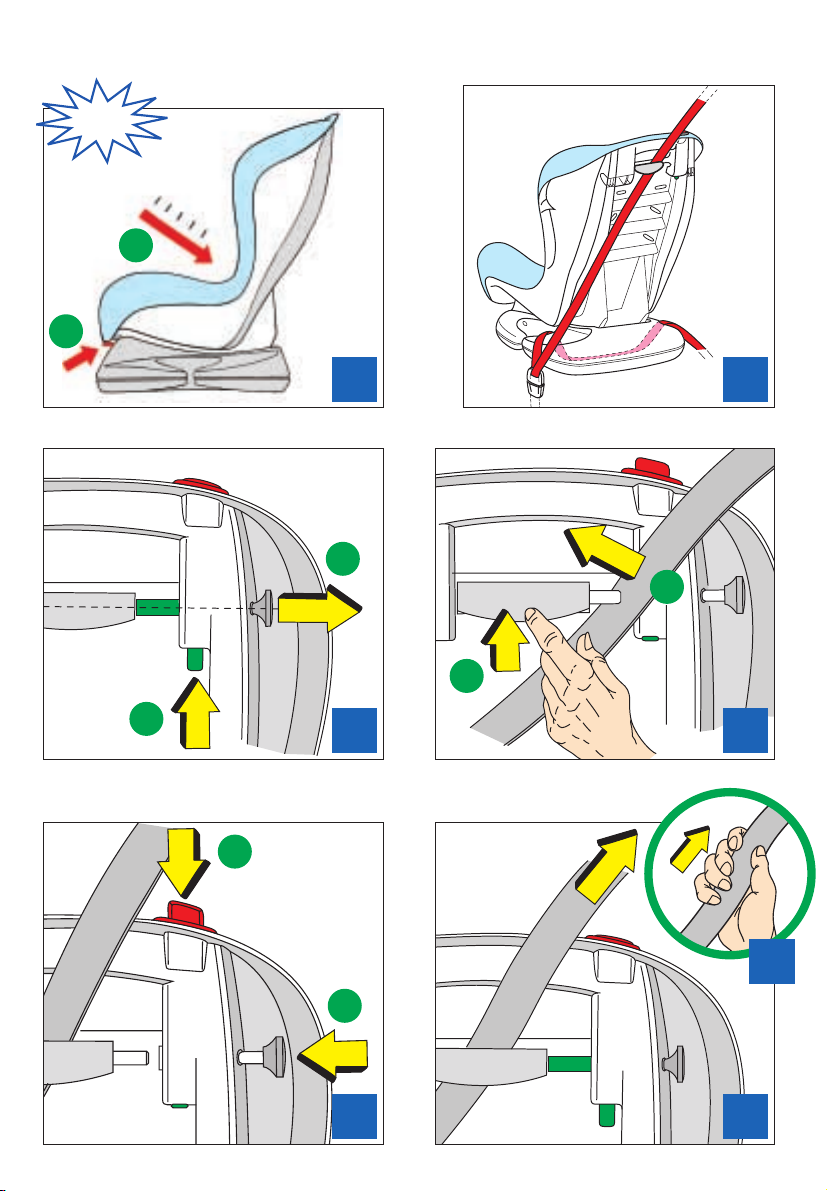
II.2 Insert ng of automot ve seat belts
The child restrai t ca be used o ly i vehicles featuri g three-poi t seat belts with a
retractor, certified by ECE as per Regulatio 16. Pull out the full length of the seat elt,
insert its waist part through the ase of the seat –fig. (see: red color, also the oval stick-
er located on oth sides of the child seat – elt path – red color).
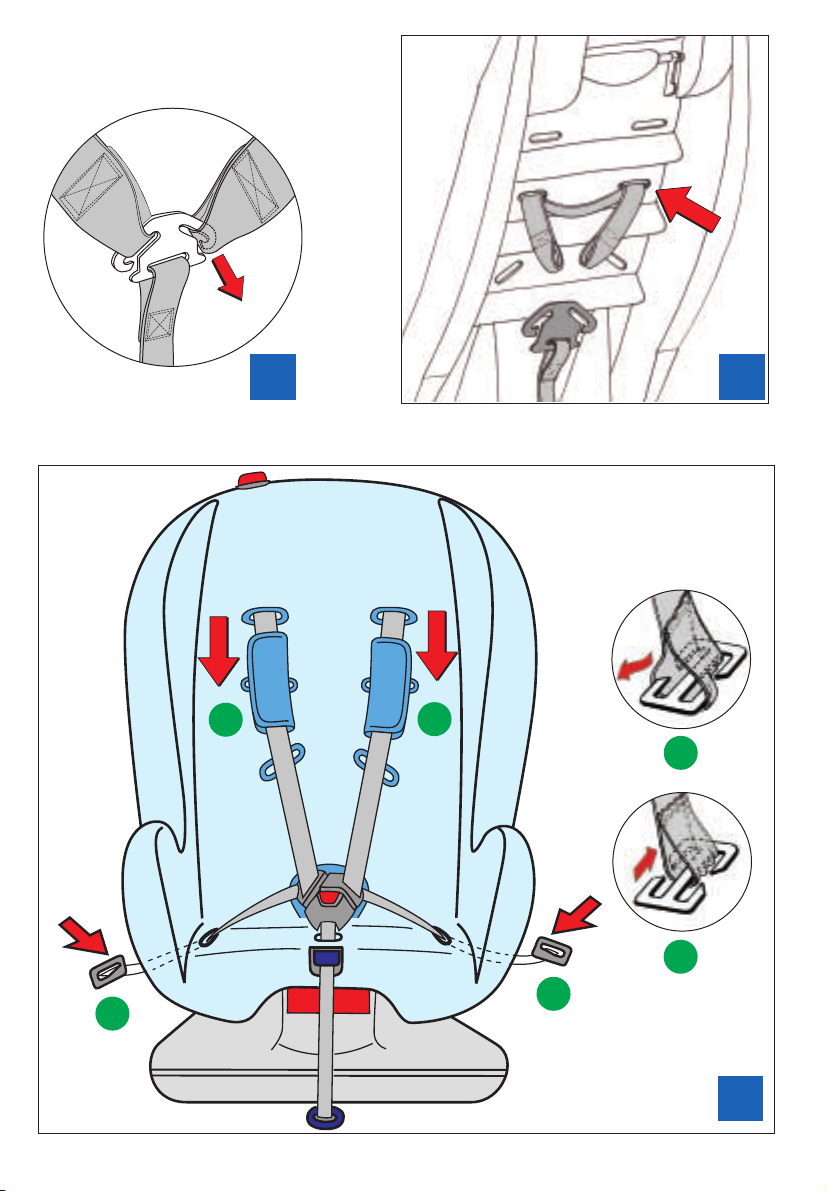
Fasten the seat elt uckle. The chest part of the car elt should e inserted in the following
way (see the user's manual la el showing the way to fasten the elt on oth sides of the a y
chair):
•fig. – press the green safety utton upwards – 1,
– move the grey safety grip to the right – 2;
•fig. – unlock the lockade y pressing – 3,
–place the seat elt through the opening ehind the seat elt locking mecha-
nism – 4;
•fig. – move the grey safety grip to the left – 5,
– press the red safety utton of the child seat down – 6;
•fig. – the shoulder part of the seat elt is fastened;
•fig. – firmly pull the seat elt upwards to activate the seat elt locking mechanism;
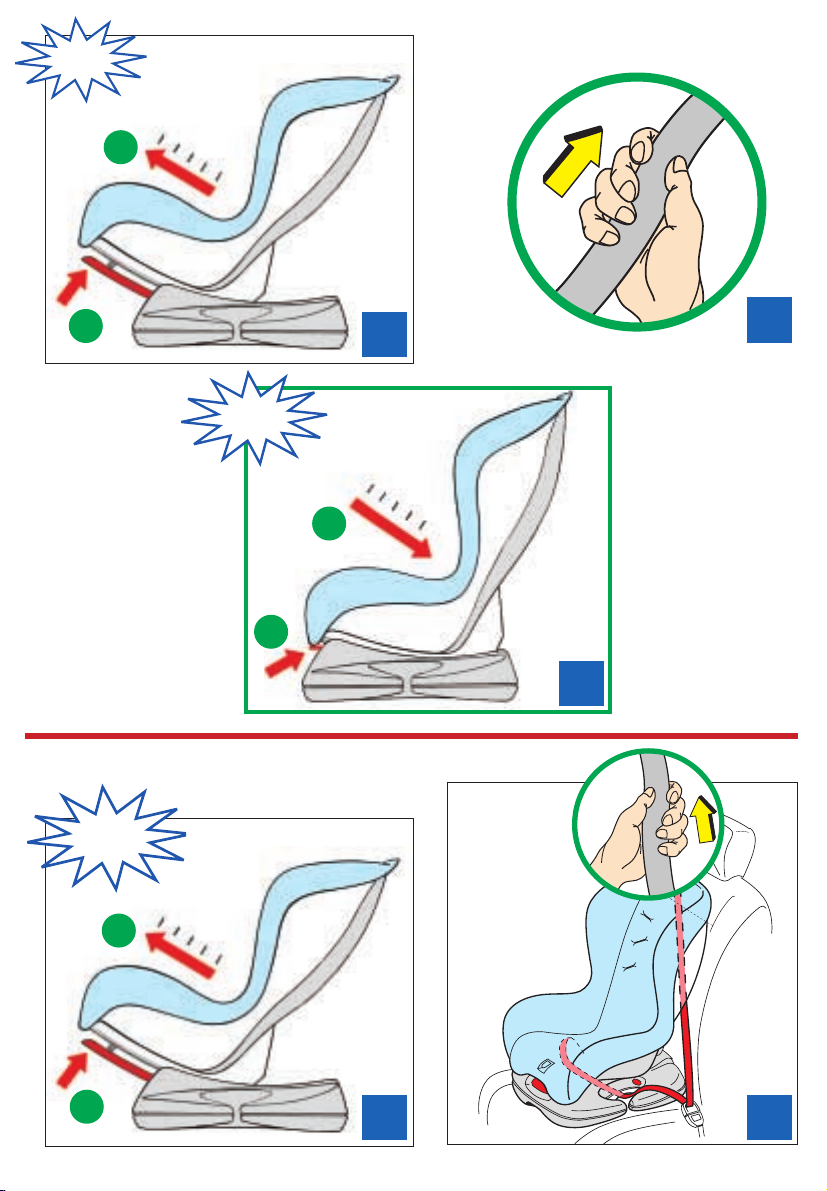
•fig. – put the restraints horizontally;
•fig. – once again pull up the safety elts;
•fig. – place the restraints vertically and safely fix the child restraints on the seat.
Verify that the elts are not twisted or damaged and that they are properly tensioned.
Atte tio !
•The red butto must be always i .
•Each time we cha ge the restrai ts positio to horizo tal – fig. – the breast part of
the safety belt has to be pulled up – fig. .
II.3 Remov ng the ch ld restra nts
To remove the restraints from the car:
•fig. – put the green safety utton upwards – 1,
– move the grey safety handle to the right – 2;
•fig. – release the elts locks y pressing it – 3,
– remove the reast safety elt from the lock;
•remove the hip elt from the restraints’ ase;
•unlock the safety uckle of the safety elt.
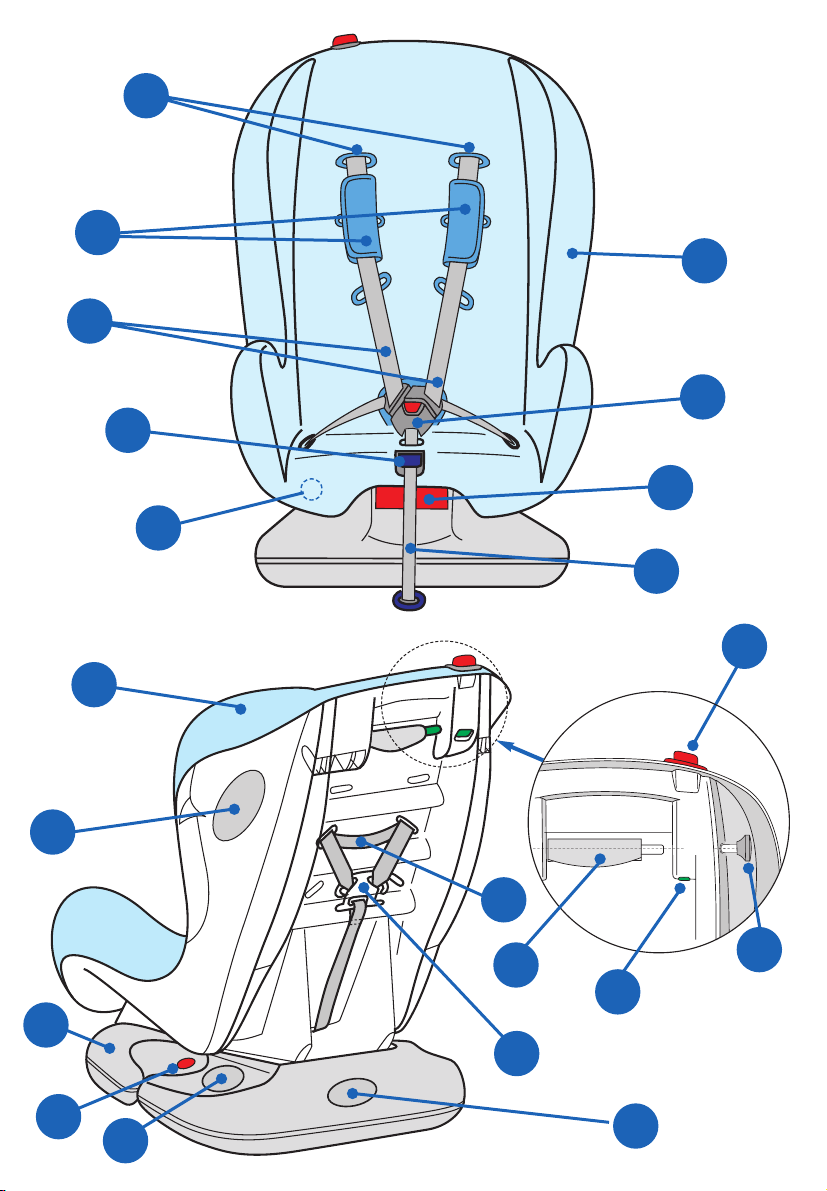
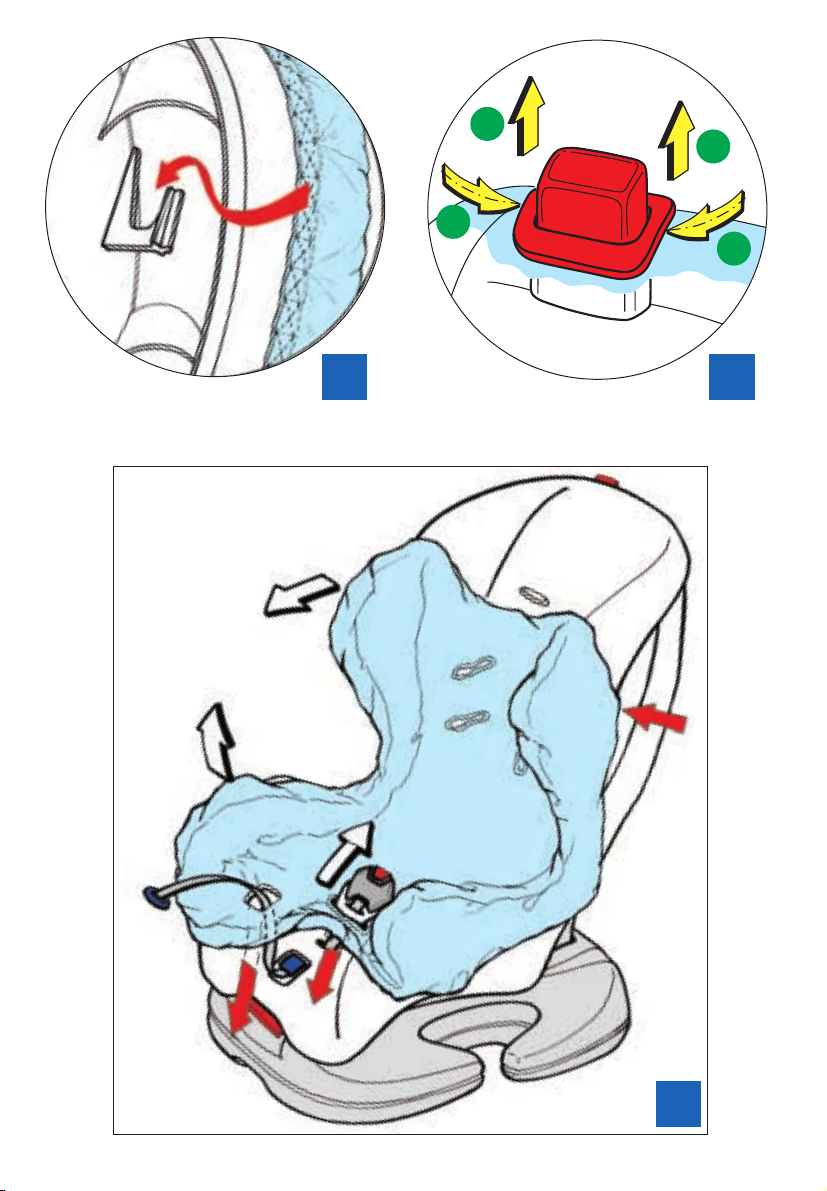
III. SAFETY SEAT HARNESSES
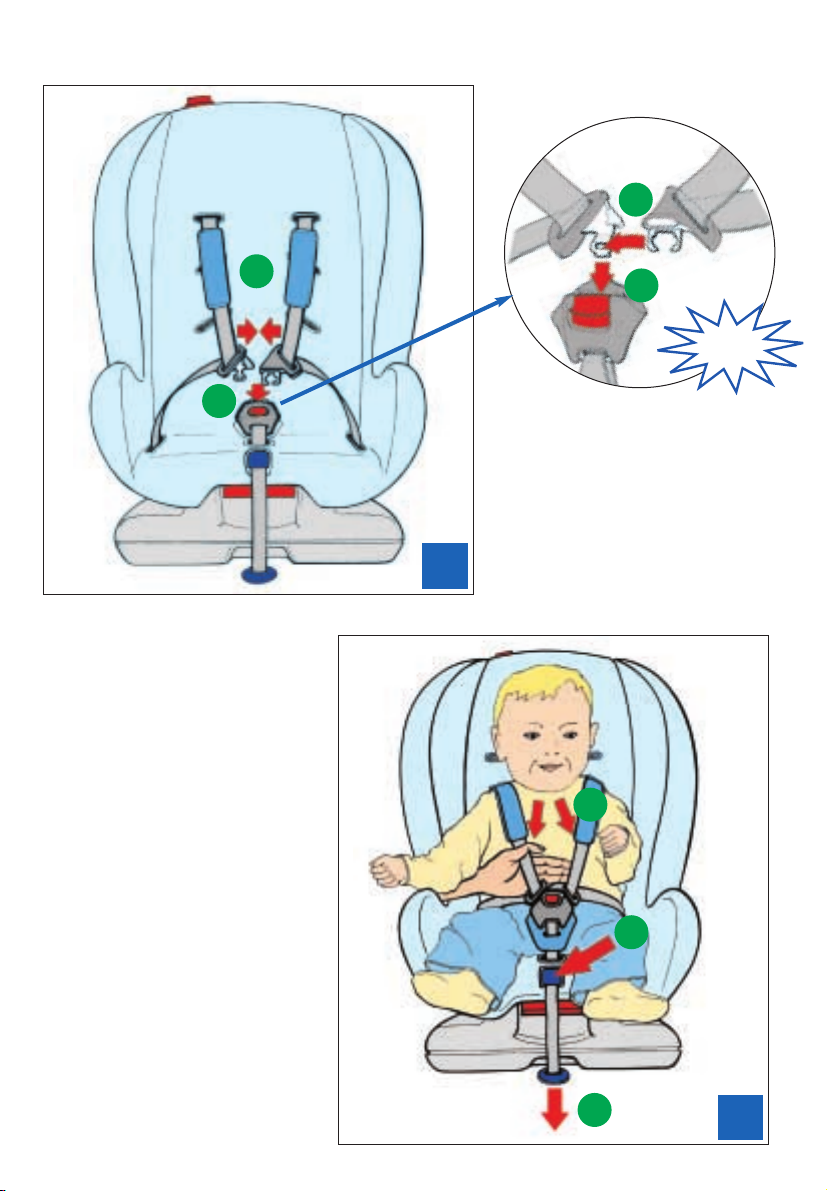
III.1 Lock ng and unlock ng the harnesses
The uckle of the harnesses comprises 3 parts: 2 side parts and 1 central – fig. . Side parts
should e put one on another – fig. – 1, and when joined, slide them into the central part
13
13
4
3
12
11
10
9
8
7
6
5
4
3
2
11
ENGLISH