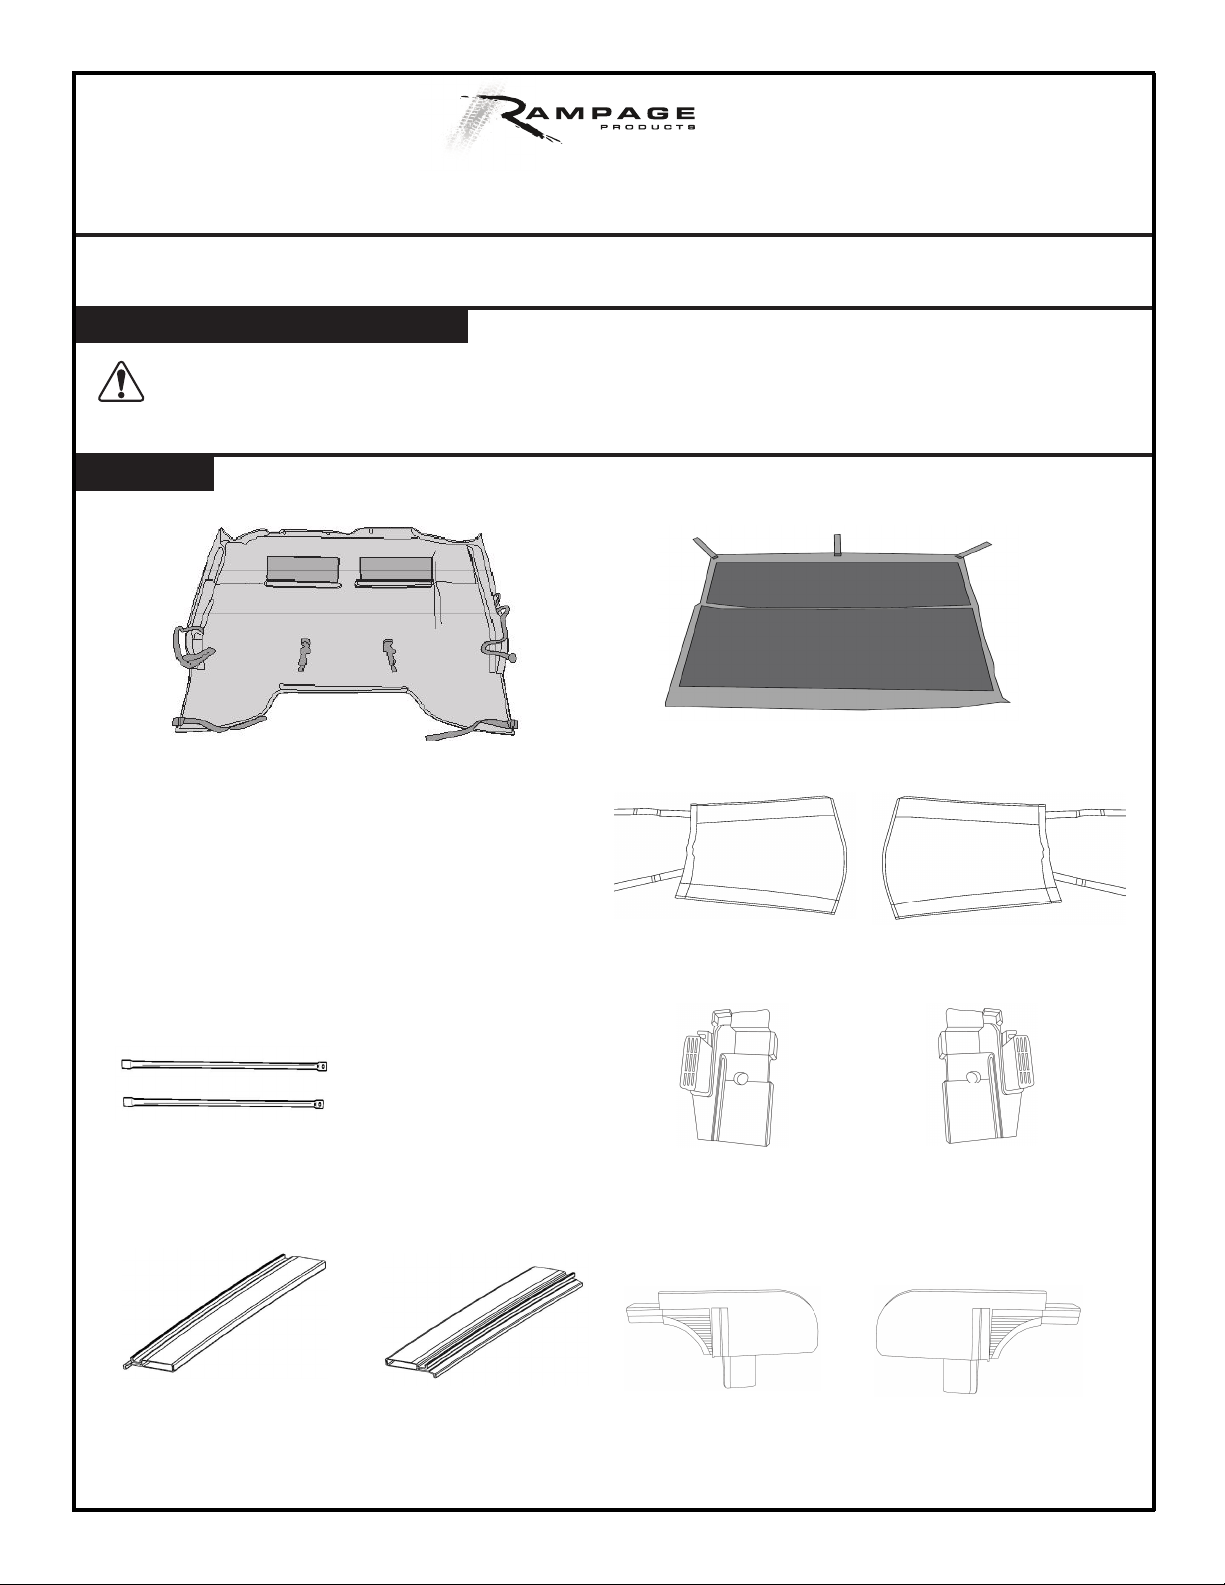
NOTE: Actual product may vary from illustration.
Page 8 of 9
31
2930
With both latches open as shown below, turn each hook
until it grabs onto the soft top hoop with slight tension.
Wrap the 2 straps attached to the main section of fabric
around the rear-middle of the sound bar. Hook into the
holes of overhead brackets. Tighten the strap until snug.
32
33
Close both latches and make sure both are snug,
but not overly tight.
34
Lift up the corners of the top fabric to expose the zippers
on the side and rear windows.
Secure all windows to the Main Deck by zipping fully into
place.
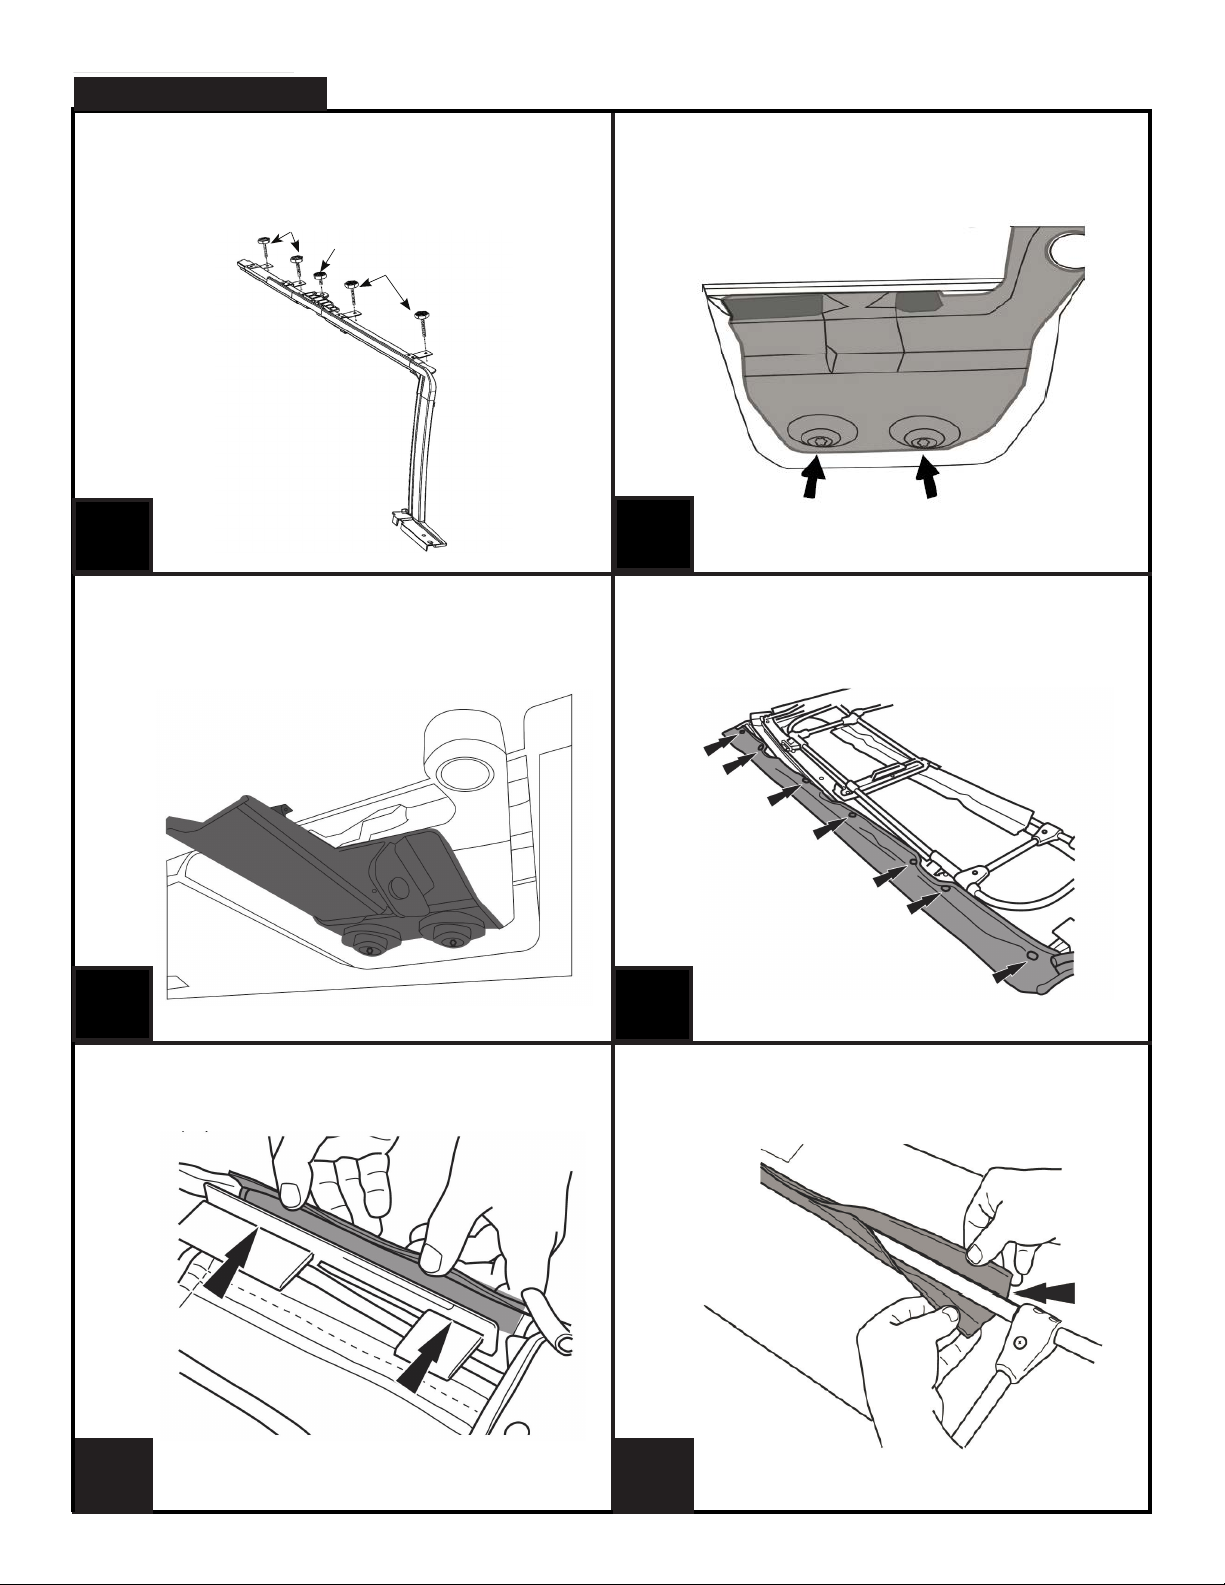
Locate the rear bow and insert into sleeve at rear of
main skin, secure with hook and loop tab. Insert into tabs
on PLASTIC UPPER CORNERS.
Install the hook on rear main straps to the inside of the
tub-rail. The hook will slide between the tub-rail and the
roll-bar. Now tighten strap.