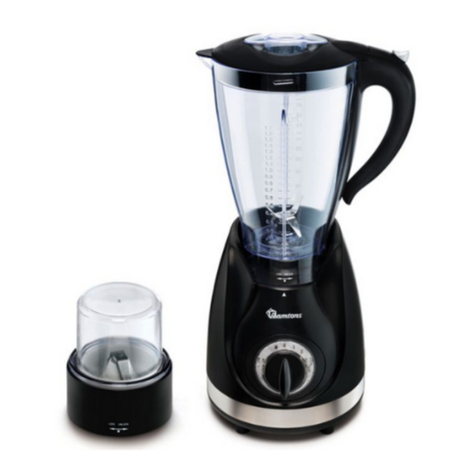
RAMTONS BL9006-GS User manual

HƯỚNG DẪN SỬ DỤNG
MODEL: BL9006-GS
2-IN-1 BLENDER
Đọc kỹ tập sách hướng dẫn này trước khi sử dụng và lưu lại để tham khảo sau này

1
Hướng dẫn an toàn sử dụng:
Khi sử dụng thiết bị điện, Cần tuân thủ các bước an toàn sử dụng sau:
1. Đọc toàn bộ giới thiệu
2. Trước khi sử dụng cần hãy kiểm tra xem nguồn điện áp có tương ứng với nguồn điện
được hiển thị trên bảng tên thiết bị không.
3. Không để dây điện trên mép bàn, kệ (cạnh sắc nhọn).
4. Không vận hành bất kỳ thiết bị nào với dây hoặc phích cắm bị hỏng hoặc sau khi thiết
bị bị trục trặc hoặc bị hỏng theo bất kỳ cách nào. Đưa thiết bị trở lại cơ sở dịch vụ được ủy
quyền gần nhất để kiểm tra, sửa chữa và bảo hành.
5. Nếu dây điện bị hỏng, nó phải được thay thế bởi nhà sản xuất hoặc đại lý dịch vụ của
hãng có chất lượng tương tự để tránh nguy hiểm.
6. Cần giám sát thiết bị chặt chẽ khi sử dụng hoặc để gần trẻ em.
7. Tránh tiếp xúc với các bộ phận đang hoạt động.
8. Không cho tay và dụng cụ nhà bếp khác vào trong máy khi máy đang hoạt động để
giảm nguy cơ bị thương hoặc làm hỏng máy xay. Có thể sử dụng dụng cụ nạo nhưng chỉ
được sử dụng khi máy xay ngừng hoạt động.
9. Việc sử dụng phụ kiện không phải của nhà sản xuất có thể gây hỏa hoạn, điện giật
hoặc thương tích
10. Tắt máy, rút phích cắm khỏi ổ cắm khi không sử dụng, trước khi lắp hoặc tháo các bộ
phận và trước khi vệ sinh
11. Để giảm nguy cơ thương tích, không bao giờ đặt bộ lưỡi dao trên đế mà không có cối
xay gắn đúng cách.
12. Để xa tầm tay trẻ em
13. Thiết bị này không dành cho những người (kể cả trẻ em) bị suy giảm khả năng thể chất,
giác quan hoặc tinh thần, hoặc thiếu kinh nghiệm và kiến thức, trừ khi họ được người chịu
trách nhiệm về sự an toàn của họ giám sát hoặc hướng dẫn sử dụng thiết bị.
14. Để máy ở nơi có thể giám sát
15. Khi tháo máy xay từ động cơ máy, cần đợi cho lưỡi dao máy ngưng hẳn.
16. Luôn đậy nắp cối khi xay
17. Luôn đặt máy ở nơi khô thoáng, an toàn
18. Không đặt máy ở trong khu vực có ga nóng và thiết bị điện đốt nóng.
19. Không sử dụng ngoài trời
20. Không sử dụng thiết bị ngoài mục đích sử dụng chính của máy
21. Không chạm vào lưỡi dao hoặc thiết bị đang quay
22. Tắt thiết bị và ngưng kết nối từ nguồn điện trước khi thay đổi phụ kiện hoặc máy đang

2
chạy.
23. Luôn tắt máy, ngắt nguồn điện nếu rời đi và tháo lắp, vệ sinh máy.
24. Thiết bị này được thiết kế để sử dụng trong gia đình và các ứng dụng tương tự như:
- Khu vực bếp của nhân viên trong cửa hàng, văn phòng và các môi trường làm việc
khác;
- Nhà trang trại;
- Bởi khách hàng trong khách sạn, nhà nghỉ và các môi trường kiểu dân cư khác;
- Môi trường kiểu giường và bữa sáng
25. Cẩn thận với lưỡi dao cắt sắc nhọn khi vệ sinh máy
26. Cẩn thận khi đổ nước nóng trực tiếp vào thiết bị
Sử dụng trong gia đình
Trước khi sử dụng lần đầu tiên
Kiểm tra tất cả bộ phận máy không có bất kỳ dấu hiệu nào bất thường. Chọn các bộ phận
phù hợp để xay các chức năng phù hợp. Cối lớn được dùng để xay trái cây, rau, xay
nhuyễn đá, đồng thời cối xay thịt dùng để xay thịt,.. Vệ sinh các bộ phận đi kèm theo
hướng dẫn ở mục “Vệ sinh và bảo quản”.
CẢNH BÁO: Lưỡi dao sắc nhọn, tay cầm chắc chắn và đảm bảo dây điện không kết nối
với nguồn điện.

3
VẬN HÀNH MÁY XAY
1. Đặt cối trên động cơ máy, xoay cối theo chiều kim đồng hồ cho đến khi nghe tiếng
tách, thiết bị đã được khóa an toàn. Giống như Hình 1.
Lưu ý: Đảm bảo Cối được lắp ráp vào bộ phận mô tơ đúng cách, có khóa liên động
ở vị trí, nếu cối không được lắp ráp đúng cách, máy xay sẽ không hoạt động
Hình 1.
2. Gọt vỏ và loại bỏ hạt trái cây, cắt thành lát nhỏ, sau đó bỏ vào cối xay. Để xay
nhanh hơn và mềm hơn, cần thêm một ít nước lọc. Lượng sinh tố không nên vượt
quá lượng tối đa dung tích của cối và cũng không thấp hơn lượng tối thiểu.
Tỷ lệ lý tưởng thành phần trái cây hay rau quả với lượng nước 2:3.
Lưu ý: Máy xay không phù hợp cho việc đánh trứng, đánh khoai tây, trộn bột,
ép nước hoa quả, rau, củ.
3. Luôn đậy nắp khi xay.
4. Có thể cho nguyên liệu vào cối xay trong quá trình xay qua ống tiếp nhiên liệu, sau
đó gắn cốc đong. Để các mấu của cốc đong thẳng hàng với các rãnh của nắp lọ,
xoay cốc đong xuống.
5. Đảm bảo Nút điều chỉnh ở vị trí “0”, sau đó cắm điện và điều chỉnh tốc độ theo
mong muốn. Có thể lựa chọn vị trí “P” nếu muốn tăng tốc chế độ xay. Chi tiết thể
hiện ở Hình 2.
Lưu ý: Đảm bảo nắp cối được đặt đúng vị trí trước khi xay và không mở nắp cối
trong quá trình xay.

4
6. Không xay kéo dài 3 phút/ lần và chỉ đợi cho tới khi động cơ nguội dần bằng nhiệt
độ trong phòng trước khi chuẩn bị cho lần xay kế tiếp.
7. Điều chỉnh về nút 0 khi hỗn hợp đã được xay tới độ cần thiết.
8. Xoay cối theo chiều ngược chiều kim đồng hồ khỏi động cơ, cần thận mở nắp cối,
sau đó đổ ra và thưởng thức.
CỐI XAY HẠT
1. Đặt bộ phận động cơ trên bề mặt phẳng nằm ngang và đảm bảo rằng nó đã được rút
phích cắm.
2. Đổ hạt cà phê thích hợp vào cối xay, sau đó lắp cụm lưỡi xay và cối xay lại với nhau.
Hình 3
LƯU Ý: Lượng hạt cà phê mà cối xay cho phép xay tối đa 60g.
3. Đặt phần đính kèm máy mài lên bộ phận mô tơ, Xoay cối theo chiều kim đồng hồ
cho đến khi nghe thấy tiếng tách khi khóa vào đúng vị trí. Hình 4
LƯU Ý: Có thiết bị khóa liên động an toàn dưới đáy cối, nếu bát không được lắp ráp
đúng vị trí, máy xay sẽ không hoạt động.
4. Đảm bảo Bộ chọn tốc độ ở vị trí “0”, sau đó cắm vào ổ cắm điện.
5. Chọn cài đặt tốc độ mong muốn, thiết bị sẽ bắt đầu xay. Trong quá trình xay, bạn có
thể nhấn nút Pulse xuống mà không cần nhả ra nếu muốn đẩy nhanh quá trình xay.
6. Chuyển Bộ chọn Tốc độ sang Vị trí “0” khi cà phê đã được xay đến kết quả mong
muốn của bạn.
7. Ngắt kết nối khỏi nguồn điện sau khi kết thúc. Tháo bộ phận đính kèm của máy xay
ra khỏi thiết bị, giữ cối xay hướng xuống và xoay ngược chiều kim đồng hồ (Hình 5), sau
đó đổ ra và thưởng thức.
8. Không chạy thiết bị quá 30 giây mỗi lần và chỉ đợi cho đến khi thiết bị được làm

5
mát bằng nhiệt độ phòng trước khi cho máy xay chạy lại.
Hình 3 Hình 4 Hình 5
CẢNH BÁO:
1. Không vận hành thiết bị liên tục quá 3 phút mỗi lần.
2. Cẩn thận với lưỡi dao sắc bén.
3. Không được vận hành khi không có nắp cối.
4. Không tháo rời cối khỏi đế trong tình trạng chung.
BẢO QUẢN VÀ VỆ SINH
Đảm bảo thiết bị đã ngắt kết nối với nguồn điện
Cối xay sinh tố
Đảm bảo ngắt kết nối thiết bị khỏi nguồn điện trước khi vệ sinh
Đối với máy xay sinh tố
Chức năng Tự động làm sạch có thể làm sạch máy xay sinh tố một cách dễ dàng và
nhanh chóng mà vẫn hoàn toàn an toàn.
1. Đổ một ít nước xà phòng ấm vào Bình và xoay Bộ chọn tốc độ về vị trí “1” và nhấn
nút Xung nhịp mà không nhả nút này trong vài giây.
2. Tháo dỡ tất cả các bộ phận có thể tháo rời. Tháo Bình ra khỏi bộ phận mô tơ để tháo
cụm lưỡi dao và tháo vòng đệm của đế bình (Hình 6). Ngoài ra, tháo vòng đệm của nắp lọ
ra khỏi nắp lọ. Rửa sạch bình, lưỡi dao, nắp bình và cốc đong dưới vòi nước.
3. Lau bề mặt bên ngoài của bộ phận động cơ và bằng khăn ẩm.
LƯU Ý: Không sử dụng chất tẩy rửa ăn mòn và không nhúng bộ phận động cơ vào
nước để làm sạch
4. Làm khô tất cả các bộ phận và sau đó lắp ráp chúng. Phương pháp lắp ráp phần đính
kèm máy xay sinh tố trái ngược với trình tự tháo rời của nó.
LƯU Ý: Nếu gặp bất kỳ sự cố nào trong quá trình sử dụng, tuyệt đối không được tự
mình tháo rời Bộ phận Động cơ. Chỉliên hệ với cơ sở dịch vụ được ủy quyền để kiểm

6
tra và sửa chữa.
Hình 6
Đối với cối xay hạt
1. Tháo đế bát ra khỏi cụm lưỡi dap.
LƯU Ý: Trong khi tháo, chỉ nắm phần không quay của lưỡi mài hoặc đeo găng tay
để tránh bị thương.
2. Nhúng lưỡi dao, đế bát và cối mài vào nước xà phòng ấm để làm sạch, sau đó rửa
chúng dưới vòi nước.
3. Lau bề mặt bên ngoài bằng khăn ẩm.
LƯU Ý: Không bao giờ nhúng bộ phận động cơ vào nước để làm sạch.
4. Lau khô kỹ tất cả các bộ phận và lắp ráp chúng vào vị trí.
Hình 7.
PHÂN LOẠI RÁC THÂN THIỆN VỚI MÔI TRƯỜNG
Hãy bảo vệ môi trường!
Hãy tôn trọng các quy định của địa phương: giao các thiết bị điện
không hoạt động cho một trung tâm xử lý chất thải phù hợp.

7
INSTRUCTION MANUAL
MODEL: BL9006-GS
2-IN-1 BLENDER
Read this manual thoroughly before using and save it for future reference

8
IMPORTANT SAFEGUARDS
When using this electrical appliance, basic safety precautions should always be followed,
including the following:
1. Read all instructions.
2. Before using check that the voltage indicated on the product corresponds with the
voltage of your electrical outlet.
3. Do not let cord hang on hot surface or over edge of table or counter.
4. Do not operate any appliance with a damaged cord or plug or after the appliance
malfunction or has been damaged in any manner. Return the appliance to the nearest
authorized service facility for examination, repair or adjustment.
5. If the supply cord is damaged,it must be replaced by the manufacturer or its service
agent or a similarly qualified person in order to avoid a hazard.
6. Close supervision is necessary when any appliance is used by or near children.
7. Avoid contacting the moving parts.
8. Keep hands and utensils out of container while blending to reduce the risk of severe
injury to persons or damage to the blender. A scraper may be used but must be used only
when the blender is not running.
9. The use of attachments not recommended or sold by manufacturer may cause fire,
electric shock or injury.
10. Unplug from outlet when not in use, before putting on or taking off parts, and before
cleaning. To disconnect, turn any control to “off”, then remove plug from wall outlet by
grasping the plug, not the cord.
11. To reduce the risk of injury, never place blade assembly on motor unit without the jar
properly attached.
12. Do not leave the machine on unattended.
13. When removing the blender from the motor unit, wait until the blades have completely
stopped.
14 Always operate blender with cover in place.
15. Always use the appliance on a secure, dry level surface.
16. Never place this appliance on or near a hot gas or an electric burner or where it could
touch a heated appliance.
17. Do not use outdoors.
18 Do not use appliance for other than its intended use.
19. Be care of potential injury from misuse.
20. Care shall be taken when handling the sharp cutting blades, emptying the bowl and
during cleaning.
21. Be careful if hot liquid is poured into the food processor or blender as it can be ejected
out of the appliance due to a sudden steaming.
22. Always disconnect the appliance from the supply if it is left unattended and before

9
assembling, disassembling or cleaning.
23. Switch off the appliance and disconnect from supply before changing accessories or
approaching parts that move in use.
24. This appliance shall not be used by children. Keep the appliance and its cord out of
reach of children.
25. Appliances can be used by persons with reduced physical, sensory or mental
capabilities or lack of experience and knowledge if they have been given supervision or
instruction concerning use of the appliance in a safe way and if they understand the
hazards involved.
26. Children shall not play with the appliance.
HOUSEHOLD USE ONLY
KNOW YOUR 2-IN-1 BLENDER
BEFORE THE FIRST USE
Check that all parts are complete and not damaged. Choose the appropriate attachment to
perform your desired task. The blender attachment is suitable for blending fruits or
vegetables or crushing ice, while the grinder attachment for grinding coffee. Clean the
attachment according to the section “CLEANING AND MAINTENANCE”.
WARNING: The blade is sharp, handle with great care and ensure that unplug the

10
appliance from outlet before assembling and removing parts.
BLENDER OPERATION
1. Place the Jar on the Motor Unit, Turn the jar clockwise until a click
will be heard when locked into position properly. Please see Fig.1.
NOTE: There is a safety interlock device at the bottom of jar, if the
jar is not assembled in place, the blender will not operate.
2. Peel or core the fruits or vegetables and then cut it into small pieces,
then put them into the jar. Usually certain amount of purified water has
to be added to facilitate the smooth running of appliance. The amount
of mixture should not exceed the max level as indicated on the jar, nor
sit lower the min level. The best proportion of the fruits or vegetables
and water is 2:3.
NOTE: The blender is not applicable for beating egg white, mashing potatoes, mixing
dough, extracting juice from fruit and vegetable.
3. Replace jar cover on the jar.
4. You may add ingredient into the jar through the center opening of jar cover during
operation, then replace measuring cup if necessary. Let the tabs of measuring cup aligns
with the grooves of jar cover, put down the measuring cup.
5. Ensure the Speed Selector to “0” Position,then plug into power outlet and set Speed
Selector to your desired setting. You can set Speed Selector to the “P” position if want
to accelerate the process of blending. The detailed information is shown in below fig. 2
NOTE: Make sure the jar cover is placed in position completely before operating, and
never open the jar cover during operation.
Fig. 1

11
6. Do not run the appliance for more than 3 minutes per time, and only wait until the unit
is cooled to room temperature before performing next operation cycle.
7. Turn the Speed Selector to “0” Position once the mixture has been blended to your
desired consistency.
8. Turn the jar by anti-clockwise and remove it from the motor unit, carefully take down
the jar cover, then pour and serve.
GRINDER OPERATION
1. Lay the motor unit on the flat horizontal surface and make sure it is
unplugged.
2. Fill the grinding bowl with proper coffee bean, then assemble the
grinding blade assembly and grinding bowl together. Please see
Fig.3
NOTE: The quantity of coffee bean the grinding bowl allows to
grind is Max 60g.
3. Place the grinder attachment on the motor unit, Turn the bowl
clockwise until a click will be heard when locked into position
properly. Please see Fig. 4
NOTE: There is a safety interlock device at the bottom of bowl, if
Fig.3
Fig.4
Fig. 2

12
the bowl is not assembled in place, the chopper will not operate.
4. Ensure the Speed Selector to “0”Position, then plug into power outlet.
5. Select the desired speed setting, the appliance will start grinding. During grinding, you
can press down the Pulse button without releasing it if want to accelerate the process of
grinding.
6. Turn the Speed Selector to “0”Position once the coffee has been ground to your
desired result.
7. Disconnect from power supply once finished. Disassemble the grinder attachment from
the unit, keep the grinding bowl downward and turn it anticlockwise (see
fig.5), then empty the bowl and serve.
8. Do not run the appliance for more than 30s per time, and only
wait until the unit is cooled to room temperature before performing next
operation cycle.
WARNING:
1. Never operate the appliance continuously for more than 3 minutes per time.
2. Blades are very sharp. Handle with care.
3. Do not operate without the jar cover in place.
4. Do not disassemble the jar or bowl from the jar base or bowl base in general condition.
CLEANING AND MAINTENANCE
Make sure to disconnect appliance from power supply before cleaning
For blender
The Auto Clean function can clean the blender
easily and rapidly in complete safety.
1. Pour a little warm soapy water into the Jar
and turn the Speed Selector to “1” position
and press down the Pulse button without
releasing it for a few seconds.
2. Dismantle all detachable parts.Disassemble the Jar from the motor unit, To detach the
blade assembly, and remove the jar base seal ring (see fig.6). In addition, detach the jar
cover seal ring from the jar cover. Rinse the jar, blade, jar cover and measuring cup
Fig.5

13
under running water.
3. Wipe the outer surface of motor unit and with a damp cloth.
NOTE: Do not use abrasive cleanser and never immerse motor unit in water for
cleaning
4. Dry all parts and then assemble them. The method of assembling blender attachment
just is in opposite of its detaching sequence.
NOTE: If any problem has been encountered during using, never disassemble the
Motor Unit by yourself. There are no user serviceable parts inside. Only contact the
authorized service facility for examination and repair.
For grinder
1. Detach the bowl base from the grinding blade assembly.
NOTE: While detaching, only grasp the unsharp part of grinding blade or wear glove
to prevent any injuries.
2. Immerse the blade, bowl base and grinding bowl into warm soapy water for cleaning,
and then rinse them under running water.
3. Wipe the outer surface with damp cloth.
NOTE: Never immerse the motor unit into water for cleaning.
4. Dry all parts thoroughly and assemble them in position.

14
ENVIRONMENT FRIENDLY DISPOSAL
You can help protect the environment!
Please remember to respect the local
regulations: hand in the non-working
electrical equipments to an appropriate waste
disposal centre.

15
Table of contents
Languages:
Other RAMTONS Blender manuals

RAMTONS
RAMTONS RM/580 User manual

RAMTONS
RAMTONS RM/367 User manual

RAMTONS
RAMTONS RM/583 User manual

RAMTONS
RAMTONS RM/477 User manual

RAMTONS
RAMTONS NutriRise RM/568 User manual

RAMTONS
RAMTONS RM/246 User manual

RAMTONS
RAMTONS RM/449 User manual

RAMTONS
RAMTONS RM/368 User manual

RAMTONS
RAMTONS RM/259 User manual

RAMTONS
RAMTONS RM/308 User manual