Raptor R00186 User manual

R00190
Wolseley UK, CV31 3HH
0344 292 7060
help@raptortool.co.uk
www.raptortool.co.uk
Before using the instrument, please read this manual
carefully and save for future reference.
R00186
SINGLE INPUT K TYPE THERMOMETER
USER MANUAL

Safety information
Safety Information.
In order to use the thermometer correctly,
please read the instructions carefully before
use, noting any safety information. It is
recommended that you keep this instruction
manual safe for future reference.
Warning.
A Warning identifies conditions and actions
that pose hazards to the user. To avoid
electrical shock or personal injury,
follow these guidelines:
1. Before using the thermometer inspect
the case.
2. Do not use the thermometer if it
appears damaged. Look for cracks or
missing plastic. Pay particular attention to
the insulated wires on any thermocouple/
probes used.
1 2

3. Do not use the thermometer if it operates
abnormally. When in doubt, have the
thermometer serviced/checked by an
approved service engineer.
4. Do not operate the thermometer around
explosive gas, vapour, or dust.
5. Do not use the thermometer and probes
on or near live apparatus.
6. Do not place the thermometer handset near to
hot objects.
7. Reflective objects result in lower than actual
temperature measurements. These objects
pose a burn hazard.
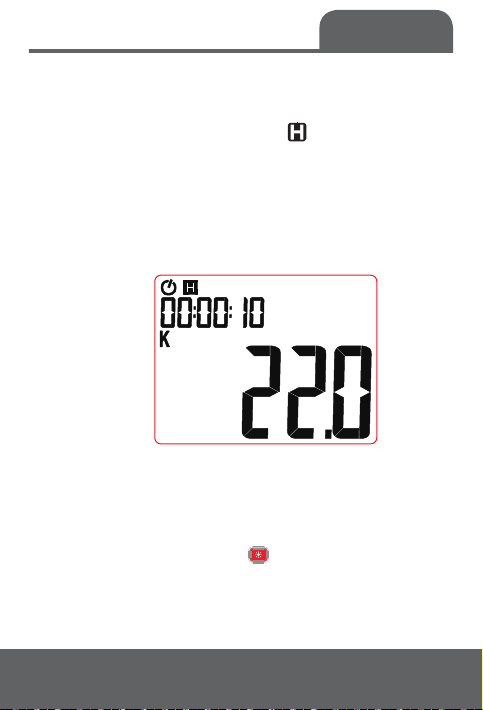
8. Replace the batteries as soon as the battery
indicator appears. The possibility of false
readings can lead to personal injury.
9. Never attempt to open the unit and perform
any repairs, this will automatically void
the warranty.
2
Safety information

3 4
Maintenance
Maintenance Information.
• The unit may be cleaned using a dry soft cloth,
do not use a wet or abrasive cloth, solvents
or detergents.
• For extra protection always store the instrument
in the case provided when not in use.
Important Information.
• The thermometer has built in cold end
compensation. This will allow the thermometer
to automatically compensate between ambient
temperature within the thermometer and the
cold end temperature of the thermocouple/
probe.
• If there is a sudden change in the environmental
temperature, the instrument should be
acclimatised for a minimum of 30 minutes. This
will ensure the ambient temperature is the same,
both inside and outside of the thermometer.

4
Maintenance
Calibration.
To maintain the integrity of measurements,
Wolseley recommends that the thermometer is
calibrated annually at an approved Calibration
Laboratory.
Wolseley can offer this service,
please contact calibration@raptortool.co.uk
or call 0344 292 7060 to arrange.

5 6
Accessories.
• Storage pouch.
• 1 x 1m K Type wire thermocouple.
• 3 x AAA batteries (included).
• User instructions.
Features.
• LCD screen.
• Back Light.
• °C /°F / K (kelvin) functions.
• Data hold function.
• Record, Max / Min / Avg.
• Built in cold end compensation (NTC).
• Offset setting ± 6°C.
• Timer.
• Low battery indicator.
• Auto power off
(thermocouple/probe must be removed).
• K Type port.
• Supplied with a 1m K Type wire thermocouple.
Features

6
Physical Appearance.
Power
Hold
Back Light
Settings
Record Max /
Min /Avg
Unit °C /°F / K (Kelvin)
Thermocouple port
Built in cold
compensation
(NTC)
Features
Height - 127mm
Width - 58mm
Depth - 30mm
Weight - 105g

7 8
Measurement
Method
Connect Thermocouple/Probe.
Press the power button to turn on the
thermometer and insert K Type into port.
Always ensure + and - pins of the K Type plug
are inserted into the correct thermometer ports.
Failure to do this will result in an inaccurate
reading.
Select Unit of Temperature.
Press C/F/K button to select the unit of
measurement °C,°F, K (Kelvin).
Display Temperature.
Place the thermocouple/probe in a position
to record a measurement. The measurement
results will be displayed on the display screen
in the selected unit (Fig.1). If no thermocouple/
probe is inserted or the thermocouple/probe is
faulty the LCD will read “----” (Fig.2).
Fig.1 Fig.2

8
Measurement
Method
View MAX, MIN and AVG Readings.
Press REC button to view Max, Min, Avg
temperatures. On pressing the REC button, the
timer will automatically start at 00.00. The Max,
Min, Avg will display in top right hand side of
LCD, with actual temperature reading on main
screen. Use REC button to scroll through Max,
Min, Avg readings. The timer will show the actual
recorded time of Max & Min. When in Avg mode
timer will show current length of recorded period.
NOTE: Min, Max & Avg readings can only be
accessed once REC Button is pressed. Old data
cannot be accessed.
Fig.3

9 10
Back Light.
Press Back Light button to turn on back
light. It will automatically be extinguished in
20 secs, or press Back Light button again to
turn off.
Measurement
Method
Data Hold.
Press the Hold button to keep the temperature
reading on the screen. The “ ” symbol
appears on the screen (Fig.4). Press the Hold
button again to turn off the Hold function and
restore to the measurement status.
Fig.4

Set Options.
Press the set button to enter the settings mode,
by pressing the set button again the settings
option menu can be scrolled through. Long
press the set button to exit.
Auto Power Off Setting (P).
Enter the power off setting mode, the
thermometer will display P-10 (Fig.5),
use the and keys to select the setting
of auto power off time between 5 and 60
minutes, long press or key can increase or
decrease rapidly. When the auto power off time
is less than 5 minutes, the word “OFF” will be
displayed.
NOTE: The auto power off time starts when
there is no thermocouple/probe inserted.
10
Settings
Fig.5

11 12
Settings
Offset Setting (0.0).
User can adjust the display value of the
thermometer to compensate for the error of
a thermocouple. The range of permissible
adjustment is 6 °C.
After entering the OFFSET, the deviation setting
is changed by and key.
When OFFSET mode is in activation OFFSET will
be displayed in the centre of the screen (Fig.6).
NOTE: OFFSET will maintain in the memory even
after unit is switched off.
NOTE: When the deviation is not required,
please restore the deviation to 0.0.
Fig.6

Battery Replacement.
In order to avoid inaccurate temperature
readings, always replace the batteries when the
appears on the top right of LCD screen.
Always remove any thermocouple/probe
before changing the batteries.
When the instrument is not in use for a long time,
please take out the batteries to prevent damage
caused by leakage.
Please replace the battery by following these steps:
1. Turn off the instrument.
2. Remove the battery cover by loosening the
screw of the battery cover.
3. Remove old batteries and replace them with 3
new AAA batteries (Fig.7). Always ensure battery
rotation is correct with + & -.
4. Replace battery cover and tighten screw.
12
Fig.7
Battery
Replacement

13 14
Battery
Replacement
NOTE: When the batteries are too low the LCD
screen can also show random readings (fig.8).
Fig.8

14
Temperature Measuring
Range -200°C ~ 1372°C
-328°F ~ 2501°F
Accuracy Range (. °C)
Resolution <1000°C = 0.1°C
>1000°C = 1°C
Working Temperature &
Humidity 0°C ~ 40°C
(<80% RH,< 10°C non-condensing)
Storage Temperature &
Humidity -10°C ~ 60°C
(<70% RH, remove the batteries)
Power Supply 3 x 1.5V AAA Batteries
(included)
Technical
Handset
Temperature Measuring
Range -40°C ~ 200°C
-40°F ~ 392°F
Accuracy Range .°C
Response Time 0.5 Seconds
Compliance BS EN60584-1
BS EN60584-3
Technical
Thermocouple

Wolseley UK, CV34 6DY
Customer Services:
0344 292 7060
help@raptortool.co.uk
www.raptortool.co.uk
Limited warranty
1 year warranty against any manufacturing
defects or faulty workmanship. This warranty
does not cover fuses, disposable batteries
or damage from accident, neglect, misuse,
alteration, contamination or abnormal
conditions of operation or handling.
WEEE Directive 2012/19/EU At the end of
the product life, dispose of the instrument
& batteries in a corresponding recycling
centre. Do not dispose of the unit with the
usual domestic refuse.
Do not burn the product.
Table of contents
Other Raptor Thermometer manuals
Popular Thermometer manuals by other brands

Emax
Emax EM 2239 manual

Ink Bird
Ink Bird IHT-2PB Operation instructions

Mobi Technologies
Mobi Technologies HTD8813C QUICK START USER INSTRUCTIONS

Fine Offset Electronics
Fine Offset Electronics WH0270 user manual

Chauvin Arnoux
Chauvin Arnoux PPD 26 user manual

Extech Instruments
Extech Instruments 403265 user manual