Safety Information.
In order to use the thermometer correctly,
please read the instructions carefully before
use, noting any safety information. It is
recommended that you keep this instruction
manual safe for future reference.
Warning.
A Warning identifies conditions and actions
that pose hazards to the user. To avoid
electrical shock or personal injury,
follow these guidelines.
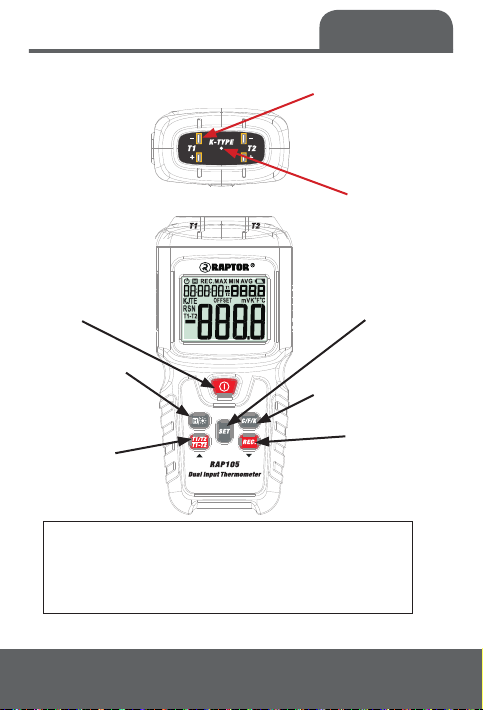
1. Before using the thermometer inspect
the case.
2. Do not use the thermometer if it
appears damaged. Look for cracks or
missing plastic. Pay particular attention to
the insulated wires on any thermocouple/
probes used.
3. Do not use the thermometer if it operates
abnormally. When in doubt, have the
thermometer serviced/checked by an
approved service engineer.
4. Do not operate the thermometer around
explosive gas, vapour, or dust.
5. Do not use the thermometer and probes
on or near live apparatus.
6. Reflective objects result in lower than actual
temperature measurements. These objects
pose a burn hazard.
7. Replace the batteries as soon as the battery
indicator appears. The possibility of false
readings can lead to personal injury.
8. Never attempt to open the unit and perform
any repairs this will automatically void
the warranty.
2
Safety information