Rauch AXEO 2.1 User manual

INSTRUCTION MANUAL
AXEO 2.1/16.1/18.1
Please read carefully
before using the ma-
chine.
Keep for future reference.
This instruction manual/assembly in-
struction is to be considered as part of
the machine. Suppliers of new and sec-
ond-hand machines are required to
document in writing that the instruc-
tion manual/assembly instruction was
delivered with the machine and hand-
ed over to the customer. Original instructions
5900854-e-en-0114

Preface
Dear Customer
By purchasing the single-disc spreader of the AXEO series you have shown confidence in our
product. Thank you very much! We want to justify this confidence. You have purchased a powerful
and reliable machine.
However, in case unexpected problems arise: Our customer service is always there for you.
Please read this operator's manual carefully before commissioning the single-disc spread-
er and follow the advice given.
This operator's manual gives detailed instructions on the operation of the machine, as well as val-
uable information on assembly, maintenance, and care.
This manual may also describe equipment that is not included in your machine.
Please note that damage caused by incorrect operation or improper use is not covered by war-
ranty claims.
Technical improvements
We are continuously improving our products. Therefore, we reserve the right to make any
improvements and changes to our machine that we consider necessary without notice.
This constitutes no obligation to make such improvements or changes on machines that
have already been sold.
We will be pleased to answer any other questions that you might have.
Yours sincerely
RAUCH
Landmaschinenfabrik GmbH
n CAUTION
Please enter the type and serial number together with the year of manu-
facture of your single-disc spreader here.
This information can be obtained from the nameplate and/or at the frame.
Please always state this information when ordering spare parts or accessories,
and in case of complaints.
Type Serial number Year of construction

Table of Contents
I
Preface
Technical improvements
1 Intended use and EU declaration of conformity 1
1.1 Intended use . . . . . . . . . . . . . . . . . . . . . . . . . . . . . . . . . . . . . . . . . . . . . . . . . . . . . . . 1
1.2 Declaration of conformity. . . . . . . . . . . . . . . . . . . . . . . . . . . . . . . . . . . . . . . . . . . . . . 2
2 User instructions 3
2.1 About this operator’s manual. . . . . . . . . . . . . . . . . . . . . . . . . . . . . . . . . . . . . . . . . . . 3
2.2 Structure of the operator’s manual . . . . . . . . . . . . . . . . . . . . . . . . . . . . . . . . . . . . . . 3
2.3 Notes on text descriptions . . . . . . . . . . . . . . . . . . . . . . . . . . . . . . . . . . . . . . . . . . . . . 4
2.3.1 Instructions and procedures. . . . . . . . . . . . . . . . . . . . . . . . . . . . . . . . . . . . . . 4
2.3.2 Listings. . . . . . . . . . . . . . . . . . . . . . . . . . . . . . . . . . . . . . . . . . . . . . . . . . . . . . 4
2.3.3 References. . . . . . . . . . . . . . . . . . . . . . . . . . . . . . . . . . . . . . . . . . . . . . . . . . . 4
3 Safety 5
3.1 General Information . . . . . . . . . . . . . . . . . . . . . . . . . . . . . . . . . . . . . . . . . . . . . . . . . . 5
3.2 Significance of warnings . . . . . . . . . . . . . . . . . . . . . . . . . . . . . . . . . . . . . . . . . . . . . . 5
3.3 General information on the safety of the machine . . . . . . . . . . . . . . . . . . . . . . . . . . . 7
3.4 Instructions for the operator. . . . . . . . . . . . . . . . . . . . . . . . . . . . . . . . . . . . . . . . . . . . 7
3.4.1 Personnel qualifications . . . . . . . . . . . . . . . . . . . . . . . . . . . . . . . . . . . . . . . . . 7
3.4.2 Instruction. . . . . . . . . . . . . . . . . . . . . . . . . . . . . . . . . . . . . . . . . . . . . . . . . . . . 7
3.4.3 Accident prevention . . . . . . . . . . . . . . . . . . . . . . . . . . . . . . . . . . . . . . . . . . . . 8
3.5 Information on operational safety . . . . . . . . . . . . . . . . . . . . . . . . . . . . . . . . . . . . . . . 8
3.5.1 Lifting and moving the machine . . . . . . . . . . . . . . . . . . . . . . . . . . . . . . . . . . . 8
3.5.2 Parking the machine . . . . . . . . . . . . . . . . . . . . . . . . . . . . . . . . . . . . . . . . . . . 8
3.5.3 Filling the machine . . . . . . . . . . . . . . . . . . . . . . . . . . . . . . . . . . . . . . . . . . . . . 9
3.5.4 Checks before start-up. . . . . . . . . . . . . . . . . . . . . . . . . . . . . . . . . . . . . . . . . . 9
3.5.5 Hazard zone. . . . . . . . . . . . . . . . . . . . . . . . . . . . . . . . . . . . . . . . . . . . . . . . . 10
3.5.6 Operation . . . . . . . . . . . . . . . . . . . . . . . . . . . . . . . . . . . . . . . . . . . . . . . . . . . 11
3.6 Use of spreading material . . . . . . . . . . . . . . . . . . . . . . . . . . . . . . . . . . . . . . . . . . . . 12
3.7 Hydraulic system . . . . . . . . . . . . . . . . . . . . . . . . . . . . . . . . . . . . . . . . . . . . . . . . . . . 12
3.8 Maintenance and service. . . . . . . . . . . . . . . . . . . . . . . . . . . . . . . . . . . . . . . . . . . . . 13
3.8.1 Qualifications of maintenance staff . . . . . . . . . . . . . . . . . . . . . . . . . . . . . . . 13
3.8.2 Wear parts . . . . . . . . . . . . . . . . . . . . . . . . . . . . . . . . . . . . . . . . . . . . . . . . . . 13
3.8.3 Maintenance and service work. . . . . . . . . . . . . . . . . . . . . . . . . . . . . . . . . . . 13
3.9 Safety in traffic. . . . . . . . . . . . . . . . . . . . . . . . . . . . . . . . . . . . . . . . . . . . . . . . . . . . . 14
3.9.1 Checks before driving . . . . . . . . . . . . . . . . . . . . . . . . . . . . . . . . . . . . . . . . . 14
3.9.2 Transportation drive with the machine . . . . . . . . . . . . . . . . . . . . . . . . . . . . . 15
3.10 Safety equipment at the machine . . . . . . . . . . . . . . . . . . . . . . . . . . . . . . . . . . . . . . 16
3.10.1 Position of safety equipment . . . . . . . . . . . . . . . . . . . . . . . . . . . . . . . . . . . . 16
3.10.2 Function of safety equipment. . . . . . . . . . . . . . . . . . . . . . . . . . . . . . . . . . . . 18
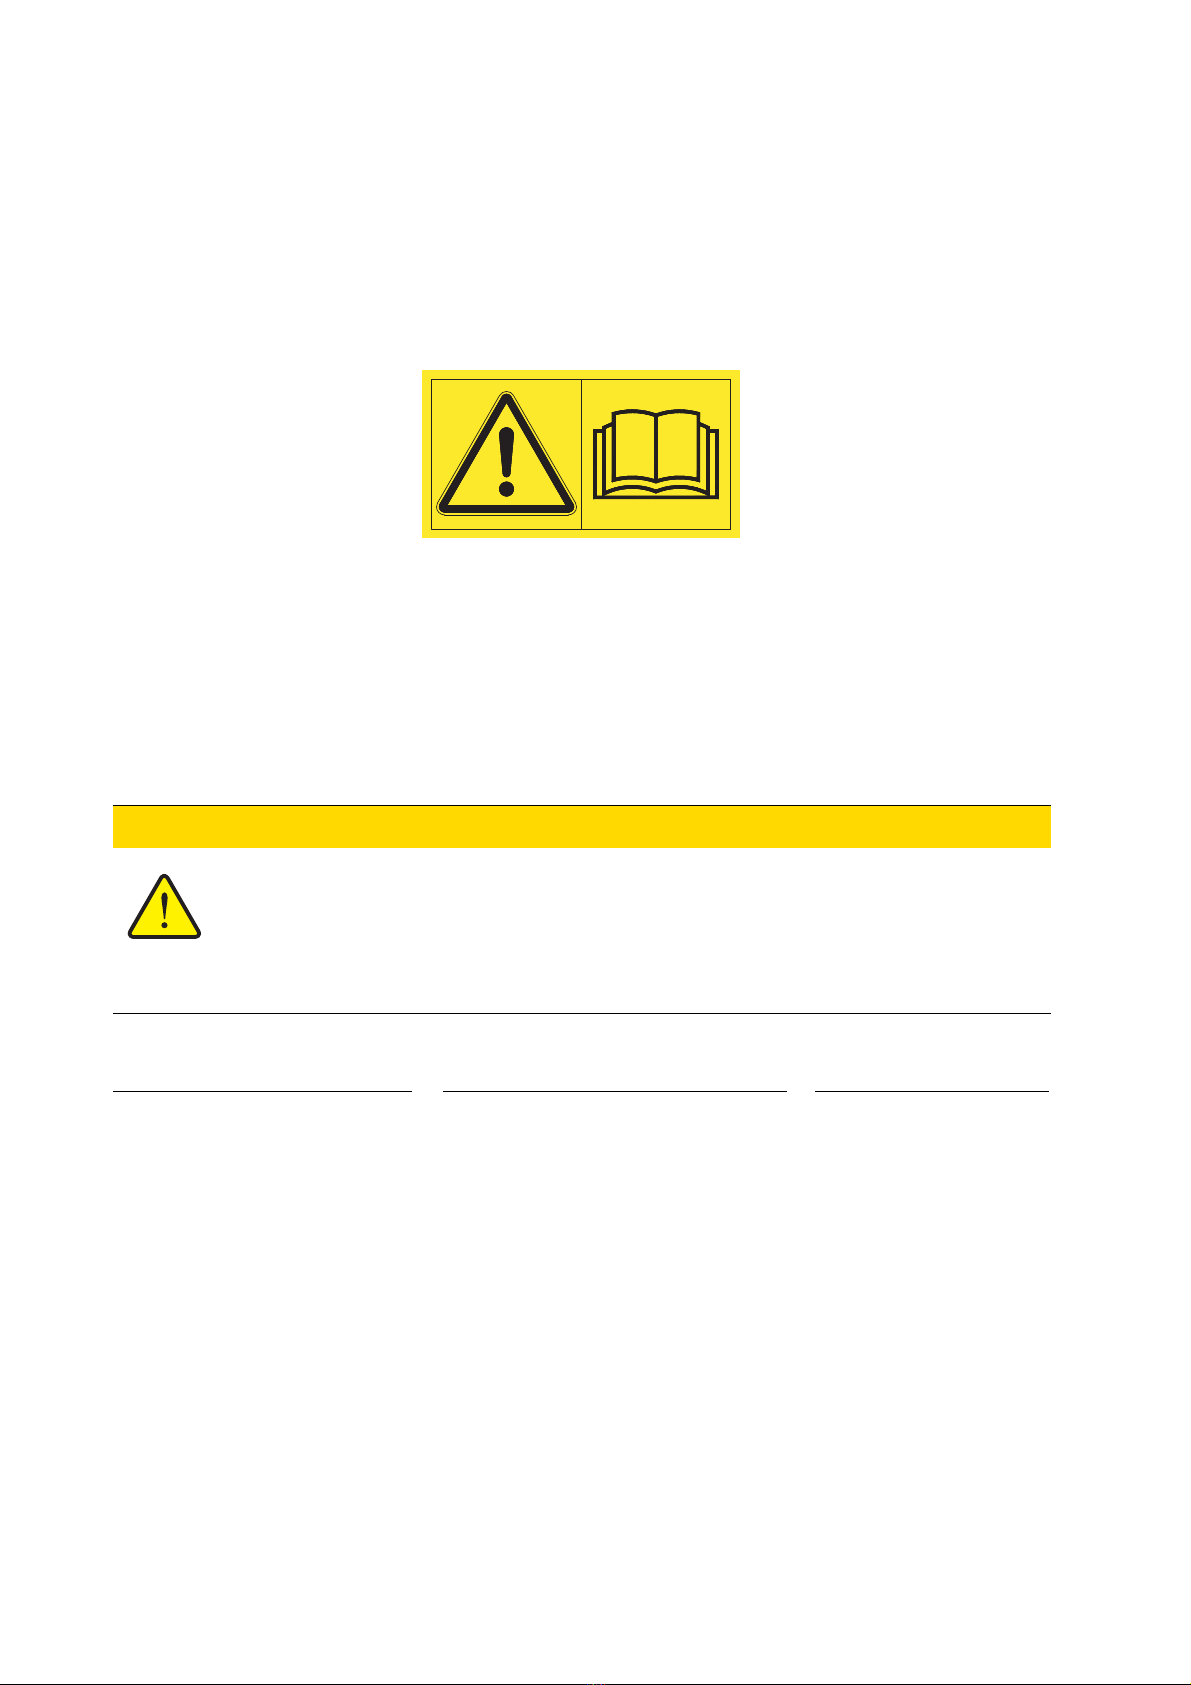
3.11 Warning and instruction stickers . . . . . . . . . . . . . . . . . . . . . . . . . . . . . . . . . . . . . . . 19
3.11.1 Warning stickers. . . . . . . . . . . . . . . . . . . . . . . . . . . . . . . . . . . . . . . . . . . . . . 20
3.11.2 Instruction stickers and nameplate. . . . . . . . . . . . . . . . . . . . . . . . . . . . . . . . 21
3.12 Lighting system with reflector and sidelights . . . . . . . . . . . . . . . . . . . . . . . . . . . . . . 22

Table of Contents
II
4 Technical data 23
4.1 Manufacturer . . . . . . . . . . . . . . . . . . . . . . . . . . . . . . . . . . . . . . . . . . . . . . . . . . . . . . 23
4.2 Description of the machine. . . . . . . . . . . . . . . . . . . . . . . . . . . . . . . . . . . . . . . . . . . . 24
4.2.1 Assembly overview, rear (all machine types) . . . . . . . . . . . . . . . . . . . . . . . . 24
4.2.2 Assembly overview, front, PTO drive . . . . . . . . . . . . . . . . . . . . . . . . . . . . . . 25
4.2.3 Assembly overview, front, hydraulic drive. . . . . . . . . . . . . . . . . . . . . . . . . . . 25
4.2.4 Assembly overview, HydroControl (-HC) . . . . . . . . . . . . . . . . . . . . . . . . . . . 26
4.3 Versions . . . . . . . . . . . . . . . . . . . . . . . . . . . . . . . . . . . . . . . . . . . . . . . . . . . . . . . . . . 27
4.3.1 Drive with universal drive shaft . . . . . . . . . . . . . . . . . . . . . . . . . . . . . . . . . . . 27
4.3.2 Drive with hydraulic motor . . . . . . . . . . . . . . . . . . . . . . . . . . . . . . . . . . . . . . 27
4.4 Technical data of basic equipment. . . . . . . . . . . . . . . . . . . . . . . . . . . . . . . . . . . . . . 29
4.5 Technical data of extensions and extension combinations . . . . . . . . . . . . . . . . . . . 30
5 Transportation without tractor 31
5.1 General safety instructions. . . . . . . . . . . . . . . . . . . . . . . . . . . . . . . . . . . . . . . . . . . . 31
5.2 Loading and unloading, parking . . . . . . . . . . . . . . . . . . . . . . . . . . . . . . . . . . . . . . . . 31
6 Commissioning 33
6.1 Accepting the machine . . . . . . . . . . . . . . . . . . . . . . . . . . . . . . . . . . . . . . . . . . . . . . . 33
6.2 Requirements for the tractor. . . . . . . . . . . . . . . . . . . . . . . . . . . . . . . . . . . . . . . . . . . 34
6.3 Mounting the universal drive shaft (versions H, Q, C) . . . . . . . . . . . . . . . . . . . . . . . 35
6.3.1 Checking the length of the universal drive shaft. . . . . . . . . . . . . . . . . . . . . . 35
6.3.2 Fitting / removing the universal drive shaft . . . . . . . . . . . . . . . . . . . . . . . . . . 36
6.4 Installing the machine on the tractor . . . . . . . . . . . . . . . . . . . . . . . . . . . . . . . . . . . . 39
6.4.1 Preconditions . . . . . . . . . . . . . . . . . . . . . . . . . . . . . . . . . . . . . . . . . . . . . . . . 39
6.4.2 Attaching the machine . . . . . . . . . . . . . . . . . . . . . . . . . . . . . . . . . . . . . . . . . 39
6.5 Connecting the hydraulic drive (Version H-100/200, Q-100/200, C-100/200,
Q-100/200-HC). . . . . . . . . . . . . . . . . . . . . . . . . . . . . . . . . . . . . . . . . . . . . . . . . . . . . 43
6.6 Connecting the metering slide actuator . . . . . . . . . . . . . . . . . . . . . . . . . . . . . . . . . . 44
6.6.1 Connecting the hydraulic metering slide actuator (Version H) . . . . . . . . . . . 44
6.6.2 Connecting the electronic metering slide actuator: AXEO, Version Q . . . . . 44
6.6.3 Connecting the electrical metering slide actuator: Version C . . . . . . . . . . . . 45
6.7 Connecting the actuator for the spreading width limiter (Version H) . . . . . . . . . . . . 45
6.8 Connecting the lighting. . . . . . . . . . . . . . . . . . . . . . . . . . . . . . . . . . . . . . . . . . . . . . . 45
6.9 Filling the machine . . . . . . . . . . . . . . . . . . . . . . . . . . . . . . . . . . . . . . . . . . . . . . . . . . 46
6.10 Parking and unhitching the machine . . . . . . . . . . . . . . . . . . . . . . . . . . . . . . . . . . . . 47

Table of Contents
III
7 Machine settings 49
7.1 Setting options overview . . . . . . . . . . . . . . . . . . . . . . . . . . . . . . . . . . . . . . . . . . . . . 49
7.2 Spreading disc and agitator speed adjustment . . . . . . . . . . . . . . . . . . . . . . . . . . . . 51
7.2.1 PTO drive . . . . . . . . . . . . . . . . . . . . . . . . . . . . . . . . . . . . . . . . . . . . . . . . . . . 51
7.2.2 Drive with hydraulic motor (Version H-100/200, Q-100/200, C-100/200). . . 51
7.3 Adjusting the application rate. . . . . . . . . . . . . . . . . . . . . . . . . . . . . . . . . . . . . . . . . . 53
7.4 Adjusting the drop point. . . . . . . . . . . . . . . . . . . . . . . . . . . . . . . . . . . . . . . . . . . . . . 55
7.5 Adjusting the spreading width limiter . . . . . . . . . . . . . . . . . . . . . . . . . . . . . . . . . . . . 57
7.6 Adjustment options with HydroControl (Version Q-100/200-HC). . . . . . . . . . . . . . . 58
7.7 Adjusting the half-side slide. . . . . . . . . . . . . . . . . . . . . . . . . . . . . . . . . . . . . . . . . . . 59
7.8 Setting the spreading vanes . . . . . . . . . . . . . . . . . . . . . . . . . . . . . . . . . . . . . . . . . . 61
7.8.1 Increasing the spreading density on the right-hand side in the direction
of travel . . . . . . . . . . . . . . . . . . . . . . . . . . . . . . . . . . . . . . . . . . . . . . . . . . . . 61
7.8.2 Increasing the spreading density on the left-hand side in the direction
of travel . . . . . . . . . . . . . . . . . . . . . . . . . . . . . . . . . . . . . . . . . . . . . . . . . . . . 62
7.9 Use the fertiliser chart . . . . . . . . . . . . . . . . . . . . . . . . . . . . . . . . . . . . . . . . . . . . . . . 63
7.9.1 Information on the fertiliser chart . . . . . . . . . . . . . . . . . . . . . . . . . . . . . . . . . 63
7.9.2 List of fertiliser charts . . . . . . . . . . . . . . . . . . . . . . . . . . . . . . . . . . . . . . . . . . 64
7.9.3 Fertiliser chart for grit (3/5 mm) . . . . . . . . . . . . . . . . . . . . . . . . . . . . . . . . . . 65
7.9.4 Fertiliser chart for sand . . . . . . . . . . . . . . . . . . . . . . . . . . . . . . . . . . . . . . . . 66
7.9.5 Fertiliser chart for rock salt. . . . . . . . . . . . . . . . . . . . . . . . . . . . . . . . . . . . . . 67
7.9.6 Fertiliser chart for refined salt. . . . . . . . . . . . . . . . . . . . . . . . . . . . . . . . . . . . 68
7.9.7 Fertiliser chart for fertiliser . . . . . . . . . . . . . . . . . . . . . . . . . . . . . . . . . . . . . . 69
7.10 Calibration . . . . . . . . . . . . . . . . . . . . . . . . . . . . . . . . . . . . . . . . . . . . . . . . . . . . . . . . 84
7.10.1 Determining the nominal output rate . . . . . . . . . . . . . . . . . . . . . . . . . . . . . . 84
7.10.2 Implementing the calibration . . . . . . . . . . . . . . . . . . . . . . . . . . . . . . . . . . . . 85
8 Spreading work 87
8.1 General information . . . . . . . . . . . . . . . . . . . . . . . . . . . . . . . . . . . . . . . . . . . . . . . . . 87
8.2 General information on the agitator . . . . . . . . . . . . . . . . . . . . . . . . . . . . . . . . . . . . . 88
8.3 Instructions regarding the spreading operation . . . . . . . . . . . . . . . . . . . . . . . . . . . . 89
8.4 Spreading grit . . . . . . . . . . . . . . . . . . . . . . . . . . . . . . . . . . . . . . . . . . . . . . . . . . . . . 90
8.5 Spreading of sand or moist salt . . . . . . . . . . . . . . . . . . . . . . . . . . . . . . . . . . . . . . . . 91
8.6 Spreading of salt . . . . . . . . . . . . . . . . . . . . . . . . . . . . . . . . . . . . . . . . . . . . . . . . . . . 92
8.7 Spreading granulated fertiliser. . . . . . . . . . . . . . . . . . . . . . . . . . . . . . . . . . . . . . . . . 93
8.8 Spreading grit-salt mixtures. . . . . . . . . . . . . . . . . . . . . . . . . . . . . . . . . . . . . . . . . . . 94
8.9 Discharging residual material . . . . . . . . . . . . . . . . . . . . . . . . . . . . . . . . . . . . . . . . . 95

Table of Contents
IV
9 Maintenance and service 97
9.1 Safety . . . . . . . . . . . . . . . . . . . . . . . . . . . . . . . . . . . . . . . . . . . . . . . . . . . . . . . . . . . .97
9.2 Wear parts and screw connections . . . . . . . . . . . . . . . . . . . . . . . . . . . . . . . . . . . . . 97
9.2.1 Checking wear parts . . . . . . . . . . . . . . . . . . . . . . . . . . . . . . . . . . . . . . . . . . . 97
9.2.2 Checking screw connections . . . . . . . . . . . . . . . . . . . . . . . . . . . . . . . . . . . . 98
9.3 Cleaning . . . . . . . . . . . . . . . . . . . . . . . . . . . . . . . . . . . . . . . . . . . . . . . . . . . . . . . . . . 98
9.4 Metering slide adjustment . . . . . . . . . . . . . . . . . . . . . . . . . . . . . . . . . . . . . . . . . . . . 99
9.5 Checking the agitator for wear . . . . . . . . . . . . . . . . . . . . . . . . . . . . . . . . . . . . . . . . 101
9.5.1 Dismounting the agitator. . . . . . . . . . . . . . . . . . . . . . . . . . . . . . . . . . . . . . . 101
9.5.2 Checking agitator RWK AX 140 for wear . . . . . . . . . . . . . . . . . . . . . . . . . . 102
9.5.3 Checking agitator RWK AX 160 for wear . . . . . . . . . . . . . . . . . . . . . . . . . . 102
9.5.4 Checking agitator RWK AX 180 for wear . . . . . . . . . . . . . . . . . . . . . . . . . . 103
9.5.5 Checking agitator RWK AX 220 for wear . . . . . . . . . . . . . . . . . . . . . . . . . . 104
9.5.6 Checking agitator RWK AX 240 for wear . . . . . . . . . . . . . . . . . . . . . . . . . . 105
9.5.7 Checking the thrust ring for wear . . . . . . . . . . . . . . . . . . . . . . . . . . . . . . . . 105
9.5.8 Checking the stop ring in the hopper for wear . . . . . . . . . . . . . . . . . . . . . . 106
9.6 Replacing the spreader vanes . . . . . . . . . . . . . . . . . . . . . . . . . . . . . . . . . . . . . . . . 106
9.7 Transmission oil . . . . . . . . . . . . . . . . . . . . . . . . . . . . . . . . . . . . . . . . . . . . . . . . . . . 107
9.7.1 Quantity and types . . . . . . . . . . . . . . . . . . . . . . . . . . . . . . . . . . . . . . . . . . . 107
9.7.2 Checking the oil level . . . . . . . . . . . . . . . . . . . . . . . . . . . . . . . . . . . . . . . . . 108
9.8 Lubrication plan . . . . . . . . . . . . . . . . . . . . . . . . . . . . . . . . . . . . . . . . . . . . . . . . . . . 109
10 Faults and possible causes 111
11 List of available accessories 113
11.1 Electrical remote control (metering slide and spreading width limiter) . . . . . . . . . . 113
11.2 Hydraulic remote control (metering slide). . . . . . . . . . . . . . . . . . . . . . . . . . . . . . . . 113
11.3 Extensions . . . . . . . . . . . . . . . . . . . . . . . . . . . . . . . . . . . . . . . . . . . . . . . . . . . . . . . 113
11.4 Hopper cover . . . . . . . . . . . . . . . . . . . . . . . . . . . . . . . . . . . . . . . . . . . . . . . . . . . . . 113
11.5 Spreader apron . . . . . . . . . . . . . . . . . . . . . . . . . . . . . . . . . . . . . . . . . . . . . . . . . . . 114
11.6 Agitators . . . . . . . . . . . . . . . . . . . . . . . . . . . . . . . . . . . . . . . . . . . . . . . . . . . . . . . . . 114
11.6.1 RWK AX 140. . . . . . . . . . . . . . . . . . . . . . . . . . . . . . . . . . . . . . . . . . . . . . . . 114
11.6.2 RWK AX 160. . . . . . . . . . . . . . . . . . . . . . . . . . . . . . . . . . . . . . . . . . . . . . . . 114
11.6.3 RWK AX 180. . . . . . . . . . . . . . . . . . . . . . . . . . . . . . . . . . . . . . . . . . . . . . . . 115
11.6.4 RWK AX 220. . . . . . . . . . . . . . . . . . . . . . . . . . . . . . . . . . . . . . . . . . . . . . . . 115
11.6.5 RWK AX 240. . . . . . . . . . . . . . . . . . . . . . . . . . . . . . . . . . . . . . . . . . . . . . . . 116
11.7 Adapter for attachment at category 1N . . . . . . . . . . . . . . . . . . . . . . . . . . . . . . . . . 116
11.8 BLO 18 lighting. . . . . . . . . . . . . . . . . . . . . . . . . . . . . . . . . . . . . . . . . . . . . . . . . . . . 116
11.9 Universal drive shaft with ratchet clutch . . . . . . . . . . . . . . . . . . . . . . . . . . . . . . . . . 116

Table of Contents
V
12 Disposal 117
12.1 Safety. . . . . . . . . . . . . . . . . . . . . . . . . . . . . . . . . . . . . . . . . . . . . . . . . . . . . . . . . . . 117
12.2 Disposal . . . . . . . . . . . . . . . . . . . . . . . . . . . . . . . . . . . . . . . . . . . . . . . . . . . . . . . . . 118
13 Axle load calculation 119
Index A
Terms/conditions of warranty

Table of Contents
VI

Intended use and EU declaration of conformity
1
1
1 Intended use and EU declaration of conformity
1.1 Intended use
The AXEO single-disc spreader may only be used in accordance with the infor-
mation given in this operator's manual.
The AXEO single-disc spreader has been constructed for the following applica-
tions (intended use) exclusively:
in winter road maintenance for spreading material that can be delivered by
chute, such as grit (3/5), sand and salt,
in agriculture for spreading dry, granular and crystalline fertilisers,
Any use outside these definitions is considered misuse. The manufacturer is not
liable for any damage which results from misuse. The operator bears the entire risk.
The intended use also includes compliance with the operating, maintenance, re-
pair and servicing conditions prescribed by the manufacturer. Only genuine spare
parts from the manufacturer may be used as replacements.
The AXEO single-disc spreader may only be used, maintained and repaired by
instructed and trained staff who are familiar with the characteristics of the ma-
chine and who are aware of the risks.
Important information on the operation and safe handling of the machine is pro-
vided in this operator's manual. The manufacturer also attaches warning notes
and warning symbols to the machine. All such information must be followed when
using the machine.
Moreover, the relevant accident prevention regulations and the other generally
recognised safety, occupational health, and road traffic regulations must be strict-
ly observed when using the machine.
Unauthorized modifications to the single-disc spreader are not permitted. They
will exempt the manufacturer from liability for any damage resulting therefrom.
In the following chapters, the single-disc spreader is referred to as “machine”.
Foreseeable misuse
The manufacturer provides warning notes and signs on the AXEO single-disc
spreader relating to foreseeable misuse. These warning notes and signs must be
observed under all circumstances in order to prevent the AXEO single-disc
spreader from being used for any other purpose than that specified in the opera-
tor's manual.

Intended use and EU declaration of conformity1
2
1.2 Declaration of conformity
In accordance with 2006/42/EC, Appendix II, No. 1.A
Rauch - Landmaschinenfabrik GmbH,
Landstrasse 14, 76547 Sinzheim, Germany
We hereby declare that the product:
Single-disc spreader of the series AXEO
Type: AXEO 2.1, AXEO 6.1, AXEO 18.1
complies with all relevant regulations of the EC Machinery Directive 2006/42/EC.
Technical documents compiled by:
Rauch - Design Management
Landstrasse 14, 76547 Sinzheim, Germany
(Norbert Rauch - Managing director)
Muster
Sample
Spécimen

User instructions
3
2
2 User instructions
2.1 About this operator’s manual
This operator's manual is an integral part of the AXEO single-disc spreader.
The operator’s manual contains important information for a safe, appropriate
and economic use and maintenance of the machine. Adherence to this opera-
tor’s manual helps to avoid risks, to reduce repair costs and downtime, and to
increase the machine's reliability and service life.
The complete documentation, comprising this operator's manual and any other
documents provided, must be kept in an easily accessible location close to where
the machine is used (e. g. in the tractor).
If the machine is sold, the operator's manual must also be passed on to the new
owner.
The operator's manual is intended for the operator of the machine of the AXEO
series and anyone involved in operating and maintaining it. The operator's man-
ual must be read, understood, and applied by all persons entrusted with the fol-
lowing work on the machine:
Operation,
Maintenance and cleaning,
Repairing faults.
The following are particularly important:
The chapter on safety,
The warnings in the text of the individual chapters.
The operator's manual does not replace your own responsibility as the oper-
ator and operating personnel of the control unit.
2.2 Structure of the operator’s manual
The operator's manual is divided into 6 points of focus:
General information,
Safety instructions,
Machine data,
Instructions on the operation of the machine,
Instructions on detecting and rectifying faults and
Maintenance and repair instructions.

User instructions2
4
2.3 Notes on text descriptions
2.3.1 Instructions and procedures
Steps that the operator must carry out are shown as a numbered list.
1. Instruction for action step 1
2. Instruction for action step 2
Instructions involving only one step are not numbered. The same applies for ac-
tion steps that do not have a specific sequence.
A bullet is placed in front of these instructions:
Handling instruction
2.3.2 Listings
Listings without a specific sequence are shown with bullet points (level 1) and
dashes (level 2):
Property A
- PointA
- PointB
Property B
2.3.3 References
References to other text passages in the document are indicated with section
number, headline text and page number:
Example: See also Chapter 3: Safety,page 5.
References to other documents are indicated as note or instruction without exact
chapter or page number:
Example: Please also observe the instructions contained in the manual for
the universal drive shaft.

Safety
5
3
3 Safety
3.1 General Information
The chapter Safety contains basic warning notes as well as working and traffic
safety instructions for the usage of the installed machine.
The adherence to the instructions in this chapter is a prerequisite for the safe han-
dling and trouble-free operation of the machine.
There are additional warnings in the other chapters of this operator’s manual,
which must also be observed. The warning instructions are given before the text
for the relevant actions.
Warning notes on the supplier components can be found in the respective sup-
plier documentation. These warning instructions must also be observed.
3.2 Significance of warnings
The warning instructions in this manual have been structured according to the de-
gree of danger and the probability of their occurrence.
Danger signs and symbols inform the user about other construction-related and
unavoidable residual risks that may be encountered when operating the machine.
The warning notes used are structured as follows:
Example
Signal word
Symbol Explanation
n DANGER
Risk to life if warning is not observed
Description of the danger and possible consequences.
Ignoring these warnings will result in very serious or even fatal
injury.
Measures to prevent the danger.

Safety3
6
Warning severity level
The degree of danger is indicated by the signal word. The levels are classified as
follows:
n DANGER
Type and source of danger
This warning warns of a danger posing an immediate threat to the
health and life of persons.
Ignoring these warnings will result in very serious or even fatal
injury.
Always observe the measures described to prevent this
danger.
n WARNING
Type and source of danger
This warning warns of a possible dangerous situation for the
health of persons.
Ignoring these warnings will result in very serious injury.
Always observe the measures described to prevent this
danger.
n CAUTION
Type and source of danger
This warning warns of a potentially dangerous situation for per-
sonal health or of material and environmental damage.
Ignoring this warning can result in injuries and damage to the prod-
uct or the general area.
Always observe the measures described to prevent this
danger.
NOTICE
General information containing application tips and particularly useful informa-
tion, but which constitutes neither warnings nor hazards.

Safety
7
3
3.3 General information on the safety of the machine
The machine is constructed in accordance with the state of the art and the recog-
nized technical regulations. However, its usage and maintenance may cause
danger to the health and life of the operator or third parties and/or the impairment
of the machine and other material assets.
For this reason, the machine may only be operated
when it is in a proper and roadworthy condition,
being aware of safety and dangers.
For this purpose, it is essential that you know and apply the content of the oper-
ator's manual, the applicable accident prevention regulations as well as the gen-
eral safety, occupational health and road-traffic regulations.
3.4 Instructions for the operator
It is the operator's responsibility that the machine is used as intended.
3.4.1 Personnel qualifications
Before starting any work on or with the machine, all persons who are involved in
operation, maintenance or repair must have read and understood this operator’s
manual.
The machine may only be operated by instructed personnel authorized by the
owner.
Members of staff who are still in training or subject to coaching/instructions
may only work on the machine when an experienced person is present.
Only qualified maintenance staff may implement maintenance and service
work.
3.4.2 Instruction
Distribution partners, works representatives or employees of RAUCH will instruct
the operator regarding the operation and maintenance of the machine.
The owner must ensure that newly recruited operating and maintenance person-
nel are instructed to the same extent and with the same care with regard to the
operation and repair of the machine in compliance with this operator’s manual.

Safety3
8
3.4.3 Accident prevention
Safety and accident prevention regulations are governed by law in every country.
The operator of the machine shall be responsible for the compliance with these
regulations applicable in the country of use.
The following instructions must also be observed:
Never let the machine run without supervision.
Do not ride on the machine while it is working or being transported (no pas-
sengers).
Do not use machine parts as climbing aids.
Always wear tight fitting clothes. Do not wear work clothes with belts, loose
threads or other items that could snag.
Follow the manufacturer's warning notes when handling chemicals. You may
have to wear personal protective equipment (PPE).
3.5 Information on operational safety
To avoid dangerous situations, only use the machine in a reliable condition.
3.5.1 Lifting and moving the machine
The machine is delivered ex works standing on a pallet.
Only lift the machine at the pallet using a suitable pallet truck or forklift. Take
the total weight into consideration.
Never lift or move the machine at the hopper or at other, non-marked anchor
points.
3.5.2 Parking the machine
Only park the machine with the hopper empty and on horizontal, solid ground.
If the machine is parked on its own (without tractor), fully open the metering
slide. The return spring is released and any water in the hopper can run out.

Safety
9
3
3.5.3 Filling the machine
Only fill the machine when the motor of the tractor is stopped. Remove the
ignition key in order to ensure that the motor cannot be started.
Use suitable auxiliary equipment for filling the spreader (e.g. front-end loader,
auger, silo).
When manually filling it (e.g. loading it with big bags), use suitable steps.
Fill the machine no higher than the top-edge. Observe the maximum admis-
sible payload.
Only fill the machine when it is mounted.
Only fill the machine when the protective grid is closed. This way, faults during
spreading caused by lumps in the spreading material or other foreign bodies
are prevented.
3.5.4 Checks before start-up
Check the operating safety of the machine before the first and every subsequent
start-up.
Is the entire safety equipment installed at the machine and functional?
Are all fasteners and load-bearing connections tight and in proper condition?
Are the spreading disc, the spreading vanes and their fixings in proper condi-
tion?
Is the protective grid locked in the hopper?
Are all locks firmly closed?
Is the hazard zone of the machine clear of persons?
Is the universal drive shaft guard in good condition?
Check the mounting height. The distance from the lower edge of the frame to
the floor may not exceed 120 cm.

Safety3
10
3.5.5 Hazard zone
Ejected spreading material may cause serious injury (e. g. to the eyes).
When persons are present between the tractor and the machine, there is a great
hazard caused by the tractor rolling away or machine movements which may
have fatal consequences.
The following figure displays the hazard zones of the machine.
Figure 3.1: Hazard zones around attachment units
[A] Hazard zone in spreading operation
[B] Hazard zone when coupling/uncoupling the machine
For this reason, ensure that nobody is present in spreading range [A] of the
machine.
Immediately stop the machine and the tractor if persons are present in the
hazard zone of the machine.
When actuating the hydraulic lift, ensure that nobody is present in the hazard
zone [B].
A
B

Safety
11
3
3.5.6 Operation
If the machine malfunctions, stop the machine immediately and secure it.
Have the fault repaired immediately by appropriately instructed and author-
ised personnel.
Never climb onto the machine while the spreader unit is running.
Only operate the machine with the protective grid in the hopper. The protec-
tive grid must not be removed during operation.
Only operate the machine with closed maintenance cover.
Rotating machine components can cause serious injury. For this reason, en-
sure that you avoid any contact between body parts or clothes and rotating
components.
Before setting the application rate, completely close the metering slide if the
machine is equipped with a hydraulic metering slide actuator.
Do not deposit any parts (such as screws, nuts) in the spreader hopper.
Ejected spreading material may cause serious injury (e. g. to the eyes). For
this reason, ensure that nobody is present in the spreading range of the ma-
chine.
If the wind speed is too high, stop spreading since the specified spreading
range can no longer be guaranteed under such conditions.
Never climb onto the machine or the tractor when it is situated beneath high-
voltage electrical power lines.

Safety3
12
3.6 Use of spreading material
Incorrect selection or use of spreading material may cause serious injury or envi-
ronmental damage.
When selecting the spreading material, inform yourself about its effects on
persons, the environment, and the machine.
Follow the directions of the spreading material manufacturer exactly.
3.7 Hydraulic system
The hydraulic system is under high pressure.
Fluid escaping under high pressure can cause serious injuries and environmental
damage. The following instructions must be observed to prevent danger:
Always operate the machine below the permissible maximum operating pres-
sure.
Depressurise the hydraulic system before any maintenance work. Turn the
tractor motor off. Secure it against reactivation.
When looking for leaks, wear protective glasses and protective gloves at
all times.
In the case of injury in connection with hydraulic oil, consult a physician im-
mediately as severe infections may occur otherwise.
When connecting the hydraulic hoses to the tractor, ensure that the hydraulic
system is depressurised, both on the tractor and the machine side.
Attach the hydraulic hoses of the tractor and the spreader hydraulic systems
only with the prescribed connections.
Prevent any contamination of the hydraulic circuit. Always suspend the cou-
plings in the brackets provided. Use the dust caps. Clean the connections be-
fore joining them.
Regularly check the hydraulic components and hydraulic hose lines for me-
chanical defects, e.g. cuts and abrasions, contusions, bends, tears, porosity
etc.
Even when stored correctly and used within approved load limits, hoses and
hose couplings are subject to a natural ageing process. This limits their stor-
age and service life.
The service life of the hose lines may not exceed 6 years, including a possible
storage time of maximally 2 years.
The date of manufacture of the hoses is indicated on the hose coupling in month
and year
Replace hydraulic hoses if damaged or aged.
Replacement of hydraulic hoses must meet the technical requirements of the
equipment manufacturer. In particular, note the different maximum pressure
ratings of replacement hoses.
Other manuals for AXEO 2.1
1
This manual suits for next models
2
Table of contents
Other Rauch Spreader manuals

Rauch
Rauch K 51 User manual

Rauch
Rauch MDS 8.2 User manual

Rauch
Rauch TWS 85.1 User manual

Rauch
Rauch AXENT 100.1 User manual

Rauch
Rauch SA 121 User manual

Rauch
Rauch 2.1 User manual

Rauch
Rauch AXIS H EMC Series User manual

Rauch
Rauch SA 250 User manual

Rauch
Rauch SA 121 User manual

Rauch
Rauch AXENT Series User manual
Popular Spreader manuals by other brands

Wolf Garten
Wolf Garten WE-B Original manual

Amazone
Amazone IceTiger Original operating manual

Art's Way
Art's Way X350 Operator manual & illustrated parts list

Bush Hog
Bush Hog MS1300P Operator's manual

Pik Rite
Pik Rite Hydra-Pull HP-500 Operation and parts manual

Toro
Toro 41253 Series installation instructions