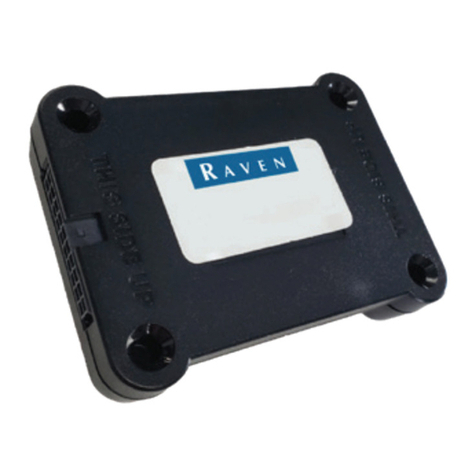
Raven CRX User manual

Installation manual
(English) (Original)
CRX + RS1
RAVEN EUROPE GENERIC
016-8000-028EN REV. A1

PAGE 2/35 | Installation manual |016-8000-028EN |Rev. A1
Raven Industries Inc.

PREFACE | CRX + RS1 | RAVEN EUROPE GENERIC
PAGE 3/35 | Installation manual |016-8000-028EN |Rev. A1
PREFACE
This installation manual is intended for persons
responsible for installing a CRx kit. The manual
contains important instructions that should be
complied with when commissioning, operating and
servicing the CRx kit.
This manual has been compiled with the utmost care.
Raven Europe assumes no responsibility for any errors
or omissions in this document.
Any comments or questions can be sent to service-
eu@ravenind.com.
Raven Europe or any of its suppliers will accept no
liability for physical or material damage caused
whilst using the CRx.
The installed Raven system produces less than 70dB
(A) noise.
This installation guide uses a number of concepts for
extra attention to a few things:
Hint!:
Provides recommendations on how certain
activities can be performed much easier.
Please note!:
Indicates certain problems that the user
should take note of.
Caution!:
Indicates that the machine can be damaged.
Warning!:
Indicates a risk of injury.

PAGE 4/35 | Installation manual |016-8000-028EN |Rev. A1
Raven Industries Inc.
DISCLAIMER | CRX + RS1 | RAVEN EUROPE GENERIC
DISCLAIMER
The safety instructions contained in the manuals of the tractor or implements must be complied with at all
times.
Always switch off the tractor before installing or repairing hydraulic and electrical components of the
SBGuidance system.
It is strictly prohibited to use the CRx systems on public roads.
It is strictly prohibited to leave a driving vehicle unattended when the CRx system is switched on. The driver is
always responsible for the direction and course of the vehicle.
To prevent injury or fire, replace defective fuses only with fuses of the same type and amperage.
The SBGuidance the operating system is not able to detect and avoid obstacles. If there is an obstacle in your
path, you will always need to take action for it to be avoided.
Only allow authorized/qualified persons to operate the system. Authorized/qualified persons are defined as:
persons who have read and understood the manual, have been given instructions by a product specialist, and
who are both physically and mentally fit and able to operate the system.
The system contains moving parts! Make sure the immediate environment is clear of people before operating
the system.
In case of system failure or breakdown switch of the tractor and disconnect the electrical power source to
avoid further damage. Contact your dealer for further instructions on how to repair your system.
Always wear personal protective equipment when operating/adjusting/repairing the system outside of the
tractor cab.
In order to prevent power surges from occurring, always start the machine first, before initiating the
SBGuidance control system.
Only touch the touch-screen with your finger or by using a special touch-screen stylus/pen. Operating the
touch-screen with sharp objects may cause permanent damage to the screen.
Always consult your supplier as to which products are best suited first before cleaning the touch-screen with
chemicals or alcohol.
If the terminal is not used for a long period, better remove the terminal from the tractor and store in a heated
environment. This will extend the life span of the electronic components.
To prevent theft, it is better to not let the terminal and GPS-antenna unattended in the tractor on the field.
WARNING!
PAY ATTENTION!

CONTENTS | CRX + RS1 | RAVEN EUROPE GENERIC
PAGE 5/35 | Installation manual |016-8000-028EN |Rev. A1
CONTENTS
PREFACE..............................................................................................................................................................................................................3
DISCLAIMER.......................................................................................................................................................................................................4
CONTENTS.........................................................................................................................................................................................................5
APPLICATION DRAWINGS CR7..................................................................................................................................................................6
APPLICATION DRAWINGS CR12 ...............................................................................................................................................................9
1STEERING SYSTEM INSTALLATION ................................................................................................................................................12
MOUNTING HARNESSES...........................................................................................................................................................12
HYDRAULICS..................................................................................................................................................................................14
1.2.1 HYDRAULIC VALVE.............................................................................................................................................................14
1.2.2 HYDRAULIC INSTALLATION LOAD SENSE................................................................................................................15
1.2.3 CONNECTING THE SHUTTLE VALVE ...........................................................................................................................15
1.2.4 HYDRAULIC INSTALLATION OPEN CENTER.............................................................................................................16
1.2.5 PRESSURE RELIEF VALVE..................................................................................................................................................17
1.2.6 HYDRAULIC SYSTEM ON TRACTORS WITH GEAR PUMP AND LOAD SENSE ORBITROL CONNECTION
18
1.2.7 MOUNTING AND CONNECTING THE HYDRAULIC DRIVE UNIT......................................................................19
1.2.8 WHEEL ANGLE SENSOR ...................................................................................................................................................20
1.2.9 MOUNTING SPY-CABLE...................................................................................................................................................20
1.2.10 MOUNTING THE WHEEL ANGLE SENSOR ................................................................................................................21
1.2.11 MOUNTING THE SENSOR DISC ....................................................................................................................................23
1.2.12 HEAVY-DUTY CARRARO FRONT AXLE WITH INDEPENDENT SUSPENSION...............................................27
STEER READY TRACTORS..........................................................................................................................................................28
SMARTRAX MD.............................................................................................................................................................................29
2RS1 INSTALLATION ..............................................................................................................................................................................30
3CRX INSTALLATION..............................................................................................................................................................................32
MOUNTING THE CR7..................................................................................................................................................................32
SLINGSHOT INSTALLATION .....................................................................................................................................................33
MOUNTING THE CR12 ...............................................................................................................................................................34

PAGE 6/35 | Installation manual |016-8000-028EN |Rev. A1
Raven Industries Inc.
APPLICATION DRAWINGS CR7 | CRX + RS1 | RAVEN EUROPE GENERIC
APPLICATION DRAWINGS CR7

APPLICATION DRAWINGS CR7 | CRX + RS1 | RAVEN EUROPE GENERIC
PAGE 7/35 | Installation manual |016-8000-028EN |Rev. A1

PAGE 8/35 | Installation manual |016-8000-028EN |Rev. A1
Raven Industries Inc.
APPLICATION DRAWINGS CR7 | CRX + RS1 | RAVEN EUROPE GENERIC

APPLICATION DRAWINGS CR12 | CRX + RS1 | RAVEN EUROPE GENERIC
PAGE 9/35 | Installation manual |016-8000-028EN |Rev. A1
APPLICATION DRAWINGS CR12

PAGE 10/35 | Installation manual |016-8000-028EN |Rev. A1
Raven Industries Inc.
APPLICATION DRAWINGS CR12 | CRX + RS1 | RAVEN EUROPE GENERIC

APPLICATION DRAWINGS CR12 | CRX + RS1 | RAVEN EUROPE GENERIC
PAGE 11/35 | Installation manual |016-8000-028EN |Rev. A1

PAGE 12/35 | Installation manual |016-8000-028EN |Rev. A1
Raven Industries Inc.
STEERING SYSTEM INSTALLATION | CRX + RS1 | RAVEN EUROPE GENERIC
1STEERING SYSTEM INSTALLATION
This chapter describes the installation of all the
different steering systems, hydraulic and SmarTrax MD.
Look carefully at the system overviews to know which
parts of the installation are applicable.
MOUNTING HARNESSES
When installing an autosteer system, the power cables
should always be connected to the battery. Two
options are possible, a Basic Harness (1-115-8000-141)
or an Implement Ready Harness (1-115-8000-060
frontmount or 1-115-8000-315 midmount). The
differcence between these harnesses is the IBBC
connector, this one is included at an Implement Ready
(IR) Harness (Figure 1) .
Power harness: an Implement Ready power harness is
mounted from the battery to the rear of the tractor. A
Basic power harness is mounted from the battery to
the chassis harness. Make sure that the relays and
fuses are mounted in a dry, clean and accessible spot
(Figure 2).
Which harness will be connected to the Power Harness
depends on which type of steering will be installed.
In addition, a number of guidelines have been
established for the assembly of all types of cable
harnesses:
Mount the relays fixed and in a dry, clean and
accessible spot (Figure 2).
The red wire is + (12V). The black wire is minus
(ground). Make sure that the first part of the
red wire (part in between battery and fuses)
cannot damage during operation.
If necessary the positive and negative wires, in
between the battery and the fuses, can be
shortened. Be sure to use cable sockets with
the correct size for proper connection.
FIGURE 1 IBBC CONNECTOR
FIGURE 2 CORRECT MOUNTED RELAYS AND FUSES

STEERING SYSTEM INSTALLATION | CRX + RS1 | RAVEN EUROPE GENERIC
PAGE 13/35 | Installation manual |016-8000-028EN |Rev. A1
If a ground switch is used in the tractor,
connect the wiring harness behind the ground
switch (not at the battery side of the ground
switch!).
If a main (12V) switch is used in the tractor, the
red wire connect the wiring harness behind the
main switch (not at the battery side of the
main switch!).
If no main switch is used, always connect the
wiring harness directly to the battery.
If the system is connected to a 24 Volt
machine, always use a 24V to 12V converter.
Never connect between the two batteries of a
24V machine!
Lead the terminal harness along with the GPS
and radio/GSM antenna cables through one
pillar of the cab.
Tie-wrap the harnesses so they are attached
free from vibration and friction.
Caution!:
It is important to ensure that the wiring harness
is always connected to the battery AFTER
installing all wires and controllers!

PAGE 14/35 | Installation manual |016-8000-028EN |Rev. A1
Raven Industries Inc.
STEERING SYSTEM INSTALLATION | CRX + RS1 | RAVEN EUROPE GENERIC
HYDRAULICS
1.2.1 HYDRAULIC VALVE
Figure 3 shows a manifold mounted onto a manifold
bracket with four M8 bolts. The manifold bracket is
preferably mounted at the right hand side of the
tractor (Figure 4). This is usually the side of the tractor
with the most space.
Please note!:
Make sure the connectors of the valves and the
pressure sensor can still be connected after
mounting the manifold.
FIGURE 3 MANIFOLD BRACKET WITH A
MANIFOLD AND STEERING CONTROLLER
MOUNTED
FIGURE 4 MOUNTED MANIFOLD AND HYDRAULIC
DRIVE UNIT

STEERING SYSTEM INSTALLATION | CRX + RS1 | RAVEN EUROPE GENERIC
PAGE 15/35 | Installation manual |016-8000-028EN |Rev. A1
1.2.2 HYDRAULIC INSTALLATION LOAD SENSE
The manifold should be connected between the hoses
leading from the steering orbitrol to the steering
cylinder(s). To do so, the hoses should be
disconnected, preferably on an existing connection
between a pipe line and a hose.
Connect the hoses from the steering orbitrol to A1
and B1 on the manifold. Connect the hoses to the
steering cylinders to A and Bon the manifold (Figure 7
and Figure 5).
Connect the pressure line, return line and the LS line of
the hydraulic pump to the P, Tand LS of the manifold.
When needed refer to the hydraulic diagram of the
tractor to find the correct connections on the tractor.
Caution!:
If there are separate hydraulic systems with
separate oil tanks on the tractor, the manifold
must be connected to the system in which the
steering orbitrol and steering cylinder are
included in.
Hint!:
Mark the lines twice with 'A' and 'B', before
disconnecting them
1.2.3 CONNECTING THE SHUTTLE VALVE
A shuttle valve should be installed in the load sense
line. See Figure 6 for proper mounting and orientation
of the shuttle valve. This way, when in rest, the ball
inside the shuttle valve floats inside the valve, which
will benefit the response for the load sense signal. In
addition, it is important that the shuttle valve is
installed as close to the pump as possible.
Steering Cylinder(s)
FIGURE 7 LOAD SENSE CONNECTING CIRCUIT.
FIGURE 5 CONNECTIONS FOR THE HYDRAULIC
LOAD SENSE MANIFOLD
FIGURE 6 TOP VIEW OF SHUTTLE VALVE FOR
MOUNTING IN THE LOAD SENSE LINE.
Signal from
manifold
Signal from
other users
Signal to LS-
pump

PAGE 16/35 | Installation manual |016-8000-028EN |Rev. A1
Raven Industries Inc.
STEERING SYSTEM INSTALLATION | CRX + RS1 | RAVEN EUROPE GENERIC
Hint!:
In case the wheels of the tractor are steering,
when the hydraulics of the tractor are operated;
a checkvalve should be mounted in the load
sense line from the manifold. The non-return
valve should let oil pass from the manifold to
the check valve/pump and should block in
opposite direction.
Hint!:
A shuttle valve for CNH tractors can be provided
by Raven Europe (part no. 13348001014) or the
local CNH dealer (part no. 82018814).
1.2.4 HYDRAULIC INSTALLATION OPEN CENTER
The manifold v3 open center consists of the standard
load sense manifold v3 with an add-on open center
part (Figure 8). Ensure the add-on is mounted the
correct way.
The pressure line that normally runs from the hydraulic
pump to the steering orbitrol, should be connected to
the Pof the add-on open center part. Then connect a
line between P1 of the manifold and the pressure line
of the orbitrol. Connect the Tof the manifold to a tank
inlet (Figure 9Figure 9 and Figure 10).
Connect the hoses leading from the orbitrol to A1 and
B1 on the manifold. Connect the hoses to the steering
cylinders to A and Bof the manifold (Figure 9Figure 9
and Figure 10Figure 10).
FIGURE 8 ADD-ON PART OF THE OPEN
CENTER MANIFOLD.
FIGURE 9 OPEN CENTER CONNECTION
CIRCUIT.
FIGURE 10 CONNECTIONS OF THE HYDRAULIC
OPEN CENTER MANIFOLD.

STEERING SYSTEM INSTALLATION | CRX + RS1 | RAVEN EUROPE GENERIC
PAGE 17/35 | Installation manual |016-8000-028EN |Rev. A1
1.2.5 PRESSURE RELIEF VALVE
A pressure relief valve is mounted to the add-on part
of the open center manifold (Figure 10). This pressure
relief valve must be set to the maximum allowable
control pressure of the steering system. The default
setting of the pressure relief valve is about 180 bar.
Determine the maximum pressure of the steering
system before mounting the manifold. Follow the next
steps:
Mount a pressure gauge, by making use of
a t-piece in the pressure line between the
hydraulic pump and the steering orbitrol.
Steer the front wheels to one side and
keep steering until the maximum pressure
is reached.
Read out the value on the pressure gauge.
After mounting the manifold. Set the maximum
pressure of the pressure relief valve, equal to the
maximum pressure of the steering system. Follow the
next steps:
Mount a pressure gauge, by making use of a t-
piece in the pressure line between the
hydraulic pump and the manifold.
Loosen the locking nut of the pressure relief
valve.
Loosen the pressure relief valve two turns
counter clockwise.
Steer the front wheels to one side, using the
Left/Right buttons of the CRx. Keep steering
until the maximum pressure is reached.
Read out the value on the pressure gauge.
Adjust the pressure relief valve until the
pressure is equal to the pressure it was before
mounting the manifold.
Secure the pressure relief valve with the
locking nut.
FIGURE 11 OPEN CENTER MANIFOLD.

PAGE 18/35 | Installation manual |016-8000-028EN |Rev. A1
Raven Industries Inc.
STEERING SYSTEM INSTALLATION | CRX + RS1 | RAVEN EUROPE GENERIC
1.2.6 HYDRAULIC SYSTEM ON TRACTORS WITH
GEAR PUMP AND LOAD SENSE ORBITROL
CONNECTION
Tractors with a gear-type pump and equipped with an
orbitrol with load sense connection fitted with a load
sense priority valve. This concerns most Valtra models
(Advanced, Versu and Direct) and some Deutz-Fahr
models.
This enables the use of a standard load sense manifold
with a shuttle valve. Because the maximum pressure is
normally limited by the steering orbitrol, an additional
pressure relief valve needs to be installed in the
pressure line to the manifold.
The load sense signal should be connected to the
existing load sense line from the steering orbitrol by
using the shuttle valve supplied. Preferably mount the
shuttle valve horizontally. Connect the hydraulic hoses
as indicated in Figure 12.
Determine the maximum pressure of the steering
system before mounting the manifold. The maximum
pressure of the additional pressure relief valve should
be set equal to the maximum pressure of the steering
system, before mounting the manifold.
Pressure relief
valve
(p=140 bar)
T
P P
Shuttle
valve
Orbit
LS A1 B1
T
P A B
T
P
LS
-prior
Steering cylinder(s)
Manifold
FIGURE 12 CONNECTING CIRCUIT FOR LS PRIORITY
VALVE.

STEERING SYSTEM INSTALLATION | CRX + RS1 | RAVEN EUROPE GENERIC
PAGE 19/35 | Installation manual |016-8000-028EN |Rev. A1
1.2.7 MOUNTING AND CONNECTING THE
HYDRAULIC DRIVE UNIT.
The Hydraulic Drive Unit bracket can be mounted to
the manifold. The Hydraulic Drive Unit can then be
fitted to the manifold bracket (Figure 13).
Important notes when mounting the Unit:
Mount the Hydraulic Drive Unit with
connectors directed downwards to prevent the
ingress of water!
Do not mount the Hydraulic Drive Unit too
close to parts which have a high temperature
(for example, the exhaust system of the
tractor)!
Connect the DIN connectors marked "Left" and “Right”
to the proportional valve. Connect the DIN connector
marked "Lock" to the shut-off valve. Connect the 4-pin
Phoenix M12 connector to the pressure sensor of the
manifold.
Please note!:
The torque of the pressure sensor in the
manifold V3 is 30 Nm. It is not necessary to
check this at delivery of an assembled
manifold. However, make sure, when replacing
the pressure sensor, that it is tightened with
the correct torque.
FIGURE 13 SIDE VIEW OF THE HYDRAULIC DRIVE
UNIT FITTED TO THE MANIFOLD.

PAGE 20/35 | Installation manual |016-8000-028EN |Rev. A1
Raven Industries Inc.
STEERING SYSTEM INSTALLATION | CRX + RS1 | RAVEN EUROPE GENERIC
1.2.8 WHEEL ANGLE SENSOR
For a correct operation of the Raven system a wheel
angle sensor is necessary. In various types of tractors a
factory fitted wheel angle sensor is already mounted in
the front axle. For different tractor types a ‘spy cable’ is
available at Raven to use the factory fitted wheel angle
sensor for the Raven system. When a spy cable is used
it is not necessary to install a Raven wheel angle
sensor. Ask Raven for more information about the
availability for a specific tractor brand or type.
1.2.9 MOUNTING SPY-CABLE
Take the following steps to mount a wheel angle
sensor spy-cable:
1. Follow the cable from the wheel angle sensor
on the front axle of the tractor to the first
connection in this cable.
2. Disconnect the connectors.
3. Connect the spy-cable in between the
connectors.
4. Connect the wheel angle sensor 5M cable to
the M12 connector of the spy-cable.
5. Mount the spy-cable in a clean and dry
position (Figure 14).
FIGURE 14 SPY CABLE MOUNTED ON A CNH
TRACTOR.
Other manuals for CRX
1
This manual suits for next models
1
Table of contents
Other Raven GPS manuals

Raven
Raven Phoenix 50 Administrator Guide

Raven
Raven RPR 100S Manual

Raven
Raven RS1 Use and care manual

Raven
Raven Viper 4 Technical manual

Raven
Raven Cruizer II User manual

Raven
Raven Phoenix 300 User manual

Raven
Raven Envizio Pro User manual

Raven
Raven RS1 User manual

Raven
Raven 210LB Manual instruction

Raven
Raven RTH-10 Parts list manual