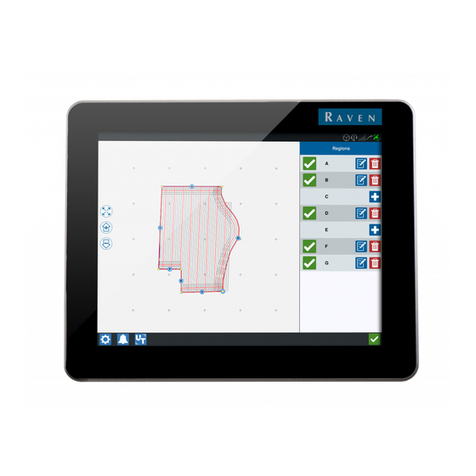
Raven Viper 4 User manual

Featuring the Raven Operating Software (ROS)
Viper 4™
Installation Manual

While every effort has been made to ensure the accuracy of this document,
Raven Industries assumes no responsibility for omissions and errors. Nor is any
liability assumed for damages resulting from the use of information contained
herein.
Raven Industries shall not be responsible or liable for incidental or consequential
damages or a loss of anticipated benefits or profits, work stoppage or loss, or
impairment of data arising out of the use, or inability to use, this system or any of
its components. Raven Industries shall not be held responsible for any
modifications or repairs made outside our facilities, nor damages resulting from
inadequate maintenance of this system.
As with all wireless and satellite signals, several factors may affect the availability
and accuracy of wireless and satellite navigation and correction services (e.g.
GPS, GNSS, SBAS, etc.). Therefore, Raven Industries cannot guarantee the
accuracy, integrity, continuity, or availability of these services and cannot
guarantee the ability to use Raven systems, or products used as components of
systems, which rely upon the reception of these signals or availability of these
services. Raven Industries accepts no responsibility for the use of any of these
signals or services for other than the stated purpose.
Disclaimer
©Raven Industries, Inc. 2013

Table of Contents
Manual No. 016-0171-539 Rev. A i
Chapter 1 Important Installation Safety Information............................. 1
Chapter 2 Viper 4 Introduction................................................................ 3
Overview ...................................................................................................................................3
Viper 4 Features ........................................................................................................................4
Raven OS ............................................................................................................................ 4
Enclosed Display .................................................................................................................5
Touch Screen ......................................................................................................................5
Power Button and Status Indicator ......................................................................................6
Integrated DGPS Receiver Option ...................................................................................... 6
Speed Compensated Monitoring and Control .....................................................................7
Connectivity Features ..........................................................................................................7
Care and Use ............................................................................................................................ 9
Updates .............................................................................................................................10
Technical Specifications .......................................................................................................... 11
Chapter 3 Installation Overview and Kit Contents.............................. 13
Overview of the Installation Process .......................................................................................13
Viper 4 Kit Contents ................................................................................................................14
Chassis and Console Cabling .................................................................................................15
Optional Feature Installation ...................................................................................................15
Chapter 4 Mounting the Viper 4 ............................................................ 17
Mounting the Field Computer .................................................................................................. 18
Orientation ......................................................................................................................... 18
Mount the Field Computer .................................................................................................18
DGPS Antenna Mounting Recommendations ......................................................................... 19
Best Practices ...................................................................................................................19
Chapter 5 Viper 4 System Connections ............................................... 21
Connecting the Field Computer ..............................................................................................21
Best Practices ...................................................................................................................21
Viper 4 Adapter Cable .......................................................................................................23
Viper 4 Console Cable ...................................................................................................... 23
Integrated DGPS Receiver Antenna Cable ....................................................................... 23
Connect an External DGPS Receiver ............................................................................... 23
Optional Connections ..............................................................................................................24
Wi-Fi Antenna .................................................................................................................... 24
Ethernet ............................................................................................................................. 24
Auxiliary Controller Area Network (CANbus) Interface ...................................................... 24

Table of Contents
ii Viper 4™ Installation and Set Up Guide

CHAPTER
1
Manual No. 016-0171-559 Rev. A 1
C hapt er 1
Important Installation
Safety Information
Electrical Safety
While installing the Viper 4 and other electrical system components:
•Disconnect the Raven OS device and all electrical components of the Raven system before jump-starting
the vehicle or welding on any component of the equipment.
•Always verify that the power leads are connected to the correct polarity as marked. Reversing the power
leads could cause severe damage to the equipment.
•To ensure that any system components are not activated automatically while installing system components,
install power cables, leads or connectors last.
Hydraulic Safety
While installing any hydraulic system components with the Raven Viper 4:
•Raven Industries recommends that appropriate protective equipment be worn at all times when working on
any hydraulic system.
•Ensure the Raven OS device is disabled prior to starting any maintenance work on the machine or
components of the control system.
•Never attempt to open or work on a hydraulic system with the equipment running. Care should always be
taken when opening a system that has been previously pressurized.
•When disconnecting the hydraulic hoses or purging is required, be aware that the hydraulic fluid may be
extremely hot and under high pressure. Caution must be exercised.
•Any work performed on a hydraulic system must be done in accordance with the machine manufacturer’s
approved maintenance instructions.
•When installing hydraulics or performing diagnostics, maintenance or routine service, ensure that
precautions are taken to prevent any foreign material or contaminants from being introduced into the
machine’s hydraulic system. Objects or materials that are able to bypass the machine’s hydraulic filtration
system will reduce performance and possibly damage the hydraulic valves.
CAUTION

Chapter 1
2 Viper 4™ Installation Manual
Read this manual and the operation and safety instructions included with the equipment and/or controller
carefully before installing the Raven Viper 4.
•Follow all safety information presented within this manual.
•If you require assistance with any portion of the installation or service of Raven equipment, contact a local
Raven dealer for support.
•Follow all safety labels affixed to the system components. Be sure to keep safety labels in good condition
and replace any missing or damaged labels. To obtain replacements for missing or damaged safety labels,
contact a local Raven dealer.
When operating the machine after installing the Raven Viper 4, observe the following safety measures:
•Be alert and aware of surroundings.
•Do not operate the Raven Viper 4 while under the influence of alcohol or an illegal substance.
•Remain in the operator’s position in the machine at all times when the Viper 4 is engaged in product control
functions or while any additional automated features are operating. Disable these functions or features
when exiting the operator’s position.
•Determine and remain a safe working distance from other individuals. The operator is responsible for
disabling the Viper 4 or any system features when the safe working distance has been diminished.
NOTICE

CHAPTER
2
Manual No. 016-0171-559 Rev. A 3
C hapt er 2
Viper 4 Introduction
Overview
Thank you for purchasing the Raven Viper 4 field computer featuring the Raven Operating Software (Raven
OS). The Viper 4 is a multi-purpose precision agriculture management device capable of offering multiple
features simultaneously during field operations including product application control, coverage mapping and
reporting tools, and field guidance features. The Viper 4 is capable of interfacing with several optional Raven
systems to enhance the capabilities of the Raven OS. Contact a local Raven dealer for a full list of add-on
systems and features available for use with the Viper 4 and for purchasing assistance.
FIGURE 1. Raven Viper 4 Field Computer with Raven OS
This document provides information regarding the following aspects of the Raven Viper 4 field computer and
Raven OS:
•Features, Care, and Maintenance
•Installation

Chapter 2
4 Viper 4™ Installation Manual
Viper 4 Features
The following sections are intended to provide an overview of the Raven Viper 4 capabilities and interface
possibilities.
Raven OS
The Raven Operating Software, or Raven OS, has been designed to assist with the tasks of managing an
implement fleet and multiple equipment operators.
Secure User Login
Multiple user profiles allow the system administrator to set up unique Personal Identification Numbers (PIN) to
secure the application system from unauthorized use. As well as secure access, each user profile may
configure various user preferences such as language and display units to ensure that each operator is
comfortable operating the system.
Widget Based Field Operation Displays
The Raven OS features widget based screens for field operation and guidance. The operator may select from
various widgets to customize the information displayed on the screen during field operations and may
customize the widget layout to keep important operation information or operation tools available at a glance.
Each screen profile may be saved and recalled quickly to view additional information as necessary or as
different tasks become more critical for the field operation.
Note: Refer to the Raven Operating Software (ROS) Basic Operation Manual for additional information
about creating, saving, and using screen widget profiles.
Machine Configurations
Machine Configurations allow the system administrator to configure multiple machine profiles. As the Raven
OS device is moved from implement to implement, the device will automatically detect the machine
configuration for the implement on which the device is currently running to simplify set up and preparations for
field operations.
Product Configurations and Job Profiles
Preconfigured product configurations and job profiles allow the system administrator to set up product and job
information and allow the operator to quickly select the product loaded and the job or operation to perform to
begin field work.
The system administrator may view and use the above information from the job report to make administrative
decisions required with as much information as needed for the specific operation.
Note: Please review the Raven Operating Software (ROS) Basic Operation Manual for details on setting
up user and job profiles or equipment and product configurations.

2
Manual No. 016-0171-559 Rev. A 5
Viper 4 Introduction
Enclosed Display
The Viper 4 enclosure is designed to resist the conditions experienced in the field to help ensure that the field
computer is ready to operate when you are. The enclosed case design provides dust and splash resistance,
even in open or exposed cabin vehicles and tractors. The lightweight magnesium alloy provides excellent heat
transfer properties to keep the Viper 4 operating efficiently, even in direct sunlight.
Note: The case is designed to allow a small air gap 1/8 inch [3 mm] between the mounting bracket and
the case to allow air flow over the case cooling fins. Do not seal or obstruct this air gap, or
otherwise modify the case.
It is normal for the case to become warm to the touch while the Viper 4 is in operation.
Touch Screen
Transflective screen technology provides clear screen visibility across a range of lighting conditions and even
in direct sunlight. Touch screen functionality places menus and options literally at the operator’s finger tips. A
12.1 in. [30.7 cm] high resolution display provides a large viewing area and easy to read displays to allow the
operator to quickly reference information during in field operations.
Two and Three Dimensional Field Operation Views
During field operations, the Viper 4 provides either a two or three dimensional view of the equipment location
within the field area. The Raven OS is capable of providing swath guidance for the configured equipment using
the configured equipment geometry to assist the operator and keep the equipment on track during the field
operation.
Note: Swath guidance may also be used by automated steering systems such as Raven SmarTrax to
automatically steer the equipment onto the displayed swath guidance line. These systems are
available to help reduce operator fatigue and can allow the operator to monitor various input or
application systems during the field operation.
Contact a local Raven dealer for additional information about automated steering systems
available for use with the Raven Viper 4.
On-Screen Mapping and Job Reporting
During field operations, the Viper 4 monitors and tracks the vehicle location and records input or application
systems. As active sections or the working equipment width covers field area, the Viper 4 creates a live map of
previous equipment coverage. When the job is complete, the Viper 4 compiles the location and any population,
rate, or yield information into a report file for transfer to a home or office computer. The reports may be edited
and used for customer billing, tracking product input or application for governmental agencies or environmental
purposes, or to help plan future crop inputs and field operations.
Job reports must be transferred to a Slingshot user account via either a Slingshot Field Hub™ or a USB flash
drive. The Slingshot web service is free and does not require any hardware or monthly subscriptions to utilize
the reporting features of the web site. With a Slingshot Field Hub, files may be transferred from the home or
office to the equipment in the field and completed job reports may be transferred back to the home or office via
a wireless network connection.

Chapter 2
6 Viper 4™ Installation Manual
Power Button and Status Indicator
The Viper 4 features a LED indicator to provide device status information at a glance.
FIGURE 2. Raven Viper 4
Power Status LED. When the Viper 4 is powered up, the LED will flash red for a few seconds and will then
switch to green.
Light Sensor. The light sensor will automatically adjust the screen brightness for ambient light conditions and
set user preferences. Refer to the Raven Operating Software (ROS) Basic Operation Manual for more
information on user preferences and screen settings.
Integrated DGPS Receiver Option
The Viper 4™ is available with either of the following options:
•Viper 4 base unit without an integrated DGPS solution (P/N 063-0173-410),
•Viper 4 with integrated, scalable dual frequency DGPS receiver (P/N 063-0173-409).
These configurations allow the Viper 4 to be integrated into existing precision agriculture systems or installed
as the first building block for equipping a precision agriculture solution your current operations.
The Viper 4 with an integrated DGPS receiver provides the in-cabin components necessary to start adding
precision agriculture tools into a few implements in the machine shed or an entire fleet. With an integrated
DGPS receiver, the Viper 4 may be quickly transferred between tractors, applicators, swathers, and harvesters
for use throughout the growing season.
Whether equipped with an integrated DGPS receiver or not, the Viper 4 may be integrated into machines with
existing DGPS solutions to utilize or enhance existing DGPS equipment already in the vehicle cabin.
Note: Review the installation information provided with any external DGPS equipment to install and
connect the Viper 4.
When used with an external DGPS receiver, the internal receiver will not be used during field
operations. If the external receiver stops providing signal during the field operation, the internal
DGPS receiver may be enabled to allow operations to continue.
Power Status
Light Sensor

2
Manual No. 016-0171-559 Rev. A 7
Viper 4 Introduction
Speed Compensated Monitoring and Control
The Viper 4 provides speed compensated monitoring or automatic control features for a variety of field
operations. Whether monitoring seed population, application rate, or harvest yield information, the information
displayed to the operator is automatically adjusted for the current equipment speed. If the Viper 4 is configured
for automatic equipment control, the Viper 4 will automatically make adjustments to the seed or product rate
control system to adjust for changes in the equipment speed. These features allow the operator to observe
other equipment functions and guide the vehicle during field operations, help reduce operator fatigue during
long operating sessions, and reduce critical input, application, or yield errors.
Note: Additional hardware may be required to allow the Viper 4 field computer to control equipment
functions automatically. Contact a local Raven dealer for a complete list of available features for
use with the Viper 4 and more information on optional control systems and components.
Connectivity Features
FIGURE 3. Viper 4 Ports and Connectors
TABLE 1. Viper 4 Port and Connector Detail
Port
Label Description Pin
Count Connector Type
1. Power Connector 4 Conxall
2. Main Interface Connector 20 Conxall
3. Ethernet Connector 8 Turck
4. Video Output/External Display 32 DVI
5. Auxiliary CANbus Channels (2-4) 7 Conxall
6. Video Camera Input 8 Conxall
7. GPS Antenna - Coaxial
8. Wi-Fi Antenna - Coaxial
USB (x2)
External Audio
Output
123456
87
Built-In
Speakers
Case
Cooling Fins

Chapter 2
8 Viper 4™ Installation Manual
Power and Main Interface Cable Connector Pin Definitions
The power and main interface ports will be the primary inputs with many systems and machine configurations.
FIGURE 4. Power Connector (Port 1) and Main Interface Connector (Port 2) Cable Pin Outs
External Audio Output
The audio jack is available for connecting the Viper 4 to an external sound system or a head set.
USB Ports
Two USB 2.0 ports are available on the side of the Viper 4. These ports will be used to perform system
updates, file maintenance if wireless communications are unavailable in the vehicle cabin, or allows the
operator to connect other USB devices as necessary.
Note: Insert the USB flash drive only when necessary. Do not start the field computer with a flash drive
connected or leave the drive inserted during normal operation.
Power Connection Main Interface Connection
Pin # Description Pin # Description Pin # Description
1. Battery Negative (Ground) 1. GPS Data Input 11. COM A CTS
2. Switched Ignition 2. GPS Data Output 12. COM D Input
3. Switch Battery Output 3. COM A Input 13. COM C Output
4. Battery Positive 4. RTK Corrections Input 14. External Switch Input (0)
5. COM B Input 15. CANbus High Voltage
6. COM A Output 16. COM D TX Data
7. COM A RTS 17. CANbus Low Voltage
8. RTK Corrections Output 18. External Switch Input (1)
9. COM B Output 19. Simulated Radar Output
10. COM C Input 20. Ground
CAUTION
Damage to the field computer may occur if the
USB ports are used to charge mobile devices
such as cellular phones, tablets, or mp3
devices. The USB ports should only be used for
performing file transfer and maintenance.
Power
Connection
Main Interface
Connection

2
Manual No. 016-0171-559 Rev. A 9
Viper 4 Introduction
Camera Inputs
Up to four separate video cameras may be connected to the Viper 4 to help the operator monitor equipment
functions or product levels on the system.
DGPS Antenna
The antenna port on the Viper 4 is used to pass position information onto the integrated DGPS receiver (if
available). This port is used only if the integrated DGPS receiver will be used during field operations for
location and course corrections.
For equipment utilizing or requiring an external receiver for location and course correction, the connector
labeled “DGPS” on the console cable must be used to pass correction information to the Viper 4.
Wi-Fi Antenna
The Raven Viper 4 field computer is ready for future wi-fi connectivity and communication options.
Care and Use
Refer to the following guidelines for proper care and use of the Viper 4:
•Do not apply any type of liquid or glass cleaner directly to the surface of the touch screen. Harsh chemicals
may damage the touch screen. Clean the touch screen and exterior enclosure as needed with a soft cloth
dampened with glass cleaner. Apply the cleaner to the cloth and then wipe the screen gently.
•Do not use any type of pointed or sharp instrument on the touch screen. Only a fingertip or an approved
stylus should be used.
•Damage to the Viper 4 may occur if the USB ports are used to charge mobile devices such as cellular
phones, tablets, or mp3 devices. The USB ports should only be used for performing file transfer and
maintenance.
•While the Viper 4 is resistant to limited exposure to the elements, the unit is not weatherproof. It is
recommended that the unit be mounted inside of the machine cabin or drivers compartment and not
exposed to precipitation, condensation, or other liquids for extended periods. If the vehicle cabin is not
enclosed, remove the unit at the end of each days use. Store the Viper 4 in a dry environment when not in
use.
•When temperatures are expected to be 0° F [-17° C] or lower, it is recommended to remove the Viper 4 from
the vehicle and store it in a climate controlled environment. At these temperatures, the unit will not sustain
damage, however, the Viper 4 may not operate as expected until the temperature of the unit is raised above
this temperature.
•Mount the Viper 4 securely and route cables to prevent tripping hazards and keep the wires from pinching
or breaking.
•Always remove the power connections for the Viper 4 and any control nodes from the machine battery
before jump starting or welding on any component of the machine or implement. Jump starting or welding
on the equipment will damage the Viper 4 and CANbus nodes.
CAUTION

Chapter 2
10 Viper 4™ Installation Manual
Updates
Product software and documentation updates may be made available periodically on the Raven Applied
Technology web site:
www.ravenhelp.com
At Raven Industries, we strive to make your experience with our products as rewarding as
possible. One way to improve this experience is to provide us with feedback on this manual.
Your feedback will help shape the future of our product documentation and the overall service
we provide. We appreciate the opportunity to see ourselves as our customers see us and are
eager to gather ideas on how we have been helping or how we can do better.
To serve you best, please send an email with the following information to
-Viper 4™ Installation Manual
-Manual No. 016-0171-559 Rev. A
-Any comments or feedback (include chapter or page numbers if applicable).
-Let us know how long have you been using this or other Raven products.
We will not share your email or any information you provide with anyone else. Your feedback
is valued and extremely important to us.
Thank you for your time.

2
Manual No. 016-0171-559 Rev. A 11
Viper 4 Introduction
Technical Specifications
TABLE 2. Viper 4 Technical Specifications
Memory Resources
The Viper 4 features a 32 gigabyte (GB) solid state hard drive for storage of application and job related files.
Note: It is recommended to perform file maintenance regularly to copy job or report files to a home or
office computer for archiving. File maintenance may be performed with either a USB flash drive up
to 32 GB or a Slingshot®Field Hub to transfer files to the office wirelessly from the field.
U.S. Metric
Dimensions
Height 9.629 in. 24.457 cm
Width 12.015 in. 30.518 cm
Depth 1.786 in. 4.536 cm
Diagonal (screen) 12.1 in. 30.7 cm
(portrait or landscape)
Weight approximately 4.7 lbs. approximately 2.1 kg
Power Operating Voltage 9 to 16 V nominal
(6.5 V drop-out to 32 V spike tolerant)
Input/Output
USB 2 (USB 2.0)
Ethernet Category 5 Connectivity with Adapter Cable
Audio 3.5 mm Stereo Minijack
Video Camera/Video Input - PAL/NTSC Formats
Display Output - DVI Port
GPS TNC Antenna Port - NMEA Messages
CAN 4 CAN Communication Ports
(Raven Proprietary CANbus,
ISOBUS, J1939, Open)
Switch 2 Digital Switch Inputs
Mounting
Plate/Arm RAM Mounting Plate and Socket Arm
Hardware (provided) Screws - 10-32 x 1/2” and 1/4-20 x 3/8” (Black)
Washers - Flat and Split Lock
Environmental
Operating Conditions 32° to 158° F 0 to 70° C
Storage Conditions -40° to 185° F -40° to 85° C
Relative Humidity non-condensing

Chapter 2
12 Viper 4™ Installation Manual

CHAPTER
3
Manual No. 016-0171-559 Rev. A 13
C hapt er 3
Installation Overview
and Kit Contents
Overview of the Installation Process
The information provided in this manual is intended to cover basic installation of the Raven Viper 4™ and
components supplied with device. The following procedures are recommended to complete installation of the
Viper 4 and control systems:
1. Review Chapter 3, Installation Overview and Kit Contents and verify necessary components are on hand
before starting the installation process.
2. Review to Chapter 4, Mounting the Viper 4 for details on mounting the Raven OS device.
3. Mount and connect GPS antenna (integrated receiver) or install external GPS components. Review the
DGPS Antenna Mounting Recommendations section on page 19 for assistance with mounting the GPS
antenna.
4. Install any optional CANbus components.
5. Route and connect chassis and console cabling. Refer to Chapter 5, Viper 4 System Connections.
6. Connect power leads to vehicle battery.
Note: Review the Raven CANbus Network Installation Manual for additional information on building a
CAN (Controller Area Network) system. For instructions on installing additional or optional
hardware with the Viper 4, refer to installation documentation provided with the additional or
optional component(s).

Chapter 3
14 Viper 4™ Installation Manual
Viper 4 Kit Contents
Before proceeding with the installation of the Viper 4, review the following components provided with the field
computer:
TABLE 1. Viper 4™ Kit Contents
Contact a local Raven dealer for additional assistance or to purchase additional components.
Viper 4 Kits (P/N 117-5010-010)
B W L H K KG
Components Part Number without
GPS WAAS/
SBAS withoutGPS
Antenna OmniSTAR
HP/XP RTK RTK/
GLONASS
Console, Viper 4
(with integrated DGPS receiver) 063-0173-409 - 1 1 1 1 1
Console, Viper 4 063-0173-410 1 - - - - -
Antenna, Helix (MBA-6) 063-0172-651 - 1 - 1 1 1
Plate, Aerial Antenna Mounting 063-0172-971 - 1 - 1 1 1
Cable, Antenna - 15’ [4.5 m] 115-0171-117 - 1 - 1 1 1
Wi-Fi Antenna 121-0000-034 1 1 1 1 1 1
Kit, Mounting
(RAM Mount and Hardware) 117-0171-132 1 1 1 1 1 1
Manual, Viper 4 Installation 016-0171-539 1 1 1 1 1 1
Serial Extension Cable 115-0172-022 - - - - 1 1
Slingshot Field Hub Power Cable 115-0171-999 - - - - 1 1
Pre-authorized Features
OmniSTAR HP/XP 077-0180-081 X X X
RTK 077-0180-074 X X
RTK and GLONASS 077-0180-084 X
Single Product Variable Rate 077-0180-100
Multi-Product Variable Rate 077-0180-101
Combo (Single/Multi) Variable
Rate 077-0180-102
Weather Station 077-0180-103

3
Manual No. 016-0171-559 Rev. A 15
Installation Overview and Kit Contents
Chassis and Console Cabling
Note: A Viper 4 console cable is not supplied in kits and will be required to power up and connect the
console with the control or guidance system(s). Contact a local Raven dealer for details on
available console cables and purchasing a cable appropriate for your specific operations.
One of the following cables will be required with the Viper 4 field computer:
TABLE 2. Available Cabling for Viper 4 Field Computers
Many existing systems that currently have a Raven field computer installed may be upgraded to the Raven
Viper 4 by using the adapter cable listed above. This adapter cable allows the Viper 4 to replace the existing
field computer without replacing any existing system cables.
For new installations, the Viper 4 Gen 2 console cable connects directly to an equipment specific chassis
cable. The generation 2 cabling platform and hitch connection design is well suited for using the Viper 4 with
tractors and various towed implements. This highly modular design allows the operator to quickly switch the
control system for different field operations throughout the growing season.
Optional Cabling and Components
Review the following table for cabling options and other components available for use with the Raven Viper 4.
Contact a local Raven dealer for details or purchasing information.
TABLE 3. Viper 4 Optional Equipment Cables
Note: Refer to the Raven CANbus Installation Manual for additional cable platform and connection
information.
Optional Feature Installation
Several optional systems and features are available for use with the Raven Viper 4, such as automated
steering, automatic section or row control, product control and automated boom leveling and height control
systems.
Contact a local Raven dealer for a complete list of features compatible with the Viper 4, for additional
information on required hardware, or for purchasing or installation assistance with these optional systems.
Description Part Number
Cable, Viper 4 Gen 2 Console 115-0172-025
Cable, Viper 4 Stand-Alone Console 115-0172-024
Cable, Gen 1 to Viper 4 Adapter 115-0172-023
Description Part Number
Cable, Anti-vibration Ethernet 6.5’ [2 m] 115-0172-090
Cable, DVI Monitor 6’ [1.8 m] 115-0172-091
Cable, 4 Input Closed Circuit Camera 115-0172-077
Cable, 3 Input Auxiliary CANbus 115-0172-078

Chapter 3
16 Viper 4™ Installation Manual
Other manuals for Viper 4
2
Table of contents
Other Raven Industrial PC manuals
Popular Industrial PC manuals by other brands

Hatteland
Hatteland HT C02Hx STC series user manual

Avalue Technology
Avalue Technology EMS-SKLU Quick reference guide

Neousys Technology
Neousys Technology Nuvo-8000 Series user manual

IEI Technology
IEI Technology PAC-400AI-C236 user manual

AXIOMTEK
AXIOMTEK IPC972 user manual

Hitachi
Hitachi HF-W6500 45/40 user manual