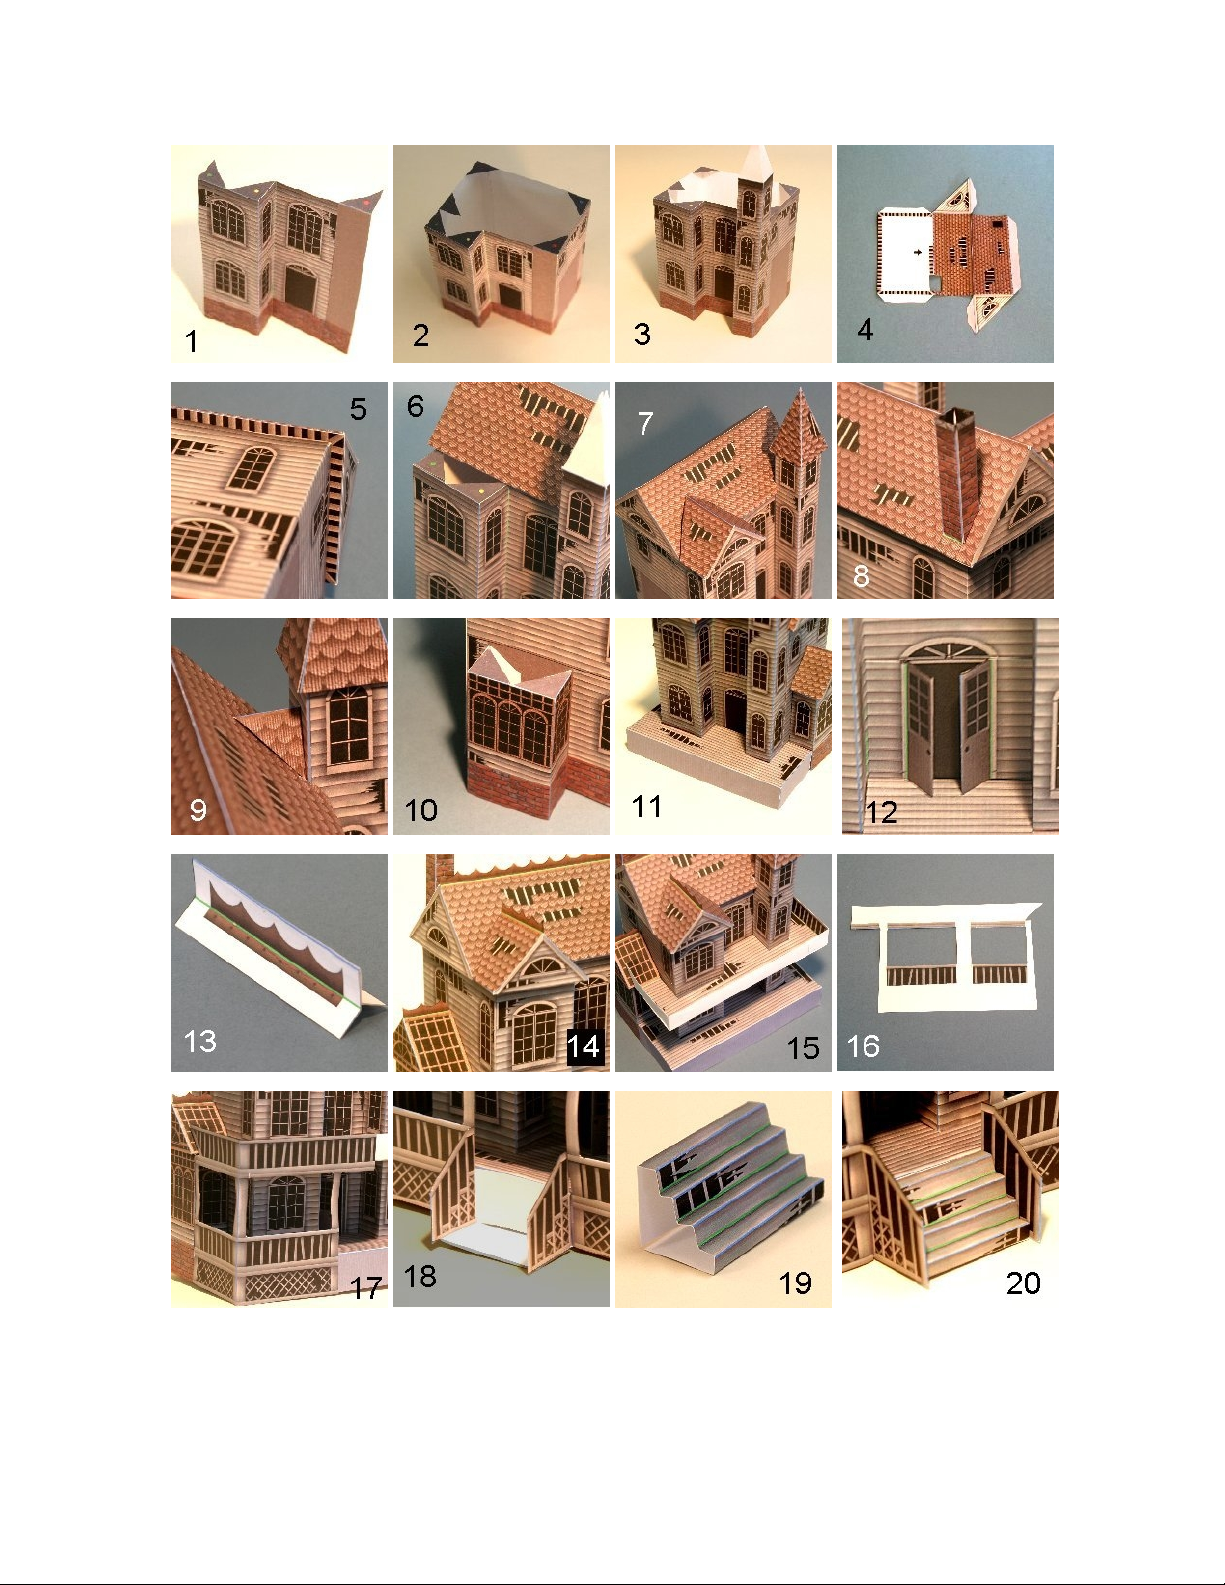
THE GHOST HOUSE – ASSEMBLY INSTRUCTIONS page 8.
Now cut out the AWNING on page 11. Fold the two ail panels UPWARD along the
g een lines. Fold DOWNWARD along the blue line between the two shingle
panels. Fold DOWNWARD between the shingle panel and the t iangula wall panel
(along the blue line). Fold the tab with the yellow dot and the two blank g ay tabs
DOWNWARD. Fold DOWNWARD between the t iangula wall panel and the
ectangula wall panel. Glue the tab with the yellow dot to the inside of the
adjoining shingle panel. Glue the two blank g ay tabs to the inside of the adjoining
shingle panels. To connect the AWNING to the f ont of the DECK, put glue on the
back of the two ail panels, position the awning ove the steps (as shown in Figu e
21) and glue in place.
STORAGE COMPARTMENT ASSEMBLY:
Cong atulations! The house is now complete. But of cou se... all haunted houses
have a few sec et places. So we’ll be adding a hidden sto age compa tment. Cut
out the BOX on Page 13. Fold the fou blank b own tabs DOWNWARD and then
fold all fou side panels DOWNWARD. Glue the b own tabs to the inside of the
adjoining side panels to fo m a box. Cut out the BOX LINER on Page 14. Fold the
fou side panels UPWARD and then glue the BOX line to the inside of the BOX,
as shown in Figu e 22. T im the top edge as necessa y and da ken with a black
ma ke if desi ed. The box should now slide into the bottom of the house. If the box
is too snug, you can pinch the box co ne s to collapse the sides of the box inwa d
slightly. You now have a hidden sto age compa tment.
LANDSCAPE ASSEMBLY:
If you wish you can call you model complete at this point, but it’s much mo e
imp essive when it sits on its own ‘p ope ty’. To build the landscaping, begin by
cutting out the LEFT LAWN on Page 15 and the RIGHT LAWN on Page 16. Cut
along the two white lines on each piece to sepa ate the tabs with g een dots. The
RIGHT LAWN has fou tabs with ed dots. Glue these to the unde side of the
LAWN LEFT piece so that the lawn panels meet and one la ge piece is fo med, as
shown in Figu e 23. Fold the inne tabs with g een dots DOWNWARD. Fold the
fou tabs with yellow dots DOWNWARD and then fold the fou side panels
DOWNWARD. Glue the fou tabs with yellow dots to the inside of the adjoining
side panels to fo m a pedestal like the one shown in Figu e 24.
Remove the BOX f om the house model and place it in the hole in the LAWN
piece. Tu n the piece upside down and line up the lowe edges of the tabs (with
g een dots) and the bottom of the BOX. Glue the tabs to the BOX. The lawn should
now sit level on you tabletop with the bottom of the BOX also esting on the
tabletop, as shown in Figu e 25. You’ll now be able to slide the house ove the
sto age box and the box will hold the house in position on the lawn.
(CONTINUED ON NEXT PAGE)