Raychem nVent User manual

User guide thermostat
- electrical under floor heating
nVent Raychem
NRG-DM Software Version 1.60
nVent.com

2
Indhold
1. Description............................................................................................................. 3
2. Navigation principle ............................................................................................... 4
3. Getting started....................................................................................................... 5
4. Working modes...................................................................................................... 6
4.1 Event Mode - weekly schedule mode................................................................ 6
4.2 Constant Mode - single temperature mode ...................................................... 6
4.3 Boost Mode - temporary override mode........................................................... 6
5. Changing/consulting settings ................................................................................. 8
5.1 Event settings - programming a weekly schedule.............................................. 8
5.2 User settings ................................................................................................... 10
5.2.1 Time and date ........................................................................................... 10
5.2.2 Child lock................................................................................................... 10
6. Trouble shooting .................................................................................................. 10

3
1. Description
The electronic under floor heating thermostat has already been set up to function in a way which
gives you the best possible comfort at the lowest possible energy consumption.
This user guide only has to be used in case of power failure or other unforeseen events which call
for e.g. a reinstallation of the thermostat’s factory settings, or if you wish to change the set
temperature and on/off periods.
The thermostat switches the floor heating on and off to reach the set temperature. When the
thermostat is switching on the floor heating, this symbol is visible on the display:
The thermostat controls the electrical floor heating in 3 different working modes:
Working Mode
Description
Symbol
Constant Mode
In the Constant Mode, the thermostat is aiming for
one temperature around the clock.
You can easily adapt this set temperature by using
the +/- button.
Event Mode
In the Event Mode, the thermostat is working
according to a weekly schedule. The Event Mode is
created in order to maximize the comfort while
minimizing the energy consumption of your
electrical floor heating system.
Boost Mode
The Boost Mode is a temporary override of the
Constant Mode or the Event Mode.
This means by activating the Boost Mode, you can
temporarily step away from another working mode
and choose a temporary set temperature and
duration for the Boost Mode.
After this duration, the thermostat will automatically
switch back to the last used Mode (Constant or
Event).
eller
Table 1

4
2. Navigation principle
Only 4 buttons are used to navigate, highlighted with bold above
Use the button (7) in order to execute the command (6).
In the example on figure 1:
The Left and Right buttons (7) are used to select ”-” or ”+”.
This means that you can change the set temperature with 0,5 °C by using these buttons (7).
The Middle button (7) shows ”Menu” or “Select”.
This means that you can enter the Menu by using this button (7).
1. On/off switch
2. Day and time
3. Working Mode
4. Heating symbol
5. Display temperature
6. Three commands
7. Three buttons
Figure 1
5
3. Getting started
The thermostat is set up with a factory setting to give you the best possible comfort at the lowest
possible energy consumption. If you have changed the settings, or there has been a power failure,
you can return to the factory settings by using the three buttons (no. 7 - see page 4) and press
forward to the menu “Factory reset”. You do this by selecting “Settings” followed by “Engineer
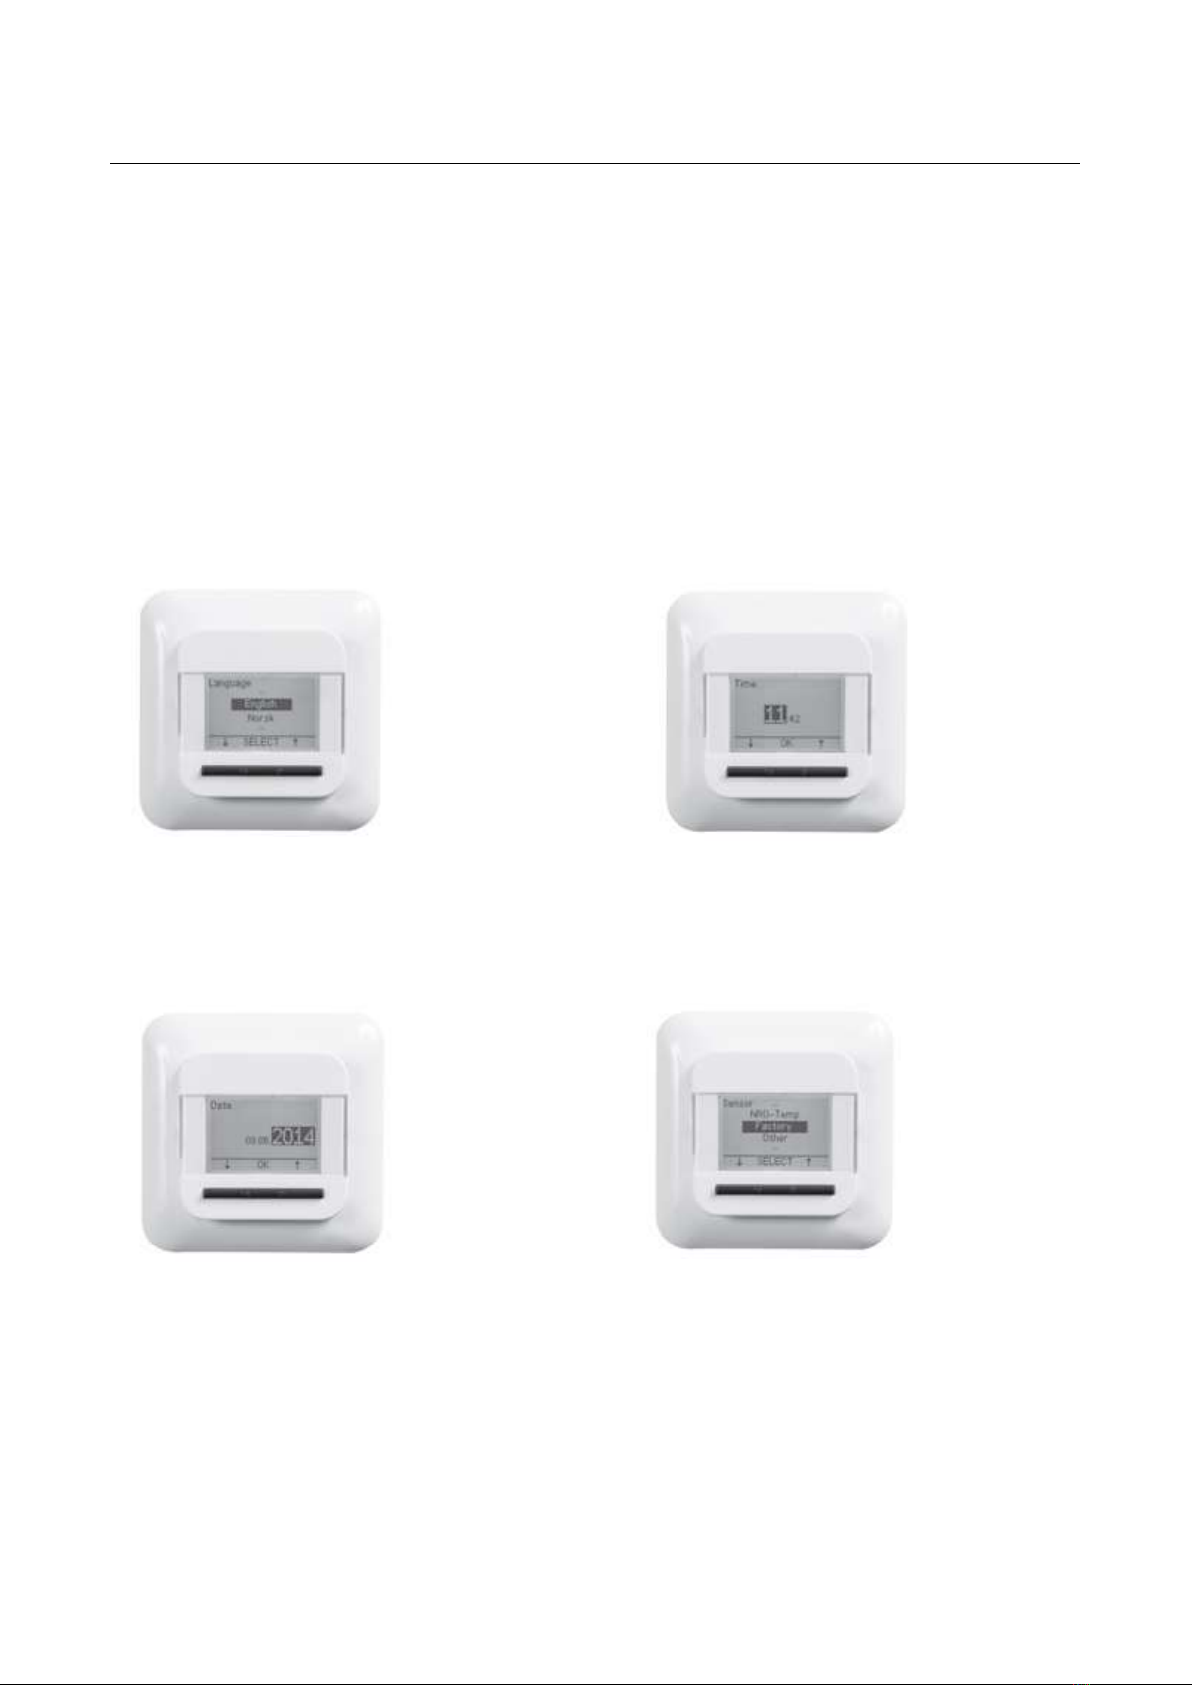
settings” and ”Factory reset”. When you are here, you are asked to follow a setup menu with 4
simple questions.
1. Select Language 2. Confirm Time
3. Confirm Date 4. Select Sensor
Remark: This menu will only be shown when you reset factory settings.
When you choose language, you can choose between e.g. English, French, German etc.
Figure 2
Figure 3
Figure 4
Figure 5

6
4. Working modes
4.1 Event Mode - weekly schedule mode
The Event Mode is the most energy efficient mode. In this mode a weekly schedule has been set
up, and it can easily be adapted to your needs.
The weekly schedule in the Event Mode is based on a 7 days schedule where each day can be
defined as 1 to 6 events. Events are a combination of duration (to-from) and a temperature.
The Event Mode is pre-programmed as follows:
Schedule
Period 1
Period 2
Period 3
Period 4
Period 5
Period 6
Mon-Fri
00:00-
06:30
06:30-
08-30
08:30-
18:00
18:00-
21:00
21:00-
24:00
N/A*)
Temperature
16 °
23°
16 °
23°
16 °
N/A
Schedule
Period 1
Period 2
Period 3
Period 4
Period 5
Period 6
Sat-Sun
00:00-
08:00
08:00-
24.00
N/A
N/A
N/A
N/A
Temperature
16 °
23°
N/A
N/A
N/A
N/A
To program the weekly schedule (see 5.1 Event settings).
Remark: You can temporarily step away from the weekly schedule by activation the Boost Mode
(see 4.3 Boost Mode).
4.2 Constant Mode - single temperature mode
The Constant Mode is a simple working mode where the thermostat is aiming for one temperature
only. In this mode, you can choose the temperature by using the buttons + and -.
Remark: You can temporarily step away from the Constant Mode by activation the Boost Mode
(see 4.3 Boost Mode).
4.3 Boost Mode - temporary override mode
The Boost Mode is a temporary override of the working mode (Event Mode or Constant Mode).
This means by activating the Boost Mode, you can temporarily step away from a working mode. At
the end of the Boost Mode, the thermostat will continue working in the mode that was active just
before the activation of the Boost Mode.
Table 2 *) The abbreviation N/A means that there are no relevant data here.

7
When activating the Boost Mode, the thermostat will ask you to confirm the requested
temperature and duration of the temporary override.
The Boost Mode is identified on the screen by the following Boost icons:
When coming from the Constant Mode
When coming from the Event Mode
In order to stop the Boost Mode, simply press on the Stop button (no. 7 - see page 4).
In order to activate the Boost Mode, press on the Menu button, navigate to the Boost Mode and
then press on Select (no. 7 - see page 4).
Remark: If you are running in Event Mode, you can activate the Boost Mode by pressing directly
on the button + or -.
Figure 6
Figure 7
Figure 8

8
5. Changing/consulting settings
5.1 Event settings - programming a weekly schedule
The Event settings are used in order to program or adapt a weekly schedule used in the Event
Mode.
Programming the weekly schedule is done in 3 steps:
Step 1: Select a day or a sequence of days to program.
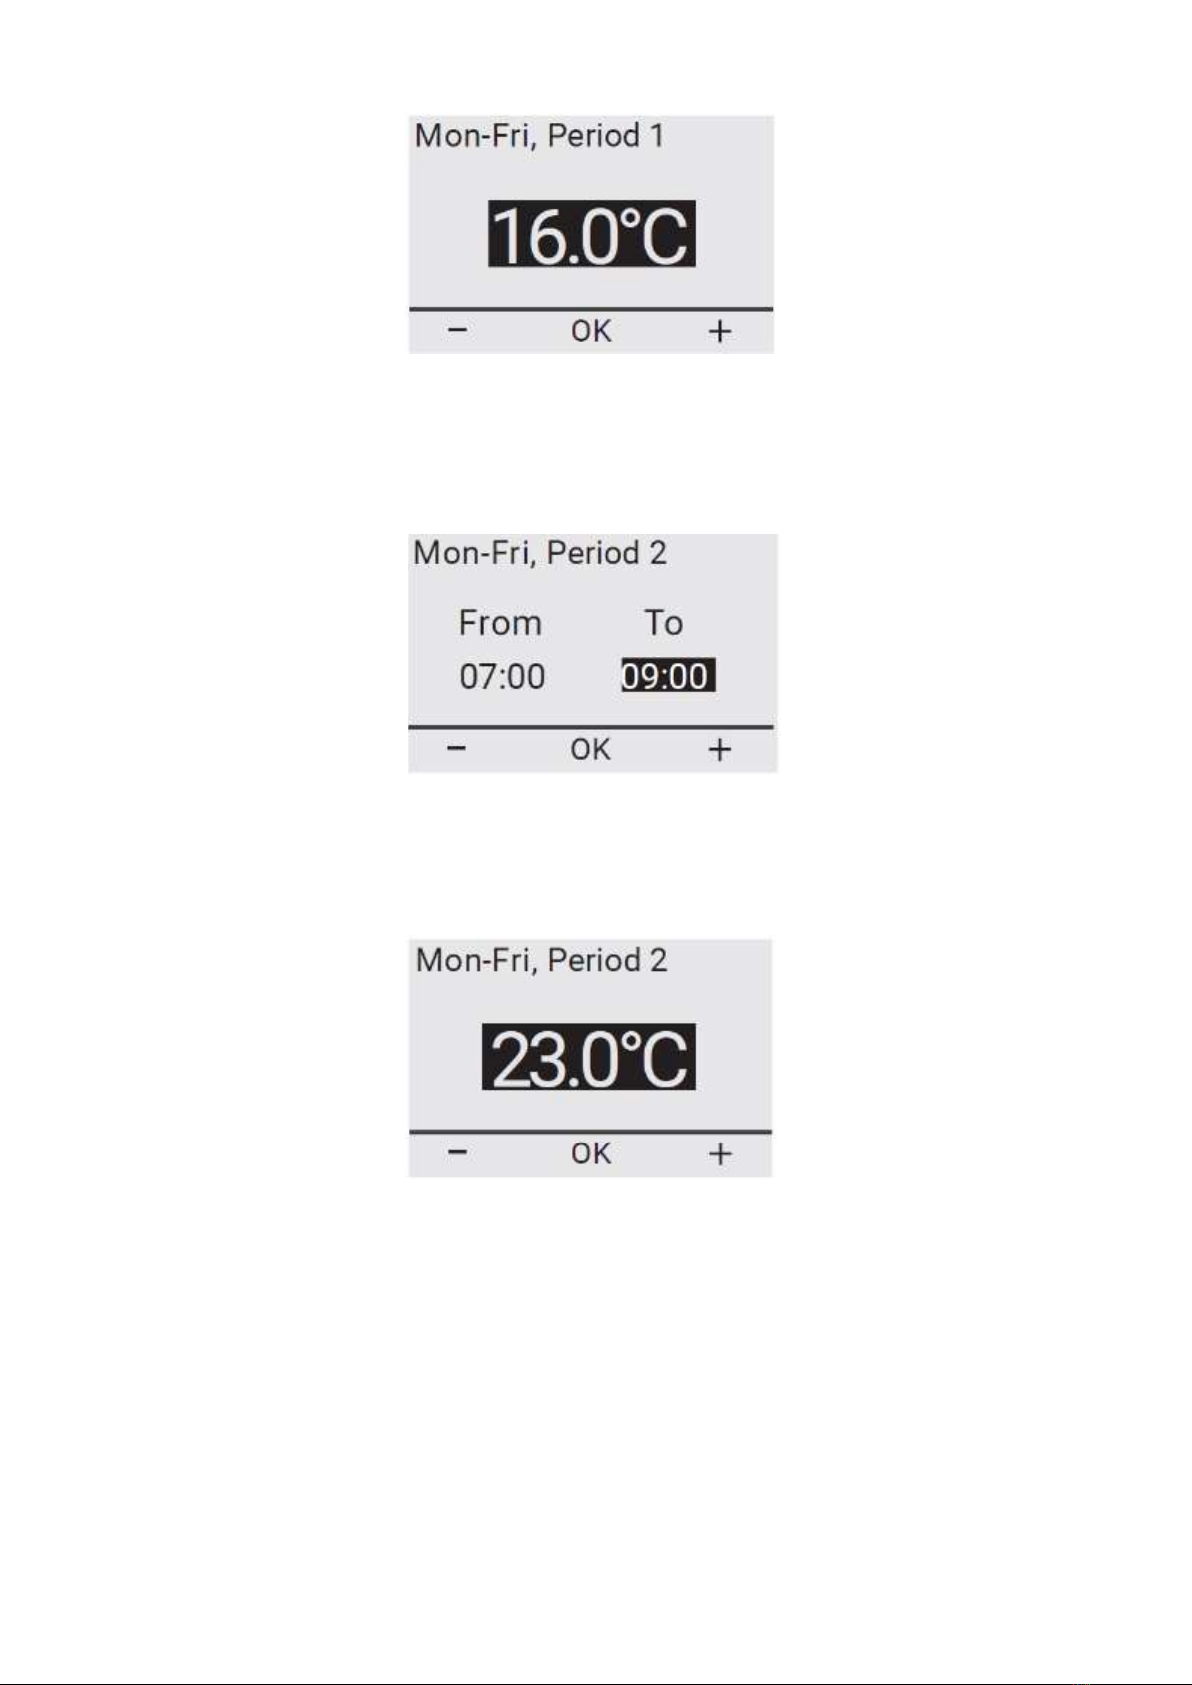
Step 2: Program up to 6 periods for this day:
Period 1:
Duration = From 00:00 to XX:XX
Temperature = XX,X ° C
Figure 9
Figure 10
9
Period 2:
Duration = From 07:00 to XX:XX
Temperature = XX,X ° C
Period 3-6 (or when 24:00 is reached)
Step 3: Decide if you want to copy this programming for the next day.
You can repeat steps 1 to 3 for other days if needed.
Figure 11
Figure 12
Figure 13

10
5.2 User settings
5.2.1 Time and date
With the Time and date setting, you can adjust the clock and calendar.
5.2.2 Child lock
By activating the child lock, the thermostat will go to the home screen and a lock sign will appear
on the screen.
The child lock will prevent the thermostat settings to be changed by accident.
To unlock the thermostat, press and hold the 3 buttons (no. 7 - see page 4) for 5 seconds.
6. Trouble shooting
In the event of damage or malfunction of one of the temperature sensors, the heating output cuts
off (fail safe), and an error code is displayed:
Number
Error type
E0
Room failure. The thermostat is defective and needs to be replaced.
E1
Room sensor defective or short circuited. The thermostat needs to be
replaced.
E2
Floor sensor defective or short circuited. The external sensor needs to
be checked or replaced.
E5
Internal overheating. The installation needs to be inspected.
Figure 14
Table 3
Table of contents
Other Raychem Thermostat manuals


