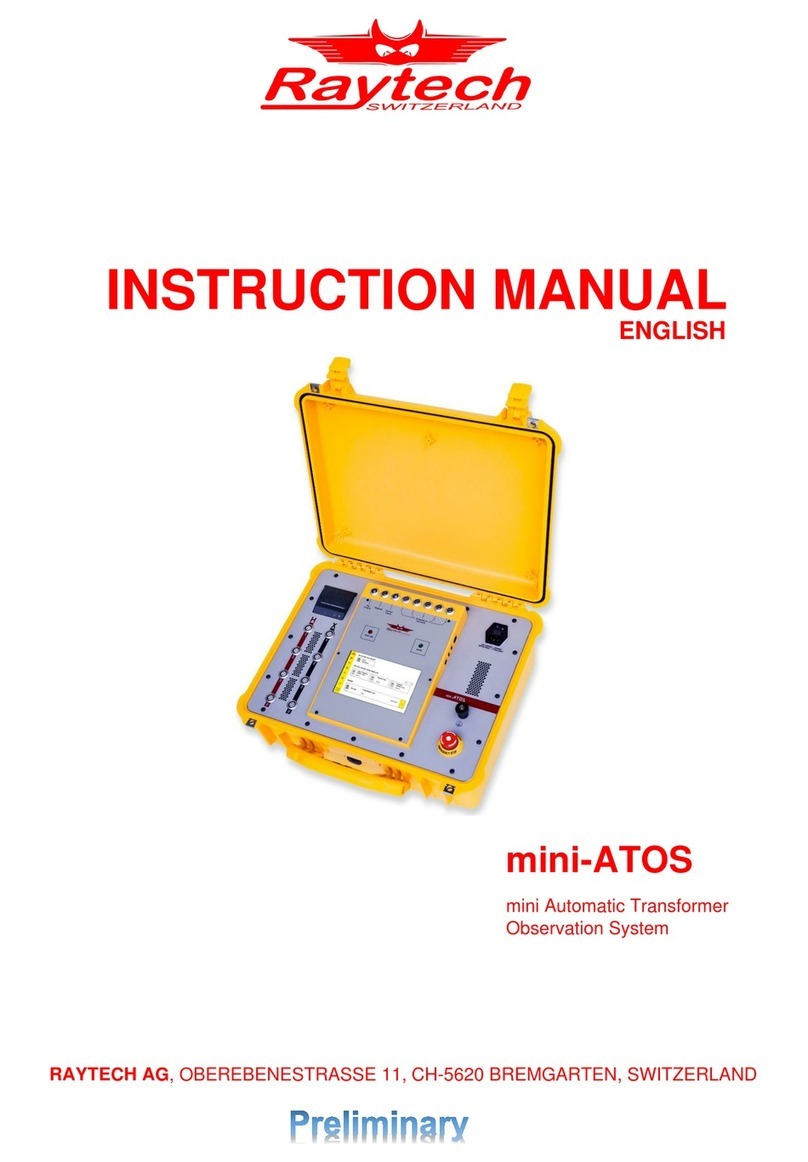
Raytech TR-Mark III 250V User manual

Version 1.10 Preliminary
RAYTECH USA, Inc.
118 S. 2nd Street, Perkasie, PA 18944 USA
Tel. 267 404 2676 Fax. 267 404 2685
Instruction Manual
Three Phase Automatic
Transformer Turns Ratiometer Test System
Model: TR–Mark III 250V

Instruction Manual TR-Mark III 250V Version 1.10 Preliminary Page 2 of 57
TABLE OF CONTENTS
1 Safety Precautions......................................................................................................................................... 3
2 Unpacking...................................................................................................................................................... 4
3 Introduction.................................................................................................................................................... 5
3.1 History.................................................................................................................................................. 5
3.2 General................................................................................................................................................. 5
3.3 Advantages & Features........................................................................................................................ 6
3.4 System Details...................................................................................................................................... 7
3.4.1 System Check:................................................................................................................................. 7
3.4.2 Transformer Turns Ratio Testing:.................................................................................................... 7
3.4.3 Transformer Turns Ratio Meter uses:.............................................................................................. 8
3.4.4 Limitations of Turns Ratio Testing: .................................................................................................. 8
4 Quick Start Guide........................................................................................................................................... 9
4.1 Instrument operation............................................................................................................................. 9
4.2 Connection to Test Object.................................................................................................................. 10
4.2.1 Hooking up a transformer .............................................................................................................. 10
4.2.2 Comparison of International Standards ......................................................................................... 11
5 Operation Elements ......................................................................................................................................12
5.1 Front Panel Overview: ....................................................................................................................... 12
5.2 Control Elements and Connections .................................................................................................... 12
5.2.1 Fuse, Mains Input and Switch........................................................................................................ 12
5.2.2 Ground Terminal............................................................................................................................ 12
5.2.3 Emergency Off............................................................................................................................... 12
5.2.4 High Voltage Side.......................................................................................................................... 12
5.2.5 Low Voltage Side........................................................................................................................... 12
5.2.6 3 Phase Extension (T-REX)........................................................................................................... 13
5.2.7 External ......................................................................................................................................... 13
5.2.8 Interface......................................................................................................................................... 13
5.2.9 Safety Indicator.............................................................................................................................. 13
5.2.10 Display and Touch Panel .............................................................................................................. 13
5.2.11 Thermal Printer ............................................................................................................................. 13
6 Operation Elements Field Case ....................................................................................................................14
6.1 Rack: Front Panel Overview............................................................................................................... 14
6.2 Rack: Rear Panel Overview ............................................................................................................... 14
7 Transformer, Measurement and Data Structure............................................................................................15
7.1 Introduction......................................................................................................................................... 15
7.2 How it works....................................................................................................................................... 15
8 Operating Menu............................................................................................................................................17
8.1 Main Screen ....................................................................................................................................... 18
8.1.1 Operating on a simple screen, no Transformer Data entered........................................................ 18
8.1.2 Further Options of the Main Screen............................................................................................... 20
8.1.3 Operating on an advanced Screen, Transformer Data entered..................................................... 22
8.1.4 Taps............................................................................................................................................... 24
8.1.5 More Taps...................................................................................................................................... 26
8.1.6 Tertiary Winding System................................................................................................................ 27
8.2 New.................................................................................................................................................... 29
8.2.1 New Transformer........................................................................................................................... 30
8.2.2 Load from Archive.......................................................................................................................... 33
8.2.3 Copy Actual Transformer............................................................................................................... 34
8.2.4 New Measurement......................................................................................................................... 35
8.2.5 Working with Templates ................................................................................................................ 35
8.3 Info ..................................................................................................................................................... 36
8.3.1 Enter Tap Changer Data by Wizard............................................................................................... 38
8.3.2 Enter Tap Changer Data manually ................................................................................................ 38
8.4 Archive ............................................................................................................................................... 39
8.5 Setup.................................................................................................................................................. 40
8.5.1 General.......................................................................................................................................... 41
8.5.1 Operators....................................................................................................................................... 42
8.5.2 Standards ...................................................................................................................................... 42
8.5.3 Printer............................................................................................................................................ 42
8.5.4 Color.............................................................................................................................................. 42
9 Technical Specification .................................................................................................................................43
10 Interfaces......................................................................................................................................................45
10.1 Hardware............................................................................................................................................ 45
10.2 Raytech Toolbox................................................................................................................................. 46
10.3 TR-Mark III 250V Communication Port............................................................................................... 47
10.3.1 Hardware Protocol .................................................................................................................... 47
10.3.2 Software Protocol...................................................................................................................... 47
10.4 TR-Mark III 250V Remote Commands ............................................................................................... 47

Instruction Manual TR-Mark III 250V Version 1.10 Preliminary Page 3 of 57
1 Safety Precautions
The following safety precautions must be observed during all phases of operation, service
and repair of this instrument. By purchasing this equipment the purchaser assumes all
liability for the operation and use of this equipment. The intended use of the instrument, its
design and manufacture, is to be conducted within the precautions or other specific warnings
located within this manual. Failure to comply with these precautions and other specific
warnings violates safety standards of design, manufacture, and intended use. Raytech and
its’ affiliates assume no liability for the operation and use of this equipment.
SAFE OPERATION:
Only qualified knowledgeable persons should be permitted or attempt to operate this test
equipment. All test personnel should fully familiarize themselves with the correct application
and operation of this and all test equipment prior to operation. Persons directly and indirectly
engaged in the operation of this test equipment should keep clear of all high voltage
apparatus while conducting tests and measurements.
BEFORE APPLYING POWER:
Do not vary the input power source voltage level (IE...Connected to a variable AC power
source). The TR-MARK III 250V auto-senses the input power from the mains plus from 100
to 250 vac 50/60Hz. Varying the input voltage will cause the test voltage to vary and result in
a higher or lower test voltage than indicated.
GROUND THE INSTRUMENT:
To minimize shock hazard, the instruments Ground Terminal must be connected to a
properly grounded receptacle. In many cases, the quality of the safety ground provided by
the power cord does not fulfil safety needs. Also the power cord supplied with the equipment
must be connected an electrical receptacle with an electrical ground (safety earth ground).
Non grounded instruments are dangerous and may cause instrument damage.
KEEP AWAY FROM LIVE CIRCUITS:
Operating personnel must not remove instrument covers. Component replacement and
internal adjustments must be made by qualified service personnel. Do not replace
components with power cable connected. To avoid injuries, always disconnect power,
discharge circuits, and remove external voltage sources before touching components.
WARNING!
Never connect TR-Mark III 250V to a transformer, which is connected
to power lines.
DO NOT OPERATE IN AN EXPLOSIVE ATMOSPHERE:
Do not operate the instrument in the presence of flammable gases or fumes.
DO NOT SUBSTITUTE PARTS OR MODIFY INSTRUMENT:
Because of the danger of introducing additional hazards, do not install substitute parts or
perform any unauthorized modification to the instrument. Return the instrument to a Raytech
service department for service to ensure proper operation and that safety features are
maintained.
Instruments, which appear damaged or defective, should be made inoperative and secured
against unintended operation until they can be repaired by qualified service personnel.

Instruction Manual TR-Mark III 250V Version 1.10 Preliminary Page 4 of 57
2 Unpacking
Unpack your new TR-Mark III 250V and check to see that you have the following standard
items:
Instrument Cable Bag H and X Lead set
2 Extension Cables Power Cord Safety Ground USB Memory Stick
5 Paper Refills Instruction
Manual
If any of the above items are missing or damaged contact your local representative or
Raytech USA immediately.
NOTE
The TR-Mark III 250V field case is a waterproof design. When the case
is unlocked, a small hole automatically opens, to compensate
atmospheric pressure changes.

Instruction Manual TR-Mark III 250V Version 1.10 Preliminary Page 5 of 57
3 Introduction
3.1 History
Raytech first developed the Transformer Turns Ratio Spy (TR-Spy) for high degree of
accuracy for the research and development of transformers. This technology was then
packaged into a portable test system for use by transformer manufacturers, rebuild shops,
and electrical maintenance crews. This first system had become the most widely respected
precision instrument for the ease of use, design, and operation. This first system was
developed with the assistance of transformer manufacturer’s and utility test crews.
The second generation TR-Spy Mark II took this initial development and added many new
features to the system including a large memory base, external control for tap changer
testing and automatic voltage level detection test. The TR-Spy Mark II was a completely new
approach in technology and has become the standard for ratio testing.
Now, the third generation TR-MARK III 250V offers new features and increased accuracy to
make it a perfect system. A Color LCD with back lighting and touch screen increases
handling and user comfort. Two USB interfaces make it easy to store measurements on
external storage devices and transfer easily to a personal computer. And Test Reports; just
print them on the internal printer or from your computer.
3.2 General
Ease of use: This system is designed to be easily used and understood. Once the buttons
and few menus are learned, the system is very simple to understand and operate. This
intelligent system analyzes the configuration of a transformer and performs all required
measurements automatically for Voltage Ratio, Turns Ratio, Current, and Phase
Displacement. The system can operate a full 3 phase testing sequence with a single push
button operation. Connect the leads; select the transformer configuration & press GO to test.
Impressive Accuracy: The TR-Mark III 250V is a high precision, fully automatic,
microprocessor based, Single and Three Phase Transformer Turns Ratio Test system. This
system is designed for highly accurate readings on-site with laboratory precision. It is the
most accurate system available.
Unique Measuring Technique: This newly designed technique of measurement
incorporates a high precision dual-vector voltage meter for ratio readings and a rectification
resolution circuit for phase displacement (vector group). The phase displacement (vector
group) can be automatically detected and displayed without operator intervention.
Operation: The TR-Mark III 250V applies a small voltage on the HIGH winding side of the
transformer and measures back through the LOW side of the transformer. Analysis is made
and the system determines whether a test can be conducted. Then the system applies the
test voltage on the HIGH winding side of the transformer and measures the voltage back
through the LOW side of the transformer. This technique has been determined to be the
safest possible method of ratio testing. The results are reported on the easy to read touch-
screen display.
Advanced Protection: Upon powering on the system initializes itself with a self-calibrating,
circuit checking sequence. If any problems are detected during this initialization period, or
during operation, the operator is immediately notified. The system constantly monitors the
condition of the transformer under test. The TR-Mark III 250V can even recognize shorted
leads and will terminate the test without any damage to the test equipment. This works
especially well when test leads accidentally fall free from the transformer while under full
voltage measurement. Accidental interchanging of the test leads on the High and Low
voltage side is also detected and the measurement is safely halted.
Simple Maintenance: There is No maintenance required. There is No calibration procedure
(No potentiometers to turn). This is due to the utilization of high precision components in the
design.

Instruction Manual TR-Mark III 250V Version 1.10 Preliminary Page 6 of 57
3.3 Advantages & Features
Color LCD with backlighting and touch screen
Automatic measurements of Voltage, Turns Ratio, Current, and Phase displacement
Easy one time hook up to the transformer
Automatic test voltage range
Displays deviation from a nominal ratio
Graphical tap changer display
Touch changer interface
Load on test object <0.05 VA
Measures Power transformers, PTs and CTs
Displays % error vs. name plate value
Automatic phase vector detection
Enhanced heavy-duty protection circuitry
Extremely rugged
Data exchange via USB Key
Internal Printer
Auto-detect phase displacement
5 Year standard warranty
External test initiation for Tap changers
Emergency shut-off switch
Light, waterproof case
Auto-detect short circuit or reverse connected transformers
USB & RS232 ports
Operates on a wide input voltage: from 100 to 250 Vac
Ratio Accuracies of 0.06% Reading
Stores more than 10,000 test results
Extension cables can be cascaded to any length
International Standards selectable

Instruction Manual TR-Mark III 250V Version 1.10 Preliminary Page 7 of 57
3.4 System Details
3.4.1 System Check:
The instrument is Line operated. The system is designed to be used with voltage power
sources (mains power) between 100-250 Vac 50/60Hz. The system performs a self-check
each time that it is powered on. The User should always visually inspect all connectors,
cables and devices to be measured to avoid any safety issues.
3.4.2 Transformer Turns Ratio Testing:
A Transformer Turns Ratio Meter does exactly as its name implies; it is used primarily for
checking the ratio of Turns of wires of the primary side and the secondary side of a
transformer. The Turns Ratio test set does not tell exactly how many turns of wire are in the
primary and secondary coils. But rather, it measures and displays the Ratio of (or
comparison of) the number turns in the primary coil to the number of turns in the secondary
coil.
This is an extremely useful device for checking for shorted turns and incorrect settings of tap
changers. The TR-Mark III 250V has an additional feature of allowing the operator to
measure the actual phase angle and vector relationship of the windings.
It is important to understand that the Nameplate Ratio on most transformers is the Voltage
ratio (Voltage in: Voltage out) and this Ratio is determined, basically, by the number of turns
of wire on the Primary (High side), the number of turns of wire on the Secondary (Low Side).
On a single phase Transformer the Turns Ratio is the same as the Voltage Ratio.
A Single Phase transformer:
H1
H2
X1
X2
For example: The High Side Winding may contain 940 Turns: Low Side Winding 440 Turns.
Therefore:
136.2
440
940
Pr TurnsSencondary
imaryTurns
TurnsRatio
With three (3) Phase Transformers of different configurations, the Turns Ratio & Voltage
Ratio can, and usually is different.
NOTE
The TR-Mark III 250V makes all the calculations and interconnections
required when the correct configurations of single (1) phase and
three (3) phase transformers are selected. In most cases, no other
external connections, other than the test leads provided, are required.
Refer to: Section 1: Safety Precautions for safety grounding.
Hooking up to a transformer:
The TR-Mark III 250V protects against a wrong hook-up to a
transformer or testing a severely defective transformer. Every effort
has been made to alert the operator when something is wrong.
Negative (reverse polarity) hook up is also automatically detected.

Instruction Manual TR-Mark III 250V Version 1.10 Preliminary Page 8 of 57
3.4.3 Transformer Turns Ratio Meter uses:
Transformer Turns Ratio Meter is very useful as a tool for investigating problems associated
with the core, the windings, and the tap changer of transformers and should be used for:
1. Identify shorted turns and finding turn errors
2. Defective and incorrect tap settings
3. Finding mislabelled terminals and mislabelled nameplates
Turns Ratio testing is a required test during the manufacture of transformers.
Turns Ratio testing is a part of a good routine preventative maintenance program as well as
for Acceptance testing.
3.4.4 Limitations of Turns Ratio Testing:
In general, there are few limitations on ratio testing of Transformers. However, there are
limitations to be aware of when attempting to test the following transformer:
Phase relationships other than 30°
Non symmetrical Zig Zag windings
Off-center neutral points
Suspected broken, damaged, or missing core laminations.
In the cases listed above, Raytech recommends the use of the optional unit; model T-Rex, in
conjunction with the TR-Mark III 250V. To get further Information on the T-Rex please view
the website; www.raytechusa.com or contact Raytech to get additional details and
information.
Also, a current transformer is nothing more than an opposite wound voltage transformer.
Most current transformers can be tested with the TR-Mark III 250V.
Please see chapter ‘A.A Current Transformer Testing’for details about CT testing.
You may find it difficult to use the TR-Mark III 250V with some low power current
transformers. In this case, please contact Raytech for information about a TR-1.

Instruction Manual TR-Mark III 250V Version 1.10 Preliminary Page 9 of 57
4 Quick Start Guide
4.1 Instrument operation
Wait until the green light shows “Safe” before handling the cables
If you are new to transformer turns ratio testing, please review the
entire manual carefully before operating this equipment.
Examples for connections to the transformer see next pages
“Overcurrent” error may be displayed with some configurations.
It is OK to run through all the transformer selections with the leads tied
together.
1. Switch on the instrument. 2. When ‘New’ is selected:
To repeat last Measurement, touch Select transformer type and Test
‘GO ABC’. Touch ‘New’ to create a Voltage, then touch ‘GO’.
new transformer configuration.
3. Press ‘Go ABC’ or ‘Go…’ to 4. Get the results
start measurement.
WARNING!
Do not touch the test clips while the safety indication is red.
Test voltage will be present.

Instruction Manual TR-Mark III 250V Version 1.10 Preliminary Page 10 of 57
4.2 Connection to Test Object
4.2.1 Hooking up a transformer
This section describes a typical, step by step operation of the TR-Mark III 250V.
Plug the TR-Mark III 250V into an available grounded outlet with 100/250 vac 50/60 Hz
power source.
Connect the TR-Mark III 250V to the transformer under test with the coloured test leads and
if required, use the Red 10 meter measuring lead extensions. The extensions will connect
into the multicolour leads. Check the nameplate information of the transformer. If the
nameplate is missing, it is still possible to test the transformer by a trial and error method.
The TR-Mark III 250V test set is designed to detect errors in transformer hook ups. Contact
the Raytech Service & Support department if you need assistance.
NOTE
No extra external leads or jumpers are required when using the
TR-Mark III 250V. All necessary connections are made internally.
Single Phase Transformer Three Phase Transformer
The colored leads are marked to indicate which transformer terminal it must be connected to
for correct operation.
For a Single (1) phase transformer, use leads:
WIRE COLOR ANSI IEC ANSI IEC
-RED indicates H1 U phase (Red clip) or X1 u phase (Black clip)
-YELLOW indicates H0 N neutral(Red clip) or X0 n neutral (Black clip)
For a Single (1) phase auto-transformer, use leads:
WIRE COLOR ANSI IEC ANSI IEC
-RED indicates H1 U phase (Red clip) or X1 u phase (Black clip)
-Black indicates H2 V neutral(Red clip) or X2 v neutral (Black clip)
For a Three (3) phase transformer, use leads:
WIRE COLOR ANSI IEC ANSI IEC
-RED indicates H1 U phase (Red clip) or X1 u phase (Black clip)
-BLACK indicates H2 V phase (Red clip) or X2 v phase (Black clip)
-WHITE indicates H3 W phase (Red clip) or X3 w phase (Black clip)
-YELLOW indicates H0 N neutral(Red clip) or X0 n neutral (Black clip)

Instruction Manual TR-Mark III 250V Version 1.10 Preliminary Page 11 of 57
4.2.2 Comparison of International Standards
High Winding Side:
Wire Color ANSI Wire Color IEC Wire Color Australian
RED H1 RED U RED A
BLACK H2 BLACK V WHITE B
WHITE H3 BLUE W BLUE C
YELLOW H0 YELLOW N BLACK N
Low Winding Side:
Wire Color ANSI Wire Color IEC Wire Color Australian
RED X1 RED u RED a
BLACK X2 BLACK v WHITE b
WHITE X3 WHITE w BLUE c
YELLOW X0 YELLOW n BLACK n
NOTE
This manual refers to the ANSI standards for all examples. To change
the standard in the test instrument please refer to chapter ‘8.6.1’
WARNING!
BEFORE OPERATING THIS OR ANY OTHER TEST EQUIPMENT
READ ALL SAFETY WARNINGS AND UNDERSTAND THEM FULLY.
DO NOT VARY INPUT VOLTAGE (MAINS) AFTER POWERING ON
TEST SET.
The TR-Mark III 250V auto-senses the input (mains) voltage from 100
to 250 vac 50 / 60 Hz.
The TR-Mark III 250V then “locks–in” the test voltage range. If the
input voltage (mains) is varied after the TR-Mark III 250V was powered
on the actual test voltage may be higher or lower than indicated.

Instruction Manual TR-Mark III 250V Version 1.10 Preliminary Page 12 of 57
5 Operation Elements
5.1 Front Panel Overview:
5.2 Control Elements and Connections
5.2.1 Fuse, Mains Input and Switch
A 2A fuse (slow blow) protects the device. Use only the correct fuse type to replace it.
5.2.2 Ground Terminal
Use this terminal to connect an additional ground line even if your mains Power cable
(Mains) provides an Earth ground line. Also, use it even if you are not sure that the local
installation Earth ground is a low resistive ground.
5.2.3 Emergency Off
Press to Stop. The system will halt and cease Voltage to the test leads immediately. Turn
clockwise to release. The device will remain in a safe state.
5.2.4 High Voltage Side
The connector for the High side lead (H) to test object.
5.2.5 Low Voltage Side
The connector for the Low side lead (X) to test object.
4: High Voltage Side
5: Low Voltage Side
7: External
(Touch
Changer)
6: 3 Phase
Extension
(T-REX)
8: Interface
(USB and RS232)
11: Thermal
Printer
10: Display and
Touch Panel
9: Safety
Indicator
3: Emergency Off
1: Fuse, Mains Input and
Switch
2: Ground Terminal

Instruction Manual TR-Mark III 250V Version 1.10 Preliminary Page 13 of 57
5.2.6 3 Phase Extension (T-REX)
On TR-Mark III 250V, the T-Rex Interface is used to connect and control the optional T-Rex
test set.
5.2.7 External
This port is used for an external connection to a tap changer dry contact. This port can also
be connected to the optional external control switch- Part No. 1003N-31001 for utilizing the
remote test start sequence.
5.2.8 Interface
RS232 and USB 1.1 Please see Chapter ‘10.1Hardware’ for additional details.
5.2.9 Safety Indicator
Green Light on: No voltage applied to test leads. System is in safe standby mode.
Red light on: Indicates there is test voltage on test leads. System is testing.
5.2.10 Display and Touch Panel
TR-Mark III 250V can be easily manipulated and fully controlled by the touch screen panel. If
preferred, an external mouse can be connected to the USB Port for system control.
5.2.11 Thermal Printer
Allows the user to quickly get results on paper by using the built-in thermal printer. The
printer uses thermal heat transfer technology. Therefore, there are no ink cartridges required
or printer heads. Special thermal paper is required for the printer to operate properly.

Instruction Manual TR-Mark III 250V Version 1.10 Preliminary Page 14 of 57
6 Operation Elements Rack
Please find legend of elements on previous page.
6.1 Rack: Front Panel Overview
6.2 Rack: Rear Panel Overview
1 Mains Switch
2: Ground Terminal
3: Emergency Stop
4: High Voltage Side
5: Low Voltage Side
6: 3 Phase
Extension
(T-REX)
7: External
(Touch
Changer)
8: Interface
(USB and RS232)
9: Safety
Indicator
8: Interface (USB)
10: Display and
Touch Panel
1: Fuse and
Mains Input

Instruction Manual TR-Mark III 250V Version 1.10 Preliminary Page 15 of 57
7 Transformer, Measurement and Data Structure
7.1 Introduction
There are thousands of instruments on earth that do a measurement and offer the possibility
to store a measured value. This is a very useful feature which saves a lot of time and
eliminates errors of writing down values by the operator. But still you have to do the handling
and organization of the measured data on your own. This may introduce one day mistakes
into your data set, especially when several measurements will be taken at once and sorted
after words, or, if several operators use the same storage device.
7.2 How it works
With TR-Mark III 250V we offer another powerful tool that increases comfort in handling
many transformers which are tested time after time. You do not have to sort a stored
measurement anywhere. Once a transformer, or let us say a transformer profile is created,
several measurements directly can be attached to it.
The profile or transformer contains the general (header) data. An attached result contains the
measurement of all transformer phases. Or to define it more exactly:
A transformer / profile contains:
Number of winding systems
Type of winding systems
Test voltage
Rated voltages (primary, secondary, tertiary)
Name plate info (name, serial number, location, manufacturer, type and remarks)
Max. ratio deviation and standard (ANSI, IEC, Australian)
A measurement contains
Measured results of all phases (ratio, deviation, current, phase angle)
Date and time of all measurements
What you usually will do is creating a new transformer (profile), do a measurement and store
it. In this case the profile and the actual measurement will be stored.
Or you load an existing transformer, do a measurement and store it. In this case, the new
measurement will be attached or let us say stored with the loaded transformer.
Please find this illustrated on the following page.
NOTE
There is no difference between saving a transformer or attaching the
actual measurement. Both are done with the button ‘save’ in the Main
screen. See chapter ‘8.1.2.3

Instruction Manual TR-Mark III 250V Version 1.10 Preliminary Page 16 of 57
Transformer Profile
(Header)
Measurement 1
(1. Jun 2010)
Measurement 2
(1. Jul 2010)
Measurement 3
(1. Aug 2010)
Load it Do
measurement
Measurement 4
(1. Sept 2010)
Measurement 4
(1. Sept 2010) Save it
This shows a Transformer that has been created and measured for the first time on Jun 1th
2010. Profile and Measurement was saved by touching the ‘save’ button in Main Screen.
Then, this transformer was measured again, every 1th of a month. This means, that the
transformer was loaded from archive again
1
, measurement was done and the measurement
was attached by touching the ‘save’ button in main screen.
In our example, now it is the 1th of September. And again, the transformer is loaded and
measurement is done. This means, that a new measurement data block is created. And it is
saved and attached by touching ‘save’.
1
Please see chapter ’8.3.2 Load from Archive’ or ’8.5 Archive’ for details

Instruction Manual TR-Mark III 250V Version 1.10 Preliminary Page 17 of 57
8 Operating Menu
TR-MARK III 250V Menu structured as shown in the figure below. Pressing a Cancel button,
will bring you one layer towards Main Screen.
Main Screen
(Measurement)
New Info Archive Setup
Delete Export
Load
General
License About Clock Cursor
Update Language Service
Standard Printer Colours
Load
from Archive Copy Actual
Transformer
New
Transformer New
Measurement
Diagram Print
Result

Instruction Manual TR-Mark III 250V Version 1.10 Preliminary Page 18 of 57
8.1 Main Screen
8.1.1 Operating on a simple screen, no Transformer Data entered
When a new Transformer configuration is entered into TR-Mark III 250V in the Setup screen
and “GO” is pressed, the main test screen appears as followed:
This Main Test Screen is the basic platform of the TR-Mark III 250V operation. On this
screen, you will find buttons, indications and results.
Now let’s start with the Go buttons. After connection to a transformer, Press “Go ABC” to
measure all three phases A, B, and C in one cycle. The TR-Mark III 250V will automatically
display any complete result per phase. After the test cycle, the main test screen will appear
as followed:
This is also the display you will find after switching on the instrument, if a measurement was
finished before it was switched off.

Instruction Manual TR-Mark III 250V Version 1.10 Preliminary Page 19 of 57
If you are not up to measure all three phases at once, you can also touch ‘Go…’ to choose a
phase to be measured in the appearing window. In this case no other phase than the chosen
one will be measured.
This Option is also used to do a ‘GO Tab’ if you have tabs. Please see chapter ‘6.3.4’ about
how to define a transformer with taps.

Instruction Manual TR-Mark III 250V Version 1.10 Preliminary Page 20 of 57
8.1.2 Further Options of the Main Screen
8.1.2.1 Change Test Voltage
The following is further measurement settings that are provided by the main test screen.
The TR-Mark III 250V offers three Test Voltage settings. To change the Test Voltage, just
touch on the button with the ‘Ut=…’ on the upper right side of the touch-screen. A selection
window appears.
It is now possible to select a new Test Voltage by Selecting the button ‘Ut=…’.
Tip here
8.1.2.2 Stop Measurement and Continuous Measurement
On the TR-Mark III 250V, a scrolling progress bar indicates that a measurement is being
made. In this condition the buttons on the lower part of the display disappear, and the two
buttons “Cont” and “Stop” appear. Touch “Cont” (continuous) will lead to a continuous
measurement of the marked phase.
In the continuous mode, the ‘Cont’ button will convert to a ‘Next’ button. This ‘Next’ button is
used to switch to the next phase and stay in continuous mode.
Stop will immediately stop measurement in standard and continuous mode.
Progress Bar
Continuous and
Stop buttons
Other manuals for TR-Mark III 250V
1
Table of contents
Other Raytech Test Equipment manuals
Popular Test Equipment manuals by other brands

M.C. MILLER
M.C. MILLER VADER user guide

Apera Instruments
Apera Instruments PH60F-Z instruction manual

System Sensor
System Sensor RTS151KEY Installation and maintenance instructions

HBM
HBM PW20i Mounting instructions

Amprobe
Amprobe 3503229 user manual

Berg Engineering & Sales Company
Berg Engineering & Sales Company SonoDur-R NS-2227690 instruction manual