RayTek GP Series User manual

GP Series
Operating Instructions
Rev. F 10/2011
54201


WARRANTY
The manufacturer warrants this instrument to be free from defects in
material and workmanship under normal use and service for the
period of two years from date of purchase. This warranty extends
only to the original purchaser. This warranty shall not apply to fuses,
batteries, or any product that has been subject to misuse, neglect,
accident, or abnormal conditions of operation.
In the event of failure of a product covered by this warranty, the
manufacturer will repair the instrument when it is returned by the
purchaser, freight prepaid, to an authorized Service Facility within
the applicable warranty period, provided manufacturer’s
examination discloses to its satisfaction that the product was
defective. The manufacturer may, at its option, replace the product in
lieu of repair. With regard to any covered product returned within
the applicable warranty period, repairs or replacement will be made
without charge and with return freight paid by the manufacturer,
unless the failure was caused by misuse, neglect, accident, or
abnormal conditions of operation or storage, in which case repairs
will be billed at a reasonable cost. In such a case, an estimate will be
submitted before work is started, if requested.
THE FOREGOING WARRANTY IS IN LIEU OF ALL OTHER
WARRANTIES, EXPRESSED OR IMPLIED, INCLUDING BUT
NOT LIMITED TO ANY IMPLIED WARRANTY OF
MERCHANTABILITY, FITNESS, OR ADEQUACY FOR ANY
PARTICULAR PURPOSE OR USE. THE MANUFACTURER
SHALL NOT BE LIABLE FOR ANY SPECIAL, INCIDENTAL OR
CONSEQUENTIAL DAMAGES, WHETHER IN CONTRACT,
TORT, OR OTHERWISE.

TABLE OF CONTENTS
1 SAFETY INSTRUCTIONS............................................1
2 DESCRIPTION ...............................................................4
3 GP MONITOR ................................................................5
3.1 TECHNICAL DATA......................................................5
3.1.1 Measurement Specifications ...............................5
3.1.2 Electrical Specifications ......................................6
3.1.3 Environmental Specifications .............................6
3.2 MOUNTING INSTRUCTIONS........................................7
3.2.1 Mounting Bracket Accessory ..............................8
3.2.2 Cutout Template and Cosmetic Frame..............10
3.3 ELECTRICAL INSTALLATION.....................................11
3.3.1 Terminal Block Layout......................................11
3.3.2 Raytek Sensor Model GP ..................................13
3.3.3 Raytek Sensor Model XR ..................................13
3.3.4 Raytek Sensor Models CI3, CM, TX ................13
3.3.5 Common Input Devices ....................................14
3.3.6 Power Connections ...........................................16
3.3.7 Output Connections .........................................17
3.3.8 External Relay (Accessory)...............................18
3.4 OPERATION...............................................................18
3.4.1 Control Panel ....................................................18
3.4.2 Device Selection ................................................20
3.4.3 Emissivity .........................................................22

3.4.4 Setpoints 1 and 2 .............................................. 23
3.4.5 Analog 4 - 20 mA Output ................................ 27
3.4.6 Degrees C and F................................................ 28
3.4.7 Signal Processing.............................................. 29
3.4.8 Ambient Temperature Compensation............... 30
3.4.9 Display and Analog Output Offset .................. 31
3.4.10 Thermocouple Output..................................... 32
3.4.11 Lockout Mode.................................................. 33
3.4.12 Factory Defaults ............................................. 34
3.5 QUICK REFERENCE...................................................34
4 INSTALLATION OF SENSING HEADS ................ 39
4.1 RAYTEK SENSING HEADS......................................... 39
4.9 AIMING THE SENSING HEAD ................................... 43
5 GPR/GPS SENSING HEAD....................................... 44
5.1 OPTIONS ................................................................... 47
5.1.1 Air/Water-cooled Housing (GPR/GPS) ........... 47
5.2 ZUBEHÖR.................................................................. 49
5.2.1 Adjustable Mounting Bracket .......................... 49
5.2.2 Air Purge Collar ............................................... 49
5.2.3 Right Angle Mirror .......................................... 51
5.2.4 Sighting Viewer (GPR)..................................... 52
5.3 TECHNICAL DATA.................................................... 52
5.3.1 Optical Parameter............................................. 52
5.3.2 Measurement Specifications ............................. 55
5.3.3 Environmental Specifications ........................... 55

6 MAINTENANCE ..........................................................57
6.1 FAIL-SAFE OPERATION.............................................58
6.2 CLEANING THE LENS................................................58
7 APPENDIX.....................................................................60
7.1 DETERMINATION OF EMISSIVITY..............................60
7.2 TYPICAL EMISSIVITY VALUES...................................61
8 NOTES............................................................................65


Safety Instructions
GP Series Rev. F 10/2011 1
1Safety Instructions
This document contains important information, which should be
kept at all times with the instrument during its operational life. Other
users of this instrument should be given these instructions with the
instrument. Eventual updates to this information must be added to
the original document. The instrument should only be operated by
trained personnel in accordance with these instructions and local
safety regulations.
Acceptable Operation
This instrument is intended only for the measurement of
temperature. The instrument is appropriate for continuous use. The
instrument operates reliably in demanding conditions, such as in
high environmental temperatures, as long as the documented
technical specifications for all instrument components are adhered to.
Compliance with the operating instructions is necessary to ensure the
expected results.
Unacceptable Operation
The instrument should not be used for medical diagnosis.
Replacement Parts and Accessories
Use only original parts and accessories approved by the
manufacturer. The use of other products can compromise the
operational safety and functionality of the instrument.
Instrument Disposal
Disposal of old instruments should be handled
according to professional and environmental
regulations as electronic waste.

Safety Instructions
2 Rev. F 10/2011 GP Series
Operating Instructions
The following symbols are used to highlight essential safety
information in the operation instructions:
Helpful information regarding the optimal use of the
instrument.
Warnings concerning operation to avoid instrument
damage and personal injury.
The instrument can be equipped with a Class 2 laser.
Class 2 lasers shine only within the visible spectrum at an
intensity of 1 mW. Looking directly into the laser beam
can produce a slight, temporary blinding effect, but does
not result in physical injury or damage to the eyes, even
when the beam is magnified by optical aids. At any rate,
closing the eye lids is encouraged when eye contact is
made with the laser beam. Pay attention to possible
reflections of the laser beam. The laser functions only to
locate and mark surface measurement targets. Do not aim
the laser at people or animals.

Safety Instructions
GP Series Rev. F 10/2011 3
Pay particular attention to the following safety instructions.
Use in 110 / 230 VAC electrical systems can result in
electrical hazards and personal injury if not properly
protected. All instrument parts supplied by electricity
must be covered to prevent physical contact and other
hazards at all times.

Description
4 Rev. F 10/2011 GP Series
2Description
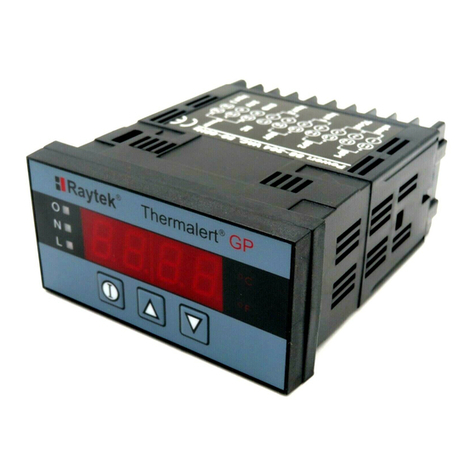
The GP monitor consists of printed circuit boards, A/D converters,
microprocessor, control switches, and power conditioners, all
mounted in a 1/8 DIN panel-mount NEMA-12 (IP 54) enclosure. The
GP monitor accepts inputs from any 0-5V and 4-20mA devices, which
allows it to be used as a panel meter for many applications. Other
settings allow the GP to act as a temperature monitor for Raytek fixed
infrared sensors like GPR, GPS, CI3, CM, TX and XR and for other
temperature gathering devices. The GP Monitor also accepts various
types of thermocouple inputs. It provides two programmable
setpoint alarm signals (open collector or relay) and one of two types
of analog output: 4-20 mA output or thermocouple output. (Factory
default is 4-20 mA output.)
Figure 1: GP Monitor

GP Monitor
GP Series Rev. F 10/2011 5
3GP Monitor
3.1 Technical Data
3.1.1 Measurement Specifications
Input Accuracy: 0 –5 V input resolution: 1 mV,
accuracy: ± 2 mV
4 –20 mA input resolution: 0.01 mA
accuracy: ± 0.02 mA
J, K, E, N, T thermocouple input:
± 0.5 % or ± 2°C, whichever is greater
R, S thermocouple input:
± 0.5 % or ± 3°C, whichever is greater
Output Accuracy: 4 –20 mA output resolution: 0.014 mA
accuracy: ± 0.02 mA
J, K, E, N, T thermocouple output:
± 0.5 % or ± 2°C, whichever is greater
R, S thermocouple output:
± 0.5 % or ± 4°C, whichever is greater
Response Time: 300 ms (GPR/GPS system)
200 ms (all other)
Display: 4 digit LED
Emissivity: 0.10 to 1.09, adjustable in 0.01 increments –
H001 (GP heads) and H007 (XR heads) only
Warm-up Time: 5 s
Peak Hold: 0 to 998 s (999=infinite hold)
Valley Hold: 0 to 998 s (999=infinite hold)
Averaging: 0 to 60 s
Fail-Safe: Full or low scale, depending upon system
failure, see section 6.1 Fail-Safe Operation,
Seite 58.

GP Monitor
6 Rev. F 10/2011 GP Series
Setpoints:
Head type H001: -18 to 538°C (0 to 1000°F)
Head type H003: 0 to 500°C (32 to 932°F)
Head type H004: 0 V input setting = low scale,
5 V input setting = high scale
Head type H005: 4 mA input setting = low scale,
20 mA input setting = high scale
Head type H006: scale = input thermocouple range:
J-type: -40 to 750°C (-40 to 1382°F)
K-type: -40 to 1250°C (-40 to 2282°F)
E-type: -40 to 700°C (-40 to 1292°F)
N-type: -40 to 1300°C (-40 to 2372°F)
R-type: 0 to 1750°C (32 to 3182°F)
S-type: 0 to 1750°C (32to 3182°F)
T-type: -100 to 350°C (-148 to 662°F)
Head type H007: -40 to 1650°C (-40 to 3002°F)
(depending on model)
4 mA input setting = low scale,
20 mA input setting = high scale
3.1.2 Electrical Specifications
Voltage: 110 –220 VAC + 20 %, 50 –60 Hz, 100 mA
Current output: 4 to 20 mA
Max. loop impedance: 350
2 Setpoints output: CMOS level Hi/Lo (5 V / 0 V)
GPC Monitor SP1, SP2: 15 mA @ 5 V
Mechanical Relay: AC contact: 250 VAC, 3 A
GPCM Monitor DC contact: 30 VDC, 3 A
3.1.3 Environmental Specifications
Dimensions: 1/8 DIN, 118 mm length
(1.75 x 3.63 x 4.75 in)
Weight: 320 g (0.7 lbs)

GP Monitor
GP Series Rev. F 10/2011 7
Rating: IP 54 (NEMA-12), front panel only
Operating Temperature: 0 to 50°C (32 to 122°F)
Relative Humidity: 10 - 95 %, non-condensing
Storage Temperature: -30 to 65°C (-22 to 150°F)
3.2 Mounting Instructions
The GP monitor meets NEMA-12 (IEC529, IP54) requirements (front
panel only) for protection of the electronics when mounted properly.
It should be surface mounted using the flanges and holes provided
and mounted in such a manner to allow the free flow of air around
the unit. Ambient temperatures should be kept within the range of
0 to 50°C (32 to 120°F).
Mount the monitor as far away as possible from potential
sources of electromagnetic interference!
Complete the following steps to mount the GP monitor to a panel, see
also Figure 2:
1. Cut a hole 45 mm high by 92 mm wide (1.8 in by 3.62 in) in the
panel.
2. Slip the gasket over the rear of the monitor and then back the
monitor into the hole from the front side of the panel. (Mounting
bracket and cosmetic frame are available as accessories.)
3. Attach the fixing clamps to both sides of the monitor. Make sure
the tab is secure in the hole on both sides.
4. Fix the monitor with the clamp screws!

GP Monitor
8 Rev. F 10/2011 GP Series
Figure 2: Mounting the Monitor
5. Secure the monitor to the panel by tightening both fixing clamp
screws until the flanges are snug against the back surface of the
panel.
6. Connect the terminal cable as described in the following section.
7. After you complete the electrical installation, secure the rear
cover to the back of the monitor.
Do not operate with rear cover removed because of
electrical shock hazard!
3.2.1 Mounting Bracket Accessory
A mounting bracket is available as an accessory. To mount a GP
Monitor to a wall, post, column, or other flat surface, complete the
following steps:
1. Insert the rear of the monitor through the bracket’s opening so
the bottom of the monitor rests on the bracket surface. Make sure
the gasket is in place Figure 3.
Rear Cover
Gasket
Hole
Fixing Clamp
Tab
Clamp Screw

GP Monitor
GP Series Rev. F 10/2011 9
Figure 3: Mounting Bracket Accessory Installation
2. Insert the Tab on the side of each fixing clamp (one per side) into
the hole on the side of the monitor housing and hold them. You
might need to loosen the fixing clamp screws first, see Figure 4.
Figure 4: Completing the Installation
Mounting Bracket
Gasket
Hole
Fixing Clamp
Tab
Clamp Scres
Before mounting bracket, connect wires
and attach rear cover
Tighten Fixing Clamp
Screws

GP Monitor
10 Rev. F 10/2011 GP Series
4. You will need to attach wires to the monitor’s terminals and
attach the rear cover before mounting the bracket onto a surface.
(Refer to the manual for wiring instructions for your particular
device.)
5. Use 3 appropriately sized screws or bolts to fasten the bracket
onto your work surface.
This completes the monitor bracket accessory installation.
3.2.2 Cutout Template and Cosmetic Frame
If you are mounting your monitor into a panel, this plastic frame can
be used as a template for determining the proper dimensions for
your panel cutout. To use, hold or tape the template against the panel
at the location where you want to mount the monitor, and mark
around the inside edges, see Figure 5.
Once you cut the panel, you can use this template as a frame to hide
scratches or small voids on the panel that might have been created
during the cutting process.
To install, simply insert the frame between the monitor bezel and
mounting gasket prior to inserting the monitor into the panel.

GP Monitor
GP Series Rev. F 10/2011 11
Figure 5: 1/8 DIN Cutout Template and Cosmetic Frame
3.3 Electrical Installation
3.3.1 Terminal Block Layout
Either soldered spade lugs or bare wires are acceptable for
connections.
Mark around
inside edges

GP Monitor
12 Rev. F 10/2011 GP Series
Figure 6: Terminal Block Layout
Terminal block definitions:
1 4 - 20 mA output + 11 Setpoint 1 + / Relay 1 *
2 4 - 20 mA/TC output –12 Setpoint 1 –/ Relay 1 *
3 TC output + 13 Setpoint 2 + / Relay 2 *
4 TC input –14 Setpoint 2 –/ Relay 2 *
5 TC input + 15 Reset +
6 Input 2 –(Ground) 16 Reset –(Ground)
7 Input 2 + (0-5 V or ambient signal) 17 Calibration (Potential!)
8 Shield 18 no connection
9 24 VDC output power (50 mA max) 19 N Neutral (power)
10 Input 3 (4 - 20 mA or GPR/GPS) 20 H Hot (power)
* see Table 8 Output Connections, page 18

GP Monitor
GP Series Rev. F 10/2011 13
Incorrect wiring can damage the monitor, sensor, and/or
input device and void the warranty!
3.3.2 Raytek Sensor Model GP
The following table shows wiring connections for the GP sensing
heads to the monitor.
GPR/GPS
(including high temperature cable)
Terminal Pin
Wire Color
6
black
7
green
8
bare
9
red
10
white
Table 1: Wiring GP Sensing Heads
3.3.3 Raytek Sensor Model XR
The following table shows wiring connections for the XR sensing
heads to the monitor.
XR
Pin Monitor
Function
6
Ground
8
Shield
10
mA signal
Table 2: Wiring XR Sensing Heads
3.3.4 Raytek Sensor Models CI3, CM, TX
The following tables show wiring connections for the CI3, CM, TX
sensing heads to the monitor.
Other manuals for GP Series
1
Table of contents
Other RayTek Measuring Instrument manuals