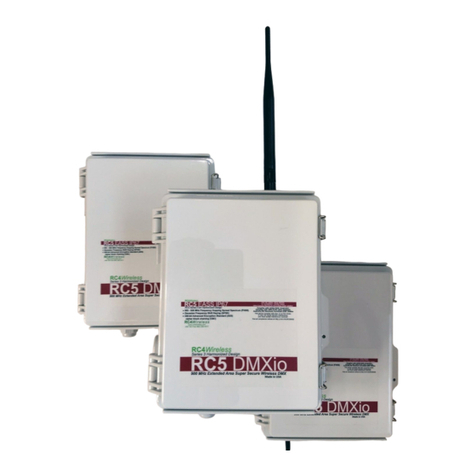
RC4 Wireless RC4Magic 3 Series User manual

RC4Magic Series 3
DMXio
Wireless DMX Transceiver
Quick Start Guide
Rev. 1.0

22
PUSH
Blink pattern on power-up
indicates selected
RC4 Private IDentity
COP*/RX/TX/Auto
DMX/RF Data
RF Power / RSSI
DMX Termination
DMX Channel Range Limit
RF Connect
1
3
2
5
4
6
ID0
ID1
ID2
ID3
Func/Shift
RX/TX/Auto RF Power
DMX Term
Hold Func/Shift while
tapping button to
invoke Shift Functions
Hold button while
applying power to
invoke Power-up
Functions
* COP means “Computer Operating Properly.” This indicator always shows a blink pattern, proving
that internal rmware is running. Dierent patterns indicate dierent modes of operation.
CodeLoader

3
RC4Magic DMXio
1. Power Input for AC Adaptor (included)
2. RC4 Miniplug Port
3. DMX In/Out Male and Female 5-pin XLR Connections
4. LED Indicators
5. Recessed Buttons
6. RP-SMA Antenna Connector (2.4GHz DMXio-HG + 900MHz DMXio-HG)
3

44
DMXio Quick Start Guide
Most RC4Magic DMXio users will nd all the information they need right here.
Your DMXio also has some advanced features. You can nd out more about
them in the RC4 Knowledge Base at http://rc4.info.
RC4Magic devices arrive ready to use. You probably
do not need to change any settings. Just add DMX!
Registering Your Product
Registration ensures you’ll be notied of new rmware updates, and warranty
claims can be resolved more quickly. Please complete your registration at:
www.rc4wireless.com/support/register/
Get in Touch
North Carolina, USA: 1-866-258-4577 or 1-919-229-9950
London, UK: +44 (0)20 3289 8765
Email: [email protected]
Website: www.rc4wireless.com
We’re here to help!
James David Smith
President and Chief Product Designer
RC4 Wireless

55
RC4Magic Private IDentitiesTM
RC4 Private IDentitiesTM, unique to RC4Magic wireless DMX systems, keep your
data private and safe on a Virtual Private Network (VPN) separate from other
systems, with robust resistance to signal loss and slow down.
Each Private ID transports a separate DMX universe. Multiple systems can
operate at the same time for multiple wireless universes in the same space.
Each new RC4Magic customer and project is assigned a unique set of Private
ID codes — nobody else has your IDs. They are marked on each device. Please
note your private IDs below. When you add devices to your system, you must
verify your IDs at time of purchase:
ID3, code 999, is the RC4 Public ID. It is identical in all RC4Magic Series 2 and
Series 3 devices ever made. Always use one of your private IDs when possible.
Your Private ID0, the factory default, is ideal for most users.
ID0 ___________ ID1 ___________ ID2 ___________
DMXio System Components
To use your DMXio wireless transceiver you will need:
• A DMX lighting console or other source of DMX data.
• An AC power source for the supplied AC power adaptor.
• Another RC4Magic Series 2 or Series 3 transceiver or dimmer to receive
the RC4Magic wireless signal you transmit, or to transmit a signal you
will receive with this device. (The DMXio can be either a transmitter or a
receiver, which is why it is called a transceiver.)

66
Performing a Factory Reset
If someone else has used your DMXio, or you just want to get back to a known
conguration, performing a factory reset is easy:
Power on the device. Wait until start-up is complete and the green COP
indicator is blinking continuously.
Press and hold the Func/Shift button, briey tap (press and release) the ID3
button (right beside the Func button), then release Func/Shift. The rst two
indicators will blink together a few times to conrm that factory settings are
restored.
NOTE: This process restores your RC4 Private IDentityTM to ID0. It does not
change the Unit Number if one has been assigned. Learn more about IDs on
the next page. Learn more about Unit Numbers when using RC4 Commander
conguration software.
PRO TIP:
Bending a single paper
clip into a U shape will
enable you to easily
reach and press both
buttons together.
ID3
Func

7
7
Conrming and Setting an RC4 System ID
All RC4Magic devices being used together must be set to the same RC4 System ID.
On power-up, the currently selected System ID is indicated with a blink pattern on
the DMX Data and COP indicators. The four dierent patterns are noted below.
The factory default ID0 is indicated with a few rapid blinks of the yellow DMX Data
LED on power-up. A factory reset will restore this ID setting.
An ID can be selected by holding one button on power-up. The blink pattern for the
newly selected ID will appear on the indicators. You can also conrm the currently
selected ID at any time by cycling power and watching the blink pattern that appears
at start-up with no buttons pressed.
To select an ID, press and hold the associated button, apply power, and release the
button when the blink pattern appears. For example, to select ID1, hold the ID1
button and apply power. When you see the green LED blink rapidly, release the
button.
All RC4Magic Series 3 devices indicate IDs in the same way, making it easy to
quickly conrm that all devices in your system are set correctly to work together.
ID0 (default), yellow blink. Hold the ID0 button on power-up to select.
ID1, green blink. Hold ID1 on power-up to select.
ID2, yellow and green blink together.
ID3 (public), yellow and green alternate.
Note: ID3 is public and is less secure than Private IDs.

88
PUSH
Blink Pattern Indicates
ID on Power Up
COP/RX/TX/Auto
DMX Data
RF Connect
Connecting with other RC4Magic Devices
All RC4Magic devices congured on the same RC4 Private IDentityTM will
automatically connect and form a VPN (Virtual Private Network). Conrm that each
device in your system is labeled with the same RC4 Private IDentityTM codes, and
that each device indicates the same System ID selection on power up (see page 7).
The default is ID0, which is ideal for most users.
When rst powered up, or after a transmitter has gone o and then comes back
online, receivers can take up to 10 seconds to join the VPN. This is normal, and it is
usually much less than 10 seconds.
A DMXio transceiver in Auto Mode (the default setting) will automatically detect
wired DMX data from your console and establish itself as the system transmitter.
RC4Magic devices from a dierent system will not work with your RC4 Private IDs.
This is the key to RC4Magic data security and superior performance for all users.

Title
Text
99
Yellow blinks with data packets and may appear irregular:
Green long blinks indicate transmitter mode:
RC4Magic Indicator LEDs After Power-Up
The COP indicator blinks with dierent patterns to indicate various device modes.
The DMX Data LED indicates that DMX data is present, either from a connected
DMX controller, or from the VPN wireless link. If the yellow indicator is not active,
no DMX data is present.
DMX Data:
On DMXio transceivers operating in transmitter mode, the RF Connect LED blinks
slowly to indicate that a wireless VPN has been formed and the DMXio is the
master transmitter:
DMXio, Transmit Mode COP Pattern:
RF Connect:
RC4Magic Series 3 (2.4GHz) Receivers
If your DMXio has a purple and black label, it is part of an RC4Magic Series 3
system operating in the 2.4GHz band. The RF Connect indicator remains on
(not blinking) while the DMXio is searching for your VPN. It blinks quickly and
continuously while your DMXio is connected to your wireless VPN.
DMXio RF Connect, Searching:
Connected:
RC4Magic-900 (900MHz) Receivers
If your DMXio has a blue and black label, it is part of an RC4Magic-900 system
operating in the 900MHz band. The RF Connect indicator is always blinking, and
indicates only that the RF system is functional, not whether or not it has joined a
VPN. Use the DMX Data indicator to conrm that streaming DMX is present.
DMX Data Received Wirelessly:

1010
DMXio Auto Mode - Automatic Transmit or Receive Selection
RC4Magic devices from a dierent system will not work with your RC4 Private IDs.
This is the key to RC4Magic data security and superior performance for all users.
A DMXio transceiver in Auto Mode (the default setting) will automatically
determine if it should transmit or receive. To do this, it detects whether or not
wireless DMX is already present on the air for the selected System ID, and whether
or not DMX data from a controller is present at the XLR connectors.
The device starts in Auto mode, with the green COP blinking a 50% duty cycle:
The DMXio rst scans all available RF channels for the presence of data from
another transmitter on the same RC4 Private IDentity. If it nds valid RF data, it
automatically sets itself as a wireless receiver:
If no valid RF signal is found, the DMXio checks for DMX data coming in from a
controller connected to the 5-pin XLR connectors. If valid DMX data is found, it
automatically sets itself as a wireless transmitter:
If neither RF nor DMX data are found, the DMXio stays in Auto mode, waiting for
one of the two conditions to be met. Thus, if it is connected to a DMX console,
transmitter mode will be invoked when the console is turned on and it starts
generating data.
Green long blinks indicate transmitter mode:
Green short blinks indicate receiver mode:
Auto mode, application detection:

1111
Manual Selection of Transmit or Receive Mode
Auto mode is the recommended setting and the default. It is a reliable context-
sensitive system that ensures all your DMXio devices are always doing what you
need them to do, even when you swap them around in the dark.
If you prefer to force a mode, you can. Using a small screwdriver or bent paperclip,
press the recessed button for RX/TX/Auto. Each time you press the button, the
mode toggles to the next available setting. When an option other than Auto is
selected, the DMXio will indicate the current mode with the green LED, without
doing any scanning rst.
If the DMXio is forced to function as a transmitter, it will power up and show the
transmitter mode COP indicator pattern:
If the DMXio is forced to function as a receiver, it will power up and show the
receiver mode COP indicator pattern:
CAUTION: RC4Magic wireless networks support only a single transmitter per
System ID. If you congure more than one DMXio to operate as a transmitter at
the same time on the same ID, the system may not perform as expected. This is
why it is best to not force transmitter mode. In Auto mode, the DMXio will conrm
there is no other transmitter already operating before it will enable itself as a
transmitter.
Green long blinks indicate TX (transmitter) mode:
Green short blinks indicate RX (receiver) mode:

1212
RF Transmit Power
In transmit mode, the RC4Magic DMXio can operate over a range of RF power
levels. The default is the maximum power, and this is often appropriate for real-
world applications where numerous other wireless devices and systems compete
for bandwidth and priority.
It is best practice, however, to use the lowest power level that is satisfactory for
your specic application and environment. A lower transmit power reduces the
overall RF noise oor and can be helpful for all the wireless systems in the same
facility or project. The same applies for all those other systems as well; when
possible, it is best to operate all wireless systems at the lowest transmit power
that yeilds acceptable performance.
On the DMXio, RF power is a Func/Shift function. That means that the Func/Shift
button must be held while tapping the RF Power button to change the power level.
RF power is indicated with a blinking red LED, marked RF Power/RSSI. It is the
third indicator from the left, after the yellow and green indicators. Three RF levels
can be selected with the buttons. Faster blinking indicates high power:
With the Func/Shift button pressed, each tap of the RF Power button will
increment to the next RF power level. After the highest level is selected, the next
option is the lowest, and so on. (This is the same button used to select ID0 on
power-up, and to select Auto/RX/TX modes when not holding the Func button.)
Maximum RF Power indicated with fastest blinks:
Medium RF Power:
Minimum RF Power indicated with slowest blinks:

1313
DMX Line Termination
The RC4Magic DMXio has a selectable internal DMX/RDM line terminator. This
terminator should be activated when the DMXio is at the end of a DMX cable run.
Do not enable the terminator if DMX data is passing through to additional devices
down the line. The green indicator, fth from the left, indicates the status of the
DMXio internal line terminator:
Tap the DMX Term button to toggle the state of the internal terminator.
(This is not a Func/Shift function. A single button-press controls this feature.)
DMX Channel Range Limit
It is possible to limit the range of DMX channels being transmitted over the
RC4Magic wireless VPN network. To accommodate this, two hidden parameters
within the device allow setting the lowest and highest channels to be transmitted.
Accessing these parameters can be done only with RC4 Commander conguration
software.
When these parameters are set to other than 1 (lowest) or 512 (highest), the
yellow indicator marked DMX Channel Range Limit, fourth from the left, will
illuminate as a warning that some DMX channels are not being transmitted.
Without RC4 Commander software, you can cancel channel range
limiting by doing a factory reset (page 6).
DMX Channel Range Limit ON means channel range is limited, not all channels are transmitted
OFF means all channels are being transmitted
DMX Termination ON means DMX/RDM end-of-line termination is engaged
OFF means no termination is enabled within the DMXio

1414
2.4GHz DMXio-HG : The “High Gain” Option
The 2.4GHz DMXio is available in two versions, one with an internal antenna, and
the other with an RP-SMA antenna connector with an external whip antenna. The
latter version is the DMXio-HG. The 900MHz DMXio-HG is standard; there is no
internal antenna version.
The “HG” means “High Gain” because it can be used with high-gain antennas.
Note, however, that the standard antenna provided with the DMXio-HG provides
the same gain as the regular DMXio with an internal antenna.
The DMXio-HG provides additional exibility for applications where specialty
antennas are helpful. It is impossible to outline all the dierent types and sizes of
antennas in this quick-start guide, but examples include:
• High-gain dipole antennas deliver more signal horizontally by reducing RF
radiation vertically (above and below). The higher the gain in dBi, the atter
the signal prole. It is sometimes helpful to use 7dBi or 9dBi antennas with
the DMXio-HG.
• Directional panel antennas focus RF energy in a particular direction with
a spread usually specied in degrees. Antennas with 120-degree and
180-degree proles are helpful for sending more signal towards a stage or
performance area, by not sending energy behind the panel.
• Yagi antennas concentrate RF energy in a highly focused beam. When aimed
properly, they enable for long distance radio links. Their disadvantage is
susceptibility to mis-alignment. In most cases, Yagi antennas are not needed
for wireless DMX applications, but they are sometimes used to send signals
around large buildings, or across wide open areas.

15
Advanced Features
The DMXio is a multifaceted device for users of all experience levels. The
features below can be explored further at http://rc4.info/ or by asking us for
• RC4 Commmander software, available for Mac OSX and Windows,
provides a rich user interface for conguring multiple RC4Magic devices
remotely.
• The DMXio can be optionally powered by DC voltage on XLR connector
pins 4 and 5. This requires opening the device and soldering jumpers
across two clearly marked pairs of solder pairs. The DC input voltage
range is identical to all other RC4Magic devices: 5V - 35VDC. Learn more
about this option at http://rc4.info/ or by asking us for help at
• The DMXio does not support wireless RDM transmission and reception.
• RC4Magic devices do support wired RDM, making it easy to congure
dimmers and other devices using an RDM controller plugged into the
miniplug port. An XLR-to-miniplug adaptor facilitates this connection.
15

1616
Caring for Your DMXio
• The DMXio should be powered by the AC adaptor provided, or an
equivalent adaptor, power supply or battery delivering voltage
between 5VDC and 35VDC. The voltage does not need to be perfectly
regulated but it must remain within the specied range. At 9V, the
power supply should be able to deliver at least 300mA of current.
• Do not connect AC line voltage directly to the DMXio. Doing so
will severely damage the device and is extremely dangerous for the
operator.
• The DMXio should be kept away from excessive heat, cold, dust and
moisture. An IP-65 enclosure kit is available from RC4 Wireless for use
in outdoor installations.
• Do not immerse in water or other uids.
• Allow space for air to move around the unit for cooling, especially in
very hot environments.
Failing to observe appropriate safety precautions can result in re or other
risk, and usually voids the RC4Magic warranty. RC4 Wireless cannot be
held responsible or liable in such cases. Operate the DMXio at your own
risk.
Other manuals for RC4Magic 3 Series
2
This manual suits for next models
1
Table of contents
Other RC4 Wireless Transceiver manuals