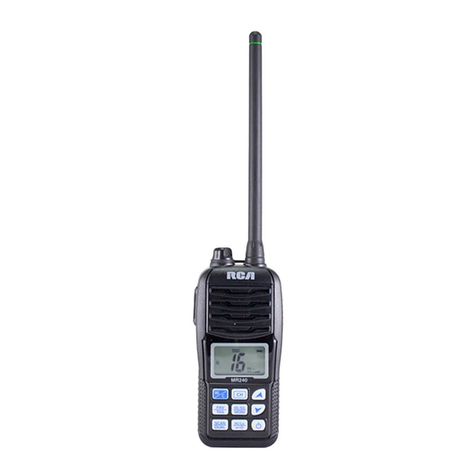
RCA MR240 User manual

Copyright © 2015 RCA Communications Systems
1
MR240TM VHF Marine Two-Way Radio Instruction Manual
Congratulations on selecting the MR240TM from
RCA Communications Systems - The Most Trusted Name In Radio!
Our new series of business communications products establishes a new benchmark in
premium radio products made to perform awlessly under the most demanding commercial
conditions. Cutting edge design, professional grade materials and components, simple
operation and superior assembly quality - RCA Communications Systems has it all, including
our exclusive no-nonsense, two-year “Warranty Protection Program” one of the most
comprehensive warranties in the communications industry.
To ensure you achieve maximum performance from your MR240TM radio, please be sure to
carefully read this manual.
MODELS COVERED IN THIS MANUAL:
MR240 Handheld Marine Two-Way Radio

MR240TM VHF Marine Two-Way Radio Instruction Manual
2
FOREWORD
Thank you for purchasing an RCA MR240TM
Handheld Marine Two-Way Radio. Read all
instructions carefully and completely before
using the transceiver.
MR240 Handheld Marine Two-Way Radio is a
powerful marine radio. It is designed to
IMO (International Maritime Organization)
standards. With proper care this radio
should provide you with years of trouble-free
operation.
SAVE THIS INSTRUCTION MANUAL - This
instruction manual contains important
operating instructions. Please read all the
instructions carefully and completely before
using the transceiver.
CAUTION
■ NEVER connect the transceiver to an AC out-
let. This may pose a re hazard or result in an
electric shock.
■ DO NOT use or place the transceiver in direct
sunlight or in areas with temperatures below
5°F (-15°C) or above 131°F (55°C).
■ KEEP the transceiver at least 1 meter away
from your vessel’s magnetic navigation
compass.
■ BE CAREFUL the transceiver meets IP-X7
requirements for waterproof protection.
However, once the transceiver has been dropped,
waterproof protection cannot be guaranteed
because of possible damage to the
transceiver’s case or the waterproof seal.

Copyright © 2015 RCA Communications Systems
3
MR240TM VHF Marine Two-Way Radio Instruction Manual
■ MAKE SURE the exible antenna and battery
cover are securely attached to the transceiver and
that antenna and battery cover are dry before
attachment. Exposing the inside of the
transceiver to water will result in serious
damage to the transceiver.
RECOMMENDATION
Clean the transceiver thoroughly with fresh
water after exposure to saltwater, and dry it
before operating. Otherwise, the transceiver’s
key, switches and controllers may become
unusable due to salt crystallization.
NOTE: DO NOT submerge the transceiver
in water if there is any reason to suspect the
waterproof protection may not be effective.
For example, in cases where the battery
cover or DC power jack rubber seal is
damaged, cracked or broken, or the
transceiver has been dropped, or when the
battery cover, antenna or DC power jack are
detached from the transceiver.
FEATURES
■FLOATS ON WATER
The transceiver oats in fresh or salt water even
when the supplied accessories are attached.
Unit may not oat when third-party replace-
ment parts and/or accessories are used.

MR240TM VHF Marine Two-Way Radio Instruction Manual
4
■FLOATS AND FLASHES
At the bottom of each radio is a light that blinks
while oating in the water. The LED light is
noticeable in the dark (like a ashing shing
oat) so the radio can easily be found while
in the water. The light works even when the
radio is turned OFF.
Flashing Warning Lights
■WATER CLEAN
WaterClean is new technology that helps
clears water from the speaker. The WaterClean
function emits a vibrating beep that helps
remove water, which can mufe the sound
coming from the speaker, from the speaker
housing.
ADDITIONAL FEATURES
■Up To 5 Watts
■Dual Bands / Three Bands Frequency Watch
■Large LCD Display Easy To See And Operate
■Auto Scan Function
■Built-in Charger Circuitry

Copyright © 2015 RCA Communications Systems
5
MR240TM VHF Marine Two-Way Radio Instruction Manual
IN CASE OF EMERGENCY
If your vessel requires assistance, contact other
vessels and the Coast Guard by sending a dis-
tress call on Channel 16.
DISTRESS CALL PROCEDURE
USING CHANNEL 16
1. “MAYDAY MAYDAY MAYDAY.”
2. “THIS IS ..........................” (name of vessel)
3. Your call sign or other indication of the
vessel.
4. “LOCATED AT ..................” (your position)
5. The nature of the distress and assistance
required.
6. Any other information which might
facilitate the rescue.

MR240TM VHF Marine Two-Way Radio Instruction Manual
6
PREPARATION
Supplied Accessories .................................... 8
Charging the Battery Pack .......................... 8
Battery Pack ................................................ 9
Flexible Antenna ......................................... 10
Belt Clip .................................................... 10
Hand Strap .................................................10
PANEL DESCRIPTION
Panel Description ....................................... 11
Display ....................................................... 13
Turn ON/OFF ............................................... 15
Adjusting the Volume Level .......................... 15
Adjusting the Squelch Level ........................ 16
Receiving and Transmitting .......................... 16
Receiving .............................................. 16
Transmitting .......................................... 17
Channel Group Selecter .............................. 17
Channel Selection ...................................... 18
Channel 16 ............................................ 18
Channel 9 (Call Channel) ...................... 18
Weather Channels ................................. 19
Call Channel Programming .......................... 19
Monitor Function ...................................... 20
Volume Loud Function .............................. 21
Volume Mute Function .............................. 21
Automatic Backlight .................................. 21
Lock Function ............................................ 21
WaterClean Water Draining Function ......... 22
SCAN OPERATION
Scan Types ................................................ 22
Setting TAG Channels ............................... 24
Setting (or clearing) a TAG Channel .......24
Setting (or clearing) all Tagged Channels .. 24
Starting a Scan...........................................24
CONTENTS
Copyright © 2015 RCA Communications Systems
7
MR240TM VHF Marine Two-Way Radio Instruction Manual
DUALWATCH / TRI-WATCH
Description..........................................25
Operation ..................................................25
SET MODE
Set Mode Programming ............................26
Set Mode Operation .......................... 26
Set Mode Items .........................................28
Beep Tone Function (“bP”) ...................... 28
Weather Alert (“AL”)............................ 28
Priority Scan Function (“Pr”) ................ 28
Scan Resume Time (“St”) ......................28
Auto Scan Function (“AS”) ................... 28
Dual/Tri-watch Function (“dt”) ............... 29
Monitor Key Action (“Sq”) ................... 29
Automatic Backlighting (“bL”) ............. 29
LCD Contrast Setting (“LC”) .................. 29
Power Save Function (“PS”) ................... 29
CHANNEL LIST .......................................... 31
SPECIFICATIONS ......................................... 32
TROUBLESHOOTING .................................. 34
BATTERY CAUTION ................................... 36
WARRANTY STATEMENT ........................... 40
RF EXPOSURE ............................................ 43
CONTENTS [continued]

MR240TM VHF Marine Two-Way Radio Instruction Manual
8
PREPARATION
■ Supplied Accessories
Carefully unpack the transceiver. We
recommend that you identify items listed in
the table below before discarding the packing
materials. If any items are missing or damaged,
please contact your dealer immediately.
Items Qty.
Antenna 1
Battery Pack 1
Adaptor 1
Belt Clip 1
Hand Strap 1
Instruction Manual 1
■ Charging the Battery Pack
Important: Prior to using the transceiver for
the rst time, the battery pack must be fully
charged for optimum life and operation. To
avoid damage to the transceiver, turn the
power OFF while charging.
1. Connect the AC Adapter to a standard
electrical outlet.
2. Rotate and remove the power jack cap on
the top of the transceiver and plug the power
adapter connector into the female connection.
When the unit is charging, and will
show up on the display.
3. Once the battery is charged, “FL” will appear
on the DISPLAY. Remove Power Adapter from
radio.

Copyright © 2015 RCA Communications Systems
9
MR240TM VHF Marine Two-Way Radio Instruction Manual
NOTE: If the battery pack is not installed or
improperly installed, the DISPLAY will show
“Er” when trying to charge the unit.
■ Battery Pack
To insert the battery pack:
Place the battery into the transceiver so it ts
at, and securely attach the battery cover as
shown. Push the cover until the latch comes
back to the locked position.
To remove the battery pack, slide the latch
and lift the battery cover to remove it. Then
remove the battery pack, as shown.
CAUTION: When inserting or replacing the
battery pack, please be sure the battery cover
latch is returned to the locked position. If the
latch is not properly locked, water may enter
the unit causing damage.
Power Switch
Charging Interface
Power Adapter
AC Outlet Power Contacts
Battery Pack
Snap
Battery Cover
Battery Pack
Power Contacts
Snap

MR240TM VHF Marine Two-Way Radio Instruction Manual
10
■ Flexible Antenna
1. To connect the supplied xable antenna to
the antenna connector, rotate it clockwise.
2. To remove the antenna, rotate it counter-
clockwise.
- NEVER carry the transceiver by the antenna
■ Belt Clip
Using the two supplied screws, attach the belt
clip to the back of the transceiver.
■ Hand Strap
Pass the hand strap through the loop on the
side of the transceiver as illustrated at right.
This facilitates carrying.

Copyright © 2015 RCA Communications Systems
11
MR240TM VHF Marine Two-Way Radio Instruction Manual
PANEL DESCRIPTION
PANEL DESCRIPTION
1. PTT (Push To Talk)
- Hold down to transmit; release to receive.
2. 16/C (Channel 16/Call Channel)
- Push to select channel 16.
- Hold for 1 second to select the call channel.
(factory default: channel 9 )
- When the call channel is selected, hold for 3
seconds to enter the call channel programming
mode.
- While in the set mode, push to return to the
normal operation mode.
3. FAV/TAG
- PUSH to sequentially select your favorite
channels in a channel group.
- Hold for 1 second to set or clear the TAG for
Speaker
Microphone
Display

MR240TM VHF Marine Two-Way Radio Instruction Manual
12
6. POWER [ ]
- Push to turn power ON or OFF.
7. VOL./SQL/MONI
- Push to enter the volume adjustment mode
or the squelch adjustment mode.
- Hold for 1 second to activate the Monitor
function.
- While holding this key, hold [ ] key to
turn ON the power and enter the Set Mode
function.
- While in the Set Mode, push to select an item.
- While holding this key, push[▼]to turn ON
the Volume Mute function .
Do the same steps again to turn OFF the
function.
the display channel.
- While holding, turn ON the power to clear
or set all TAG channels in the selected channel
group.
4. SCAN/DUAL
- Push to start or stop a normal or priority scan.
- Hold for 1 second to enter the Dual/Tri-watch
mode.
- Push to exit the Dual/Tri-watch mode
- Hold this key and HI/LO key for 1 second,
to activate the WaterClean function. (See page
22 for AutoQuake information.)
5. [HI/LO]/[ ]
- Push to select the high or low output power.
- Hold for 1 second to turn the Lock function
ON or OFF.

Copyright © 2015 RCA Communications Systems
13
MR240TM VHF Marine Two-Way Radio Instruction Manual
10. ANTENNA CONNECTOR
- Connect the supplied antenna here.
11. [DC 6V]
- Connect the adaptor or optional power cable
here.
NOTE: Reattach the power jack cap when the
adaptor is not connected. Otherwise, water
may be able to get into the transceiver.
DISPL AY
- While holding this key, push [▲] to turn ON
the Volume Loud function.
Do the same steps again to turn OFF the
function.
8. [▲]/[▼]UP/DOWN
- Push to select an operation channel.
- While in the Set Mode, push to select the
setting or value of an item.
- Push to check TAG channels or change
scanning direction during a scan.
9. [CH]
- Hold for 1 second, one or more times, to
select a USA, International, or Canada channel
group.
- Push to return to the previous channel before
selecting Channel 16 or the calling channel.

MR240TM VHF Marine Two-Way Radio Instruction Manual
14
Icon Description
Appears when International
channel group is selected
Appears when Canadian channel
group is selected
Appears when receiving a
signal or when the squelch
opens
Blinks while monitoring
Appears when a TAG
channel is selected
Appears when the call
channel is selected
Appears when the radio is charging
Battery Indicator, remaining
battery power
Blinks while scanning
Appears while the lock function is
activated
Icon Description
Transmit Indicator. Appears
while transmitting
Low Power indicator
1) “LOW” appears when
low power is selected
2) “LOW” blinks when switching
forced low power mode
because of a high temperature
error or low voltage
Weather Channel and Weather
Alert Indicator “WX” appears
when the weather channel
group is selected. “WX ALT”
appears while the weather alert
function is activated; icon blinks
when an alert tone is received.
Appears while working
in ATIS Channel
Appears when U.S.A.
channel group is selected

Copyright © 2015 RCA Communications Systems
15
MR240TM VHF Marine Two-Way Radio Instruction Manual
BASIC OPERATION
TURN ON/OFF
1. Press [ ] for 1 second to turn ON.
2. Press again [ ] for 1 second to turn OFF.
ADJUSTING THE VOLUME LEVEL
The volume level can be adjusted using [VOL/
SQL] and [▼] or [▲].
1. Push [VOL/SQL] once to enter the volume
adjustment mode. Then press [▼] or [▲] to
adjust the volume level.
- The ”VOL” icon starts blinking.
- The transceiver has 31 volume levels and OFF.
- When no key operation is performed for 5
Icon Description
Appears when a duplex
channel is selected
Appears when in Dualwatch mode.
Appears when Tri-watch mode.
Channel number readout.
Indicates the selected
operating channel number
In Set Mode, indicates the
selected condition
In Dual/Tri-watch mode shows
CH16 during priority scan.
Appears while volume selecting
Appears while SQL selecting
Appears while mode selecting
Shows squelch level
Shows volume level
Blinks when the volume
mute is activated

MR240TM VHF Marine Two-Way Radio Instruction Manual
16
seconds, the transceiver returns to the normal
mode.
2. Push [VOL/SQL] twice to exit the volume
adjustment model.
ADJUSTING THE SQUELCH LEVEL
The squelch level can be adjusted using [VOL/
SQL] and [▼] or [▲] in the order to properly
receive signals. Be sure to adjust the squelch
when scanning channels to ensure proper
reception.
1. Push [VOL/SQL] twice to enter the squelch
adjustment mode, then push [▼] or [▲] to
adjust the squelch level.
- The ”SQL” icon starts blinking.
- The transceiver has 11 squelch levels: OP is
completely open; 10 is tight squelch; 1 is
loose squelch.
- If a squelch adjustment is not made within 5
seconds, the transceiver returns to the normal
mode.
2. Push [VOL/SQL] again to exit the squelch
adjustment mode.
RECEIVING AND TRANSMITTING
■ Receiving
1. Set the volume levels by push [VOL/SQL],
[▼] or [▲].
2. Set the squelch levels by [▼] or [▲].
- When receiving a signal, [ ] appears and
audio is heard from the speaker.
- To conserve battery power, the transceiver’s
“Power Save” function automatically activates
when no signal is received for 5 seconds.

Copyright © 2015 RCA Communications Systems
17
MR240TM VHF Marine Two-Way Radio Instruction Manual
■ Transmitting
1. Push [Hi/Lo] to select output power.
- “LOW” appears when low power is selected.
- Choose low power for short range
communications; choose high power for
longer distance communications.
- Some channels work in low power mode
only.
2. Hold down [PTT] to transmit, then speak
into the microphone.
- “TX” appears.
- Channel 70 cannot be used for transmission.
3. Release [PTT] to receive.
NOTE: Transmitting without an antenna can
damage the transceiver.
- To maximize the readability of your transmitted
signal, pause for a second after pushing [PTT]
hold the microphone 2” - 4” (5 - 10cm) from
your mouth and speak into the microphone at
a normal voice level.
CHANNEL GROUP SELECTER
This transceiver is pre-programmed with
U.S.A., International, Canadian channels.
Choose the appropriate channel groups for
your operating area.
1. Push [CH] to select a regular channel.
2. Hold down [CH] for 1 second, one or more
times,to select the desired channel group.
- The selectable channel groups are different,
depending on your operating area.

MR240TM VHF Marine Two-Way Radio Instruction Manual
18
3. Push [▼] or [▲] to select a channel.
- “A” appears when a simplex channel is
selected.
CHANNEL SELECTION
■ Channel 16
Channel 16 is the distress and safety channel. It
used for establishing initial contact with an aid
station and for emergency communications.
Channel 16 is monitored in both Dualwatch
and Tri-watch mode. When not broadcasting,
you must always monitor Channel 16.
1. Push [16/C] momentarily to select Channel
16.
2. Push [CH] to return to the channel used
before Channel 16, or push [▼] or [▲] to
select a channel.
■ Channel 9 (Call Channel)
Each regular channel group has separate
leisure-use call channels. The Call Channel is
monitored during Tri-watch. The Call Channels
can be programmed and are used to store
your most often used channel in each channel
International Channel Group
U.S. Channel Group Canadian Channel Group

Copyright © 2015 RCA Communications Systems
19
MR240TM VHF Marine Two-Way Radio Instruction Manual
1. Push [CH] to select weather channel or
normal channel.
- Appears “WX” when weather channel
selected.
- Appears “WX ALT” when turned on weather
alert function.
2. Push [▼] or [▲] to select channel.
CALL CHANNEL PROGRAMMING
Call Channel is used to access the channels you
use most often. Channel 9 is the Call Channel
default. However, you can set up Call Channels
in each channel group for quick recall of the
channels you use most often.
group for quick recall.
1. Push and hold 16/C for 1.5 second to select
the Call Channel of the selected channel group.
“CALL” and call channel number appears.
2. Push [CH] to return to return to the previous
channel, or push [▼] or [▲] to select a channel.
■ Weather Channels
The MR240TM transceiver has 10 pre-
programmed weather channels. There are
used for monitoring weather broadcasts. The
transceiver can automatically detect a weather
alert tone on the selected weather channel
while receiving on another channel or while
scanning.

MR240TM VHF Marine Two-Way Radio Instruction Manual
20
1. Push [CH] to select a desired channel group
to be programmed
2. Push [16/C] for 1 second to select a Call
Channel.
3. Push [16/C] for 3 seconds until you hear a
beep and a “DUDU” tone. After the tone, you
can begin entering the channels you want in
Call Channel Programming.
- Channel number blinks.
4. Push [▼] or [▲] to select desired call channel
5. Push [16/C] to conrm and save. Push [CH]
cancel and exit.
MONITOR FUNCTION
The monitor function opens the squelch.
- Push [MONI] to active monitor function.
- “BUSY” will blink and sound while monitor
function actives.
Dual-Band Duty
Other manuals for MR240
1
Table of contents
Other RCA Two-way Radio manuals

RCA
RCA RDR23 0 Series User manual

RCA
RCA RDR2300V User manual

RCA
RCA RDR2500VX User manual

RCA
RCA PRODIGI RDR42 Series User manual

RCA
RCA Prodigi RDR1520 Series User manual

RCA
RCA RDR430 Series User manual

RCA
RCA RDR2600V User manual

RCA
RCA RDR2000 Series User manual

RCA
RCA Alpha One APR100 Series User manual

RCA
RCA Prodigi RDR1520 Series User manual