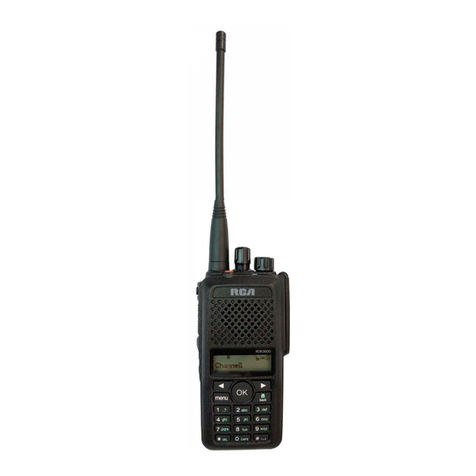
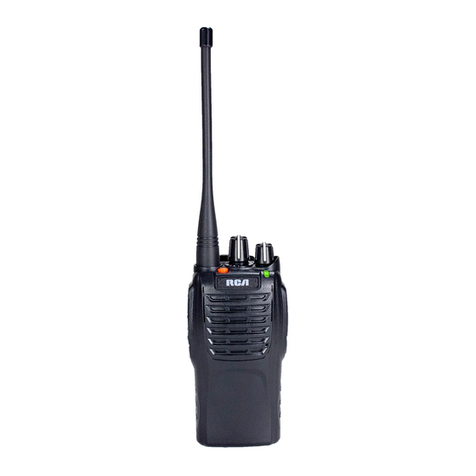
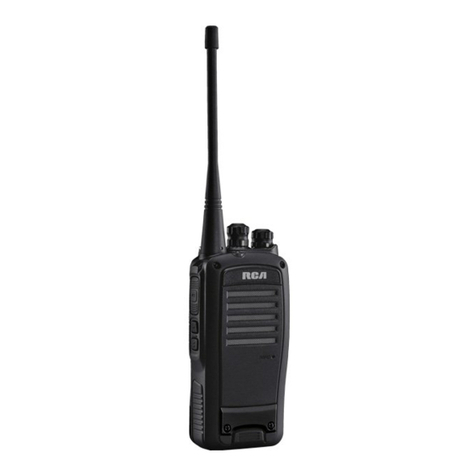
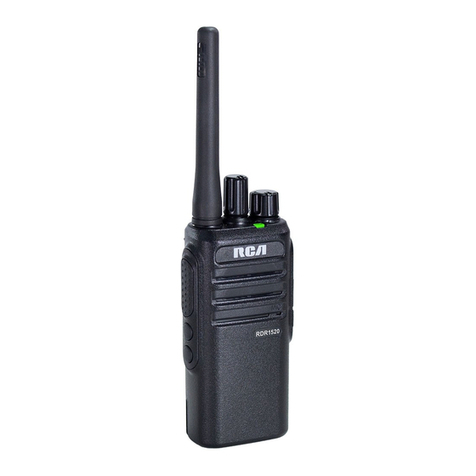
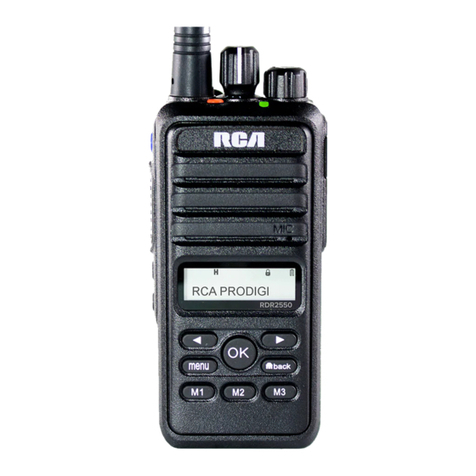
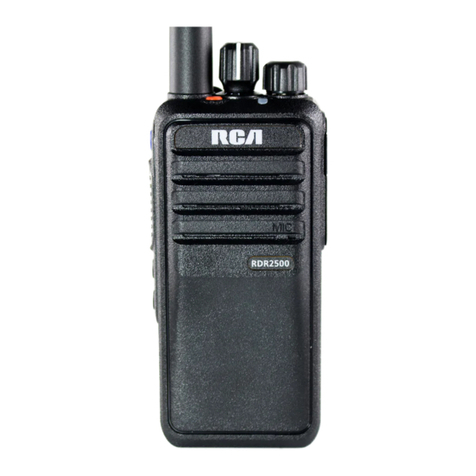
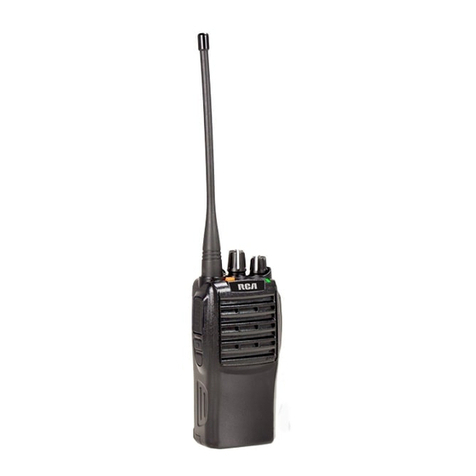
RCA PRODIGI RDR42 Series User manual

1
Copyright © 2020 RCA Communications Systems www.RCACommunicationsSystems.com
Communications Systems
RDR42x0 Professional Digital
Two-Way Radios
INSTRUCTION MANUAL
Congratulations and Thank You for selecting
the PRODIGI RDR42x0 Series portable two-way
radio from RCA Communications Systems
- The most trusted name in radio!
Our newest digital series professional communications products
based on DMR technology establishes a benchmark in premium
digital two-way radio equipment, made to perform flawlessly under the
most demanding commercial conditions. Cutting edge design, high-
end professional grade materials and components, simple operation
and superior assembly quality: RCA Communications Systems has
it all, including our exclusive no-nonsense, three-year “Warranty
Protection Program,” one of the most comprehensive warranties in the
communications industry.
To ensure you achieve maximum performance from your RDR4220,
RDR4250, or RDR4280 radio, please be sure to carefully read this
manual.
MODELS COVERED IN THIS MANUAL:
• RDR4220V VHF Two-Way Radio
• RDR4220U UHF Two-Way Radio
• RDR4250V VHF Two-Way Radio
• RDR4250U UHF Two-Way Radio
• RDR4280V VHF Two-Way Radio
• RDR4280U UHF Two-Way Radio
YEAR
WARRANTY
PROTECTION PROGRAM
CONTENTS:
Product Inspection..........2
RCA RDR42x0 Series Overview..........2
Preparing Radio For Initial Use Setting Up the Charger..........3
Battery Information
Charging the Battery..........3
Battery Storage..........3
Attaching the Battery..........3
Attaching / Removing the Antenna..........3
Attaching / Removing the Belt Clip..........4
Connecting Audio Accessories..........4
Turn On/O the Radio..........4
Adjusting the Volume..........4
Select A Channel..........4
Programmable Buttons..........4
Push-To-Talk (PTT) Button..........5
Switching Between Analog/Digital Mode..........5
Accessing the Programmed Functions..........5
Function Keypad..........5
Radio Keypad (RDR4280 only)..........5
Operational Status Indicators..........5
Display Icons..........6
Call Icons..........6
LED Indicator..........6
Audio Tones..........6
Making and Receiving Calls
Selecting a Zone..........7
Selecting a Channel, Subscriber ID or Group ID..........7
Receiving and Responding to a Radio Call..........7
Receiving and responding to an Group Call..........7
Receiving and responding to an Private Call..........7
Receiving an All Call..........7
Monitoring A Channel (Analog)..........7
Making a Radio Call..........7
Making a Call
Making a Group Call..........7
Making an All Call..........8
Making a Private Call..........8
Making Group / Private Call with One Touch Call Function..........8
Emergency Operation..........9
Initiating & Responding to Emergency Alarm..........9
Exiting Emergency Mode..........9
Advanced Features
Radio Check..........9
Initiating Remote Monitor (RDR4250 / RDR4280)..........9
Contacts Setting (RDR4250 / RDR4280)..........10
Group Call from Contacts (RDR4250 / RDR4280)..........10
Private Call from Contacts (RDR4250 / RDR4280)..........10
Alert Tone Settings
Activating/Deactivating Call Alert Tones Private Calls (RDR4250 /
RDR4280)..........10
Activating/Deactivating Call Alert Tones Group Calls (RDR4250 /
RDR4280)..........10
Activating/Deactivating Call Alert Tones Alert Calls (RDR4250 /
RDR4280)..........10
Activating/Deactivating Call Alert Tones Text Messages (RDR4250 /
RDR4280)..........10
Call History Features (RDR4250 / RDR4280)
Accessing the Call History..........11
Storing an Alias or ID from a Call List (RDR4250 / RDR4280)..........11
Deleting a Call from Call List..........11
Call Alert (RDR4250 / RDR4280)..........11
Receiving and Responding to a Call Alert..........11
Making a Call Alert from the Contact List (RDR4250 /
RDR4280)..........11
Text Messages Features (RDR4250 / RDR4280)
Navigating To Messages..........11
Receiving Text Messages..........11
Managing Received Text Messages..........11
Viewing a Text Message from the Inbox..........11
Writing and Sending Text Messages (RDR4280)..........12
Sending a Quick Text Message (RDR4250 / RDR4280)..........12
Managing Failed-to-Send Text Messages..........12
Resending a Text Message..........12
Forwarding a Text Message..........12
Managing Sent Text Message..........12
Viewing Sent Text Messages..........12
Deleting All Sent Text Messages from Sent Items..........13
Replying to a Text Message from the Inbox..........13
Deleting All Text Message from the Inbox..........13
Encryption
Making and Encrypted Call..........13
Turning Encryption On/O..........14
Dual Tone Multi Frequency (DTMF)..........14
Radio Enable/Disable (RDR4250 / RDR4280)..........14
Scanning
Starting and Stopping Scan..........14
Responding to a Scan..........15
Scan Lists..........15
Viewing an Entry in the Scan List (RDR4250 / RDR4280)..........15
Deleting a Nuisance Channel..........15
Restoring a Nuisance Channel..........15
Radio Settings (RDR4250 / RDR4280)
Keypad Locked and Keypad Unlocked..........15
Turning Keypad Tones On or O..........15
Setting the Power Level..........15
Controlling the Display Backlight (RDR4250 / RDR4280)..........16
Controlling the Display Brightness (RDR4250 / RDR4280)..........16
Switching Day/Night Mode..........16
Channel Display (RDR4250 / RDR4280)..........16
Man Down..........16
Lone Worker..........16
Squelch Level (Analog Mode Only)..........17
Tones/Alerts..........17
Turning the Radios Tones/Alerts On/O..........17
Turning the LED Indicator On/O (RDR4250 / RDR4280)..........17
Radio PIN Lock (RDR4250 / RDR4280)..........18
Turning Voice Operation Transmission (VOX) Feature On/O..........18
Talkaround..........18
Function Keys (RDR4250 / RDR4280)..........18
Keypad Mode (RDR4250 / RDR4280)..........19
Vibration (Non I.S.(Intrinsically Safe)Modes Only)..........19
GPS Settings (Digital Mode Only)..........19
General Radio Information (RDR4250 / RDR4280)..........19
CARE AND CLEANING..........20
TROUBLESHOOTING..........20
CONTENTS: (continued)

2
Copyright © 2020 RCA Communications Systems www.RCACommunicationsSystems.com
Communications Systems
RDR42x0 Professional Digital
Two-Way Radios
INSTRUCTION MANUAL
PRODUCT INSPECTION
Prior to unpacking the RDR42x0 series portable radio, please inspect
the packaging for signs of damage and report any damage or missing
components immediately to your RCA Communications System Sales
and Service Center. Every RDR42x0 series portable radios should
come with the following items:
Item Qty.
Handheld Radio Unit 1
2300 mAh Li-Ion Battery 1
Whip Antenna 1
Heavy Duty Belt Clip 1
Desktop Rapid Charger Base 1
Power Supply for Charger Base 1
Wrist Strap 1
2300 mAh
Li-Ion Battery
Desktop Rapid
Charger Base
Power Supply for
Charger Base
Heavy Duty
Belt Clip
VHF UHF
Whip Antenna
RDR4220
Handheld Radio
RDR4280
Handheld Radio
RDR4250
Handheld Radio
1Side Button 1
(Programmable) 7Channel Knob 13 2-Way Navigation
Button 19 Antenna
2Push-To-Talk Button
(PTT) 8Top Button
(Programmable) 14 Return / Home Button 20 Battery
3Side Button 2
(Programmable) 9Speaker 15 Front Button (Programmable)
4Side Button 3
(Programmable) 10 Display (RDR4250 / RDR4280) 16 Keypad
5LED Indicator 11 OK / Menu Button 17 Microphone
6On/O/ Volume Knob 12 Front Button (Programmable) 18 Accessory Connector
RDR4220 RDR4250 RDR4280
1
2
3
4
5
6 7
9
8
18
19
17
78
9
10
11
12
13
14
15
5
6
18
19
17
7
9
10
11
12
13
14
15
16
17
8
5
6
19
18
20

3
Copyright © 2020 RCA Communications Systems www.RCACommunicationsSystems.com
Communications Systems
RDR42x0 Professional Digital
Two-Way Radios
INSTRUCTION MANUAL
Preparing Your Radio for Initial Use Setting Up Your Charger
1. Plug the adapter’s AC connector into the AC outlet socket. (see
image A)
2. Plug the adapter’s DC connector into the DC socket on the back of
the charger. (see image B)
3. Place the radio with the battery attached, or the battery alone, in the
charger. (see image C)
4. Make sure the battery contact is touching the charging terminals.
The charging process begins when the red LED light illuminates.
5. The green LED light will illuminate approximately two hours later,
indicating the battery is fully charged.
Battery Storage
1. Fully charge the battery before storing it for an extended period of
time to avoid battery damage due to over-discharge.
2. Recharge a battery after three months storage to avoid reduced
battery capacity due to over-discharge.
3. When storing a battery, keep it in a dry place at room temperature.
Attaching/ Removing the Battery
1. To install the battery, please place it into the groove on
the top of the radio chassis about 5mm away from latch.
If the radio has the belt clip installed, you will have to press one side
of the clip to raise it and then slide the battery in proper position.
Press the battery with your fingers and push the battery until you
hear a latch click. The battery is now installed. (See Figure 1)
2. If you want to remove the battery from the radio, first press the
battery latch located on the bottom of the radio, and then press down
to slide the battery about 5mm to release the latch. (See Figure 2)
Attaching the Antenna
Screw the antenna into the connector at the top of the radio by holding
the bottom of the antenna and turn it clockwise until secure. (See
Figure 3)
Battery Information
Charging the Battery
Your radio is powered by a Lithium-Ion (Lilon) battery. To avoid damage
and comply with warranty terms, charge the battery using only an
original RCA charger, exactly as described in the charger user guide.
When the charger’s LED illuminates red, it is an indication that the
battery is being correctly charged. When the LED illuminates green,
the battery charge is complete.
Note: Charge a new battery 12 to 14 hours before initial use for best
performance. Maximum battery capacity is normally achieved after
two or three full charge / discharge cycles.
Caution: To reduce the risk of injury, use only batteries specified by
RCA Communications Systems.
– To avoid risk of personal injury, do not dispose of batteries in a fire. -
Dispose of batteries according to local recycling regulations. Do not
dispose as household waste.
– Never attempt to disassemble the battery.
– When charging a battery, keep it at a temperature between 41°F ~
104°F (5°C ~ 40°C) to ensure a full charge. Temperatures outside
this range significantly reduce battery life. The operating time (talk-
time and standby time) is noticeably shorter than normal, replace
the battery.
– Before charging a battery attached to a radio, turn the radio o to
ensure a full charge. Never leave a radio on while in the charger, as
it can damage both the battery and the radio; the charger is not a
radio stand.
Image A Image B
Image C
– Do not cut o the power supply or remove battery while charging.
– Never charge a battery that is wet. Dry it with soft cloth prior
charging.
– The battery will eventually weaken. When the operating time (talk-
time and standby time) becomes noticeably shorter than normal,
replace the battery.
– Battery performance greatly decreases at temperatures below -4°F
(-20°C). Having a spare battery is always necessary in extremely
cold environments. A cold battery may work again when it returns to
room temperature, so keep it for later use.
– Dust on the battery contact may cause the battery not to work or
charge properly. Use a clean dry cloth to wipe it before attaching
the battery to the radio.
– Batteries with damaged contacts can be extremely dangerous. Any
battery with damage to one or more contacts should be replaced
immediately and not used under any circumstances.
3
1 2

4
Copyright © 2020 RCA Communications Systems www.RCACommunicationsSystems.com
Communications Systems
RDR42x0 Professional Digital
Two-Way Radios
INSTRUCTION MANUAL
Attaching / Removing the Belt Clip
Use the 2 screws (M2.5x8.0) supplied with the radio and insert these
screws through the holes in the radio clip and into the holes in the
aluminum case. If you want to remove the clip from the radio, just
unscrew them, and remove the clip. You can put the screws back into
the radio to make sure you do not lose them. (See Figure 4)
Programmable Buttons
Your RCA Communications Systems Dealer can program the
programmable buttons as shortcuts to radio functions or preset
channels/groups depending on the duration of a button press:
Short Press - Press and release quickly.
Long Press - Press and hold for the programmed duration (between 1
seconds and 3.75 seconds).
Connecting Audio Accessories
Open the cover of the connector for external speaker/MIC, and
then insert the plug of the external speaker or microphone onto the
connector socket of the radio. When screwing the accessory plug,
make sure it is properly aligned (straight) to ensure the right connection
to the connector of the radio. (See Figure 5)
All Alert Tones On/O - Toggles all tones and alerts on or o.
Emergency On - Initiates an emergency alarm or call.
Emergency O - Cancels an emergency alarm or call.
Nuisance Delete - Temporarily removes an unwanted channel, except the
Selected Channel, from the scan list. The Selected Channel refers to the
user’s selected zone/channel combination from which scan is initiated.
High/Low Transmit Power - Toggles transmit power level between high
and low.
Monitor On/O - Monitors a selected channel for activity.
One Touch Access - Directly initiates a predefined Private or Group Call,
a Call Alert or a Quick Text message.
Scan On/O - Toggles scan on or o. Tight/Normal Squelch -
Toggles squelch level between tight and normal squelch levels.
Privacy On/O - Toggles privacy (basic voice encryption) on or o.
VOX On/O - Toggles Voice Activated Function on or o.
Lone Worker On/O - Toggles Lone Worker feature On or O, on per
channel basis.
Zone Toggle (RDR4220) - Toggles between Channel Zone 1 and Channel
Zone 2.
Battery Indicator (RDR4220) - Indicates battery charge level, low,
medium or high.
4
5
Turn On/O the Radio
1. Rotate the On/O/Volume Control Knob clockwise until you hear a
click. The LED blinks orange and a brief tone sounds, indicating that
the power up test is successful. The RDR4250 & RDR4280 radio
displays “RCA RDR42X0 DMR Radio” when powered up.
2. To turn o the radio, rotate the knob counterclockwise until you hear
a click.
Note: There is no power up tone if the radio tones/alerts function is
disabled. If your radio does not power up, check your battery. Make
sure that it is charged and properly attached. If your radio still does not
power up, contact your RCA Communications Systems dealer.
Adjusting the Volume
To increase the volume, turn the On/O/ Volume Control Knob
clockwise. To decrease the volume, turn this knob counterclockwise.
Select A Channel
Rotate the Channel Selector Knob to the desired channel. or to switch
between channels. Channels can be configured as analog or digital
channel. Your radio has features that are available in both analog and digital
mode. The minor dierences in the way each feature works does not aect
the performance of your radio.
Programmable Functions
Adjust Power Level Nuisance Delete
Adjust Squelch Level One Touch Call 1
All Alert Tones On/O One Touch Call 2
Accessory Link Audio Switch One Touch Call 3
Channel Down One Touch Call 4
Channel Knob Disable One Touch Call 5
Channel Up One Touch Call 6
Contact List Preset Channel1
Emergency Alarm Ack Preset Channel2
Emergency O Preset Channel3
Emergency On Preset Channel4
Encryption On/O Record Delete
Favorite Contact List Record Play/Play Next/Play Stop
Group Call Alert Repeater/Talk Around
Home Screen Scan On/O
Keypad Lock Squelch On/O
Lone Worker On/O Surveillance/Covert Mode
ManDown On/O VOX On/O
Manual Dial For Private Zone Down
Momentary Monitor Zone Toggle (RDR4220)
Monitor Zone Up (RDR4220)
None

5
Copyright © 2020 RCA Communications Systems www.RCACommunicationsSystems.com
Communications Systems
RDR42x0 Professional Digital
Two-Way Radios
INSTRUCTION MANUAL
Radio Keypad (RDR4280 only)
You can use the alphanumeric keypad to access the radio features. You can
also use the keypad to enter subscriber numbers or IDs, and text messages.
Note: Some characters require that you press a key multiple times. The
table shows the number of times a key needs to be pressed to generate the
required character.
Operational Status Indicators
Your radio indicates its operational status through the following:
• Display Icons (RDR4250 / RDR4280)
• Call Icons (RDR4250 / RDR4280)
• Sent Item Icons (RDR4250 / RDR4280)
• LED Indicator (Entire RDR42x0 Series)
• Audio Tones (Entire RDR42x0 Series)
Push-To-Talk (PTT) Button
The PTT button on the side of the radio has two main functions:
-Press and hold down PTT button to initiate and call and talk.
Release the PTT button to listen. The microphone is activated
when the PTT button is pressed.
-If a call is in progress, the PTT button allows the radio to transmit to
the other radios that are part of the call.
Note: If the Talk Permit Tone is enabled, wait until the short alert tone
ends before talking.
During a call, if the Channel Free Indication feature is enabled on your
radio (programmed by your RCA Communications Systems Dealer),
you will hear a short alert tone the moment the target radio (the radio
that is receiving your call) releases the PTT button, indicating the
channel is free for you to respond. You will also hear the Channel Free
Indication tone if your call is interrupted, for example, when the radio
receives an Emergency Call.
Switching Between Analog/Digital Mode
Each channel in your radio can be programmed as an analog channel
or a digital channel. Use the Channel Selector Knob to switch between
an analog or a digital channel.
Note: When switching from digital to analog, certain features of the radio
become unavailable.
Accessing the Programmed Functions
You can access various radio functions one of the following ways: A short
or long press of the relevant programmable buttons. OR -
-To access the main menu, press the [
OK
] button. To toggle through
the menu options, press “ ” or “ ”.
-To select a function or access a sub-menu, press the [
OK
] button.
-To go back one menu level, or return to the previous screen, press
the [
BAC K
] button.
Note: Your radio will exit the menu after a period of inactivity and returns
to Main Menu.
OK BACK
Key 1 2 3 4 5 6 7 8 9 10 11 12 13
1,.? 1 . , ? ! @ & ‘ % - : * #
2abc A B C 2
3def D E F 3
4ghi G H I 4
5jkl J K L 5
6mno M N O 6
7pqrs P Q R S 7
8tuv T U V 8
9wxyz W X Y Z 9
0CAPS
0 NOTE: Press to enter “0” and long press to
activate the CAPS lock. Another long press to
turn o the CAPS lock.
*DEL * or Del NOTE: Press during text entry to delete
a character.
#
˽
# or Space NOTE: Press during text entry to
insert a space.
Number of Times Key is Pressed

6
Copyright © 2020 RCA Communications Systems www.RCACommunicationsSystems.com
Communications Systems
RDR42x0 Professional Digital
Two-Way Radios
INSTRUCTION MANUAL
Display Icons
The LCD display shows radio status, text entries, and menu entries.
The following are icons that appear on the radio’s display.
No Signal
The number of bars displayed represents the radio
signal strength and is only displayed while the radio
is in receiving mode.
Received Signal
Strength Indicator
(RSSI)
The number of bars displayed represents the radio
signal strength. Four bars indicate the strongest
signal. This icon is only displayed while receiving.
Battery The number of bars (0 - 4) shown indicates the
charge remaining in the battery.
Accessory Link The Accessory Link feature is enabled but there is
no remote Accessory Link device connected.
Accessory Link
Connected
The Accessory Link feature is enabled. The icon
stays lit when one or more remote Accessory Link
devices are connected.
Scanning Scan land on Scan feature is enabled.
Encryption Enable The Encryption feature is enabled.
GPS Available The GPS feature is enabled. The icon stays lit when
a position fix is available.
GPS Not Available
/ Out of Range
The GPS feature is enabled. The icon stays lit when
a position fix is available.
Accessories Con-
nected Accessory Connected
L H/ Power Level Radio is set at Low/High power.
DM Direct Mode Talk around mode.
RM Repeater Mode Repeater mode
Unread Message Unread Message
Missed Call Missed Call
VOX Enable VOX Enable
Speaker Open Speaker Open
Call Icons
The following icons appear on the radio’s display during a call and in the
Contacts list to indicate ID type.
Sent Items Icons
The following icons appear at the top right corner of the radio’s display
in the Sent Items folder.
Switch Input Method
Long press # key to switch input method between,
LED Indicator
The LED indicator shows the operational status of your radio.
Audio Tones
Alert tones provide you with audible indications of the radio’s status or
the radio’s response to data received.
Continuous Tone - A monotone sound. Sounds continuously until
termination.
Periodic Tone - Sounds periodically depending on the duration set by
the radio.
Repetitive Tone - A single tone that repeats itself until it is terminated
by the user.
Momentary Tone - Sounds only once for a short period of time defined
by the radio.
Lowercase Uppercase Digit
The text message to a subscriber alias or ID’s pending transmission,
followed by waiting for acknowledgment. Or The text message to a
group alias or ID is pending transmission.
Blinking Red – Radio is at low battery condition
Solid Orange – Powering up
Solid Green – Radio is receiving, or detecting activity over the air.
Solid Red – Radio is transmitting
Blinking Orange – Radio is scanning, or in selective call, or emergency
state
Note: When the LED is solid green, it indicates the radio detects activity over
the air. Due to the nature of the digital protocol, this activity may or may not
aect the radio’s programmed channel.
Accessory Link Device Found List
Private Call - Indicates a Private Call in progress. In the
Contacts list, it indicates a subscriber alias (name) or ID
(number).
Sent Successfully
Group Call/All Call - Indicates a Group Call or All Call
in progress. In the Contacts list, it indicates a group
alias(name) or ID (number).
Send Failed
Accessory Link Audio Device - Accessory Link-enabled
audio device, such as a headset.
abc
ABC
123
Battery indicator
Battery Usage Status Audio Indication (RDR4220 model) Display Indication (RDR4250/RDR4280)
Power ≤ 100% 4 Beeps
Power ≥ 80% 3 Beeps
Power ≥ 40% 2 Beeps
Power ≤ 40% 1 Beep
Power ≤ 10% Low Battery Beep Warning

7
Copyright © 2020 RCA Communications Systems www.RCACommunicationsSystems.com
Communications Systems
RDR42x0 Professional Digital
Two-Way Radios
INSTRUCTION MANUAL
Selecting a Channel, Subscriber ID or Group ID
Once the required zone is displayed (if your radio has multiple zones),
turn the programmed Channel Selector Knob to select the desired
channel, subscriber alias or ID, or group alias or ID.
Receiving and Responding to a Radio Call
Once the channel, Subscriber ID or Group ID is displayed, you can proceed
to receive and respond to calls. To decode an encrypted call, your radio
must have the same Encryption Key, or the same Key Value and Key ID (if
ARC4 encryption type is utilized) as the transmitting radio (the radio you
are receiving the call from).
Selecting a Zone
Zones are groups of channels.
RDR4220 has up to 32 channels split in 2 zones with a maximum of 16
channels per zone. RDR4250 and RDR4280 have up to 1000 channels
in a flexible zone setup with a maximum of 1000 channels per zone.
You may switch among zones using the Radio Menu (RDR4250 and
RDR4280 only), the programmable function keys or the Channel Knob
as programmed by your RCA Communications Systems dealer.
1. Press “ ” to access the menu.
2. Press “ ” or “ ” to navigate to the Zone menu.
3. Press “ ” to select the Zone menu.
4. Press “ ” or “ ” to navigate to the desired Zone.
5. Press “ ” to select the Zone.
Making and Receiving Calls
Receiving and Responding to a Group Call
To receive a Group Call, your radio must be configured with the Group
ID in the RX Group List on the channel you are receiving the call on. This
is programmed by your RCA Communications Systems Dealer. When
you receive a Group Call:
1. The LED blinks green.
2. Your radio unmutes and the incoming call sounds through the radio
speaker.
3. The Group Call icon appears on the display (RDR4250 and RDR480
only). The first text line shows the Caller Subscriber ID/Alias. The
second text line displays the Group Call ID/Alias.
4. To respond to the call, press the [PTT] button, the LED indicator
lights up red.
5. Hold the radio vertically 1 to 2 inches (2.5 to 5.0 cm) from your
mouth and then speak clearly into the microphone.
Note: If Talk Permit Function is enabled, wait for the Talk Permit Tone
to sound before speaking.
6. Release the [PTT] button to listen.
7. If there is no voice activity for a set period of time, the call ends.
Receiving and Responding to a Private Call
A Private Call is a direct call from one individual radio to another
individual radio. When you receive a Private Call:
1. The LED blinks green.
2. Your radio unmutes and the incoming call sounds through the radio
speaker.
3. The Private Call icon appears on the display (RDR4250 and RDR480
only). The first text line shows the Caller Subscriber ID/Alias.
4. To respond to the call, press the [PTT] button, the LED indicator
lights up red.
Receiving an All Call
An All Call is a call from an individual radio to every radio on the same
channel or a channel with the same frequency and color code as the
transmitting radio. It is used to make important announcements requiring
the attention of all radio users. When you receive an All Call:
1. The LED blinks green.
2. Your radio unmutes and the incoming call sounds through the radio
speaker.
3. The All Call icon appears on the display (RDR4250 and RDR480
only). The first text line shows the Caller ID/Alias. The second text
line displays the All Call ID/Alias.
4. Once the All Call ends, the radio returns to the previous screen
before receiving the call.
Note: You cannot respond to an All Call. The radio will stop receiving
the All Call if you switch to a dierent channel while receiving the call
Monitoring A Channel (Analog)
Use the Monitor feature to make sure a channel is clear before
transmitting by listening for activity on the channel.
1. Press the programmed Monitor function key and listen for activity.
The monitor icon appears on the display.
2. If you hear activity on the channel the channel is busy. If you hear
“white noise” on the channel the channel is free.
Making a Radio Call
Select a channel by using the channel selector knob and/or
the programmable function keys, as programmed by your RCA
Communications Systems dealer. After selecting a channel, you can make
a call to a Subscriber ID/Alias, or Group ID/Alias (other than the Group ID
already assigned as TX Contact on the channel) by using a programmed
One Touch Call function key, the contact list in the radio menu or a manual
dial.
Making a Call
Making a Group Call
To make a Group Call, your radio must be configured with the Group
ID, as a TX Contact on the channel (the Group ID of the group you are
transmitting to).
1. Turn the Channel Selector Knob to select the desired channel.
2. When on the desired channel, press the [PTT] button to make the
call, the LED indicator lights up red.
3. Hold the radio vertically 1 to 2 inches (2.5 to 5.0 cm) from your mouth
and then speak clearly into the microphone.
Note: If Talk Permit Function is enabled, wait for the Talk Permit Tone to
sound before speaking.
4. Release the [PTT] button to listen.
5. When the target radio responds, the LED lights up red.
6. If there is no voice activity for a predetermined period of time, the call
ends. The radio returns to the screen you were on prior to initiating
the call (RDRD4250 and RDR4280 only).
OK
OK
OK
5. Hold the radio vertically 1 to 2 inches (2.5 to 5.0 cm) from your
mouth and then speak clearly into the microphone.
Note: If Talk Permit Function is enabled, wait for the Talk Permit Tone
to sound before speaking.
6. Release the [PTT] button to listen.
7. If there is no voice activity for a set period of time, the call ends.

8
Copyright © 2020 RCA Communications Systems www.RCACommunicationsSystems.com
Communications Systems
RDR42x0 Professional Digital
Two-Way Radios
INSTRUCTION MANUAL
Making an All Call
An All Call is a call from an individual radio to every radio on the same
channel or a channel with the same frequency and color code as the
transmitting radio. It is used to make important announcements requiring
the attention of all radio users. Your radio must be programmed by your
RCA Communications Systems Dealer to allow you to use this feature.
To initiate an All Call:
1. Turn the Channel Selector Knob to select the designated All Call
channel with a preset All Call Group ID/Alias as TX Contact.
2. Press the [PTT] button to make the call. The LED lights up red.
3. Hold the radio vertically 1 to 2 inches (2.5 to 5.0 cm) from your mouth
and then speak clearly into the microphone.
Note: If Talk Permit Function is enabled, wait for the Talk Permit Tone to
sound before speaking.
4. Release the [PTT] button.
Or (RDRD4250 and RDR4280 only)
1. Turn the Channel Selector Knob to select the desired channel.
2. Press “ ” to access the menu.
3. Press “ ” or “ ” to navigate to the Contacts. Press “OK”.
4. Press “ ” to enter the Contacts List.
5. Press “ ” or “ ” to navigate to the All Call Group ID/Alias.
When highlighted, press the [PTT] button to make the call. The LED
lights up red.
6. Hold the radio vertically 1 to 2 inches (2.5 to 5.0 cm) from your mouth
and then speak clearly into the microphone.
Note: If Talk Permit Function is enabled, wait for the Talk Permit Tone to
sound before speaking.
7. Release the [PTT] button.
Note: Users cannot respond to an All Call.
Or (RDRD4250 and RDR4280 only)
1. Turn the Channel Selector Knob to select the desired channel.
2. Press “ ” to access the menu.
3. Press “ ” or “ ” to navigate to the Contacts. Press “OK”.
4. Press “ ” to enter the Contacts List.
5. Press “ ” or “ ” to navigate to the desired Group ID/Alias.
When highlighted, press the [PTT] button to make the call. The LED
lights up red.
6. Hold the radio vertically 1 to 2 inches (2.5 to 5.0 cm) from your mouth
and then speak clearly into the microphone.
Note: If Talk Permit Function is enabled, wait for the Talk Permit Tone to
sound before speaking.
7. Release the [PTT] button.
OK
OK
OK
OK
Making a Private Call
To make a Private Call, your radio must be configured with the Private
Subscriber ID, as a TX Contact on the channel (the Subscriber ID of the
radio you are transmitting to).
1. Turn the Channel Selector Knob to select the desired channel.
2. When on the desired channel, press the [PTT] button to make the
call, the LED indicator lights up red.
3. Hold the radio vertically 1 to 2 inches (2.5 to 5.0 cm) from your mouth
and then speak clearly into the microphone.
Note: If Talk Permit Function is enabled, wait for the Talk Permit Tone to
sound before speaking.
4. Release the [PTT] button to listen.
5. When the target radio responds, the LED lights up red.
6. If there is no voice activity for a predetermined period of time, the call
ends. The radio returns to the screen you were on prior to initiating
the call (RDRD4250 and RDR4280 only).
Or (RDRD4250 and RDR4280 only)
1. Turn the Channel Selector Knob to select the desired channel.
2. Press “ ” to access the menu.
3. Press “ ” or “ ” to navigate to the Contacts. Press “OK”.
4. Press “ ” to enter the Contacts List.
5. Press “ ” or “ ” to navigate to the desired Subscriber ID/
Alias. When highlighted, press the [PTT] button to make the call. The
LED lights up red.
6. Hold the radio vertically 1 to 2 inches (2.5 to 5.0 cm) from your mouth
and then speak clearly into the microphone.
Note: If Talk Permit Function is enabled, wait for the Talk Permit Tone to
sound before speaking.
7. Release the [PTT] button.
OK
OK
Making a Group or Private Call using One Touch Call Function
The One Touch Call allows you to make quick Group or Private Call
respectively to a predefined Group or Private Subscriber ID/Alias. This
feature can be assigned to a short or long programmable function key
press. You can only have one alias or ID assigned to a One Touch Call
programmable function key. Your radio can have multiple One Touch
Call programmable function keys programmed.
1. Press the programmed One Touch Call programmable function key.
2. Press the [PTT] button to make a call. The LED lights up red.
3. Hold the radio vertically 1 to 2 inches (2.5 to 5.0 cm) from your mouth
and then speak clearly into the microphone.
Note: If Talk Permit Function is enabled, wait for the Talk Permit Tone to
sound before speaking.
4. Release the [PTT] button to listen. When the target radio responds,
the LED blinks green.
5. If there is no voice activity for a predetermined period of time, the call
ends. The radio returns to the screen you were on prior to initiating
the call (RDRD4250 and RDR4280 only).

9
Copyright © 2020 RCA Communications Systems www.RCACommunicationsSystems.com
Communications Systems
RDR42x0 Professional Digital
Two-Way Radios
INSTRUCTION MANUAL
Emergency Operation
An Emergency Alarm is used to indicate a critical situation. Your radio
supports 3 Emergency Alarms:
• Emergency Alarm
• Emergency Alarm with Call
• Emergency Alarm with Voice to Follow
Each alarm has the following types:
• Regular: Radio transmits an alarm signal and shows audio and/or
visual indicators.
• Silent: Radio transmits an alarm signal without any audio or visual
indicators. There will be no response (call) from the target radio until
you press the PTT button to initiate the call.
• Silent with Voice: Radio transmits an alarm signal and is able to
receive an incoming call, without any audio or visual indicators, until
you press the [PTT] button to initiate, or respond to the call.
Note: Only one Emergency Alarm can be programmed per channel.
ADVANCED FEATURES
Radio Check
If enabled, this feature allows you to determine if another radio is
active in your radio system without disturbing the user of that radio.
No audible or visual notification is shown on the target radio. Only
RDR4250 and RDR4280 can initiate a Radio Check. To be able to
initiate a Radio Check, the feature must be enabled by your RCA
Communications Systems Dealer.
Note: This is a direct radio to radio feature and it is only applicable for
subscriber IDs/Aliases in digital mode.
Sending a Radio Check (RDR4250 and RDR4280 Only)
1. Press “ ” to access the menu.
2. Press “ ” to enter Contacts.
3. Press “ ” to enter Contacts List.
4. Press “ ” or “ ” to access the required subscriber ID/Alias
and press “ ” to select. Or press “ ” or “ ” to navigate
to Manual Dial, then press “ ” and input the subscriber ID.
5. Press “ ” to enter Control Services and press “ ” to select
Radio Check. Wait for acknowledgment.
6. The screen will display Radio Check, indicating that Radio Check is
in progress. The LED blinks in red.
7. If the target radio is active in the system, a tone sounds and the
display briefly shows Target Available. If the target radio is not
active in the system, a tone sounds and the display shows Target
Not Available.
Note: Do not press the “ ” key. Pressing the “ ” key while the
radio is waiting for acknowledgment will terminate all retries and exits
Radio Check.
Initiating Remote Monitor (RDR4250 & RDR4280 only)
If enabled, this feature allows you to remotely monitor (listen) another
radio in your radio system without disturbing the user of that radio.
No audible or visual notification is shown on the target radio. Only
RDR4250 and RDR4280 can initiate a Remote Monitor. To be able to
use the Radio Monitor feature, the feature must be enabled by your
RCA Communications Systems Dealer, in both the initiating radio and
the target radio.
1. Press “ ” to access the menu.
2. Press “ ” to enter Contacts.
3. Press “ ” to enter Contacts List.
4. Press “ ” or “ ” to access the required subscriber ID/Alias
and press “ ” to select. Or press “ ” or “ ” to navigate
to Manual Dial, then press “ ” and input the subscriber ID.
5. Press “ ” to enter Control Services and press “ ” to select
Remote Monitor. Wait for acknowledgment.
6. The screen will display Radio Monitor, indicating that Radio Monitor
is in progress. The LED blinks in red.
Initiating & Responding to Emergency Alarm
1. To initiate an Emergency Alarm, press the programmed Emergency
programmable function key (typically the top orange key). The LED
blinks in red.
2. (RDR4250 and RDR4280 Only) The display shows Sending Alarm,
the Group ID alternating with the Group Alias. The Emergency
Icon appears on the status bar of the display. When an Emergency
Alarm acknowledgment is received, an alert tone sounds and the
display shows Emergency Alarm Successful.
3. Depending on the settings programmed by your RCA
Communications Systems Dealer, you can press the [PTT] to talk
or your radio’s microphone is automatically activated, allowing you
to communicate with the target radios without pressing the [PTT]
button.
4. To Respond to an Emergency Alarm, press the “ ” key to stop
all Emergency Alarm received indications. Press [PTT] button to
initiate a call with the emergency initiating radio.
Exiting Emergency Mode
Your radio exits Emergency mode automatically when any of the
following occurs:
• Emergency Alarm acknowledgment is received (for Emergency
Alarm only).
• All retries to send the alarm have been exhausted.
• The Emergency is turned O by pressing the programmed
Emergency O programmable function key.
• Your radio is powered o
OK
BAC K BAC K
OK
OK
OK
OK
OK
OK
OK
OK
OK
OK
OK
OK
OK
OK

10
Copyright © 2020 RCA Communications Systems www.RCACommunicationsSystems.com
Communications Systems
RDR42x0 Professional Digital
Two-Way Radios
INSTRUCTION MANUAL
7. The display shows Remote Monitor Successful or Remote Monitor
Failed.
8. If successful, the radio will start receiving audio from the monitored
radio for the duration of the programmed Remote Monitor time.
Once the timer expires, the radio sounds an alert tone and the
display shows Remote Monitor Ended. If the Remote Monitor is
unsuccessful, the radio repeats the attempt until the programmed
number of retries expires.
Contacts Settings (RDR4250, RDR4280 only)
Contacts provides an address-book capability on your radio. Each
entry corresponds to an ID/Alias that you can use to initiate a call.
Additionally, each entry can be associated with one of 3 types of calls:
Group Call, Private Call, All Call. Each entry within Contacts displays
the following information:
• Call Type
• Call Alias
• Call ID
Note: You can add, delete, or edit contacts from the Digital Contacts
list.
Group Call from Contacts (RDR4250, RDR4280 only)
1. Press “ ” to access the menu.
2. Press “ ” to enter Contacts.
3. Press “ ” to enter Contacts List. All entries are alphabetically
sorted.
4. Press “ ” or “ ” to select the desired Group ID/Alias.
5. Press [PTT] button to make the call. The LED lights up red. The
display shows the Group Call Icon and the Group ID/Alias.
6. Hold the radio vertically 1 to 2 inches (2.5 to 5.0 cm) from your
mouth and then speak clearly into the microphone.
Note: If Talk Permit Function is enabled, wait for the Talk Permit Tone
to sound before speaking.
7. Release the [PTT] button to listen.
8. When any user in the group responds, the LED lights up solid
green. The display shows the Group Call Icon, the Group ID/Alias,
and the calling Subscriber ID/Alias.
9. If there is no voice activity for a programmed period of time, the
call ends.
Private Call from Contacts (RDR4250, RDR4280 only)
1. Press “ ” to access the menu.
2. Press “ ” to enter Contacts.
3. Press “ ” to enter Contacts List. All entries are alphabetically
sorted.
4. Press “ ” or “ ” to select the desired Subscriber ID/Alias.
5. Press [PTT] button to make the call. The LED lights up red. The
display shows the Private Call Icon and the Subscriber ID/Alias.
6. Hold the radio vertically 1 to 2 inches (2.5 to 5.0 cm) from your
mouth and then speak clearly into the microphone.
Note: If Talk Permit Function is enabled, wait for the Talk Permit Tone
to sound before speaking.
7. Release the [PTT] button to listen.
8. When any user in the group responds, the LED lights up solid green.
The display shows the Private Call Icon, the Subscriber ID/Alias.
Alert Tone Settings
Activating and Deactivating Call Alert Tones for Private Calls
(RDR4250 and RDR4280 only)
Turn on or o the call alert tones for a received Private Call.
1. Press “ ” to access the main menu.
2. Press “ ” or “ ” to navigate to Setting and press “ ” to
select.
3. Press “ ” or “ ” to navigate to Tone/Alerts and press “ ”
to select.
4. Press “ ” or “ ” to navigate to Individual Call and press
“ ” to select.
5. Press “ ” or “ ” to navigate to “On/O” and press “ ”
to select.
6. Press “ ” or “ ” to “On” or “O”.
Activating and Deactivating Call Alert Tones for Group Calls
(RDR4250 and RDR4280 only)
Turn on or o the call alert tones for a received Group Call.
1. Press “ ” to access the main menu.
2. Press “ ” or “ ” to navigate to Setting and press “ ” to
select.
3. Press “ ” or “ ” to navigate to Tone/Alerts and press “ ”
to select.
4. Press “ ” or “ ” to navigate to Talkgroup Call and press
“ ” to select.
5. Press “ ” or “ ” to navigate to “On/O” and press “ ”
to select.
6. Press “ ” or “ ” to “On” or “O”.
Activating and Deactivating Call Alert Tones for Alert Calls
(RDR4250 and RDR4280 only)
Turn on or o the call alert tones for a received Private Call.
1. Press “ ” to access the main menu.
2. Press “ ” or “ ” to navigate to Setting and press “ ” to
select.
3. Press “ ” or “ ” to navigate to Tone/Alerts and press “ ”
to select.
4. Press “ ” or “ ” to navigate to Alert Call and press “ ”
to select.
5. Press “ ” or “ ” to navigate to “On/O” and press “ ”
to select.
6. Press “ ” or “ ” to “On” or “O”.
Activating and Deactivating Call Alert Tones for Text Messages
(RDR4250 and RDR4280 only)
Turn on or o the call alert tones for a received Text Message.
1. Press “ ” to access the main menu.
2. Press “ ” or “ ” to navigate to Setting and press “ ” to
select.
3. Press “ ” or “ ” to navigate to Tone/Alerts and press “ ”
to select.
4. Press “ ” or “ ” to navigate to Text Message and press
“ ” to select.
5. Press “ ” or “ ” to navigate to “On/O” and press “ ”
to select.
6. Press “ ” or “ ” to “On” or “O”.
OK
OK
OK
OK
OK
OK
OK
OK
OK
OK
OK
OK
OK
OK
OK
OK
OK
OK
OK
OK
OK
OK
OK
OK
OK
OK
9. If there is no voice activity for a programmed period of time, the
call ends.

11
Copyright © 2020 RCA Communications Systems www.RCACommunicationsSystems.com
Communications Systems
RDR42x0 Professional Digital
Two-Way Radios
INSTRUCTION MANUAL
Call History Features (RDR4250 and RDR4280 Only)
Your radio keeps track of all recent outgoing, answered, and missed
Private Calls. Use the Call History feature to view and manage recent
calls. You can store a Subscriber ID from the Call History to Contacts
or Delete it. The Call History list types are Missed, Answered and
Outgoing.
Note: When the Call List contains no entries, the display shows No
Records.
Text Message Features (RDR4250 and RDR4280 Only)
Your radio is capable to receive and send data such as a text messages
from/to another radio. The maximum text message length is 70
characters.
Receiving Text Message
When your radio receives a message, the display shows the Message
Icon as a notification and the radio sounds an alert tone.
1. Press View to read the text message.
2. Press Ignore to disregard and read it later.
Managing Received Text Messages
Your radio can store the incoming text messages into an Inbox folder.
You can use the Inbox to manage your text messages. The following
options are supported:
• Reply
• Forward
• Detail
• Delete
Viewing a Text Message from the Inbox
1. Press “ ” to access Menu.
2. Press “ ” or “ ” to navigate to Messages and press “ ”
to select.
3. Press “ ” or “ ” to navigate to Inbox and press “ ” to
select.
4. Press “ ” or “ ” to navigate to Inbox List and press “ ”
to select, and press “ ” again to view the message.
5. Press “ ” to Reply, Forward, Detail or Delete the message.
Unread messages are indicated with a closed envelope icon. Read
messages are indicated with opened envelope icon.
Navigating to Messages
1. Press “ ” to access the menu.
2. Press “ ” or “ ” to navigate to Messages.
Note: Press Back button at any time to return to the previous screen.
Call Alert (RDR4250 and RDR4280 Only)
Call Alert enables you to alert a specific radio user to call you back
when they are able to do so. This feature is applicable for subscriber
IDs/Aliases only and is accessible through the menu via Contacts or
Manual Dial.
Accessing the Call History
Use the programmed Remote Monitor button.
1. Press “ ” to access the menu.
2. Press “ ” or “ ” to navigate to Call History and press “ ”
to select.
3. Press “ ” or “ ” to navigate to the desired list and press
“ ” to select. The most recent entry is displayed first.
4. Use the “ ” or “ ” button to scroll through the list.
5. After locating the desired contact, press [PTT] to initiate a call.
Storing an Alias or ID from a Call List (RDR4250 and RDR4280 Only)
1. When viewing an entry from the Call History list press “ ” to
select.
2. Press “ ” or “ ” to navigate to the desired subscriber ID,
press “ ” to select.
3. Press “ ” or “ ” to navigate to Save, press OK to select.
4. Use the keypad to Input the desired Subscriber Alias, press “ ”
to Save.
5. The display shows Contact Saved.
Note: You can store an ID without an Alias.
Receiving and Responding to a Call Alert
When you receive a Call Alert:
1. You hear a repetitive Alert Tone.
2. On the display you see Call Alert. To respond to the Call Alert
directly, Press [PTT] button to make the call. The LED lights up red.
The display shows the Private Call Icon and the Subscriber ID/Alias.
3. Hold the radio vertically 1 to 2 inches (2.5 to 5.0 cm) from your
mouth and then speak clearly into the microphone.
Note: If Talk Permit Function is enabled, wait for the Talk Permit Tone
to sound before speaking.
4. Release the [PTT] button to listen.
5. To view the Subscriber ID/Alias of the calling radio, press “ ”. To
ignore the Alert Call press “ ”.
Deleting a Call from a Call List
1. While viewing an entry from the Call Log list press “ ” to select.
2. Press “ ” or “ ” to navigate to Delete.
3. Press “ ” and press “ ” or “ ” to navigate to Yes and
press “ ”. The display shows Deleted.
OK
OK
OK
OK
OK
OK
OK
OK
OK
OK
BAC K
Making a Call Alert from the Contact List (RDR4250, RDR4280 only)
1. Press “ ” to access the menu.
2. Press “ ” or “ ” to navigate to Contacts and press “ ”
to select.
3. Press “ ” or “ ” to navigate to Contacts List and press
“ ” to select.
4. Press “ ” or “ ” to navigate to Control Services.
5. Press “ ” or “ ” to find the desired Subscriber ID/Alias and
press “ ” to select. For Manual Dial, press “ ” or “ ” to
the Manual Dial option and press “ ”. Use the keypad to input
the Subscriber ID and press “ ”.
6. Press “ ” or “ ” to navigate to Call Alert, then press “ ”.
7. The display shows Call Alert Icon.
8. The LED blinks in red when your radio is sending the Call Alert.
9. If the Call Alert acknowledgment is received, a tone sounds,
and the display shows Call Alert Successful. If the Call Alert
acknowledgment is not received, a tone sounds, and the display
shows Call Alert Failed.
OK
OK
OK
OK
OK
OK
OK
OK
OK
OK
OK
OK
OK
OK

12
Copyright © 2020 RCA Communications Systems www.RCACommunicationsSystems.com
Communications Systems
RDR42x0 Professional Digital
Two-Way Radios
INSTRUCTION MANUAL
Writing and Sending Text Message (RDR4280 Only)
1. Press “ ” to access the menu.
2. Press “ ” or “ ” to navigate to Message.
3. Press “ ” or “ ” to navigate to New Message and press
“ ” to select.
4. Use the keypad to type your message. Press “#” to enter space,
press “*” to delete the last character.
5. When done, press “ ” to send or save the text message.
6. Press “ ” or “ ” to navigate to Send and press “ ” to
select Send.
7. Press “ ” or “ ” to navigate to Contact List and press “ ”
to select it.
8. Press “ ” or “ ” to navigate to the desired Subscriber ID/
Alias or Group ID/Alias. Or Press “ ” or “ ” to navigate to
Manual Dial.
9. Press “ ” to send the text message.
10. If the message is sent successfully, a tone sounds, and the display
shows Success. If the message is not sent, a low tone sounds and
the display shows Failed. If the text message fails to send, the radio
returns to the home screen.
Sending a Quick Text Message (RDR4250 and RDR4280 Only)
Your radio stores a maximum of 50 Quick Text Messages as
programmed by your RCA Communications Systems Dealer. While
Quick Text Messages are predefined, you can edit each message
before sending it.
1. Press “ ” to access the menu.
2. Press “ ” or “ ” to navigate to Message.
3. Press “ ” or “ ” to navigate to Quick Text and press “ ”
to select.
4. Press “ ” or “ ” to find the desired Quick Text and press
“ ” to select.
5. Use the keypad to edit the message, if needed. Press “#” to enter
space, press “*” to delete a character.
6. Press “ ” when ready to send the message.
7. Press “ ” or “ ” to navigate to Send and press “ ” to
select Send.
8. Press “ ” or “ ” to navigate to Contact List and press “ ”
to select it.
9. Press “ ” or “ ” to navigate to the desired Subscriber ID/
Alias or Group ID/Alias. Or Press “ ” or “ ” to navigate to
Manual Dial.
10. Press “ ” to send the text message.
11. If the message is sent successfully, a tone sounds, and the display
shows Success. If the message is not sent, a low tone sounds, and
the display shows Failed. If the text message fails to send, the radio
returns to the home screen.
Note: Your RCA Communications Systems Dealer can program a
One Touch Access programmable function key to send a Quick Text
Message to a predefined Subscriber ID/Alias or Group ID/Alias.
Managing Sent Text Message
Once a message is sent to another radio, it is saved in the Outbox.
The most recent sent text message is added to the top of the Outbox
List. The Outbox folder is capable for storing a maximum of thirty (30)
last sent messages. When the folder is full, the next sent text massage
automatically replaces the oldest text message in the folder.
Viewing Sent Text Messages
1. Press “ ” to access Menu.
2. Press “ ” or “ ” to navigate to Messages and press “ ”
to select.
3. Press “ ” or “ ” to navigate to Outbox and press “ ” to
select.
4. Press “ ” or “ ” to navigate to Outbox List and press “ ”
to select.
5. Press “ ” or “ ” to navigate to the desired message and
press “ ”.
Managing Failed-to-Send Text Messages
You can select one of the following options if the message fails to send.
• Resend
• Forward
• Detail
• Delete
Resending a Text Message
1. Once in Messages, press “ ” or “ ” to navigate to Outbox
and press “ ” to select.
2. Press “ ” or “ ” to navigate to Outbox List.
3. Press “ ” or “ ” to navigate to the desired message, press
“ ” to select and press “ ” to enter the Options menu.
4. Press “ ” or “ ” to navigate to Resend and Press “ ”
to resend the same message to the same Subscriber ID/Alias or
Group ID/Alias.
5. If the message is sent successfully, a tone sounds, and the display
shows Success. If the message is not sent, a low tone sounds, and
the display shows Failed. If the text message fails to send, the radio
returns to the home screen.
Forwarding a Text Message
1. Once in Messages, press “ ” or “ ” to navigate to Outbox
and press “ ” to select.
2. Press “ ” or “ ” to navigate to Outbox List.
3. Press “ ” or “ ” to navigate to the desired message, press
“ ” to select and press “ ” to enter the Options menu.
4. Press “ ” or “ ” to navigate to Forward and Press “ ”
to forward the same message to the same Subscriber ID/Alias or
Group ID/Alias.
5. If the message is sent successfully, a tone sounds, and the display
shows Success. If the message is not sent, a low tone sounds, and
the display shows Failed. If the text message fails to send, the radio
returns to the home screen.
OK
OK OK
OK
OK
OK
OK
OK
OK
OK
OK
OK OK
OK
OK
OK
OK
OK
OK
OK
OK
OK
OK
OK
OK
OK

13
Copyright © 2020 RCA Communications Systems www.RCACommunicationsSystems.com
Communications Systems
RDR42x0 Professional Digital
Two-Way Radios
INSTRUCTION MANUAL
You can select one of the following options while viewing a sent
message:
• Resend
• Forward
• Detail
• Delete
To perform any of the functions follow the steps described in section
Managing Failed-to-Sent Text Messages.
Deleting All Sent Text Messages from Sent items
1. Press “ ” to access Menu.
2. Press “ ” or “ ” to navigate to Messages and press “ ”
to select.
3. Press “ ” or “ ” to navigate to Outbox and press “ ” to
select.
4. Press “ ” or “ ” to navigate to Delete All and press “ ”
to select.
5. The display shows Delete All?, press “ ” to confirm. The display
shows Success.
Deleting All Text Messages from the Inbox
1. Press “ ” to access the menu.
2. Press “ ” or “ ” to navigate to Messages and press “ ”
to select.
3. Press “ ” or “ ” to navigate to Inbox and press “ ” to
select.
4. Press “ ” or “ ” to navigate to Delete All and press “ ”
to select.
5. The display shows Delete All?, press “ ” to confirm. The display
shows Success.
Note: When you select the Inbox and it contains no text messages, the
display shows Inbox Empty.
Encryption
If enabled and programmed into your radio, this feature helps to prevent
eavesdropping by unauthorized users on a channel, using software-
based encryption solution. The signaling and user identification
portions of a transmission are not encrypted. Your radio must have
encryption enabled on the channel to send an encrypted transmission,
although it is not required for receiving encrypted transmission. Your
radio supports two types of encryption:
• Basic Encryption
• PRODIGI Advanced Encryption
• DMRA ARC4 Encryption
Only ONE encryption type can be assigned to your radio.
To decode an encrypted call or data transmission, your radio must be
programmed to have the same encryption key (for Basic Encryption),
OR the same Key Value of up to 18 characters for PRODIGI Advanced
Encryption as the transmitting radio.
If your radio receives an encrypted call that is of a dierent encryption
key, OR a dierent Key Value and Key ID, you will either hear a garbled
transmission (Basic Encryption) or radio’s audio will be muted (PRODIGI
Advanced Encryption). The LED lights up solid green while the radio is
receiving an encrypted transmission.
Note: Encryption is available only in digital mode. The feature must
be enabled and programmed by your RCA Communications Systems
Dealer.
Replying to a Text Message from the Inbox
1. Press “ ” to access Menu.
2. Press “ ” or “ ” to navigate to Messages and press “ ”
to select.
3. Press “ ” or “ ” to navigate to Inbox and press “ ” to
select.
4. Press “ ” or “ ” to select Inbox List and press “ ” to select.
5. Press “ ” to navigate to the desired message and press “ ”
to select. Press “ ” again to enter the Options Menu.
You can select one of the following options if the message:
• Reply
• Forward
• Detail
• Delete
6. Press “ ” or “ ” to navigate to Reply and press “ ” to
select.
7. Press “ ” or “ ” to navigate to New Message or Quick Text
and press “ ” to select. Depending on your choice, use the
keypad to write your message or press “ ” or “ ” to navigate
to the desired Quick Text Message and press “ ” to select. If
you’ve selected a Quick Text Message you can use the keypad to
edit your message, if needed.
8. Press “ ” to confirm.
9. Press “ ” to Send.
10. If the message is sent successfully, a tone sounds, and the display
shows Success. If the message is not sent, a low tone sounds, and
the display shows Failed. If the text message fails to send, the radio
returns to the home screen.
Making an Encrypted Call
Your radio may have a mix of encrypted and unencrypted channels. To
make an encrypted call:
1. Using the channel selector knob, switch to an encrypted channel.
2. When on the desired channel, press the [PTT] button to make the
call, the LED indicator lights up red.
3. Hold the radio vertically 1 to 2 inches (2.5 to 5.0 cm) from your
mouth and then speak clearly into the microphone.
Note: If Talk Permit Function is enabled, wait for the Talk Permit Tone
to sound before speaking.
4. Release the [PTT] button to listen.
5. When the target radio responds, the LED lights up red.
6. If there is no voice activity for a predetermined period of time,
the call ends. The radio returns to the screen you were on prior to
initiating the call (RDRD4250 and RDR4280 only).
OK
OK
OK
OK
OK
OK
OK
OK
OK
OK
OK OK
OK
OK
OK
OK
OK
OK
OK
OK
OK
OK

14
Copyright © 2020 RCA Communications Systems www.RCACommunicationsSystems.com
Communications Systems
RDR42x0 Professional Digital
Two-Way Radios
INSTRUCTION MANUAL
Turning Encryption On/O
Encryption can be programmed to turn on automatically and can
be programmed without the ability to be turned o. It can also be
programmed to be controlled manually. If your radios is set for manual
control of the encryption feature , you may turn the encryption On/
O using the pre-programmed by your RCA Communications Systems
dealer long or short press function key or you may use the radio menu
(RDR4250 and RDR4280 only):
1. Press “ ” to access to the menu.
2. Press “ ” or “ ” to navigate to Settings
3. Press “ ” or “ ” to navigate to Radio Settings.
4. Press “ ” or “ ” to navigate to Encryption and press “ ”
to select.
5. Press “ ” or “ ” to Enable to turn Encryption On or Disable
to turn Encryption O. If successful, the radio displays Success.
Dual Tone Multi Frequency (DTMF)
The Dual Tone Multi Frequency (DTMF) feature allows the radio to
operate in a radio system with an interface to telephone or other DTMF
based systems. DTMF Codes can be programmed into the radio by
your RCA Communications Systems dealer. DTMF receive/transmit
feature has four optional modes with 32 encode groups with up to
30 characters per group. To use this feature, your radio must have
an access code, which is system dependent. Please contact with your
RCA Communications Systems dealer or system administrator for
more information.
To initiate a DTMF call:
1. Press and hold PTT button.
2. Enter the desired number.
Note: You can turn o the DTMF tone by disabling all radio tones and
alerts.
Radio Enable/Disable (RDR4250 and RDR4280 Only)
The Radio Enable/Disable feature allows you to enable or disable
any radio within your system. For example, you may want to disable a
stolen radio, to prevent the thief from using it, then enable that radio
once it is recovered.
Note: The Radio Disable/Enable feature requires the radio in your
system to have this function enabled. You can only Enable/Disable
a radio that is within communication range. Check with your RCA
Communications Systems Dealer or system administrator for more
information.
Scanning
When a scan is initiated, your radio cycles through the programmed
scan list for the current channel looking for voice activity. The LED
blinks orange and you see the Scan icon on the display (RDR4250 and
RDR4280 only).
There are two methods to initiating scanning:
• Manual Scan: Initiate scanning manually using the pre-
programmed Scan ON/OFF programmable function key. This must
be programmed by your RCA Communications Systems Dealer.
You can also use the radio menu as described in the Starting and
Stopping Scan section (RDR4250 and RDR4280 Only). When scan
is initiated, your radio will look for and detect matching activity
on all channels / groups included in the scan list (see Scan Lists
section for more information).
• Auto Scan: Your radio automatically starts scanning when you
select a channel / group that has Auto Scan enabled. Starting and
Stopping Scan Press the programmed Scan side button to start or
stop the Scan. OR - Follow the procedure below (RDR4250 and
RDR4280 Only):
Radio Disable: The radio receive / transmit functions become disabled
after the radio receives the Radio Disable code. In order to initiate
Radio Disable you must have a radio a model with a display (RDR4250
or RDR4280). To send a Radio Disable code:
1. Press “ ” to access the main menu.
2. Press “ ” or “ ” key to navigate to Contacts and press
“ ” to select.
3. Press “ ” or “ ” key to navigate to the desired Subscriber
ID/Alias and press “ ” to select. You may also press “ ” or
“ ” key to navigate to Manual Dial, press “ ”, input the
Subscriber ID and press “ ” to select.
4. Press “ ” or “ ” to navigate to “Control Services and press
“ ” to select.
Radio Enable: The Radio receive / transmit functions become enabled,
if the radio was previously in Disabled status, after the radio receives
the Radio Enable code. In order to initiate Radio Enable you must have
a radio model with a display (RDR4250 or RDR4280). To send a Radio
Enable code:
1. Press “ ” to access the main menu.
2. Press “ ” or “ ” key to navigate to Contacts and press
“ ” to select.
3. Press “ ” or “ ” key to navigate to the desired Subscriber
ID/Alias and press “ ” to select. You may also press “ ” or
“ ” key to navigate to Manual Dial, press “ ”, input the
Subscriber ID and press “ ” to select.
4. Press “ ” or “ ” to navigate to Control Services and press
“ ” to select.
5. Press “ ” or “ ” key to navigate to Radio Enable, then press
“ ” to select.
6. Wait for acknowledgment.
7. If successful, a tone sounds, and the display shows Success. If
failed, a low tone sounds, and the display shows Failed.
Starting and Stopping Scan
Press the programmed Scan side button to start or stop the Scan. OR –
Follow the procedure below (RDR4250 and RDR4280 Only):
1. Use the Channel Selector Knob to select a channel programmed
with a scan list.
2. Press “ ” to access the menu.
3. Press “ ” or “ ” to navigate to Scan and press “ ” to select.
4. Press “ ” or “ ” to navigate to Scan Switch and press “ ”
to select.
5. Press “ ” or “ ” to navigate to ON or OFF and press “ ”
to select.
OK
OK
OK
OK
OK
OK
OK
OK
5. Press “ ” or “ ” key to navigate to Radio Disable, then press
“ ” to select.
6. Wait for acknowledgment.
7. If successful, a tone sounds, and the display shows Success. If
failed, a low tone sounds, and the display shows Failed.
OK
OK
OK
OK
OK
OK
OK
OK
OK
OK
OK
OK

15
Copyright © 2020 RCA Communications Systems www.RCACommunicationsSystems.com
Communications Systems
RDR42x0 Professional Digital
Two-Way Radios
INSTRUCTION MANUAL
6. The display shows Turned O if you stop the scan or the display
shows Turned On if you start the scan.
7. Press “ ” to return to the main menu.
8. The LED blinks orange and the Scan Icon is displayed when Scan is
in progress. The LED turns o and the Scan icon disappears when
Scan is stopped.
BAC K
Responding to a Scan
During scanning, your radio stops on any channel / group where
matching activity is detected. After the transmission is over the radio
remains on the active channel for a programmed time known as “Hang
Time” (the Hand Time is adjustable and must be programmed by your
RCA Communications Systems dealer).
1. Press the [PTT] button during “Hang Time” to respond to the call.
The LED lights up red.
2. Release [PTT] button to listen.
Note: If you do not respond within the “Hang Time” period, the radio
will resume scanning.
Deleting a Nuisance Channel
If a channel continually generates unwanted calls or noise (termed
a “Nuisance” Channel), you can temporarily remove the unwanted
channel from the scan list.
Note: This capability does not apply to the channel designated as the
Selected Channel. This feature is not accessible through the menu.
1. When your radio stops on an unwanted or nuisance channel, press
the programmed Nuisance Channel Delete programmable function
key until you hear a tone.
2. Release the programmed Nuisance Channel Delete programmable
function key. The nuisance channel is deleted.
Restoring a Nuisance Channel
To restore the deleted nuisance channel, restart the radio by powering
it o powering it back on, or restart the scanning (see Starting and
Stopping Scanning section).
Radio Settings (RDR4250 and RDR4280 Only)
Keypad Locked and Keypad Unlocked
You can lock your radio keypad to avoid an inadvertent key entry.
1. Press “ ” to access the main menu.
2. Press “ ” or “ ” to navigate to Settings and press “ ”
to select.
3. Press “ ” or “ ” to navigate to Radio Settings and press
“ ” to select.
4. Press “ ” or “ ” to navigate to Keypad Lock and press “ ”
to select.
5. Press “ ” or “ ” to select On. The display shows “Keypad
Locked”.
To unlock the keypad, press “ ” then press [*] button. The display
shows Keypad Unlocked and returns to the Home screen.
Turning Keypad Tones On or O
You can enable or disable keypad tones if needed.
1. Press “ ” to access the main menu.
2. Press “ ” or “ ” to navigate to Settings and press “ ”
to select.
3. Press “ ” or “ ” to navigate to Radio Settings and press
“ ” to select.
4. Press “ ” or “ ” to navigate to Tone/Alerts and press “ ”
to select.
5. Press “ ” or “ ” to navigate to Keypad Tone and press
“ ” to select.
6. Press “ ” or “ ” to Enable or Disable the keypad tone.
Scan Lists
Scan lists are created and assigned to individual channels/groups. The
radio scans for activity by cycling through the channel/group specified
in the scan list for the current channel/group. The RDR4220 radio has
32 scan lists with up to 32 members each and the RDR4250/4280
has 250 scan lists with 32 members each. Each scan list supports a
mixture of both analog and digital channels. You can add, delete, or
prioritize channels by editing the scan lists.
Viewing an Entry in the Scan List (RDR4250 and RD4280 Only)
1. Use the Channel Selector Knob to select a channel programmed
with a scan list.
2. Press “ ” to access the menu.
3. Press “ ” or “ ” to navigate to Scan and press “ ” to select.
4. Press “ ” or “ ” to navigate to Scan Lists, press “ ” to
select.
5. Press “ ” or “ ” to select the desired Scan List and press
“ ” to select. Press “ ” or “ ” to select View/Edit and
press “ ” to view or edit the channel members.
Note: If set as priority, the Priority icon appears left of the channel
member Number/Alias, indicating whether the member is Priority 1
or Priority 2 channel. You cannot have multiple Priority 1 or Priority 2
channels in the same scan list. There is no Priority icon if priority is set
to None.
Setting the Power Level
You can adjust your radio power setting to high or low for each channel.
Press the programmed Power Level programmable function key to
toggle the transmit power level between high and low. You may also
use the radio menu (RDR4250 and RDR4280 Only) by following the
process outlined below:
1. Press “ ” to access the main menu.
2. Press “ ” or “ ” to navigate to Settings and press “ ”
to select.
3. Press “ ” or “ ” to navigate to Radio Settings and press
“ ” to select.
4. Press “ ” or “ ” to navigate to Power Level and press “ ”
to select.
5. Press “ ” or “ ” to select the desired power level. Once the
level is selected the display shows “Success”.
6. Press the “ ” button to return to the home screen. The display
shows the Power Level icon, “H” for High Power and “L” for Low
Power.
OK
OK
OK
OK
OK
OK
OK
OK
OK
OK
OK
OK
OK
OK
OK
OK
OK
OK
OK
BAC K

16
Copyright © 2020 RCA Communications Systems www.RCACommunicationsSystems.com
Communications Systems
RDR42x0 Professional Digital
Two-Way Radios
INSTRUCTION MANUAL
Controlling the Display Backlight (RDR4250 and RDR4280)
You can enable or disable the radio display backlight as needed. The
setting also aects the Menu navigation buttons and keypad backlight.
Press the programmed Backlight programmable function key to toggle
the backlight settings. You may also use the radio menu by following
the process outlined below:
1. Press “ ” to access the main menu.
2. Press “ ” or “ ” to navigate to Settings and press “ ”
to select.
3. Press “ ” or “ ” to navigate to Radio Settings and press
“ ” to select.
4. Press “ ” or “ ” to navigate to Backlight and press “ ”
to select.
5. Press “ ” or “ ” to select one of the following options:
• O
• On
• Timed
6. The display shows “Success”.
Note: The display backlight and keypad backlight automatically turn
o if the LED indicator is disabled.
Channel Display (RDR4250 and RDR4280)
Defines if the radio shows the channel name or frequency on the
display.
1. Press “ ” to access the main menu.
2. Press “ ” or “ ” to navigate to Settings and press “ ”
to select.
3. Press “ ” or “ ” to navigate to Radio Settings and press
“ ” to select.
4. Press “ ” or “ ” to navigate to Channel Display and press
“ ” to select.
5. Press “ ” or “ ” to select Name or Frequency, press “ ”
to select
6. The display shows “Success”.
Controlling the Display Brightness (RDR4250 and RDR4280)
You can control the display brightness depending to the environment
you are using your radio.
1. Press “ ” to access the main menu.
2. Press “ ” or “ ” to navigate to Settings and press “ ”
to select.
3. Press “ ” or “ ” to navigate to Radio Settings and press
“ ” to select.
4. Press “ ” or “ ” to navigate to Brightness and press “ ”
to select.
5. Press “ ” or “ ” to adjust to the desired display brightness.
6. The display shows “Success”.
Switching Day/Night Mode
You can switch the display to Day or Night mode according to your
need. This automatically adjust the display brightness to Day/Night
preset levels.
1. Press “ ” to access the main menu.
2. Press “ ” or “ ” to navigate to Settings and press “ ”
to select.
3. Press “ ” or “ ” to navigate to Radio Settings and press
“ ” to select.
4. Press “ ” or “ ” to navigate to Day/Night Mode and press
“ ” to select.
5. Press “ ” or “ ” to switch to Day Mode or Night Mode and
press “ ” to select.
6. The display shows “Success”.
Man Down
Man Down is an optional feature. If the feature is not activated in the
radio, contact your RCA Communications Systems Dealer.
Note: Your radio must be programmed by your RCA Communications
Systems dealer according your requirements to allow you to eciently
use the Man Down feature.
This feature enables Man Down function in the radio. Man Down
initiates an emergency alarm if the radio is in a position at a predefined
angle for a predefined period of time and there has been no actions
taken by the user during the predefined time. Man Down is radio-
wide feature. To Enable/Disable the Man Down feature press the
programmed Man Down On/O programmable function key to toggle
Man Down On and Man Down O. You may also use the radio menu by
following the process outlined below:
1. Press “ ” to access the main menu.
2. Press “ ” or “ ” to navigate to Settings and press “ ”
to select.
3. Press “ ” or “ ” to navigate to Radio Settings and press
“ ” to select.
4. Press “ ” or “ ” to navigate to Man Down and press “ ”
to select.
5. Press “ ” or “ ” to Enable or Disable, press “ ” to select.
6. The display shows “Success”.
Lone Worker
Lone Worker is an optional feature. If the feature is not activated in the
radio, contact your RCA Communications Systems Dealer.
Note: Your radio must be programmed by your RCA Communications
Systems dealer according your requirements to allow you to eciently
use the Lone Worker feature.
This feature enables Lone Worker function in the radio. Lone Worker
gives a tone as a reminder at regular intervals to which the radio user
needs to respond to by pressing the PTT button. If the worker fails to
respond, within the pre-defined time, the radio initiates an emergency
alarm. Lone Worker is radio-wide feature. Lone Worker is radio-
wide feature. To Enable/Disable the Lone Worker feature press the
programmed Man Down On/O programmable function key to toggle
Lone Worker On and Lone Worker O. You may also use the radio
menu by following the process outlined below:
OK
OK
OK
OK
OK
OK
OK
OK
OK
OK
OK
OK
OK
OK
OK
OK
OK
OK
OK
OK
OK
OK
OK

17
Copyright © 2020 RCA Communications Systems www.RCACommunicationsSystems.com
Communications Systems
RDR42x0 Professional Digital
Two-Way Radios
INSTRUCTION MANUAL
1. Press “ ” to access the main menu.
2. Press “ ” or “ ” to navigate to Settings and press “ ”
to select.
3. Press “ ” or “ ” to navigate to Radio Settings and press
“ ” to select.
4. Press “ ” or “ ” to navigate to Lone Worker and press “ ”
to select.
5. Press “ ” or “ ” to Enable or Disable, press “ ” to select.
6. The display shows “Success”.
OK
OK
OK
OK
OK
Squelch Level (Analog Mode Only)
You can adjust your radio squelch level to filter out unwanted calls
with low signal strength or channels that have a higher than normal
background noise.
Settings: Normal is the default level. Tight may help to filter out
(unwanted) calls and / or background noise. However, calls from radio
within your system that are in very remote locations may also be
filtered out.
Press the programmed Squelch On/O programmable function key
to turn Squelch On or O. You may also adjust the Squelch Level
through the radio menu (RDR4250 and RDR4280 Only) by following
the process outlined below:
1. Press “ ” to access the main menu.
2. Press “ ” or “ ” to navigate to Settings and press “ ”
to select.
3. Press “ ” or “ ” to navigate to Radio Settings and press
“ ” to select.
4. Press “ ” or “ ” to navigate to Squelch Level and press
“ ” to select.
5. Press “ ” or “ ” to choose one of the followings and press
“ ” to select.
• Open
• Normal
• Tight
6. The display shows “Success”.
Tones/Alerts
The Tones/Alerts menu allows you to preset or customize your radio
audible alerts and tones for the functions listed below. You can Enable
or Disable each one of them individually or customize the tone from
the tone list. The settings are radio-wide and aect all radio operating
modes.
1. Press “ ” to access the main menu.
2. Press “ ” or “ ” to navigate to Settings and press “ ”
to select.
3. Press “ ” or “ ” to navigate to Radio Settings and press
“ ” to select.
4. Press “ ” or “ ” to navigate to Tones/Alerts and press “ ”
to select.
5. Press “ ” or “ ” to navigate to the desired function and press
“ ” to select.
OK
OK
• Radio Silent
• Keypad tones
• Text Message
• Private Call
• Group Call
• Alert Call
• Power Up
• Low Battery
• Annunciation
• Scan
• TX Inhibit
• Lone Worker
• TOT
6. Press “ ” to select.
7. Press “ ” or “ ” to navigate to On/O or Tone List and press
“ ” to select.
8. Press “ ” or “ ” to navigate to On, O or the desired Tone
and press “ ” to select.
9. The display shows “Success”.
OK
OK
OK
OK
OK
OK
OK
OK
OK
OK
OK
Turning the Radio Tones/Alerts On/O
You can enable and disable all radio tones and alerts (except for the
incoming Emergency alert tone) if needed. Press the programmed All
Tones/Alerts On/O programmable function key to toggle All Tones/
Alerts On or O. You may also adjust the Tones/Alerts through the
radio menu (RDR4250 and RDR4280 Only) by following the process
outlined below:
1. Press “ ” to access the main menu.
2. Press “ ” or “ ” to navigate to Settings and press “ ”
to select.
3. Press “ ” or “ ” to navigate to Radio Settings and press
“ ” to select.
4. Press “ ” or “ ” to navigate to Tones/Alerts and press
“ ” to select.
5. Press “ ” or “ ” to Enable or Disable All Tones/Alerts and
press “ ” to select.
6. The display shows “Success”.
Turning the LED Indicator On/O (RDR4250 and RDR4280 Only)
The LED Indicator shows the operational status of your radio. To turn
the LED Indicator On/O follow the process outlined below:
1. Press “ ” to access the main menu.
2. Press “ ” or “ ” to navigate to Settings and press “ ”
to select.
3. Press “ ” or “ ” to navigate to Radio Settings and press
“ ” to select.
4. Press “ ” or “ ” to navigate to LED Indicator and press
“ ” to select.
5. Press “ ” or “ ” to navigate to the LED Indicator Enable or
Disable, press “ ” to select.
6. The display shows “Success”.
Note: The display backlight, buttons and keypad backlight are
automatically turned o if the LED indicator is disabled.
OK
OK
OK
OK
OK
OK
OK
OK
OK
OK

18
Copyright © 2020 RCA Communications Systems www.RCACommunicationsSystems.com
Communications Systems
RDR42x0 Professional Digital
Two-Way Radios
INSTRUCTION MANUAL
Radio PIN Lock (RDR4250 and RDR4280 Only)
For security purposes you can lock your radio with the PIN lock feature.
To turn the PIN On/O follow the process outlined below:
1. Press “ ” to access the main menu.
2. Press “ ” or “ ” to navigate to Settings and press “ ”
to select.
3. Press “ ” or “ ” to navigate to Radio Settings and press
“ ” to select.
4. Press “ ” or “ ” to navigate to PIN and press “ ” to select.
5. Press “ ” or “ ” to navigate to On/O and press “ ” to
select.
6. To turn On the PIN lock, select “On” and enter a 6 digit PIN. When
done press “ ”. To turn O the PIN lock, select “O”.
7. The display shows “Success”.
To change the PIN, follow the process outlined below:
1. Press “ ” to access the main menu.
2. Press “ ” or “ ” to navigate to Settings and press “ ”
to select.
3. Press “ ” or “ ” to navigate to Radio Settings and press
“ ” to select.
4. Press “ ” or “ ” to navigate to PIN and press “ ” to select.
5. Press “ ” or “ ” to navigate to Change Pass. and press
“ ” to select.
6. Enter the current PIN first and press “ ”. Then enter a new 6
digit PIN and press “ ”, enter the new PIN again to confirm and
press “ ”.
7. The display shows “Success”.
Turning Voice Operating Transmission (VOX) Feature On/O
This feature allows you to initiate a hands-free voice activated call
on a programmed channel. The radio automatically transmits, for a
programmed period of time, whenever the microphone on the VOX-
capable accessory detects a voice.
Note: This feature must be programmed by your RCA Communications
Systems Dealer to enable your radios to use this function. It is NOT
advised to use VOX in loud and noisy environments, around heavy
machinery or when close by to other radio users.
If VOX is programmed by your RCA Communications Systems Dealer
you may manually turn it On or O. Press the programmed VOX
programmable function key to toggle VOX On/O. You may also
use the radio menu (RDR4250 and RDR4280 Only) by following the
process outlined below:
1. Press “ ” or “ ” to navigate to Settings and press “ ”
to select.
2. Press “ ” or “ ” to navigate to Radio Settings and press
“ ” to select.
Talkaround
This feature toggles between Repeater and Talkaround (Direct) mode.
If you are using a repeater and your repeater is not operating or you
are out of range, you can continue to communicate during that time
directly with other radios within your group. This is called “Talkaround”.
Press the programmed Repeater / Talkaround programmable function
key to toggle between Talkaround and Repeater modes.
Note: The Talkaround setting is retained even after powering down.
OK
OK
OK
OK
OK
OK
OK
OK
OK
OK
OK
OK
OK
OK
OK
OK
3. Press “ ” or “ ” to navigate to VOX and press “ ” to select.
4. Press “ ” or “ ” to navigate to Enable or Disable and press
“ ” to select.
5. The display shows “Success”.
Note: Pressing the PTT button during hands-free radio operation will
disable VOX.
OK
OK
Function Keys (RDR4250 and RDR4280 Only)
This feature allows you to assign and control radio features and
functions to the programmable function keys.
1. Press “ ” to access the main menu.
2. Press “ ” or “ ” to navigate to Settings and press “ ”
to select.
3. Press “ ” or “ ” to navigate to Radio Settings and press
“ ” to select.
4. Press “ ” or “ ” to navigate to Function Keys and press
“ ” to select.
5. Press “ ” or “ ” to navigate to the desired function key and
press “ ” to select.
• Top Key (TK)
• Channel Knob
• Side Key 1 (SK1)
• Side Key 2 (SK2)
• Side Key 3 (SK3)
• PTT
• FK1 Key (-)
• FK2 Key (- -)
6. Press “ ” or “ ” to Enable or Disable and press “ ” to
confirm.
7. If Enable is selected, press “ ” or “ ” to select the desired
function and press “ ” to confirm.
8. The display shows “Success”.
OK
OK
OK
OK
OK
OK
OK

19
Copyright © 2020 RCA Communications Systems www.RCACommunicationsSystems.com
Communications Systems
RDR42x0 Professional Digital
Two-Way Radios
INSTRUCTION MANUAL
Keypad Mode (RDR4250 and RDR4280 Only)
This feature allows you to define the radio behavior upon press of any
keypad alphanumeric key when your radio is on the home screen. The
options are:
• Disable – the keypad will be inactive.
• Manual Dial – you can dial a subscriber ID/Alias directly from the
home screen.
• One Touch Call – you can select an assigned by you RCA
Communications Systems Dealer One Touch Call.
• Channel Switch – you can enter a channel number (within the
current Zone) to switch to that channel without turning the Channel
Knob.
1. Press “ ” to access the main menu.
2. Press “ ” or “ ” to navigate to Settings and press “ ”
to select.
3. Press “ ” or “ ” to navigate to Radio Settings and press
“ ” to select.
4. Press “ ” or “ ” to navigate to Keypad Mode and press
“ ” to select.
5. Press “ ” or “ ” to set one the following options:
• Disable
• Manual Dial
• One Touch Call
• Channel Switch
6. The display shows “Success”.
Vibration (None I.S. (Intrinsically Safe) Models Only)
You may set you radio to Vibrate when it receives a Private Call,
Group Call, Alert Call or a Text Message. You may enable or disable
Vibration as needed by pressing the programmed Vibration On/O
programmable function key to toggle Vibration On/O. You may also
use the radio menu (RDR4250 and RDR4280 Only) by following the
process below.
1. Press “ ” to access the main menu.
2. Press “ ” or “ ” to navigate to Settings and press “ ”
to select.
3. Press “ ” or “ ” to navigate to Radio Settings and press
“ ” to select.
4. Press “ ” or “ ” to navigate to Vibration and press “ ”
to select.
5. Press “ ” or “ ” to Enable or Disable vibration.
6. The display shows “Success”.
General Radio Information (RDR4250 and RDR4280 Only)
Your radio contains information of the following:
• Serial Number
• Radio ID
• Radio Alias
• Model
• Frequency Range
• Firmware Version
• Hardware Version
• Database Version
• Bootloader Version
• Language Version
• Picture Version
• Last Prg. Date
To access the information on your radio, follow below steps:
1. Press “ ” to access the main menu.
2. Press “ ” or “ ” to navigate to Settings and press “ ”
to select.
3. Press “ ” or “ ” to navigate to Radio Info and press “ ”
to select.
GPS Settings (Digital Mode Only)
GPS is an optional feature. A location reporting feature, which allows
the radio to obtain its current location from available satellites. The
coordinates then can be sent to a designated Dispatch console for
tracking purposes.
Note: This feature can only work when the radio is used outdoors.
At least one RCA Communications Systems compatible PC Dispatch
Console, serving as Target Contact, is needed to decode and display
properly the radio unit location coordinates. For more information
contact your RCA Communications Systems Dealer.
OK
OK
OK
OK
OK
OK
OK
OK
If GPS is enabled and programmed by your RCA Communications
Systems Dealer you may manually turn it On or O. Press the
programmed GPS programmable function key to toggle GPS On/O.
You may also use the radio menu (RDR4250 and RDR4280 Only) by
following the process outlined below:
1. Press “ ” to access the main menu.
2. Press “ ” or “ ” to navigate to Accessories and press “ ”
to select.
3. Press “ ” or “ ” to navigate to GPS and press “ ” to select.
4. Press “ ” or “ ” to select one of the following options:
• GPS On/O
• Position
• GMT
5. To turn GPS On/O, press “ ” or “ ” to navigate to On or O
and press “ ” to select.
6. The display shows “Success”.
OK
OK
OK
OK
OK
OK
OK

20
Copyright © 2020 RCA Communications Systems www.RCACommunicationsSystems.com
Communications Systems
RDR42x0 Professional Digital
Two-Way Radios
INSTRUCTION MANUAL
RCA and the RCA logo are trademarks of Technicolor SA and are used under license. All other trademarks are the property of their respective owners. © 2020 RCA Communications Systems. All rights reserved.
www.rcacommunicationssystems.com
(877) 822-2915
Created in U.S.A.
Communications Systems
CARE AND CLEANING
• Do not directly handle the radio by its antenna or external
microphone. Damage due to improper handling and misuse is NOT
covered under the warranty.
• Do not place the radio in a dusty or dirty environment.
• Clean the radio with a lint-free cloth moistened with clean water
and/or a mild dishwashing liquid to remove dirt, grease and dust.
• Avoid exposing the radio to corrosives, solvents, or spirits.
• Avoid exposing the radio and it’s battery to direct sunlight for
prolonged periods of time.
Symptom Solution
Radio will not power on
a. The battery needs charging. Recharge the battery or replace it with
a fresh one.
b. The battery is not properly installed. Remove the battery and
reattach it.
The operating time is noticeably shorter than normal even though
the battery is properly charged.
a. The battery has worn out; it is time to buy a new battery.
b. The battery is not fully charged. Make sure that the battery is
removed after LED indicator has turned green.
Cannot talk to or hear transmissions from your group members
a. Make sure that your radio operates on the same channel and / or
has the same CTCSS/CDCSS settings as your group members.
b. Make sure you are within their communication range.
Radio is on, but you cannot hear voice transmissions or they are not
very loud
a. Turn the volume control knob to its maximum volume.
b. Return the radio to your dealer to check for microphone damage.
TROUBLESHOOTING
This manual suits for next models
6
Table of contents
Other RCA Two-way Radio manuals

RCA
RCA Prodigi RDR1520 Series User manual

RCA
RCA BR850U User manual

RCA
RCA RDR3600V User manual

RCA
RCA RDR23 0 Series User manual

RCA
RCA RDR2000 Series User manual

RCA
RCA RDR6350 User manual

RCA
RCA RDR2600V User manual

RCA
RCA Prodigi RDR1520 Series User manual

RCA
RCA RDR3500V User manual

RCA
RCA digital Xsound BR250 VHF User manual