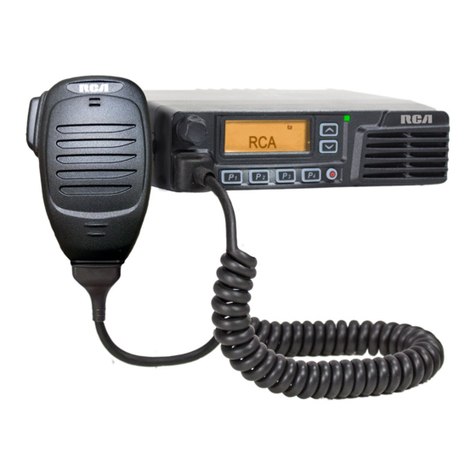
RCA BRM1250 User manual

1
BRM1250TM Professional Mobile Two-Way Radio Instruction Manual
Copyright © 2011 Discount Two-Way Radio Corporation - North American Distributor
Congratulations on selecting the BRM1250TM from
RCA Communications Systems - The most trusted name in radio!
Our new series of professional communications products establishes a new benchmark in premium
radio products made to perform awlessly under the most demanding commercial conditions.
Cutting edge design, professional grade materials and components, simple operation and superior
assembly quality: RCA Communications Systems has it all, including our exclusive no-nonsense,
two-year “Warranty Protection Program,” one of the most comprehensive warranties in the
communications industry.
To ensure you achieve maximum performance from your BRM1250TM mobile radio, please be sure
to carefully read this manual.
MODELS COVERED IN THIS MANUAL:
•BRM1250TM VHF Mobile Two-Way Radio
•BRM1250TM UHF Mobile Two-Way Radio
C
O
M
P
L
I
A
N
T
N
A
R
R
O
W
B
A
N
D
TM
CODED SQUELCH
DIGITAL
TM
Group
Call
SecurEncrypt ™
MDC
1200
COMPATIBLE
RDC
2400
COMPATIBLE

Copyright © 2011 Discount Two-Way Radio Corporation - North American Distributor
BRM1250TM Professional Mobile Two-Way Radio Instruction Manual
2
Product Inspection.........................................4
RCA BRM1250TM Overview............................6
Front Panel................................................5
Rear Panel.................................................5
Programmable Function Keys..................6-7
Installation....................................................8
Instructions................................................8
Installation Tools........................................8
Installation Steps.......................................8
Status Indicators..........................................10
LCD Icons................................................10
LED Indicator...........................................11
Basic Operations..........................................12
Turning the Radio On / Off......................12
Adjusting the Volume..............................12
Selecting a Channel.................................12
Selecting a Zone......................................12
Receiving a Call.......................................13
Transmitting a Call...................................13
Selecting the Power Level....................13
BOT ID and EOT ID..............................14
Functions and Operations............................14
Monitor...............................................14
Scan....................................................15
Busy Channel Lockout (BCL)............... 17
BCL Override.......................................17
DTMF Call...........................................17
Code Squelch......................................20
Off Hook Decode................................20
Time-out Timer (TOT)..........................21
Emergency Call...................................21
Frequency Reverse...............................22
Talk Around.........................................22
Selectable Squelch Level (SQL).............22
User Selectable CTCSS / CDCSS (UST)..23
Public Address (PA)..............................23
Home Channel....................................24
Rental..................................................24
CONTENTS:
3
BRM1250TM Professional Mobile Two-Way Radio Instruction Manual
Copyright © 2011 Discount Two-Way Radio Corporation - North American Distributor
Lone Worker...........................................25
2-Tone Encode Select (TTS)......................25
Display Frequency....................................26
Display Mode..........................................26
Voice Compander....................................26
Scrambler...............................................26
MDC1200TM...........................................26
RDC2400TM............................................27
Short Message..................................28-33
Troubleshooting..........................................34
Care and Cleaning......................................35
Optional Accessories...................................36
Warranty Statement..............................37-39
Warranty Contact Info................................39
Notes.........................................................40
CONTENTS continued

Copyright © 2011 Discount Two-Way Radio Corporation - North American Distributor
BRM1250TM Professional Mobile Two-Way Radio Instruction Manual
4
PRODUCT INSPECTION
Prior to unpacking the BRM1250TM mobile
radio, please inspect the packaging for
signs of damage and report any damage or
missing components immediately to your RCA
Communications Systems Sales and Service
Outlet. Every BRM1250TM mobile radio comes
with the following items:
Item Qty.(PCS)
Palm Microphone 1
Microphone Hanger 1
Microphone Hanger Screws 3
Mounting Bracket 1
Mounting Bracket Screws 6
Adjustment Knobs 4
Spring Washers / Flat Washers 5 / 5
Fuses 2
Vehicle Power Cord 1
Radio Unit 1
Owner’s Manual 1
Microphone Hanger
Palm Microphone
Radio Unit
Microphone Hanger
Screws
Mounting Bracket Kit
Vehicle Power Chord
Fuses

5
BRM1250TM Professional Mobile Two-Way Radio Instruction Manual
Copyright © 2011 Discount Two-Way Radio Corporation - North American Distributor
RCA BRM1250TM Overview Front Panel
(1) Volume Control Knob
(2) LCD Display
(3) Programmable Keys ▲ / ▼
(4) LED Indicator
(5) Speaker
(6) Radio Power On / Off Key
(7) Programmable Keys P1-P4
(8) Microphone Jack
Rear Panel
(1) Audio Connector
(2) External Speaker Jack
(3) Power Inlet
(4) Antenna Connector
Front Panel
Rear Panel

Copyright © 2011 Discount Two-Way Radio Corporation - North American Distributor
BRM1250TM Professional Mobile Two-Way Radio Instruction Manual
6
No. Shortcut Keys Qty.(PCS)
1CH Up (▲ by default) To select a channel quickly
2CH Down (▼ by default)
3Zone Up (P3 by default) To select a zone quickly
4Zone Down (P4 by default)
5 MONI A
To adjust the condition for incoming signal match.
6 MONI B
7 MONI C (P1 by default)
8 MONI D
9Display Frequency To display current frequency quickly
10 Display Mode To switch display mode quickly
11 User Selectable Tone (UST) To change the CTCSS frequency of current channel
temporarily
12 2-Tone Select To select 2-Tone code quickly
13 TX Power Select To adjust power level through one button press
14 Scan (P2 by default) To monitor the signals on the predened channel
15 Add/Delete To add or delete the scan channel in non-scan status
To delete the nuisance channel temporarily in scan status
PROGRAMMABLE FUNCTION KEYS
For added convenience, you may request your dealer to program the keys P1, P2, P3, P4, ▲and ▼
as shortcuts to the functions listed below:

7
BRM1250TM Professional Mobile Two-Way Radio Instruction Manual
Copyright © 2011 Discount Two-Way Radio Corporation - North American Distributor
No. Shortcut Keys Qty.(PCS)
16 Frequency Reverse To reverse the TX and RX frequencies, and the CTCSS/
CDCSS encoding and decoding frequencies
17 Talk Around To transmit with the RX frequency and CTCSS/CDCSS
frequency
18 SEL SQL To select the squelch level quickly
19 Home Channel To switch to the home channel quickly
20 Public Address To output the amplied audio signals
21 Scrambler To safeguard the privacy of your talk through voice
encryption
22 Compander To bring clearer voice under noisy environment
23 Emergency Call To summon help in emergent situations
24 RDC To select RDC call quickly
25 Lone Worker To ensure the safety of lone workers
26 Whisper To hear clearly even if the transmitting party speaks in low
voice
27 Short Message To quickly access the short message operation
28 Rental To time the rental service
29 Aux A To control the output from the port AUX A
30 Aux B To control the output from the port AUX B
31 Transparent Transmit Mode To enter the Transparent Transmit Mode quickly

Copyright © 2011 Discount Two-Way Radio Corporation - North American Distributor
BRM1250TM Professional Mobile Two-Way Radio Instruction Manual
8
INSTALLATION
Before you install the radio in a vehicle, be sure to
read the following instructions carefully:
Instructions
»The radio operates with a negative grounded
power supply of 13.6 ± 15%V only. Please
check the power supply’s polarity and voltage
before you install the radio.
» Please check how far the screws will extend
from the bottom surface of the radio before
you install it. Be sure to drill mounting holes
with caution to avoid damage of the vehicle
wiring and parts.
» Please connect the supplied antenna and power
cord to the radio, before you install the radio in
the bracket.
» Install the radio with RCA supplied mounting
bracket to keep it secure. A loose radio may
cause bodily injury in the event of an accident.
» Install the radio in a location where the front
panel controls may be easily reached.
» Please determine the location of mounting hole
before drilling.
» Please make sure there’s sufcient space at
back of the radio for wiring.
» When the fuse for DC power cord needs
replacement, it must be replaced by a fuse with
the same specication.
Installation Tools
»Electric drill: ¢6mm or above
» Cross head screwdriver
» Hex socket sleeve (used for mounting 4.8 × 20
mm self-tapping screw)
Installation Steps
1. Install the bracket in a location where it’s easy to
operate the radio.
2. Connect accessories such as antenna and power
cord to the radio.
3. Slide the radio into the mounting bracket and
secure it using the locking knobs.
4. Install the microphone hanger in a location
where it’s easy to reach the microphone.
5. Plug the palm microphone into the microphone
jack on the front panel, and place it on the
hanger when not in use.

9
BRM1250TM Professional Mobile Two-Way Radio Instruction Manual
Copyright © 2011 Discount Two-Way Radio Corporation - North American Distributor
No. Part Name No. Part Name
1 Palm Microphone 2 Adjust Knobs
3 Radio Unit 4 Power Inlet
5 Black Power Cord 6 Red Power Cord
7 Fuses 8 Antenna Connector
9 Flat Washers 10 Spring Washers
11 4 × 16 mm Self-tapping Screws 12 Microphone Hanger
13 Mounting Bracket 14 4.8 × 20 mm Self-tapping Screws

Copyright © 2011 Discount Two-Way Radio Corporation - North American Distributor
BRM1250TM Professional Mobile Two-Way Radio Instruction Manual
10
STATUS INDICATORS
LCD Icons
Your radio’s LDC displays the radio status. The
following are the icons that appear on the
radio’s display.
LCD Panel
Indicator Description
Displays CH number/name, zone number/name, DTMF number, frequency, menu and
options, etc.
Lo Indicates low power output.
Press the Monitor key:
1. The icon is displayed when CTCSS/CDCSS and 2-Tone decoding is off.
2. The icon is displayed when the speaker is unmuted.
Appears when the radio begins to scan.
Appears when the radio is transmitting a selected call.
C indicates that the current channel is in the scan list. Z indicates multi zone scan.
Appears when the Scrambler feature is enabled.
Appears when the Compander feature is enabled.

11
BRM1250TM Professional Mobile Two-Way Radio Instruction Manual
Copyright © 2011 Discount Two-Way Radio Corporation - North American Distributor
Indicator Description
Appears when the current channel is already in use.
Indicates the current channel is the priority channel. P indicates priority channel 1, P
indicates priority channel 2, P indicates priority channels 1 and 2.
•
•
•
•
LED Indicator
The LED indicator will help you easily identify current radio status.
LED Indicator Radio Status
LED glows red Transmitting
LED glows green Receiving
LED ashes orange
After the 2-Tone, MDC1200 or RDC2400 or DTMF signaling is decoded,
and during the auto reset time.
After the 2-Tone, MDC1200, RDC2400 or DTMF signaling is transmitted,
and during the auto reset time.

Copyright © 2011 Discount Two-Way Radio Corporation - North American Distributor
BRM1250TM Professional Mobile Two-Way Radio Instruction Manual
12
BASIC OPERATIONS
Turning the Radio On/Off
Press the Power On/Off key to turn on the
radio.
Press and hold down the Power On/Off key
for about 1 second to turn off the radio.
Adjusting the Volume
Turn the Volume Control knob clockwise to
increase the volume, or counter-clockwise to
decrease the volume.
Note: While adjusting, if the radio is
programmed with CTCSS/CDCSS or 2-Tone,
MDC1200, RDC2400 Signaling squelch, noise
will not be heard from local speaker even if you
fully turn the Volume Control knob clockwise.
Selecting a Channel
The ▲/▼and P1-P4 function keys are
programmable by your dealer to select a
channel. The RX/TX frequency on each
channel is set by your dealer.
Press the programmed CH UP key to select
a higher numbered channel; press the
programmed CH DOWN key to select a lower
numbered channel.
Selecting a Zone
The ▲/▼and P1-P4 function keys are
programmable by your dealer to select a zone.
The RX/TX frequency on each channel is set by
your dealer.
Press the programmed Zone UP key to select a
higher numbered zone; press the programmed
Zone DOWN key to select a lower numbered
zone.

13
BRM1250TM Professional Mobile Two-Way Radio Instruction Manual
Copyright © 2011 Discount Two-Way Radio Corporation - North American Distributor
Receiving a Call
If CTCSS/CDCSS, 2-Tone, MDC1200 or
RDC2400 is set on the current channel by your
dealer, you can only receive calls with matched
signaling. If CTCSS/CDCSS, 2-Tone, MDC1200
or RDC2400 is not set, you can hear from all
the users on the same channel.
Transmitting a Call
When transmitting a call, please follow the
steps below:
1. Hold down the PTT key on the microphone.
2. Speak into the microphone. The red LED
lights during calling.
3. Release the PTT key to return to the RX
mode.
4. When the transmission ends, put the
microphone on the hook.
Selecting the Power Level
If the current channel is programmed with
high power by your dealer, the power output
toggles between high and low upon each
press of the programmed Tx Power Select key.
The LO icon is displayed on LCD to indicate low
power.
A lower power level saves battery and reduces
the possibility of interference. Use the high
power setting only when necessary.
Note:
• If the current channel is programmed with
lower power, any Tx Power Select key press
will prompt an error tone, and the power
level will not change.
• If you switch to low power on a channel that
was set with high power, this conguration
will work on all other channels that were set
with high power.

Copyright © 2011 Discount Two-Way Radio Corporation - North American Distributor
BRM1250TM Professional Mobile Two-Way Radio Instruction Manual
14
BOT ID and EOT ID
Your dealer may congure whether to transmit
Connect ID (BOT ID) and Disconnect ID (EOT
ID), when connecting or disconnecting a
repeater or telephone system. The following
modes are programmable:
1. Press the PTT key, and the BOT ID is
transmitted.
Release the PTT key, and the
EOT ID is transmitted.
2. Press the * key while holding down the PTT,
and the BOT ID is transmitted.
Press the # key while holding down the
PTT, and the EOT ID is transmitted.
FUNCTIONS AND OPERATIONS
Monitor
If the Monitor function is set by your dealer,
press the programmed Monitor key in Rx
mode to gain access to the activities on the
current channel.
The Monitor key is programmable with one
of the following four operating modes by your
dealer:
1. Carrier Squelch-Momentary: Hold down the
Monitor key to open CTCSS/CDCSS/2-Tone
Signaling squelch, and release the key to
close the Signaling squelch.
2. Carrier Squelch-Toggle: Press the Monitor
key to open CTCSS/CDCSS/2-Tone Signaling
squelch. Press again to close the Signaling
squelch.
3. Squelch Off-Momentary: Hold down the
Monitor key to open carrier squelch, and
release the key to close the carrier squelch.
4. Squelch Off-Toggle: Press the Monitor key
to open carrier squelch. Press again to close
the carrier squelch.

15
BRM1250TM Professional Mobile Two-Way Radio Instruction Manual
Copyright © 2011 Discount Two-Way Radio Corporation - North American Distributor
Scan
Scan Type
1. Single Zone Scan: The radio scans all the
channels added into the scan list on the
current zone.
2. Multi Zone Scan: Multiple zones added into
a multi scan list can be scanned. All channels
within the zones added into the scan list can
be scanned.
Scan Start
1. Add one or more non-priority channels into
the scan list.
2. Press the programmed Channel Scan key to
initiate scan from the current channel (please
scan the channels one by one in accordance
with the list). The LCD displays SCAN (-SCAN-
for multi zone scan) and the icon.
Scan Cease
The scanning pauses or ceases upon the
following:
1. Press the programmed Channel Scan key
and cease the scanning, so that the radio
may exit the scan mode.
2. Activate the Monitor function.
3. The radio receives the carriers, which satisfy
radio unmute condition.
Scan Resume
If the scanning pauses on an active channel, it
will resume according to the scan resume mode.
The scan resume mode can be programmed by
your dealer with Carrier operated scan or Time
operated scan.
1. Time Operated Scan: Scanning remains on
an active channel for a programmed time
period (programmable by your dealer).
Once the timer expires, the radio will begin
scanning other channels even if the active
channel is still busy.

Copyright © 2011 Discount Two-Way Radio Corporation - North American Distributor
BRM1250TM Professional Mobile Two-Way Radio Instruction Manual
16
2.Carrier Operated Scan: If carriers are detected
during the scan sequence, scanning will
remain on the active channel until there is
no activity.
Dual Priority Scan
If dual priority channels are programmed
by your dealer, the radio will check the dual
priority channels for activity regularly on the
non-priority channels. If carriers are detected
on a priority channel, the radio will immediately
switch to this active priority channel.
LCD displays the “P “ icon to indicate the
Priority Channel 1, the “P ” icon to indicate
the Priority Channel 2, and the “P ” icon to
indicate the channel is programmed with
Priority Channel 1 and 2 simultaneously.
Scan Add/Delete
If the Scan Add/Delete feature is enabled by
your dealer, the current channel can be added
to/deleted from the scan list in the following
procedures:
1. Select the channel to be added/deleted in
the non-scan mode.
2. The current channel toggles between
Add/Delete status upon each press of the
programmed Scan Add/Delete key.
Note:
Only channels added to the scan list can be
scanned.
Nuisance Channel Delete
Channels in the scan list are allowed to be
temporarily deleted.
When the scan pauses on an unwanted
channel, such as a nuisance channel, press the
programmed Add/Del Scan key to temporarily
delete the channel from the scan list, and the
scan will re initiate immediately.
Note:
The temporarily deleted channel will recover its
settings prior to the scan after the radio exits
the scan mode.
•
•
•
•

17
BRM1250TM Professional Mobile Two-Way Radio Instruction Manual
Copyright © 2011 Discount Two-Way Radio Corporation - North American Distributor
Revert Channel
If you press the PTT key, the scan will be
turned off and the radio will switch to the
Revert Channel to transmit. This feature is
programmable by your dealer.
Off-Hook Scan
If this feature is enabled by your dealer, the radio
will be allowed to scan no matter whether the
palm microphone is in an off- hook position or
not. Otherwise, the scan will be disabled with
an off-hook palm microphone.
BUSY CHANNEL LOCKOUT (BCL)
This feature helps prevent transmission on a
channel that is already in use, and it can be
enabled/disabled by your dealer. If you press
the PTT key on a busy channel, transmission
will be inhibited and an alert tone will sound.
If the PTT key is released, the alert tone will
cease, and the radio will return to Rx mode.
When the channel is free, press the PTT key
again to transmit.
BCL OVERRIDE
If this feature is enabled, you can override the
BCL feature to transmit on a busy channel.
If you press the PTT key, a BCL alarm will
be heard; press the PTT key again within
0.5 seconds to override the BCL feature and
transmit on the busy channel.
DTMF CALL
Manual Dial
Hold down the PTT key, and then press any
key on the DTMF keypad of the microphone
to transmit the corresponding DTMF signal.
Meanwhile, you may hear relevant tones.
Release the PTT key. The radio will remain
in transmission mode for 2 seconds
(programmable by your dealer), and then
press another numeric key within 2 seconds to
continue the transmission.

Copyright © 2011 Discount Two-Way Radio Corporation - North American Distributor
BRM1250TM Professional Mobile Two-Way Radio Instruction Manual
18
Keypad Auto PTT
If this feature is enabled by your dealer, press
any numeric key to transmit DTMF signal
without PTT key press.
Store & Send
When this feature is enabled, enter a pre-
stored DTMF number (up to 16 digits) in Rx
mode, and then press the PTT key on the
microphone to initiate a call; simultaneously,
the dialed DTMF number scrolls across the
LCD, and the corresponding DTMF tone can
be heard.
Note:
• If you have dialed a wrong number or you
want to cancel the dialing, simply press any
key on the front panel other than the Power
On/Off key to exit.
• “D” can be programmed by your dealer as
a blank tone. In other words, if you enter
“D”, the tone will not be heard during
transmission, but there will be a delay in time,
which is programmable by your dealer.
DTMF Speed
The DTMF number is programmable by your
dealer. The feature is designed to reduce
decoding errors by providing a xed interval
between digits. It is 10 DTMF numbers per
second by default.
Store the DTMF Number
You are allowed to store a DTMF number
(up to 16 digits) in 32 Speed Dial memories
respectively as follows:
1. Press the # key on the microphone keypad,
and the LCD displays D ------.
2. Enter the desired number (range from 0~9,
A~F) via the microphone keypad. If you want
to enter A, B, C, D, E and F, hold down the
PTT key and then enter 2, 5, 8, 0, * and #
respectively.
3. Press the # key, and “D” on the LCD is
followed by a symbol “--”, which indicates
the location to enter memory numbers.

19
BRM1250TM Professional Mobile Two-Way Radio Instruction Manual
Copyright © 2011 Discount Two-Way Radio Corporation - North American Distributor
4. Enter the desired memory number (01~32).
5. Press the # key again on the microphone,
and then the entered number is stored into
its corresponding memory.
If you have dialed a wrong number or you
want to cancel the dialing, press any key on
the front panel other than the Power On/Off
key to exit.
Conrm the Stored DTMF Numbers
1. Press the * key on the microphone keypad,
and then the LCD displays A --.
2. Enter the memory number (01~32), and the
LCD displays the stored number or its alias.
3. Press any key other than the PTT, and the
LCD resumes its initial display.
Auto Dial
1. Press the * key on the microphone keypad,
and the LCD displays A --.
2. Enter the memory number (01~32), and the
LCD displays the stored number or its alias.
3. Press the PTT key, and the number is
transmitted.
Clear Stored DTMF Numbers
1. Press the # key on the microphone keypad,
and the LCD displays D ------.
2. Press the # key again on the microphone
keypad, and the LCD displays Clear --.
3. Enter the memory number to be cleared
(01~32), and press any key other than 0~9
keys to cancel this operation.
4. Press the # key on the microphone keypad to
clear stored numbers.
Redial
1. Press the * key on the microphone keypad,
and the LCD displays A --.
2. Press 0 twice, and the last dialed number (up
to 16 digits) is dialed and displayed on LCD.
3. Press the PTT key, and the number is
transmitted.
Note:
The redial memory can be cleared by powering
off the radio.

Copyright © 2011 Discount Two-Way Radio Corporation - North American Distributor
BRM1250TM Professional Mobile Two-Way Radio Instruction Manual
20
CODE SQUELCH
This feature can be enabled/disabled by your
dealer. If it is enabled, the preset 2-Tone will
control the radio mute/unmute. The radio will
not unmute until matched signaling is received.
Clear Stored DTMF Numbers
1. Radio is unmuted when the matched 2-Tone
signaling (programmed by your dealer) is
received, and the user can hear from the
transmitter without any other operation.
2. The icon ashes on the LCD, and the
LED ashes orange.
3. The radio is muted upon the programmed
Monitor key press, or no signal is received
within the preset time period.
4. If the alert tone is enabled, radio will emit an
alert tone when match signaling is received.
If the Transpond feature is enabled, the radio
will transmit a tone to the calling radio.
However, the radio will not transmit if a zone
call is received.
Transmit
1. Hold down the PTT key
2. During encoding, the LED lights red.
3. Please refer to the TTS key for 2-Tone
encoding.
4. Upon releasing the PTT key, the signaling
squelch is disabled, the icon ashes
on the LCD, and the LED ashes orange. The
LED lights green while signal is received and
ash orange if signal off.
5. If the programmed Monitor key is pressed
or no signal is received within the preset time
period, the signaling squelch is enabled.
OFF HOOK DECODE
If this feature is enabled by your dealer, CTCSS/
CDCSS signaling is active no matter whether
the palm microphone is in an off hook position
or not. If the feature is disabled, CTCSS/
CDCSS signaling is disabled when the palm
microphone is in the off-hook position.
Table of contents
Other RCA Two-way Radio manuals

RCA
RCA RDR2000 Series User manual

RCA
RCA Alpha One APR100 Series User manual

RCA
RCA RDR23 0 Series User manual

RCA
RCA RDR2 0 Series User manual

RCA
RCA Prodigi RDR1520 Series User manual

RCA
RCA RDR3600U User manual

RCA
RCA BR850U User manual

RCA
RCA MR240 User manual

RCA
RCA digital Xsound BR250 VHF User manual

RCA
RCA RDR4330 User manual