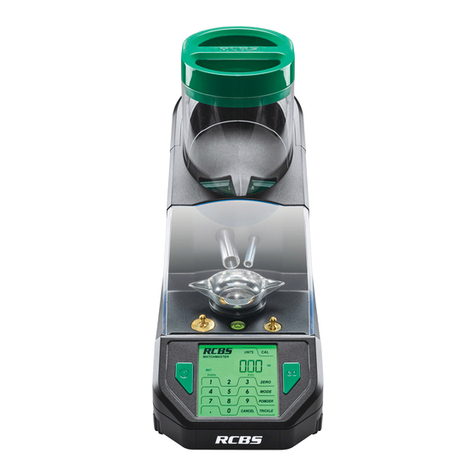
RCBS 98941 Instruction sheet

MATCHMASTER
POWDER SCALE/DISPENSER
PRODUCT INSTRUCTIONS
98941
11/19

Table of Contents
Section Page
Safety Information 1
General Information 4
Before Using the MatchMaster 4
Display Indicators 5
Function Key Description 5
Menu Settings 7
Calibration 7
Select Powder Type 8
Auto Dispense Mode 8
Interrupt Dispensing 9
Manual Dispensing Mode 9
Manually Dispensing with Trickle Key 9
Using Match Mode 9
Quick Drain Feature 10
Open Drain Warning 10
Clean Tube Seals 11
Bluetooth Download/Connect to RCBS App 12
Bluetooth Operation 12
User Dened Powder Conguration 14
Error Messages 15
Storage and Shipping 15
Checking the Firmware Version 15
Appendix 1: Default Powder Conguration Settings 16
Appendix 2: 7-Segment Display Characters 16
Appendix 3: Powder Kernel Weight Reference 17
Appendix 4: Detailed Explanation of Powder
Dispense Parameters
18
Appendix 5: Powder Dispense Parameter Step
Function
19
Warranty 21

IMPORTANT SAFETY INFORMATION
IMPORTANT: PLEASE READ ALL INFORMATION FIRST
Like any scale, you control the accuracy of your RCBS MatchMaster. Before using
the scale, read this instruction manual carefully to fully learn how to safely operate the
scale.
WARNING! Failure to properly operate the scale can result in severe
personal injury and/or equipment damage.
If you have read these instructions and still do not understand some operation, call us
at 1-800-533-5000 and a technician will assist you. This instruction manual contains
specic safety and operating information. It should be considered a permanent part of
your reloading equipment and remain with the equipment at all times for easy reference.
SAFETY
Reloading is an enjoyable and rewarding hobby that can be conducted safely. However, as with any
hobby, carelessness or negligence can make reloading hazardous. This product has been designed
from the beginning with the user’s safety in mind. When reloading, safety rules must be followed. By
observing these rules, the chance of a hazardous occurrence causing personal injury or property damage
is minimized.
RELOADING SAFETY
• Always wear safety glasses.
• Understand what you are doing and why. Read handbooks and manuals on reloading. Talk to
experienced reloaders. Write or call suppliers of equipment or components if you have questions
or are in doubt.
• Read and understand all warnings and instructions accompanying your equipment and
components. If you do not have written instructions, request a copy from the manufacturer. Keep
instructions for future reference.
• Do not rush or take short cuts. Establish a routine and follow it at a leisurely pace.
• Do not smoke while reloading, or reload near sources of heat, sparks or ame.
• Observe good housekeeping in the reloading area. Keep tools and components neat, clean and
orderly. Promptly and completely clean up any spills.
• Keep your hands and ngers away from “danger” spots and pinch-points where they might be
injured.
• Keep all reloading equipment and components out of reach of children.
• Keep all packing material out of reach of children.
• This device is not intended for use by individuals with restricted physical, sensory or mental
capacities or those with a lack of experience and/or knowledge, including children, unless they are
supervised by an individual who is responsible for their safety or have received training in operating
the device.
• Stay alert. Reload only when you can give your undivided attention. Do not reload when tired, ill,
rushed or under the inuence of drugs or alcohol.
Because RCBS® has no control over the choice, assembly or use of components or other reloading
equipment, RCBS assumes no liability, expressed or implied, for the use of ammunition reloaded with
this product.
1

PRIMERS AND POWDER
• Store powder beyond the reach of children and away from heat, dampness, open ames and
electrical equipment. Avoid areas where static electricity is evident.
• DO NOT have more than one can of powder on the bench at one time. Powder cans should be
stored away from the bench to avoid picking up the wrong one.
• DO NOT use any powder unless its identity is positively known. The only positive identication
is the manufacturer’s label on the original canister. Discard all mixed powders and those of
uncertain identity.
• DO NOT store powder in the unit after a reloading session. Over time the powder will damage
the powder hopper.
LOADING DATA
• DO NOT SMOKE WHILE RELOADING
• OBSERVE ALL WARNINGS ABOUT THE USE OF MAXIMUM LISTED LOADS.
• Use only laboratory tested reloading data. We recommend the SPEER Reloading Manual.
WARNING
This digital scale is for use with smokeless powders only. Do not use with black powder (used
in muzzle loading rearms). If black powder should come in contact with an electrical spark, an
explosion may occur, resulting in serious injury or death.
CALIBRATION
Calibration should be performed before every use. Prior to calibration, scale should be turned on
and allowed to warm up for at least 15-20 minutes. The warm up process should be performed prior
to every use if scale has been o for more than 30 minutes. Calibration is performed WITHOUT scale
pan on the platen. To calibrate correctly, follow the CALIBRATION section of this instruction manual.
A scale with improper calibration will cause an incorrect charge weight which may exceed the
maximum recommended load. Re-check frequently during use with the calibration weights provided.
If accuracy is found to be out of tolerance, the scale must be recalibrated.
PRECAUTIONS
Digital scales are very reliable devices. However, here are some events which may result in an
inaccurate reading:
• Change in temperature. If the temperature changes more than 40O F in 1 hr., you must re-calibrate
the scale. Allow scale to stabilize for 15-20 minutes prior to use.
• Changes in scale location or an uneven working surface which is not level. Use level bubble to
check working surface.
• Wind makes scales unstable. Use wind cover only if in area where there is an air current that can
not be controlled, especially in Match mode.
• O center placement of weight on the platen. Ensure weight is placed in center of platen.
• Movement of the scale during operation.
• Unlled dispense tube. After initial set up dispense one charge of 60gn to ensure the dispense
tubes are lled with powder, to avoid over/under dispense charges.
• Use only the two calibration weights supplied for accuracy.
• Calibration weight accuracy is crucial. Keep weights clean and carefully stored. If dropped or
damaged, have weights inspected against known standards. Contact RCBS Customer Service.
• Static electricity can cause erratic behavior in the scale, causing weight being displayed to
change frequently. If static build-up is evident, wipe scale with an anti-static sheet, or use anti-
static spray. Spray on clean soft cloth rst. Do not allow spray to get into mechanism.
2

• Take precautions from allowing powder or any other foreign debris from getting inside the load cell
area. The only way for powder to get inside the load cell area is if the platen is removed and if the
tubes are removed when still full of powder. To prevent this from happening ensure the platen is
always in place when there is powder in the reservoir. Also ensure the powder from the reservoir
and dispense tubes has been completely emptied prior to removing tubes for cleaning. If platen
needs to be removed, to clean spilled powder, ensure both tubes are capped to prevent powder
from falling out of tubes into load cell area.
• Do not press on the platform with your hand. You can damage the load cell.
RECORD KEEPING
• Keep complete records of reloads. Apply a descriptive label to each box showing the date
produced, and the primer, powder and bullet used. Labels for this purpose are packed with SPEER
bullets. Never attempt to guess at the identity of your ammunition.
NOTE: The scale was shipped in protective packaging. Save and use for transporting or long-term
storage of the unit. See last page for address and Toll-free Customer Service phone number.
FCC Statement
This device complies with part 15 of the FCC Rules. Operation is subject to the following two conditions: (1) This device may not cause harmful interference, and (2) this device must
accept any interference received, including interference that may cause undesired operation.
This equipment has been tested and found to comply with the limits for a Class B digital device, pursuant to Part 15 of the FCC Rules.These limits are designed to provide reasonable
protection against harmful interference in a residential installation. This equipment generates, uses and can radiate radio frequency energy and, if not installed and used in accordance
with the instructions, may cause harmful interference to radio communications. However, there is no guarantee that interference will not occur in a particular installation. If this
equipment does cause harmful interference to radio or television reception, which can be determined by turning the equipment o and on, the user is encouraged to try to correct
the interference by one or more of the following measures:
• Reorient or relocate the receiving antenna.
• Increase the separation between the equipment and receiver.
• Connect the equipment into an outlet on a circuit dierent from that to which the receiver is connected.
• Consult the dealer or an experienced radio/TV technician for help.
Shielded interface cable must be used with the equipment in order to comply with the limits for a digital device pursuant to Subpart B of Part 15 of FCC Rules. Specications and
designs are subject to change without any notice or obligation on the part of the manufacturer.
Disposal of Electric and Electronic Equipment
(Applicable in the EU and other European countries with separate collection systems)
This equipment contains electric and/or electronic parts and must therefore not be disposed of as normal household waste. Instead, it should be disposed
at the respective collection points for recycling provided by the communities. For you, this is free of charge.
If the equipment contains exchangeable (rechargeable) batteries, these too must be removed before and, if necessary, in turn be disposed of according
to the relevant regulations (see also the respective comments in this unit’s instructions).
Further information about the subject is available at your community administration, your local waste collection company, or in the store where you
purchased this equipment.
3

GENERAL INFORMATION
The scale should be stored at 4°F~122°F (-20°C ~50°C) and used at 50°F~86°F (10°C ~30°C), with
humidity below 60%. It should never be stored outside of the specied temperatures, which
can damage the load cell. If the scale has been sitting at a cool temperature, remove it from the
carton and allow it to sit at room temperature for about 30 minutes before using.
Carefully unpack the scale. Look for and identify the following items:
• Scale with Platen
• AC Power Adapter
• One 20 gram and one 50 gram Weights
• Powder Pan
• 2 Tube Caps
• Wind cover
• 1 Drain Straw
• Brush
• Instruction Manual
The scale was shipped in protective packaging which should be saved and used for transporting
the scale. This packaging is also recommended for long term storage of the unit.
POWER SUPPLY (ADAPTER):
Input: 100VAC ~ 240VAC 50Hz / 60Hz
Output: 12VDC 1 A
Power Consumption:
Max current: 156 mA
Min current:120 mA
SPECIFICATION:
3.0~1000.0 grains ± 0.1 grain (Standard mode only)
3.00~300.00 grains ± 0.04 grain (Match mode only)
(1GM = 15.432 GN)
Note: Accuracy is compromised if used under minimum weight.
IMPORTANT:
Treat the scale as you would any ne instrument. MatchMaster is physically very fragile and the
load cell can be damaged by the following:
• Pushing down or dropping the scale.
• Pulling up on the platen in such a way that it binds in the load cell.
• A sudden, violent physical shock to the scale.
(IMPORTANT!) BEFORE USING THE MATCHMASTER
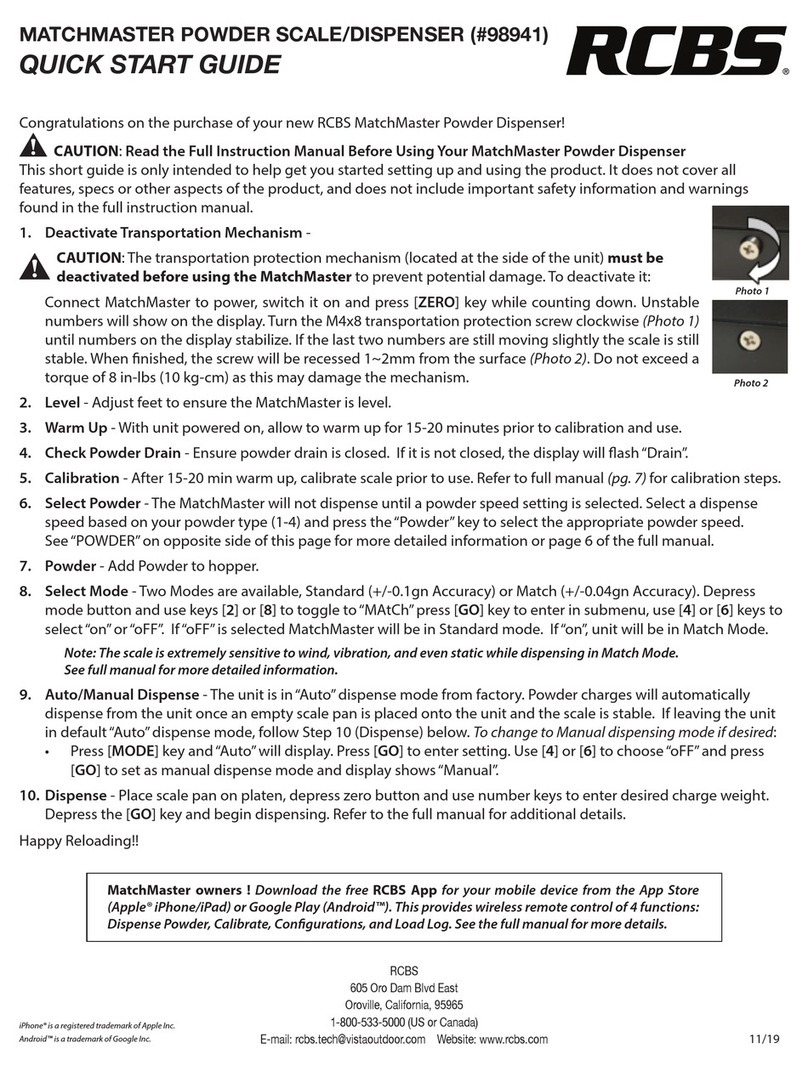
1. DEACTIVATE THE TRANSPORTATION PROTECTION MECHANISM
CAUTION: The transportation protection mechanism (located at the side
of the unit) must be deactivated before using the MatchMaster to
prevent potential damage.
Turn on the MatchMaster and press [ZERO] key while counting down.
Unstable numbers will show on the display. Turn the M4x8 transportation
protection screw clockwise (Photo 1) until numbers on the display stabilize.
If the last two numbers are still moving slightly the scale is still stable. When
nished, the screw will be recessed 1~2mm from the surface (Photo 2). Do not
exceed a torque of 8 in-lbs (10 kg-cm) as this may damage the mechanism.
Photo 1
Photo 2
4

2. ADJUST FEET TO ENSURE SCALE IS LEVEL
Adjust the leveling feet on the front of the
MatchMaster, until the bubble is centered
in viewing window (Photo 3). Tips: Turn foot
clockwise to raise higher. Turn foot counter-
clockwise to lower. Turn both feet clockwise
to move bubble to the front. Turn both feet
counterclockwise to move bubble to the back.
3. STABLE WORK SURFACE
MatchMaster is a high precision scale that is extremely sensitive to vibrations, especially when
being operated in Match Mode. Ensure your MatchMaster is used on a solid stable work surface
which is isolated from any other reloading activities. Any movement, air currents, or vibrations
during operation can alter the dispensing and cause an over or under charge condition.
SCALE DISPLAY INDICATORS
STD: Standard mode
MAT: Match mode
GN: weight in Grains
GM: weight in Grams
Stable: indicates the weight is Stable
Over: indicates the powder weight in the pan is higher than the set value, display ashes
Under: indicates the powder weight in the pan is lower than the set value
Auto: indicates in Automatic Dispense Mode
Manual: indicates in Manual Dispense Mode
: Bluetooth connection indicator
FUNCTION KEY DESCRIPTION (refer to control panel photo above)
[ ] key powers the scale on and o. When you turn the scale on the display will rst show
99999 and will go through a quick count down and display to 0.0 GN (grain mode).“Stable”
indicates when ready to use. When the scale is not in use the scale should be turned o and
unplugged.
Photo 3
5

GO: Press [GO] key to dispense the powder once you have entered a given charge. Or press key
to stop during dispensing. Pressing [GO] again will resume dispensing.
ZERO: Key is used to re-zero the scale. For example, to weigh powder in a powder pan, you
would rst place an empty pan on the scale platen and press [ZERO] key to re-zero the scale.
This will automatically subtract the weight of the pan from the scale.
POWDER: There are four default powder dispense speed settings (1-4), refer to table in
Appendix 1 (pg. 16). These will work in either Standard or Match Mode. Switching from
Standard to Match or Match to Standard will automatically switch to the correct default set of
parameters.
To set dispense speed, press the appropriate number key, followed by the [POWDER] key.
Typically Large to Small Extruded powders would be run at the slower dispense speeds while
Ball and Flake type powders would be run at the faster dispense speeds. Keep in mind there
are many dierent powder types with dierent kernel weights and shapes which attribute to
diering ow rates. This prevents some powder types from being run at the faster dispense
settings. For example, if you try to run a Large Extruded powder at a Powder Dispense Speed of
4, you will experience an overcharge condition. On the other end of the spectrum, if you run a
Ball type powder at a Powder Dispense Speed of 1, the dispense speed will be extremely long.
The following speeds are available :
1. Powder Dispense Speed 1 (Slowest Dispense Rate)
2. Powder Dispense Speed 2
3. Powder Dispense Speed 3
4. Powder Dispense Speed 4 (Fastest Dispense Rate)
Example: To select a powder dispense speed of 2, press [2] key, followed by [POWDER] key.
TRICKLE : Hold it to manually dispense the powder.
CANCEL: Clear the data or stop the operation.
CAL: Key is used to calibrate the scale. You should calibrate your scale each time you begin a
new reloading session. See the calibration section for full details.
UNITS: Key switches scale from GN (grains) to GM (grams). The default is GN.
MODE: Key is used to view/enter menu settings for dispense mode, match/standard mode,
Bluetooth, powder type and sound (buzzer). To access and change menu settings, the following
keys are used:
1. Depress [MODE] key
2. Use [2] or [8] key to scroll menu items
3. Depress [GO] key to select a menu item
4. Use [4] or [6] key to scroll setting values
5. Depress [GO] key to select the desired value
The table on the next page lists the menu items along with their available setting values with
descriptions. Asterisks denote default setting values (Auto dispense defaults to "on", etc.)
6

Menu
(use keys [2] or [8])
Setting value
(use keys [4] or [6])
(*=default)
Description
Auto on*/oFF Auto dispense
MAtCh on/oFF* Match mode
bLE
see Bluetooth Setting for more details
nAME Composed of 5 digits (0~9)
AB Set bluetooth parameters AB
(default AB = 00)
PoWdE
see pg.14, User Dened Powder Conguration for more details
uSr Congure user dened powder
conguration 06~20
A Powder Size 1~4
B Standard/match mode: 0=match,
1=standard
C Weight unit: 0=gm, 1=gn
D Minimum operation value for large
tube: 1~40
E Expected large tube stop point:
1~99
F Expected small tube stop point:
0~99
G G1G2Angle and response time for
short trickle: 0,0~9,9
H Expected start point for short trickle:
0~99
I I1I2Angle and
response time for
short trickle: 0,0~9,9
Sound on*/oFF Buzzer sound
7
CALIBRATION
Always warm up the scale 15-20 minutes before calibration. Always calibrate your scale before
use. This must be done WITHOUT the powder pan on the platen. To calibrate the scale, follow
the steps below:
1. Be sure the powder pan has been removed from the scale platen. When you turn the
scale on, the display will show 99999 across the display for a few seconds and then counts
down to display 0.0 GN (grains mode). Once “Stable”is displayed, the scale is ready to be
calibrated. See Fig. 1 (next page). Note: The unit will automatically switch to STD (standard)
mode (Match mode "oFF") when the calibration process is initiated.
2. Next please press [CAL] key on the scale. The display will show C 0, and "GM" will be
displayed in the lower right hand corner of the display. See Fig. 2.
3. When the display shows C 0 and“Stable”shows up, press the [CAL] key again.
4. When the display shows C 20, place a 20 gram weight on the platen and when “Stable”is
displayed, press the [CAL] key. See Fig. 3.

1. When the display shows C 50, remove the 20 gram weight and add the 50 gram weight to
the platen. When "Stable" is displayed, press the [CAL] key. See Fig. 4.
2. Now the display will show 50.00g. See Fig. 5. Remove weight from the platen, and place in
the weight holders. The display will automatically switch to 0.0 GN (grains) and the scale
will beep to conrm calibration is complete.
3. Next place the powder pan on the platen and press the [ZERO] key to zero the weight of
the pan. The display will show 0.0 GN and is now ready to operate. See Fig. 6.
Notice: During the calibration process, ERROR will be displayed if an incorrect weight is used.
Please use only the calibration weights that are provided with the MatchMaster.
SELECT POWDER TYPE BEFORE DISPENSING
Before start, use number key and [POWDER] key to select powder dispense speed. If dispense
speed is not selected before dispensing, “Err03” will display.
Note: If selected dispense speed dispenses on target but dispense time is long, select the next
higher dispense speed. If the dispense speed selected is fast but causes an overcharge, select
the next lower dispense speed.
AUTOMATIC DISPENSE MODE (Factory Default setting)
This allows powder charges to automatically dispense from the unit once an empty scale pan is
placed onto the unit and the scale is stable. Follow the steps below to use Auto mode:
1. Press [MODE] key and“Auto” will display. Press [GO] to enter setting. Use [4] or [6] to
choose “on”and Press [GO] to set as automatic dispense mode and display shows“Auto”.
2. Enter the desired charge weight and press [GO] key to dispense the rst charge.
8
Fig. 1
Fig. 2
Fig. 3
Fig. 4
Fig. 5
Fig. 6

9
3. Return the empty scale pan onto the scale platen. When the display shows“0.0” the
MatchMaster will automatically dispense the charge.
INTERRUPT DISPENSING
• To interrupt and change charge weight:
Dispense charge and leave powder in the scale pan, press [CANCEL] key to interrupt and
temporarily change to Manual mode. The display shows “Manual” , allowing for changing
of the charge weight.
• To continue dispensing from interruption (resume):
Empty scale pan and return it to the scale platen. Press [GO] key to continue auto dispense
and the display shows“Auto”.
• During dispensing the [GO] button can be depressed to stop dispensing. The [CANCEL]
button is depressed to change to Manual Mode and the charge weight can be changed.
When new charge weight is entered, depress [GO] button to continue dispensing to new
charge weight.
MANUAL DISPENSING MODE
To operate the MatchMaster in manual dispensing mode if desired, follow the steps below to
switch to Manual from the default Auto dispensing mode:
1. Press [MODE] key and display will show “Auto”. Press [GO] to enter setting. Use [4] or [6] to
choose “oFF” and Press [GO] to set as manual dispense mode and display shows “Manual”.
2. Use the number keys to key in the desired weight, and press [GO] key to start the
dispensing process. The decimal point must be used to enter charges using tenth grain
increments. (e.g., 45.5) Use [CANCEL] key to clear the value and enter new charge weight.
Valid values are: 3.0 – 1000.0 (Standard Mode) and 3.0-300 (Match Mode).
Note: To discard charge weight, press [ZERO] or [CANCEL] key and return to scale
mode.
3. After the dispenser has nished dispensing the charge, remove scale pan, empty and
return pan to platen. Press [GO] key again to dispense the same weight again. Continue
this process if you do not want to change the powder charge.
4. If you need to change the weight, key in the new weight as in Step #1 and press [GO] key.
5. If you are dispensing powder and wish to exit dispensing mode, press [CANCEL] key.
MANUALLY DISPENSING OPERATION WITH TRICKLE KEY
Press [TRICKLE] key to dispense the powder slowly. Release [TRICKLE] key to stop dispensing.
USING MATCH MODE
:
Match mode has a resolution of 0.02gn with an accuracy of 0.04gn for a range of 3.00-
300.00gn.; however, dispense time will increase. This is for the serious reloader who wants to
reduce their velocity extreme spread.
To activate Match Mode, press [MODE] key and “Auto” will display. Use [2] or [8] to choose
“MAtCh” and press [GO] key to enter submenu. Use [4] or [6] to choose “on”setting and Press
[GO] to set as match mode and display shows “MAT”.
Note: The scale is extremely sensitive to wind, vibration, and even static while dispensing
in Match Mode. Use wind cover to operate only if necessary. Operation when humidity is
above 60% will increase the chance of overshooting, with some Ball type powders. Refer
to Appendix 3 (Powder Kernel Weight) for list of various powders and their approximate
kernel weight. Remember when dispensing Medium or Large Extruded powder, where the
kernel weight is very close to or is heavier than .04gn (which is the accuracy limit of the
MatchMaster scale in Match Mode), there is the potential that dispensing only one kernel of
powder can create an overcharge condition.

QUICK DRAIN FEATURE
Follow these steps to quickly drain the remaining powder from your dispenser:
1. Move MatchMaster along work surface until the back half of the unit is accessible, but
making sure the center of mass marking does not go past the edge of the surface
(Photo 4). If the mark is positioned beyond the edge, the entire unit might overturn and be
damaged.
2. Insert the provided straw into the center hole of the drain disk. Place powder canister
under straw.
3. Using the tabs, rotate the drain disc to open it as shown below (Photo 5). You may need
to tap on the top of the dispenser to start the powder to drain. The MatchMaster has an
audible alarm that will sound when drain is open, this will remain on until drain is closed.
4. Use the provided small brush to clean powder o the reservoir.
5. When the bulk of the powder has been drained, remove the plastic Hopper from the
MatchMaster, this will allow for better access and aid in cleaning the reservoir.
6. When“drAin” appears, press [ TRICKLE] to rapidly dispense both tubes to clear powder
from the inside of the dispense tubes. Press [CANCEL] to stop tube rotation. Make sure
there is a scale pan on the platen to catch the powder being dispensed.
7. When nished, be sure to rotate and close the drain disc as shown below (Photo 6).
OPEN DRAIN WARNING
If the drain spout is left open; when the MatchMaster is powered on, "drAin" will appear and
ash on the display. Buzzer also sounds if buzzer is set to “on”. This alerts the user that the drain
has been left open and needs to be closed prior to adding powder to the reservoir.
Photo 6Photo 5
10
Photo 4
Center of mass mark

11
CLEAN TUBE SEALS
Sometimes powder can get lodged in the tube seals. It is
recommend to periodically remove tubes and seals to clean. Turn
tubes in a counter-clockwise direction to remove them. Remove
seal covers by sliding them up out of the main housing.
Rub seals slightly to ensure seals return to circular shape before
placing seals back to seal cover. Insert seal covers back gently.
Reinstall tubes by turning tubes clockwise. Then check each tube
for any gap between seals and the tube by moving the tube
forward and backward. If seals move with tubes, that means the
tube is well installed. Otherwise, remove the tube and try to install
the tube again starting with rubbing the seals.
When reinstalling both large and small dispense tubes ensure that
both tubes are threaded fully onto motor. This is easily identied
by noticing the two witness marks on each of the tubes. With the
powder reservoir empty and the tubes installed both witness marks
should be visible, see photo. If only one witness mark is visible the
tube is not threaded onto the motor shaft fully. Remove tube and
check to ensure there is no debris or powder lodged in the threads.
Reinstall tube and thread tube completely onto motor shaft until
both witness marks are visible.
Remove Tubes
Install Tubes

BLUETOOTH DOWNLOAD/CONNECT TO RCBS APP (optional)
1. Download the RCBS App from the App Store (Apple® devices) or Google Play (Android™
devices). Turn on Bluetooth on your mobile device and open the RCBS app.
2. Sign up by selecting a Username and Password and entering the other requested
information.
3. Register your device by naming it (“MatchMaster” is a good choice) and entering its serial
number.
4. Swipe down on the arrow at the bottom of the screen to connect your device. You will
arrive at the Home screen.
5. If you are properly connected, you will see a green icon in the upper-right corner of the
screen. If you need to update or adjust your connected device, tapping this icon will take
you to the Manage Devices screen.
6. On the Home screen itself, you will see four main functions: Dispense Powder, Calibrate,
Congurations and Load Log.
Note: If app "locks up" (iPhone/iPad), close app by double clicking home screen button then swiping up on
RCBS App window.
12
BLUETOOTH OPERATION
Bluetooth Setting
Press the [MODE] key and use [2] or [8] to choose “bLE”. Press [GO] to enter the Bluetooth
settings menu. You can choose from the following settings:
1. “nAME” — the Bluetooth name consists of ve digits (0–9). Press [GO] to save the name.
iPhone® is a registered trademark of Apple Inc.
Android™ is a trademark of Google Inc.
1
4b
3
4a
2
5a
5b

13
2. “AB” — These are the settings for the Bluetooth parameters.
“A” governs the Pair/Unpair mode settings:
0= Unpair mode (default)
1= Pair mode
“B” controls the Link Password settings:
0 = Link Password disabled (default)
1= Link Password enabled
Press [GO] to save your A and B parameters.
Unpair mode does not bind your mobile device with the MatchMaster. Since the MatchMaster
is BLE-enabled, it can still connect to the app without going through the traditional Bluetooth
pairing process. Pairing with the device is still oered as an option for extra security.
To operate in Pair mode, you must ensure that the MatchMaster is ready to pair each time you
use it. The RCBS logo will ash when the MatchMaster is ready to pair. At that point, the app
should be able to connect to your MatchMaster.
Troubleshooting in Pair Mode (iOS/Apple® devices)
If you are having trouble connecting to your MatchMaster device, even after successfully
pairing with it the rst time, take the following steps:
1. In your Bluetooth settings, locate the RCBS MatchMaster and press its blue info icon.
2. Choose “Forget This Device”.
3. Now you can follow the pairing steps above to reconnect your app to the MatchMaster.
NOTE: This type of connection problem can occur because iOS does not unbind from Bluetooth-
connected devices by default, even when you disconnect from them. For this reason, the user
has to ‘forget’ the MatchMaster manually to re-establish the connection.
Set Bluetooth Link Password
Press [MODE] key and Use [2] or [8] to choose “bLE”. Then press [CAL] key. The display shows
“PW”. After entering the new password, press [GO] key to save. Default password is 00000.
Clear Bluetooth Link and Wait for Pairing
Press [MODE] key and Use [2] or [8] to choose “bLE”. Then press [ZERO] key instead of [GO] key,
the display shows“CLinK” and then press [GO] key to clear Bluetooth link and wait for pairing. If
it is connected, it will disconnect rst.
Step 1 Step 2 Step 3

USER DEFINED POWDER CONFIGURATION
This section is for those who want to increase the eciency of their dispensing and make
improvements on the current default powder conguration settings. Since there are four
dierent dispense speeds and several dierent MatchMaster units, default settings are
established to accommodate all. Having the ability to adjust these settings allows the user to
ne tune the powder dispense conguration parameters and increase performance.
Press [MODE] key and Use [2] or [8] to choose “PoWdE”. Then press [GO] key, the display shows
the last edited “uSr” conguration. Press [GO] key to enter this user conguration and
modify values or [CANCEL] key to exit. User dened Parameters will only be saved after
pressing [GO] after the last parameter, "I", is entered. After [GO] is depressed "Test" will display.
this allows the user the option to step through parameter settings "E-I" individually. Detailed
instructions of this process can be found in Appendix 5 (pg. 19). If you choose not to step
through the powder conguration simply depress [CANCEL] when Test is displayed. The
parameters entered will be saved and dispensing can be started.
Note: At any time during the process, press [CANCEL] key to exit without saving any parameters.
When using one of the uSr dened powder congurations (uSr 06-20), you can not switch
between standard and match mode as you can when using the default settings. If wanting
to switch between standard and match the uSr conguration must be modied. This is
accomplished with parameter "B".
1. uSr: enter 6~20 to congure user dened powder (uSr 6~20). Press“Go” to edit parameter
A~I. After entering each parameter, press“Go”to enter the next parameter.
Detailed descriptions for parameters A~I (see Appendix 4, Detailed Explanation of Powder
Dispense Parameters)
2. A: Powder Size 1~4
1 = Large-Heavy (Lg. Extruded or Lg. Ball Powders)
2 = Medium (Med-Small Extruded or Med. Ball Powders)
3 = Small (Small Extruded or Small Ball Powders)
4 = Small-Light (Lg and Sm Flake or Small Extruded & Ball Powders)
3. B: Standard/match mode setting: 0=match, 1=standard
4. C: Weight unit: 0=gm, 1=gn
5. D: Minimum operation value for large tube: 1~40 gn.
6. E: Expected large tube stop point: 1~99.
7. F: Expected small tube stop point: 0~99. The smaller number means the small tube will be
expected to stop nearer to the target weight.
8. G: G1G2Angle and response time for long trickle: 0,0~9,9
a. Rotating time for long trickle = (G1+1)*100ms. (0=Min Rotation, 9=Max Rotation)
b. Response time for long trickle = (G2+1)*250ms (0=Min Response, 9= Max Response)
9. H: Expected start point for short trickle: 0-99.
10. I: I1I2Angle and response time for short trickle: 0,0~9,9
a. Rotating time for short trickle = (I1+1)*25ms. (0=Min Rotation, 9=Max Rotation)
b. Response time for short trickle = (I2+1)*250ms. (0=Min Response,9= Max Response)
Note: for parameters E-I, it is essential to take in account the momentum of the powder, when adjusting
parameters. This is the benet of the step function, which allows the user to set a parameter and visualize
the end result for the parameter only. Ex: "E" parameter is set to stop at 5 gn from target. The tube will stop
at 5 gn from target; however, the momentum of powder will take the result to 3 gn from target.
Press [CANCEL] anytime to exit the setting and return to weighing.
14

Turn counter-clockwise Protection activated
(screw popped out or
removed)
15
ERROR MESSAGES
ERR01 Invalid uSr parameter value or use of undened uSr
ERR02 Invalid input range. Example: attempt to select uSr 99
ERR03 Powder type not specied
ERROR Other error
STORAGE AND SHIPPING
Before storing or shipping the MatchMaster, please activate the transportation protection
mechanism by turning the screw at the side counter-clockwise, then removing it or leaving it
in a "popped out" state (see photo below). To do this, turn on MatchMaster and press zero key
while scale is counting down. Numbers displayed will be stable. Rotate transportation screw
counter-clockwise until numbers on the display are no longer stable, this informs the user the
protection mechanism is activated. If the screw is removed please be sure to keep the screw
with the unit for use next time. If the screw is missing, any M4x8 at head screw or round
head screw can be used. After activating the transportation protection mechanism, place
MatchMaster into its original package and ensure that it is stored at 4°F~122°F (-20°C ~50°C).
CHECKING THE FIRMWARE VERSION
Switch on MatchMaster and press [UNIT] key while counting down, and display will show
“02028”. To check the main board’s rmware, press [ZERO] and the display will show “XXX”. The
main board’s rmware version is 02028XXX. To check the touch board’s rmware, press [ . ] (to
left from the number 0) The display will show “17005” and then “XXX”. The touch board’s rmware
version is 17005XXX.

Appendix 1: DEFAULT POWDER CONFIGURATION SETTINGS
POWDER
DISPENSE
SPEED
SLOW FAST
1 2 3 4
POWDER
EXAMPLE RELODER 50 RELODER 15 300-MP BULLSEYE
MODE STANDARD MATCH STANDARD MATCH STANDARD MATCH STANDARD MATCH
A 1 1 2 2 3 3 4 4
B 1 0 1 0 1 0 1 0
C 1 1 1 1 1 1 1 1
D 22 22 22 22 15 15 6 6
E 18 18 8 8 7 7 3 3
F 35 35 26 26 20 20 10 10
G 43 33 61 41 50 31 41 21
H 25 25 20 20 15 15 5 5
I 12 14 22 13 23 03 22 13
Appendix 2: 7-SEGMENT DISPLAY CHARACTERS
Char Display Char Display Char Display
A M Y
B N Z
C O 0
D P 1
E Q 2
F R 3
G S 4
H T 5
I U 6
J V 7
K W 8
L X 9
Display
Display
16

Approximate Kernel Weight Reference
Item Powder Type Powder
Manufacturer
Powder Preferred
Dispense
Speed *
Unit Weight
(Gn)
1 Extruded Hodgdon Retumbo 1 -
2 Extruded Alliant Reloder 33 1 0.0570
3 Extruded Hodgdon H50BMG 1 0.0680
4 Extruded IMR IMR 7828 1 0.0388
5 Extruded Alliant Reloder 50 1 -
6 Extruded Hodgdon H4350 1 0.0278
7 Extruded Hodgdon H4831SC 1 0.0362
8 Extruded Alliant 4000-MR 1 -
9 Ball Hodgdon H335 1 or 2 -
10 Extruded IMR 4350 1 or 2 -
11 Ball Hodgdon H414 2 0.0048
12 Extruded Vihtavuori N165 2 -
13 Extruded Vihtavuori N150 2 -
14 Extruded Hodgdon Varget 2 0.0198
15 Extruded Alliant Reloder 22 2 0.0300
16 Extruded Alliant Reloder 19 2 0.0400
17 Extruded Alliant Reloder 7 2 0.0084
18 Extruded Alliant Reloder 17 2 0.0260
19 Extruded Vihtavuori N135 2 0.0094
20 Extruded Vihtavuori N140 2 or 3 -
21 Extruded Alliant Reloder 15 2 or 3 0.0163
22 Ball Hodgdon US 869 3 0.0084
23 Ball Alliant 300-MP 3 0.0009
24 Ball Hodgdon H380 3 -
25 Ball Winchester 296 3 -
26 Ball Alliant 2000-MR 3 0.0050
27 Ball IMR 4227 4 0.0042
28 Ball/Flake Vihtavuori 3N37 4 -
29 Extruded IMR 4 -
* If you nd that one powder dispense speed provides inconsistent results, try another powder
Dispense Speed setting (1-4). Remember a setting of 1 will yield slower dispense times, whereas
a setting of 4 will yield faster dispense times and may result in an overcharge condition.
Appendix 3: POWDER KERNEL WEIGHT
17

Appendix 4: DETAILED EXPLANATION OF POWDER DISPENSE PARAMETERS (Ex=Example)
A - Powder Size - Powders have dierent ow characteristics based on their shape and weight. This parameter will
determine the correct transition speed for the Large tube based on the powder size. It also stops the scale short of
the desired target weight, but within tolerance, by the amount listed below for each setting. This is important for
large-heavy powders where a kernel of powder can weigh in excess of 0.07gn.
Ex. if dispensing Lg-Heavy extruded powder where kernel weight is 0.07gn. and target weight is 250.00gn. the scale
will stop if within 0.04gn from target weight, which is 249.96gn. If dispensing were to continue and one kernel was
dispensed the end result would be 250.03gn. which is still within tolerance; however if 2 kernels were dispensed, an
overcharge condition would result.
1=Large-Heavy (Lg. Extruded or Lg. Ball Powders) (0.04 gn from Target weight)
2=Medium (Med-Small Extruded or Med. Ball Powders) (0.02 gn from Target weight)
3=Small (Small Extruded or Small Ball Powders) (0.02 gn from Target weight)
4=Small-Light (Lg and Sm Flake or Small Extruded & Ball Powders) (0.00 gn from Target weight)
Note: The "A" parameter prevents overcharge condition without sacricing dispense times. If you nd that the
dispense weight is consistently short of desired Target weight by 0.02 or 0.04gn, try increasing the Parameter "A"
value.
B - Mode - Sets the dispensing mode to either Standard Mode or Match Mode.
• Match Mode (+/-.04gn) = 0
• Standard Mode (+/- .1gn) = 1
C - Units - Sets the correct units that are to be used.
• Grams = 0
• Grains = 1
D - Large Tube Operation - Controls Large tube operation (1-40).
• If target weight is greater or equal to D the Large tube will Rotate.
• If target weight is less than D the Large tube will Trickle, or will not be used.
• D will normally not need to be adjusted from default setting, unless the target weight is approximately
22 grains or less, and is equal to or up to two units greater than D. This condition can cause an over
charge condition with certain powders. If this happens increase the D parameter to one over the target
weight.
E - Large Tube Stop Point - Controls when the large tube stops from target weight, each division represents
0.5gns. (Range 1-99)
Ex: If E=5, then (5) X (0.5gn) = 2.5 gn.
Large Tube will stop 2.5 gn from target.
F - Small Tube Long Trickle Start - Stop of Small tube constant rotation, each division represents 0.02gns. (Range
0-99);
Ex: if F=20, then (20) x (0.02) = .40gn.
Small Tube Long Trickle operation will start at .12gn from target.
G - Small Tube Long Trickle Operation - Rotation time and response time for long trickle, (G1, G2). (Range 00-99)
• G1 = Controls the time of rotation before stop (0-9); where 0=100ms and 9=1000ms)
• G2 = Controls the response time between stop and start of rotation (0-9); where 0=250ms and
9=2500ms)
Ex: Fastest Dispense = (90); Max time of rotation, Minimum response time.
Ex: Slowest Dispense = (09); Min time of rotation, Maximum response time.
H - Small Tube Short Trickle Start - Stop of Small tube Long Trickle, each division represents 0.02gns. (Range 0-99);
Ex: if H=6, then (6) x (0.02) = .12gn.
Small Tube Short Trickle operation will start at .12gn from target.
I - Small Tube Short Trickle Operation - Angle and response time for Short Trickle, (I1, I2) (Range 00-99)
• I1 = Controls the time of rotation before stop (0-9); where 0=25ms and 9=250ms
• I2 = Controls the response time between stop and start of rotation (0-9); where 0=250ms and
9=2500ms)
Ex: Fastest Dispense = (90); Max time of rotation, Minimum response time.
Ex: Slowest Dispense = (09); Min time of rotation, Maximum response time.
18
Other manuals for 98941
2
Table of contents
Other RCBS Dispenser manuals
Popular Dispenser manuals by other brands

BRAVILOR BONAMAT
BRAVILOR BONAMAT Rivero 12 BLRXL-011 user manual

Graco
Graco 220107 A Series Instructions-parts list

Curtis
Curtis TLP10 Installation instructions, service & warranty information

KATRIN
KATRIN 44672 installation instructions

BOWMAN
BOWMAN BG008-0111 quick start guide

Curtis
Curtis FreshTrac TFT Series user guide

KWC
KWC STRATOS STRX637 Installation and operating instructions

Bunn
Bunn Infusion ITCB Installation & operating guide

Blanc HYGIENIC
Blanc HYGIENIC PS-S-FS1000-FS-5100S user manual

CAB
CAB HS 150 Instructions for use

sultan healthcare
sultan healthcare Moist SURE quick start guide

Crathco
Crathco Simplicity Bubbler CS-3L Operator's manual