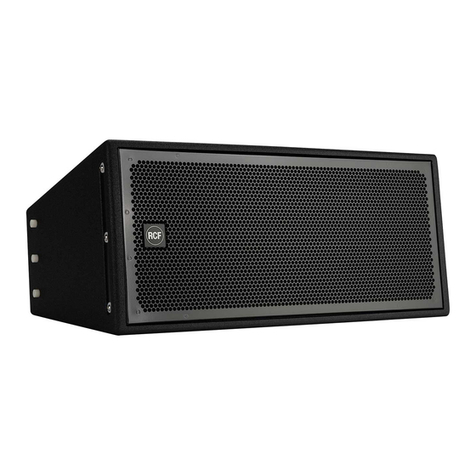
RCF TTL 4-A User manual

TTL 4-A
TTP 4-A
TTW 4-A
TTL C4-A
TTP C4-A
TTW C4-A
TWO WAY ACTIVE SPEAKER MODULES
OWNER’S MANUAL
MANUALE UTENTE


3
CONTENTS
ENGLISH
1 SAFETY PRECAUTIONS AND GENERAL INFORMATION����������������������������������������������������������������������������������������������������������������� 4
2 DESCRIPTION ������������������������������������������������������������������������������������������������������������������������������������������������������������������������������������ 6
3 REAR PANEL FEATURES AND CONTROLS ��������������������������������������������������������������������������������������������������������������������������������������� 7
4 CONNECTION ������������������������������������������������������������������������������������������������������������������������������������������������������������������������������������ 8
PART 1 - TTL 4-A, TTP 4-A, TTW 4-A��������������������������������������������������������������������������������������������������������������������������� 9
5 PRESETS..........................................................................................................................................................10
6 FLOOR CONFIGURATIONS ...............................................................................................................................11
7 SUSPENDED CONFIGURATIONS ......................................................................................................................12
PART 2 - TTL C4-A, TTP C4-A, TTW C4-A ���������������������������������������������������������������������������������������������������������������� 21
8 PRESETS..........................................................................................................................................................22
9 SUSPENDED CONFIGURATIONS ......................................................................................................................23
10 TROUBLESHOOTING...........................................................................................................................................................32
ITALIANO
1 AVVERTENZE PER LA SICUREZZA E INFORMAZIONI GENERALI������������������������������������������������������������������������������������������������� 34
2 DESCRIZIONE ���������������������������������������������������������������������������������������������������������������������������������������������������������������������������������� 36
3 PANNELLO POSTERIORE - FUNZIONI E CONTROLLI �������������������������������������������������������������������������������������������������������������������� 37
4 CONNESSIONI ��������������������������������������������������������������������������������������������������������������������������������������������������������������������������������� 38
PARTE 1 - TTL 4-A, TTP 4-A, TTW 4-A���������������������������������������������������������������������������������������������������������������������� 39
5 PRESETS..........................................................................................................................................................40
6 CONFIGURAZIONI A TERRA.............................................................................................................................41
7 CONFIGURAZIONI IN SOSPENSIONE ...............................................................................................................42
PARTE 2 - TTL C4-A, TTP C4-A, TTW C4-A ������������������������������������������������������������������������������������������������������������� 51
8 PRESETS..........................................................................................................................................................52
9 CONFIGURAZIONI IN SOSPENSIONE ...............................................................................................................53
10 RISOLUZIONE DEI PROBLEMI.............................................................................................................................................62
10 DIMENSIONS......................................................................................................................................................................64
10 SPECIFICATIONS.................................................................................................................................................................65

4
EN
The symbols used in this document give notice of important operating instructions and
warnings which must be strictly followed�
CAUTION
Important operating instructions: explains
hazards that could damage a product,
including data loss
WARNING
Important advice concerning the use of
dangerous voltages and the potential risk of
electric shock, personal injury or death�
IMPORTANT NOTES Helpful and relevant information
about the topic
SUPPORTS, TROLLEYS
AND CARTS
Information about the use of supports,
trolleys and carts� Reminds to move with
extreme caution and never tilt�
WASTE DISPOSAL
This symbol indicates that this product
should not be disposed with your household
waste, according to the WEEE directive
(2012/19/EU) and your national law�
IMPORTANT NOTES
This manual contains important information about the correct and safe use of the device�
Before connecting and using this product, please read this instruction manual carefully and
keep it on hand for future reference� The manual is to be considered an integral part of
this product and must accompany it when it changes ownership as a reference for correct
installation and use as well as for the safety precautions� RCF S�p�A� will not assume any
responsibility for the incorrect installation and / or use of this product�
SAFETY PRECAUTIONS
1. All the precautions, in particular the safety ones, must be read with special attention, as
they provide important information�
2. Power supply from mains
a� The mains voltage is sufficiently high to involve a risk of electrocution; install and
connect this product before plugging it in�
b� Before powering up, make sure that all the connections have been made correctly and
the voltage of your mains corresponds to the voltage shown on the rating plate on the
unit, if not, please contact your RCF dealer�
c� The metallic parts of the unit are earthed through the power cable�An apparatus with
CLASS I construction shall be connected to a mains socket outlet with a protective
earthing connection�
d� Protect the power cable from damage; make sure it is positioned in a way that it cannot
be stepped on or crushed by objects�
e� To prevent the risk of electric shock, never open this product: there are no parts inside
that the user needs to access�
f� Be careful: in the case of a product supplied by manufacturer only with POWERCON
connectors and without a power cord, jointly to POWERCON connectors type NAC3FCA
(power-in) and NAC3FCB (power-out), the following power cords compliant to national
standard shall be used:
-EU: cord type H05VV-F 3G 3x2�5 mm2 - Standard IEC 60227-1
-JP: cord type VCTF 3x2 mm2; 15Amp/120V~ - Standard JIS C3306
-US: cord type SJT/SJTO 3x14 AWG; 15Amp/125V~ - Standard ANSI/UL 62
3. Make sure that no objects or liquids can get into this product, as this may cause a short
circuit� This apparatus shall not be exposed to dripping or splashing� No objects filled with
liquid, such as vases, shall be placed on this apparatus� No naked sources (such as lighted
candles) should be placed on this apparatus�
4. Never attempt to carry out any operations, modifications or repairs that are not expressly
described in this manual�
Contact your authorized service centre or qualified personnel should any of the following
occur:
- The product does not function (or functions in an anomalous way).
- The power cable has been damaged.
- Objects or liquids have got in the unit.
- The product has been subject to a heavy impact.
5. If this product is not used for a long period, disconnect the power cable�
6. If this product begins emitting any strange odours or smoke, switch it off immediately
and disconnect the power cable�
7. Do not connect this product to any equipment or accessories not foreseen�
For suspended installation, only use the dedicated anchoring points and do not try to hang
this product by using elements that are unsuitable or not specific for this purpose� Also
check the suitability of the support surface to which the product is anchored (wall, ceiling,
structure, etc�), and the components used for attachment (screw anchors, screws, brackets
not supplied by RCF etc�), which must guarantee the security of the system / installation
over time, also considering, for example, the mechanical vibrations normally generated by
transducers�
To prevent the risk of falling equipment, do not stack multiple units of this product unless
this possibility is specified in the user manual�
8. RCF S.p.A. strongly recommends this product is only installed by professional
qualified installers (or specialised firms) who can ensure correct installation
and certify it according to the regulations in force.
The entire audio system must comply with the current standards and
regulations regarding electrical systems.
9. Supports, trolleys and carts�
The equipment should be only used on supports, trolleys and carts, where
necessary, that are recommended by the manufacturer� The equipment /
support / trolley / cart assembly must be moved with extreme caution� Sudden
stops, excessive pushing force and uneven floors may cause the assembly to
overturn� Never tilt the assembly�
10. There are numerous mechanical and electrical factors to be considered when installing
a professional audio system (in addition to those which are strictly acoustic, such as sound
pressure, angles of coverage, frequency response, etc�)�
11. Hearing loss�
Exposure to high sound levels can cause permanent hearing loss�The acoustic pressure level
that leads to hearing loss is different from person to person and depends on the duration
of exposure� To prevent potentially dangerous exposure to high levels of acoustic pressure,
anyone who is exposed to these levels should use adequate protection devices� When a
transducer capable of producing high sound levels is being used, it is therefore necessary
to wear ear plugs or protective earphones� See the manual technical specifications to know
the maximum sound pressure level�
OPERATING PRECAUTIONS
-Place this product far from any heat sources and always ensure an adequate air
circulation around it�
-Do not overload this product for a long time�
-Never force the control elements (keys, knobs, etc�)�
-Do not use solvents, alcohol, benzene or other volatile substances for cleaning the
external parts of this product�
IMPORTANT NOTES
To prevent the occurrence of noise on line signal cables,use screened cables only and avoid
putting them close to:
- Equipment that produces high-intensity electromagnetic fields
- Power cables
- Loudspeaker lines
WARNING! CAUTION! To prevent the risk of fire or electric
shock, never expose this product to rain or humidity.
WARNING! To prevent electric shock hazard, do not connect to
mains power supply while grille is removed
WARNING! to reduce the risk of electric shock, do not disassemble
this product unless you are qualified. Refer servicing to qualified service
personnel.
1. SAFETY PRECAUTIONS AND GENERAL INFORMATION

5
EN
1. SAFETY PRECAUTIONS AND GENERAL INFORMATION
CORRECT DISPOSAL OF THIS PRODUCT
This product should be handed over to an authorized collection site for
recycling waste electrical and electronic equipment (EEE). Improper
handling of this type of waste could have a possible negative impact on
the environment and human health due to potentially hazardous
substances that are generally associated with EEE. At the same time, your
cooperation in the correct disposal of thisproduct will contribute to the
effective usage of natural resources. For more information about where you
can drop off your waste equipment for recycling, please contact your local city
office, waste authority or your household waste disposal service.
CARE AND MAINTENANCE
To ensure a long-life service, this product should be used following these advices:
-If the product is intended to be set up outdoors, be sure it is under cover and protected
to rain and moisture�
-If the product needs to be used in a cold environment, slowly warm up the voice coils
by sending a low-level signal for about 15 minutes before sending high-power signals�
-Always use a dry cloth to clean the exterior surfaces of the speaker and always do it
when the power is turned off�
CAUTION: to avoid damaging the exterior finishes do not use
cleaning solvents or abrasives.
WARNING! CAUTION! For powered speakers, do cleaning
only when the power is turned off.
RCF S.p.A. reserves the right to make changes without
prior notice to rectify any errors and / or omissions.
Always refer to the latest version of the manual on
www.rcf.it.

6
EN
TTL 4-A / TTL C4-A - TTP 4-A / TTP C4-A - TTW 4-A / TTW C4-A
The TTx 4-A and TTx C4-A modules deliver top quality sound for demanding events indoors or outdoors, and for small-to-medium sized areas�Their
design provide the audio engineer with tonal balance and intelligibility while maintaining an unobtrusive and adaptable footprint�
Offering all the advantages of line array technology, such as high directivity, long range and uniform level distribution, they are the preferred sound
set-up for high quality suspended systems both in vertical and horizontal arrangement�
Each model offers a different coverage depending on the horn mounted on the speaker�
2. DESCRIPTION
TTL 4-A
Single or coupled vertical use
Horizontal coverage angle: 100°
Vertical coverage angle: 25°
TTW 4-A
Single vertical use
Horizontal coverage angle: 100°
Vertical coverage angle: 50°
TTP 4-A
Single or coupled vertical use
Horizontal coverage angle: 60°
Vertical coverage angle: 25°
TTL C4-A
Vertical or horizontal array use
Horizontal coverage angle: 100°
Vertical coverage angle: 25°
TTP C4-A
Vertical or horizontal array use
Horizontal coverage angle: 60°
Vertical coverage angle: 25°
TTW C4-A
Vertical or horizontal array use
Horizontal coverage angle: 100°
Vertical coverage angle: 50°

5
7
EN
1FEMALE XLR INPUTS (BAL/UNBAL) The system accepts XLR input connectors�
2MALE XLR SIGNAL OUTPUT The output XLR connector provides a loop through for
speakers daisy chaining� The balanced connector is connected in parallel and can be used to
send the audio signal to other amplified speakers, recorders or supplementary amplifiers�
3SYSTEM SET UP ENCODER Pushing the encoder allows the user to select a function
(gain reduction, delay, preset)� Rotate the encoder to select a value or a preset�
4POWER / GAIN REDUCTION LED
POWER LED: the LED lights green when the speaker is connected to the main power supply�
GAIN REDUCTION LED: pushing the encoder once, the LED will light; rotating the encoder the
gain can be set to the desired level� The gain reduction works in steps of 0,1 dB for the first 10
dB and than in 1 dB steps� The maximum reduction is 99 dB�
5DELAY / SIGNAL LED
SIGNAL LED: the signal indicator lights green if there is and audio signal present on the main�
DELAY LED: pushing the encoder twice the delay indicator lights green� Rotating the encoder
the delay reached the desired value� The delay is expressed in meters and works in steps of 0,1
m for the first 10 m and than in 1 m steps� The maximum delay will be 20 meter�
6PRESET / LIMITER LED
PRESET LED: Pushing the encoder three times the preset indicator lights green� Rotating the
encoder the desired preset will be loaded�
LIMITER LED: The amplifier has a built in limiter circuit to prevent clipping of the amplifiers
or overdriving the transducers� When the soft clipping circuit is active this LED blinks RED� It is
okay if it blinks occasionally� If the LED lights continuously, turn down the signal level�
7SYSTEM SET UP DISPLAY It displays the system setting values� In case of RDNet active
connection a rotating segment will light up�
8RDNET LOCAL SETUP/BYPASS. When released the local setup is loaded and RDNet
can only monitor the speaker� When switched the RDNet setup is loaded and bypass any
speaker local preset�
9RDNET IN/OUT PLUG SECTION The RDNET IN/OUT PLUG SECTION features etherCON
connectors for the RCF RDNet protocol� This allows the user to completely control the speaker
using the RDNet software�
10 AC INPUT Powercon locking 3-pole AC mains�
11 AC OUTPUT Powercon locking 3-pole AC mains output�
WARNING! CAUTION! Loudspeaker connections should be only made
by qualified and experienced personnel having the technical know-how or enough
specific instructions (to ensure that connections are made correctly) in order to
prevent any electrical danger.
To prevent any risk of electric shock, do not connect loudspeakers when the
amplifier is switched on.
Before turning the system on, check all connections and make sure there are no
accidental short circuits.
The entire sound system shall be designed and installed in compliance with the
current local laws and regulations regarding electrical systems.
3. REAR PANEL FEATURES AND CONTROLS
1
2
3
4
7
6
8
9
11 10
WARNING: the Powercon connector is
used to disconnect the system from the power
supply network. It shall be easily accessible
after the installation and during the use of the
system.
PRESET LABEL

8
EN
4. CONNECTIONS
The connectors must be wired according to the standards specified by the AES (Audio Engineering Society)�
BEFORE CONNECTING THE SPEAKER
On the rear panel you will find all the controls, signal and power inputs� At first verify the voltage label applied to the rear panel (115 Volt or 230
Volt)� The label indicates the right voltage� If you read a wrong voltage on the label or if you can’t find the label at all, please call your vendor or
authorized RCF SERVICE CENTRE before connecting the speaker� This fast check will avoid any damage�
In case of need of changing the voltage please call your vendor or authorized RCF SERVICE CENTRE� This operation requires the replacement of
the fuse value and is reserved to an RCF SERVICE CENTRE�
BEFORE TURNING ON THE SPEAKER
You can now connect the power supply cable and the signal cable� Before turning on the speaker make sure the volume control is at the minimum
level (even on the mixer output)� It is important that the mixer is already ON before turning on the speaker�This will avoid damages to the speaker
and noisy “bumps” due to turning on parts on the audio chain� It is a good practice to always turn on the speakers at last and turning them off
immediately after their use� You can now turn ON the speaker and adjust the volume control to a proper level�
PROTECTIONS
The speakers are equipped with a complete system of protection circuits� The circuit is acting very gently on audio signal, controlling level and
maintaining distortion at acceptable level�
VOLTAGE SETUP (RESERVED TO THE RCF SERVICE CENTRE)
200-240 Volt, 50 Hz SETUP:
FUSE VALUE T 3.15 A L 250V
100-120 Volt, 60 Hz SETUP:
FUSE VALUE T6.3 A L 250V
MALE XLR CONNECTOR
Balanced wiring
2211
33
FEMALE XLR CONNECTOR
Balanced wiring
22
11
33
TRS JACK CONNECTOR
Balanced mono wiring
TIPTIP
RINGRING SLEEVESLEEVE
TS JACK CONNECTOR
Unbalanced mono wiring
TIPTIP
SLEEVESLEEVE
PIN 1 = GROUND (SHIELD)
PIN 2 = HOT (+)
PIN 3 = COLD (-)
SLEEVE = GROUND (SHIELD)
TIP = HOT (+)
RING = COLD (-)

9
EN
TTL 4-A
TTP 4-A
TTW 4-A
PART 1 TTL 4-A, TTP 4-A, TTW 4-A

10
EN
PART 1 | 5. PRESETS
IMPORTANT NOTE: The following presets are valid for TTL 4-A, TTP 4-A and TTW 4-A only.
L1 - LINEAR Is the totally linear preset� The speaker curve response is perfectly linear� It is ideal when listening outdoor or in low reverberation
rooms, at medium distance and at a medium or high sound pressure level�
L2 - LINEAR HIGH PASS This preset is the same as L1 with a 24 dB/oct� high pass filter at 100 Hz� To be used when the speaker is a part of a
bigger system, when is a satellite of a subwoofer system or when the application is speech reproduction�
L3 - LINEAR LOW LEVEL - PLAYBACK This preset is linear with a gentle +3 dB boost at low frequency� To be used when playing at low level
or for playback music�
L4 - LINEAR INDOOR This preset is linear with a gentle -3 dB shelf at low frequency� It is ideal for a better sound balance in reverberant rooms
and for indoor speech reproduction�
C1 - CLOSE Close listening preset� To be used when the average listener is closer than 3 meter� The preset shows a gentle -3 dB shelf in high
frequencies� The sound balance is natural and never aggressive�
C2 - CLOSE HIGH PASS This preset is the same as C1 with a 24 dB/oct� high pass filter at 100 Hz�
F1 - FAR Far listening preset� To be used when the average listener distance is more than 10 meter� The preset shows a +3 dB shelf in high
frequencies to compensate the air absorption� The clarity and intelligibility in distance are improved�
F2 - FAR HIGH PASS This is the same as F1 with a 24 dB/oct� high pass filter at 100 Hz�
S1, S2 - SIDE COUPLING PRESETS These presets are linear when the speaker are coupled side to side�
These presets are properly designed for speakers coupled with a horizontal coupling angle from 70° to 80°�
The front of the cabinets shall be split and the rear of the cabinets shall be close� The S2 preset features
the low frequency high pass filter�
U1, U2 - VERTICAL COUPLING PRESETS These presets are linear when the speaker are coupled
vertically� The vertical coupling angle can vary from 0° to 10° in 2° steps� Smaller coupling angles offers a
narrower directivity but a better sound projection and far distance definition� The U2 preset features the
low frequency high pass filter�
After the parameter settings the 2 digits display will flash one time�This means saving all the preset values
in the speaker memory�
Once saved, all the speaker settings are permanent� It is possible to turn the speaker off and on and the last settings will be remembered�
To reset the speaker to the original settings :
1. Turn off the speaker
2. Keep the encoder pressed
3. Turn on the speaker (The status yellow led will blink slowly, keep the encoder pressed)
4. Wait until the 2 digits display will turn to show the completed reset procedure
6. Now release the encoder
The reset procedure is finished
Using the RDNet IN/OUT connection it is possible to load in the speaker memory a dedicated user equalisation� The speaker reset procedure will
cancel even this equalisation�
60° - 80°
TTL 4-A, TTP 4-A, TTW 4-A

11
EN
POLE
MOUNTED
SUBWOOFER
MOUNTED
Suggested subwoofer:
RCF TTS 18-A
COUPLED SPEAKERS
OVER A SUBWOOFER
Suggested subwoofer:
RCF TTS 36-A
* This configuration is
suggested for TTP 4-A
PART 1 | 6. FLOOR CONFIGURATIONS
IMPORTANT NOTE: The following configurations are valid for TTL 4-A, TTP 4-A and TTW 4-A only.
60° - 80°
TTL 4-A, TTP 4-A, TTW 4-A

12
EN
PART 1 | 7. SUSPENDED CONFIGURATIONS
SINGLE SUSPENSION ON VERTICAL FLYBAR
This configuration is suggested for TTL 4-A, TTP 4-A and TTW 4-A. The speakers can be suspended with the vertical flybar (FL-B V TT 4)
indifferently with the horn in upper or lower position�
UNLOCKING THE SUSPENSION BRACKET
The lateral suspension bracket needs to be unlocked; push the bracket, a spring will
push it out so to unlock it from its resting position�
TTL 4-A, TTP 4-A, TTW 4-A
IMPORTANT NOTE: The following configurations are valid for TTL 4-A, TTP 4-A and TTW 4-A only.
HORN
HORN

13
EN
The bracket locks itself in two positions as shown in the pictures: POSITION “1”, for a line array cluster configuration (horizontal) and POSITION
“2”, for a sound column cluster configuration (vertical)
TTL 4-A, TTP 4-A, TTW 4-A
PART 1 | 7. SUSPENDED CONFIGURATIONS
POSITION ”2”
POSITION ”1”

14
EN
PREPARING THE FLYBAR
It is possible to place the tube on the flybar in two different positions as shown in the pictures�
A B
A B
FRONT
FRONT
Refferring to the “FRONT” and the letters indication, 4 different flybar configurations are obtainable:
....
A B
FRONT
A
FRONT B
FRONT
A
....
A B
FRONT
A
FRONT B
FRONT
C
....
A B
FRONT
A
FRONT B
FRONT
B
....
A B
FRONT
A
FRONT B
FRONT
D
PART 1 | 7. SUSPENDED CONFIGURATIONS TTL 4-A, TTP 4-A, TTW 4-A

15
EN
WARNING! CAUTION! Always lock the tube
on the flybar with the two pins pointed on the picture and
secure them with the split pins on the other side.
TTL 4-A, TTP 4-A, TTW 4-A
PART 1 | 7. SUSPENDED CONFIGURATIONS
Depending on the speaker orientation (with the horn on the upper or lower side) place the flybar on the speaker and secure the two linking
brackets with the quick lock pins as shown on the following pictures:
HORN
HORN

16
EN
LINKING THE FLYBAR TO THE SPEAKER
On one side of the speaker lower the linking bracket and fix it to the speaker with the quick lock pin�
On the other side of the speaker raise the linking bracket and fix it to the flybar with the quick lock pin�
PART 1 | 7. SUSPENDED CONFIGURATIONS TTL 4-A, TTP 4-A, TTW 4-A

17
EN
DOUBLE SUSPENSION ON VERTICAL FLYBAR
This configuration is suggested for TTL 4-A and TTP 4-A; not suggested with TTW 4-A.
Two linked speakers can be suspended on the vertical flybar (FL-B V TT 4)�The speakers must be positioned with their horns side by side and linked
together with the linking brackets�
Once the first speaker is linked to the flybar, the second speaker can be suspended to the first speaker�
TTL 4-A, TTP 4-A, TTW 4-A
PART 1 | 7. SUSPENDED CONFIGURATIONS
HORN
HORN

18
EN
Follow the instructions on PART 7�1 to link the first speaker to the flybar�
On one side of the speaker lower the linking bracket and fix it to the speaker with the quick lock pin�
PART 1 | 7. SUSPENDED CONFIGURATIONS TTL 4-A, TTP 4-A, TTW 4-A
On the other side of the speaker raise the linking bracket and fix it to the other speaker with the quick lock pin�
The two speakers are now linked together�

19
EN
TTL 4-A, TTP 4-A, TTW 4-A
PART 1 | 7. SUSPENDED CONFIGURATIONS
WALL MOUNTING
This configuration is suggested for TTL 4-A, TTP 4-A and TTW 4-A. The speakers can be mounted on a wall with the vertical bracket V-BR TT 4�
Unscrew the four M8 lateral screws from the speaker, position the bracket and screw it to the speaker with the same M8 screws as shown in the
image (place the bracket exactly as shown in the image)� Use the flat washers and the serrated washers provided to install the vertical bracket�
Place the V-BR bracket on the speaker and secure it using the M10 screws (Use the flat washers and the serrated washers provided)�
Do not completely clamp the screws to allow the speaker inclination�

20
EN
PART 1 | 7. SUSPENDED CONFIGURATIONS TTL 4-A, TTP 4-A, TTW 4-A
Now define the inclination angle and fix the speaker with the M6 screws provided, then clamp the M10 screws completely�
REFER TO THIS ILLUSTRATION TO DETERMINE THE INCLINATION ANGLE
IMPORTANT NOTE: For wall mounting use wall inserts (screw anchor or chemical) with the followings specs:
- min nominal share load 167 N
- min nominal traction load 3047 N
- safety factor equal or higher than 4
-20°
+25°
-10°
+15°
-5°
+30°
-25°
+5°
-30° +20°
-15°
0°
+10°
POSITIVE VALUES
ARE FOR TILTING UPWARDS
NEGATIVES VALUES
ARE FOR TILTING DOWNWARDS
Other manuals for TTL 4-A
1
This manual suits for next models
5
Table of contents
Languages:
Other RCF Control Unit manuals
Popular Control Unit manuals by other brands

SMSCOM
SMSCOM SwitchBox All-In-One SW-B2L user manual

Stahl
Stahl 9478 Series operating instructions

Chore-Time
Chore-Time 108 FLEX-AUGER installation instructions

Huawei
Huawei RTN 380H Quick installation guide

Genebre
Genebre 2402 Installation, operation & maintenance manual

AUDAC
AUDAC SourceCon MMP40 user manual