Installation Steps:
1. Begin by unpacking and removing all components and hardware. Please verify that all hardware,
components, and mounting components are present. Please reference your original order invoice and
verify all items are accounted for.
a. If applicable, remove OEM skid plates before beginning installation of RCI Skid Plates.
b. If installing with the RCI Transmission Skid Plate, follow the Transmission Skid Plate Install guide
completely before returning to this install guide and skip steps 2 and 3.
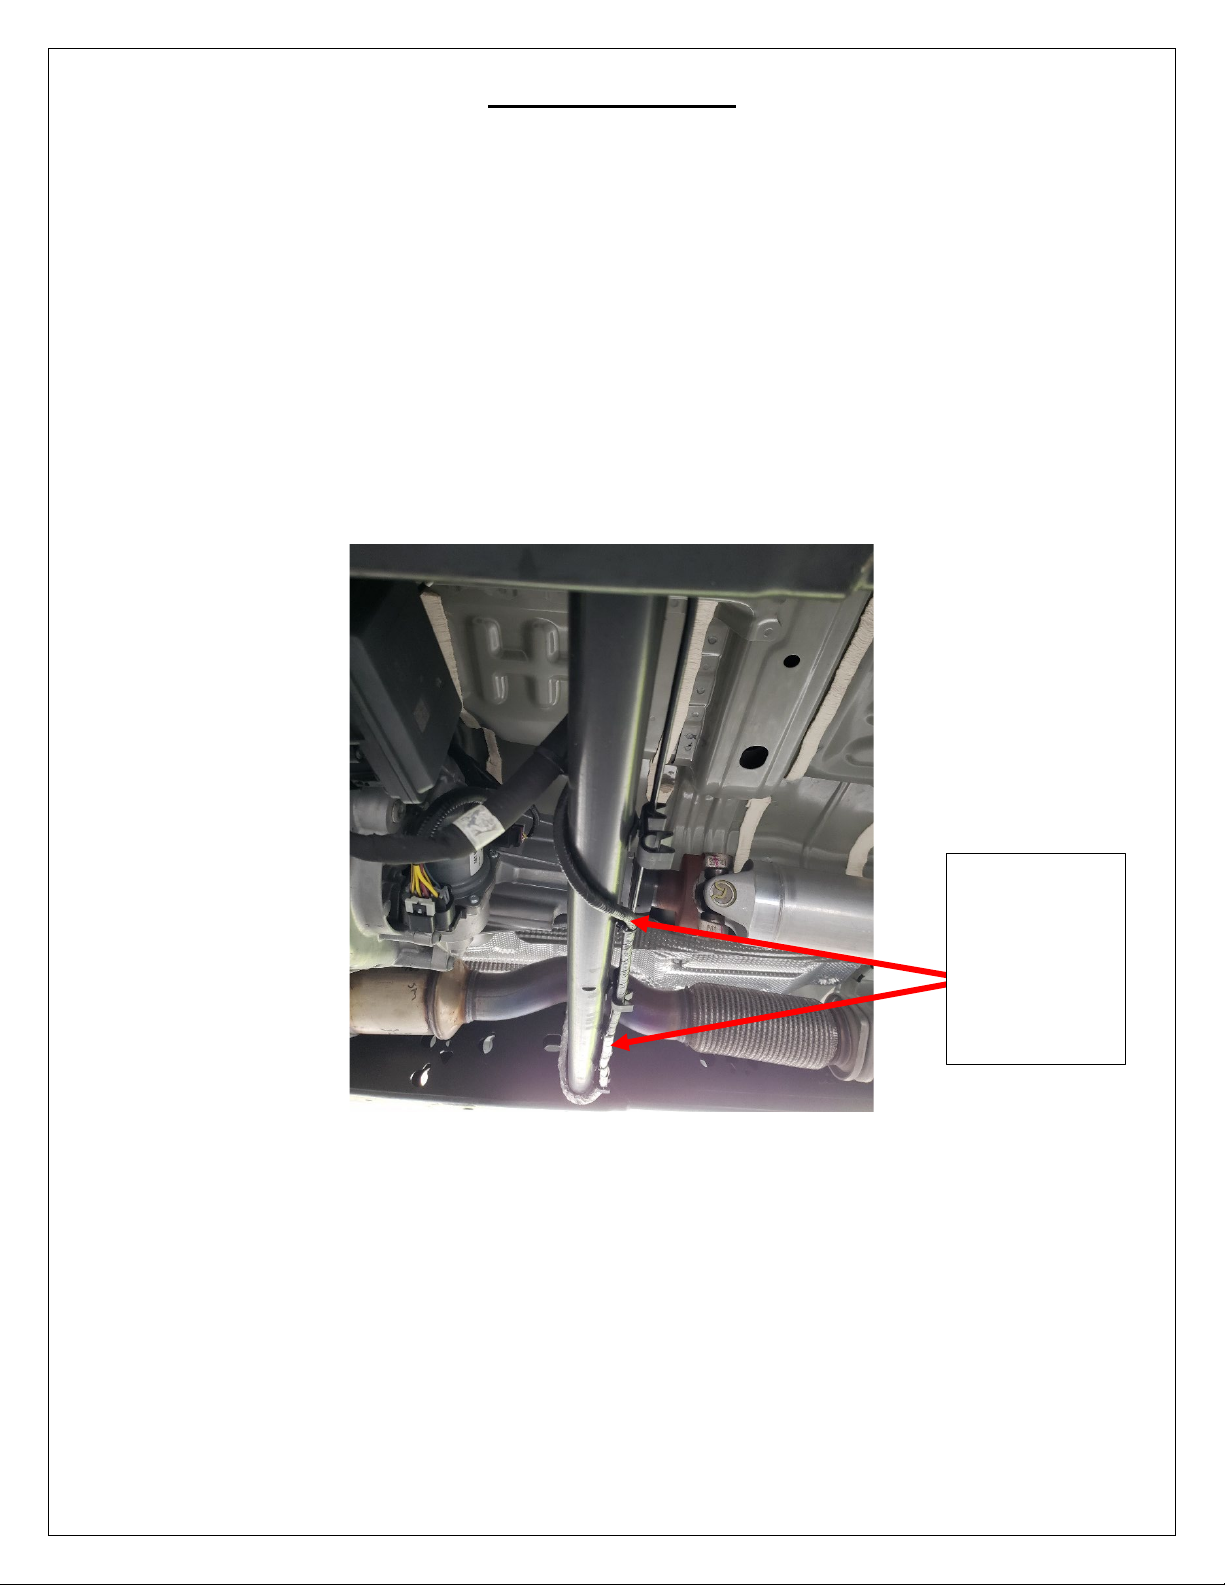
c. If your vehicle’s rear tubular crossmember (behind the transfer case) has a bundle of wires
routed under the tubular crossmember, it is highly recommended that you take this time to
reroute the wires before beginning the RCI T-Case Skid Plate installation. This step isn’t strictly
necessary, but it is highly recommended.
i. To reroute the wire, simply unclip the wires from the rear of the tubular crossmember,
move the wire bundle towards the front of the vehicle, and reroute the wire over the
tubular crossmember before re-securing the wires to the clips at the rear of the tubular
crossmember.
2. Insert a set of Mounting Plate 2’s into the rearmost rectangular crossmember as shown below:
a. You may find it easier to get the MP2’s aligned and in position by reversing their direction and installing
them from the large cutout in the center of the crossmember. Feel free to try this method if you’d
prefer, but the threaded mounting plates will be more difficult to adjust once the skid plate is up.
b. The mounting plates are marked with the text “MP2” for “Mounting Plate 2”. There is a smaller, non-
threaded hole on one end of the plate and a larger, threaded hole on the opposite end. Take special
care to install the MP2’s with the threaded end inserted first.
c. The MP2’s are mounted to the outside of the crossmember for visualization purposes only. Install the
MP2’s inside the crossmember in the shown orientations.
routed under
tubular
crossmember in
factory
orientation.


