RCMAX 55 SUPREME Owner's manual

RCMAX 55/65 SUPREME Installation and Operation
Congratulations, and thank you for purchasing your new RCMAX engine.
This is a high performance, two stroke engine which produces over five times the power of a standard
largescale, RC car/buggy engine. Please be prepared for the transformation of your RC!!
Drive with care while you are getting used to this.
We strongly recommend fitting a remote kill switch to your engine, as should be the practice with all
largescale cars. Most normal 1/5 scale kill switches, plug straight in place of the stock button provided.
Important Safety Note:
Because of the performance potential of this engine in a vehicle, such as the HPI Baja, it is
necessary to operate the vehicle in a suitable, controlled environment. It should not be operated
in a public space where people are engaged in other activities, such as a public park. Do not operate
in an area where there are children playing, near pets or other animals. Do not operate on a public.
highway.
Loss of control of such a vehicle could result in serious injury to another person, family pet or other
animal.
Be aware that the engine silencing is minimal so do not run the engine in an area where this could
cause a nuisance. You and those around you should always use ear protection during operation.
Please note: All of the manufacturers safety instructions for the operation of the vehicle in which the
engine is fitted, must be followed.
Fuel Safety Guidelines
Fuel is highly flammable. Never operate the vehicle near open flames. Do not smoke while
handling fuel. Always operate the vehicle in a well ventilated area. Model car engines produce
carbon monoxide fumes.

Installation in Losi 5ive-T
Installation in the Losi is pretty much the same as a standard engine with the exception of the
expansion chamber. This is supplied with a bracket to attach to the pull start housing 2x bolts. It is
connected to the engine using an "O" ring sealed joint and a retaining spring. The 'O' rings are supplied.
Just push the pipe over the exhaust stub, attach the springs, and bolt to the bracket wiith rubber mount.
Throttle/Carb/Intake
A Walbro WJ71 big bore carb is fitted as standard on the RCMAX 55/65. This carb has had the stock
throttle shaft drilled and a quick release fitting can be fitted here so that you can simply hook it up to your cars
servo arm and adjust to suit.
An intake system is provided with your engine package which brings the air filter in line with the vents
in the body so that clean fresh air is being used for optimal performance.
NOTE: See further sheet for more information on the carb and settings
Gearing
A higher ratio is required for the main drive gears. A 28 tooth pinion and 50 tooth spur gear should provide
a good starting point. Suitable gears for the Losi are made by
Blackbone Racing
and available from us
.
This ratio should give the car rapid acceleration and a reasonable top speed so it can be used in a
reasonably sized space. Lots of other gear combinations are available, please just ask we carry stock of
all the popular sizes.
Drivetrain
Because of the considerable extra performance of the engine it will be necessary to upgrade the drivetrain
with heavy duty parts. We would recommend using heavy duty drive shafts, heavy duty billet diff housings as
per the
RCMAX DIFFS
with oversize bearings and Billet diff casings such as the
RCMAX 7075 Diff Cup.
If your looking to prep your car as best as possible, we have created a Billet Losi Chassis (1.0/2.0) that
prevents excess flex which can kill your centre driveline (see pics below)
We also advise to use 1M weight oil or a locker in the centre, 500k in the rear and 300k oil in the
front diff. In this way you will always have at least two wheels driving and a good spread of the power.
Note: See supplementary sheet for installation in the HPI BAJA

Installation in a HPI BAJA
Installation in the vehicle is straightforward. The engine is designed to make use of most of the existing mounting points
with the exception of the left side of the chassis. Here two brackets are supplied as part of the engine package, which
replace the original parts.
Some adjustment will be required to your throttle linkage to connect to the carburettor due to the size and spacing.
The RCMAX exhaust mounts to the engine with a sealed joint and to the chassis via the supplied brackets
and rubber support mounts. Thus it is quick and easy to release if you need access to your radio gear, etc.
It is recommended that you fit a
Team Chase
roll cage to your vehicle to protect the engine and expansion
chamber in the event of a roll.
Left side front mount
Left side rear mount
Right side mounting bolts (2 behind pinion)
Note
: Three M5 bolts fitted from below
the chassis, not shown in the photo's
Note
: See supplementary sheet for installation in the Losi 5ive-T
Due to the considerable increase in power over the standard engine it is advisable to replace the standard
drivetrain parts, such as gears and drive shafts, with heavy duty, upgrade parts. We would recommend
using a billet aluminium alloy diff case with steel gears throughout. Blackbone Racing now make a full set
of replacement, heavy duty gears for the Baja gearbox.
Primary drive gears should only be from Blackbone Racing, which we stock a full range of sizes. We would
recommend using 26/48 or 27/47 gears with your 65cc engine depending on taste.
Drive shafts should be heavy duty types. We would also recommend that you fit a locked or limited slip differential.
To make control of the vehicle easier it would be advisable to fit some sort of wheelie bar on the
rear of the chassis. This, together with heavy oil in the diff (250-2M), helps to make the vehicle more driveable
on the throttle. The ideal solution is the RCMAX HEX-LOCK KIT to forget diff failures for good!
Finally a good set of wheels, preferably BRP wheels will be required to prevent constant foam blow outs!

Installation in Kraken Vekta
Installation in the Vekta is pretty much the same as a standard engine with the exception of the
expansion chamber. This is supplied with new brackets to attach to the car securely. It is
connected to the engine using a gasket and header piece, then the main pipe attaches via a slip joint
and retaining springs. A small length of tubing is supplied to fit to the end of the outlet and ensure no oil
residue from the smoke is left inside the car.
Minor Cage Modification (not body panels)
As shown on the picture below, there is a small mod required to the plastic cage bars which are in the
way of the rcmax billet intake. Simply trim this cross bar and circle section from the cage, leaving the body
panel in tact. This just allows a little room in the event of a rollover for the body to flex inwards without hitting.
Also with the new SUPREME Cylinder head, it is required to remove the front right cage bar which hits the head.
Throttle/Carb/Intake
A Rooster 990 Full Mod is fitted as standard on the RCMAX 55/65 with the option of a WJ71 also when ordering.
Both carbs are supplied with throttle arms prepared to take the supplied quick release fitting, we also
supply a new link rod which is bent to fit the large crankcase.
If your using the WJ71 Carb, youll notice its 10mm wider and therefore more effort needed on the cage, we
supply a billet spacer which fits between your cage and the bottom cage mount leg to space out the cage.
NOTE: See further sheet for more information on the carb and settings
Gearing
A higher ratio is required for the main drive gears. A 22 tooth pinion and 19 tooth step gear should provide
a good starting point. Suitable gears for the Vekta are made by Vertigo and we offer their system.
This ratio should give the car good acceleration and a reasonable top speed so it can be used in a
reasonably sized space. Lots of other gear combinations are available too.
Please bare in mind tyre size, if you run Trepadors then stage 2 gears (21/20) will be plenty.
Drivetrain
Because of the considerable extra performance of the engine it will be necessary to upgrade the drivetrain
with heavy duty parts. We would recommend using the RCMAX heavy duty front billet diff housing.
We also advise to use 1M diff oil in the rear and 300k oil in the front diff. In this way you will always have
a good spread of the power and the engine should not be able to overcome the oil too easily.

Engine Starting Procedure
NOTE:
Your Air Filter requires oiling before use -
We are
cautious with the fumes from the oil causing issues during shipment
.
Decompression valve (optional)
Engine stop switch Pull starter
Choke lever - automatically releases when throttle is opened
First Time Engine Starting.
When starting for the first time following engine installation it will be necessary to draw the
fuel from the tank up to the carburettor. Push the choke lever down into the 'ON' position.
Press the decompressor valve down (if fitted) and pull the starter cord about 3-4 times a little slower
than for engine starting. If you have a clear fuel tube you will see the fuel being drawn into the
carburettor. Once this procedure is complete you can start the engine.
Engine Starting.
With the choke on, first engage the starter carefully and then pull the starter cord fully and strongly
to start the engine.
Please note that it is necessary to reset the decompressor valve after
each pull of the starter (if fitted).
After two to three pulls of the starter the engine should fire once.
At this point release the choke lever, press the decompressor and pull the starter cord to start the engine.
Two or three
STRONG, HARD
pulls should be sufficient. DO NOT SNATCH at the starter, engage first
and then pull through with a strong meaningful stroke.
Engine Break-In.
After starting the engine make sure it is fully up to operating temperature before driving the vehicle.
For initial break in during the first 5mins, allow the engine to idle with intermittant blips of the throttle.
Then operate the vehicle using short bursts of heavy throttle to allow the engine and clutch shoes to
fully bed in, while keeping the car moving at good speeds for air flow. DO NOT fall into the trap of
driving around slowly on half throttle. This is the fastest way to overheat your engine and clutch.
Safety Note:
Because of space limitations within the vehicle, the silencing of the exhaust
system is limited. Always wear ear protection when running the engine.

Walbro WJ71 Carburettor Setting
Your engine has already been checked and tested at the factory and the carb is set at base settings.
Make sure you complete the run in of the engine on a rich setting before considering leaning it out for
optimal performance. Please remember your climate and altitude could result in the requirement for
different settings, so as with any two stroke, start with caution and care.
We fit the Walbro WJ71 carb as standard which does not come with a priming bowl. However
priming the engine is simple. Pull the engine over with the choke on a few times in order for the fuel
pump within the carb to pull the fuel up the line into the carb itself. Its ideal to use a clear fuel line so
you can watch this process and see when the fuel reaches the carb. Then you can expect the engine
to fire up, sometimes with the aid of a small amount of throttle and choke.
Location of carburettor controls
Throttle lever Idle Speed adjustment screw
Low Speed mixture adjustment screw High Speed mixture adjustment screw
Base setting:- 1 1/2 turns out Base setting:- 1 3/8 turns out
The base settings of the mixture screws may need some adjustment to suit your local
atmospheric conditions e.g. temperature, humidity. If so adjustments should be made 1/16
of a turn at a time, with a test run after each adjustment. Do not exceed 1/3 turn in from the
factory setting or it may result in engine damage.
Choke lever Fuel feed connection
Shown in 'OFF' position
Note: The choke is automatically released when the throttle is opened
Note: This carburettor has only one connection to the fuel tank. This is the fuel
feed tube which must have an in tank filter fitted.
There is no fuel return tube required so this should be removed and the hole
blanked off using a suitable sealing plug as long as your tank has a breather, if.
not then fit a MX style non return breather valve in the second unused line.

The RCMAX clutch system
With the step up into Big Bore engines, we also need to increase the performance and durability of the
clutch system. After a massive amount of investment and research, we have now developed/refined
our own sintered steel clutch. The RCMAX V3 Clutch combined with our new RCMAX Clutch springs.
This clutch is now an extremely durable and reliable big bore clutch system, requiring no maintaince
or regular adjustment. Just fit and forget.
The fitment of the clutch is simple, once you have the spring fitted to the shoes, which fits like like all 1/5
scale clutches (line up and then snap together), you simply attach the clutch via the two mounting bolts.
It is important to note that the RCMAX V3 clutch is
designed for normal 8mm 1/5th scale clutch hardware
So simply fit the bolt into the shoe with the spring washer
between head of the bolt and shoe then fit the flat washer
behind the shoe and then bolt onto the clutch backplate
on the engine.
When fitting the clutch shoes, check that the
RCMAX brand name is facing outwards
there is also a directional arrow for double checking
Clutch Removal/Replacement
Tools are available on the market called "piston stoppers" which are screwed into the spark plug hole and
stop engine rotation by physically stopping the piston from moving in the cylinder.
WE DO NOT ADVISE
THE USE OF SUCH TOOLS
Instead simply insert some pull start cord in through the plug hole (with the piston past exhaust port closure
and then gently turn the engine to TDC to pinch the cord between piston and head to lock.
Included with the engine is a tool designed to make clutch backplate removal easy if required for servicing.
The picture shows how to hold the clutch back plate while the centre retaining bolt is loosened.
Then simply wind the bolts which are threaded into the clutch backplate evenly in, turning them a fraction of
a turn each in sequence so that they pull against the clutch tool and pop the backplate off the taper on the
crankshaft. This then allows inspection of the crankseal and further stripping of the engine.
Clutch back plate removal
M6 bolts screwed into crankcase
and clutch back plate (4 off)
Allen key inserted into back plate
retaining bolt
Clutch holding tool

Maintenance
To ensure that you get the maximum enjoyment from this product and a good service life, RCMAX
recommends that you take a little time to clean the engine and vehicle after use.
It is easy to spot a little problem such as a loose bolt on an engine mount before it becomes a much
bigger problem.
It is absolutely essential that only the best quality fully synthetic two-stroke oil is used.
We
recommend Putoline RS959 or Motal 800 but there are lots of great products on the market. (please ask
if you are unsure)
This must be mixed at a fuel/oil ratio of 25:1. Only good quality 95+ Octane must be used to prevent the
possibility of detonation or seizure. We recommend using an additive called Tetraboost with your fuel for
the ultimate in reliability. (or run a two-stroke friendly leaded race fuel such as VP C12.)
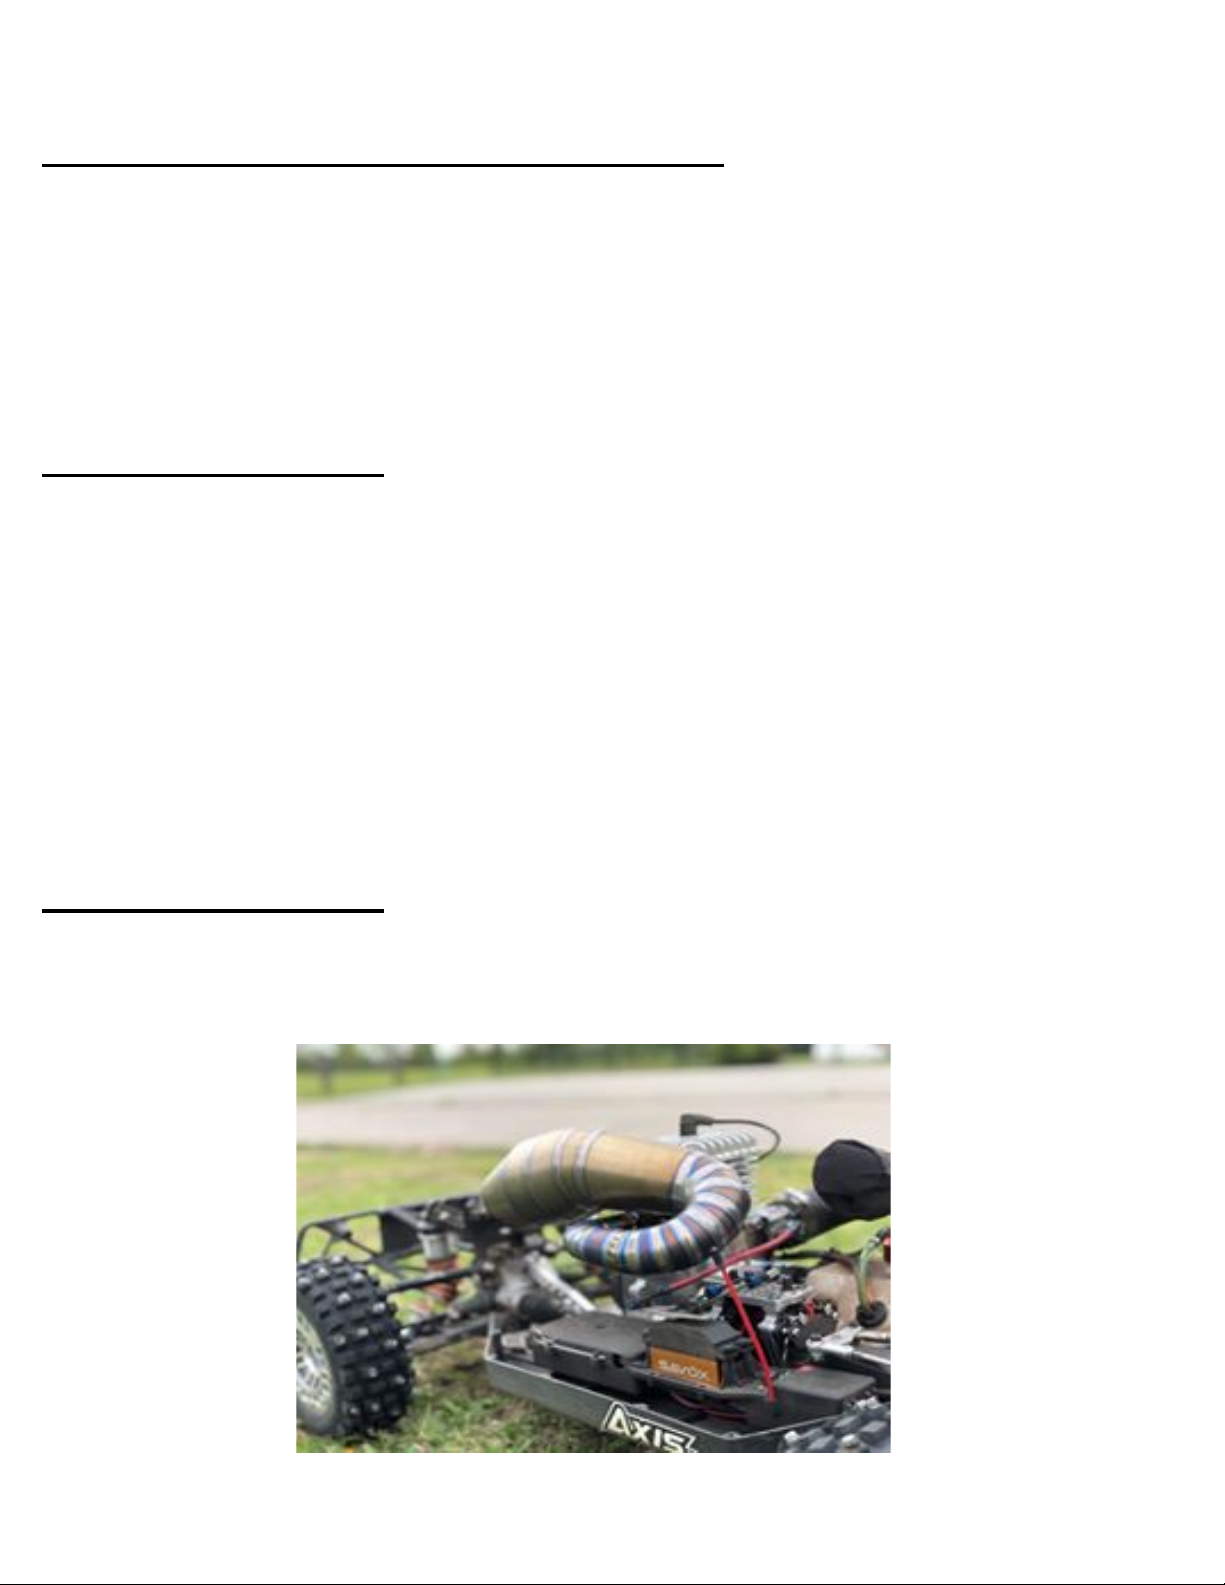
The best type of air filter to use with the engine is the quality dual stage RAM-AIR filter and should be kept
oiled for best performance. The filter is very effective at keeping the engine clean internally even when run
in dusty conditions. Regular cleaning and re-oiling is required to keep air filtration at its best. The use of an
water resistant Outerwears protective element is recommended for filtering out large debris.
Paper element filters can be used but should be of the highest spec, such as that supplied in the past,
and should be run dry and kept clean with regular checks
Please ensure that your fuel equipment, and fuel system of the vehicle is kept in a clean condition.
Dirt can play havoc with carburettors leading to much frustration and little fun. Please make sure your
vehicle in-tank fuel filter is in good working order.
Due to the size of these engines, they tend to offer a longer service life from the piston and ring than you
may be used to with traditional tuned RC engines. This will depend on how you use it and look after it but
its not unusual for a well maintained RCMAX to go years between rebuilds.
If you are unsure about carrying out a rebuild, we are more than happy to do it for you for a small charge plus
parts.
Please contact RCMAX for advice, or service, if you are in any doubt.
Contact details are as follows:
Main Contact: Mike Taylor
Contact E-mail: [email protected]
Limited Warranty
What this Warranty Covers
RCMAX warrants that the product purchased will be free from defects in materials and workmanship at the date
of purchase by the Purchaser.
What is Not Covered
This warranty is not transferable and does not cover (i) cosmetic damage, (ii) damage due to acts of God, accident,
misuse, abuse, negligence, commercial use, or due to improper use, installation, operation or maintenance, (iii) modification
of or to any part of the product, (iv) attempted service by anyone other than RCMAX or their appointed agent, or (v)
products not purchased from RCMAX or their appointed agent. (vi) the product if aftermarket components, which
are not specifically aproved by RCMAX are used with the product, e.g. exhaust system.
OTHER THAN THE EXPRESS WARRANTY ABOVE, RCMAX MAKES NO OTHER WARRANTY OR REPRESENTATION,
AND HEREBY DISCLAIMS ANY AND ALL IMPLIED WARRANTIES, INCLUDING, WITHOUT LIMITATION, THE IMPLIED
WARRANTIES OF NON-INFRINGEMENT, MERCHANTABILITY AND FITNESS FOR A PARTICULAR PURPOSE.
THE PURCHASER ACKNOWLEDGES THAT THEY ALONE HAVE DETERMINED THAT THE PRODUCT WILL SUITABLY
MEET THE REQUIREMENTS OF THE PURCHASER'S INTENDED USE
Purchasers Remedy
RCMAX's sole obligation and purchasers sole and exclusive remedy shall be that RCMAX. will, at its option,
either (i) service, or (ii) replace, any product determined by RCMAX to be defective. RCMAX Reserves the right
to inspect any and all Product(s) involved in a warranty claim. Service or replacement decisions are at the sole discretion
of RCMAX. Proof of purchase is required for all warranty claims.
SERVICE OR REPLACEMENT AS PROVIDED UNDER THIS WARRANTY IS THE PURCHASERS SOLE AND EXCLUSIVE
REMEDY.
Limitation of Liability
RCMAX SHALL NOT BE LIABLE FOR SPECIAL, INDIRECT, INCIDENTAL OR CONSEQUENTIAL DAMAGES, LOSS
OF PROFITS OR PRODUCTION OR COMMERCIAL LOSS IN ANY WAY, REGARDLESS OF WHETHER SUCH CLAIM IS
BASED IN CONTRACT, WARRANTY, TORT, NEGLIGENCE, STRICT LIABILITY OR ANY OTHER THEORY OF LIABILITY,
EVEN IF RCMAX HAS BEEN ADVISED OF THE POSSIBILITY OF SUCH DAMAGES. Further in no event shall the liability
of RCMAX exceed the individual price of the Product on which the liability is asserted. As RCMAX has no control
over use, set-up, final assembly, modification or misuse, no liability shall be assumed nor accepted for any resulting damage
or injury. By the act of use, set-up or assembly, the user accepts all resulting liability. If you as the purchaser or user are not
prepared to accept the liability associated with the use of the Product, purchaser is advised to return the Product immediately
in new and unused condition to the place of purchase.
Law
These terms are governed by the laws of England (without regard to conflict of law principals). This warranty gives you specific
legal rights. RCMAX reserves the right to change or modify this warranty at any time without notice.
This manual suits for next models
1
Table of contents
Other RCMAX Motorized Toy Car manuals