MAINTENANCE
GENERAL CARE
Your B150‑B is a precision instrument and should be cared for as such. It is shipped
to you packed in an Op/Tech USA padded neoprene carrying case. Please keep your
B150‑B in this case for transportation and storage.
Be careful not to drop your B150‑B. The rail is computer‑control machined for exact
flatness and dropping or otherwise abusing the instrument can distort the rail and will
hamper the focusing action.
CLEANING
Keep all rail and stage mating surfaces free of dust, dirt and debris. If you foul the
surfaces, please do not work the focusing action without first thoroughly cleaning all
surfaces. Dry dust and dirt can be blown off and/or wiped off with a cloth. Mud or salt
water should be washed off with clean, fresh water and then thoroughly dried. Do not
disassemble your B150‑B for cleaning.
LUBRICATION
Action of the lead screw may improve if a small amount of light machine oil is applied
to the threads. However, if you intend to use the equipment in areas where windblown
contamination (sand/dirt) is likely, we recommend keeping all surfaces clean and dry
(i.e.; do not apply lubricant).
The stainless‑steel lever on the quick‑release clamp rides on a special bronze bearing
surface. This bronze bearing washer
slides up and down the stainless‑
steel shaft which attaches the lever to the
clamp body. This shaft and the lever cam was
lubricated at the factory with a high‑quality
synthetic lubricant. Over time, you may need
to re‑lubricate this shaft or the cam surface of
the lever. Sparingly use a high‑quality machine
oil or lightweight grease only and wipe off any
excess.
MACRO FLASH
GENERAL
Flash is often used to permit the use of small (f/11-16) apertures to assure adequate
depth-of-field at an acceptable exposure duration. Also—closeup subjects may require
flash fill to reduce excessive contrast, to produce catchlights, or to enhance modeling.
It is seldom viable, when working close, to mount a strobe in the camera’s hot shoe.
That position is too low, does not offer the needed 15-30 tilt for beam aiming, and
is off-axis in vertical aspect. Add one of our flash brackets for more effective flash
placement. More than one off-camera remote strobe may be necessary to lighten a
dark background, or to provide rimlight, or backlight, on the subject; to accomplish
this, add a second flash mount to your flash bracket.
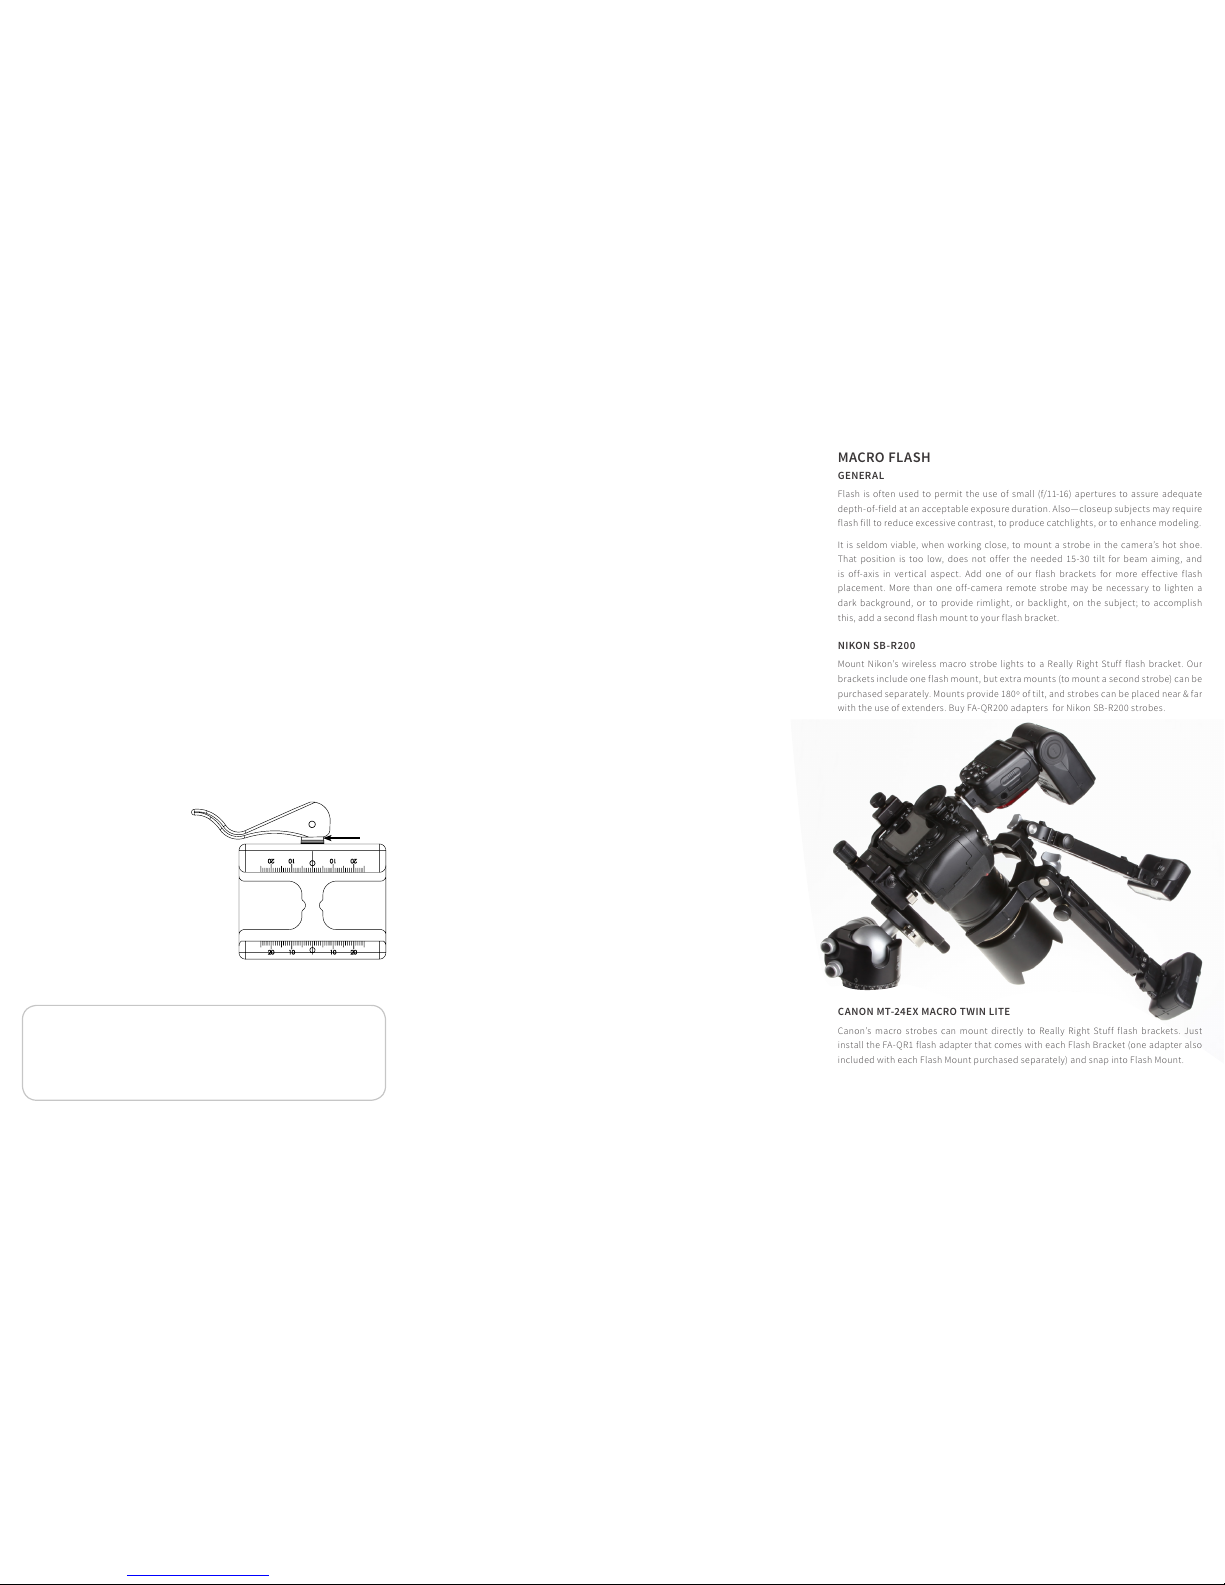
NIKON SB-R200
Mount Nikon’s wireless macro strobe lights to a Really Right Stuff flash bracket. Our
brackets include one flash mount, but extra mounts (to mount a second strobe) can be
purchased separately. Mounts provide 180º of tilt, and strobes can be placed near & far
with the use of extenders. Buy FA-QR200 adapters for Nikon SB-R200 strobes.
CANON MT-24EX MACRO TWIN LITE
Canon’s macro strobes can mount directly to Really Right Stuff flash brackets. Just
install the FA-QR1 flash adapter that comes with each Flash Bracket (one adapter also
included with each Flash Mount purchased separately) and snap into Flash Mount.
WHEN—AND HOW—TO USE THIS FOCUSING RAIL
THEORY
Begin by understanding image scale—the ratio of the size of the subject to the size of
the image registered “on film” (or on digital sensor) in the camera. Closeup photography
encompasses the image scale range from 0.1X to 1X (or “life size”), meaning that the in‑
camera image size is from 1/10th as big as the subject (ratio 1:10), up to the same size
(ratio 1:1) as the subject. And photomacrography defines image scale greater than 1X
(ratio > 1:1), where the in‑camera image is a magnified enlargement of the subject’s
true dimensions; e.g. 2X (2:1) signifies an in‑camera image that’s twice the size of the
subject. (“Macro” denotes largeness, or, as a prefix, enlarged.)
Conventional focusing technique can be applied when the closeup range is from
only 0.1X (1:10) to about 0.5X (1:2). However, this method becomes a frustration as
image scale approaches 1X (1:1) because any rotation of the lens’ focusing ring has
simultaneous and significant impact on the intended reproduction scale.
So, estimate the approximate image scale that’s desired. A U.S. dollar bill is useful for
comparison reference—its length (less blank ends) is ≈ 4X the horizontal width of the
35mm film frame, so a subject of that size would represent an image scale ≈ 0.25X (1:4)
if fully framed. Folded in half, the bill would replicate a subject size ≈ 0.5X (1:2), or ≈ 1X
(1:1) if folded again. Apply this guideline to select the approximate image scale that’s
appropriate for the subject (allow for some “air”), and manually (AF off) set the lens’
focus ring for that reproduction scale. (Most “macro lenses”, as made for closeup work,
have handy image scale settings that are clearly marked on the lens’ barrel.)
PRACTICE
Now—with the camera off the tripod (and focus preset per above)—look through the
viewfinder, and move the camera toward the subject until it can be seen in rough
focus (don’t change focus). Note that location, and set up the tripod’s apex at the
same position. Mount the focusing rail at its midpoint (oriented so that the bigger
lead screw knob is facing the photographer); mount the camera body in the top
clamp, also near midpoint. Rough focus again by using either or both of the following
methods: 1) slide the focusing rail within the ballhead’s clamp then lock down with
the ballhead clamp; and/or 2) With the Stage Lock Knob fully loose, press and hold
the Clutch Release Button and slide the Stage along the Rail. Then, release the Clutch
Release Button and twist it to its engaged position. Achieve fine focusing by turning
the Lead Screw Knob(s) at the end of the Rail. CLUTCH RELEASE BUTTON MUST BE
IN THE ENGAGED POSITION PRIOR TO TURNING THE LEAD SCREW (if Stage skips,
check that Clutch Release Button is engaged). Combine both movements with slight
focus shifts for desired composition. Lock the stage in position with the Stage Lock
Knob before releasing the shutter.
For best resolution (in 35mm format), use (marked) apertures in the f8–f16 range;
avoid f22. Use a cable release, and apply mirror lockup if exposure is by ambient light.
Supplementary (strobe) lighting is often essential; manually zoom any strobe head to
its widest angle setting.
GUARANTEE
ALL REALLY RIGHT STUFF BRAND PRODUCTS ARE GUARANTEED TO THE ORIGINAL
PURCHASER TO BE FREE OF DEFECTS IN MATERIALS OR WORKMANSHIP FOR
FIVE (5) YEARS FROM THE DATE OF PURCHASE. PRODUCTS WILL BE REPAIRED OR
REPLACED AT OUR OPTION.
lubricate
here
® , ™, © 1990-2017 Really Right Stuff, Inc. All rights reserved.