REARO selkie BOARD User manual

INSTALLATION GUIDE
BOARD
Please carefully read the following information to ensure
that you do not invalidate your 10 year guarantee.
DOMESTIC 2 OR 3 SIDED SHOWER INSTALLATION
k
Rearo Selkie Install 51218 .qx _Layout 1 11/01/2019 14:48 Page 2

Tools
We recommend that the following tools are
available prior to installation.
• Pencil & Ruler • easuring Tape
• Jig saw or Hand saw • asking Tape
• High-grab adhesive • Silicone Sealant
Wall preparation
It is essential that walls should be
completely dry before installing Selkie and
any source of dampness is treated.
Wherever possible, remove existing wall
coverings such as wall paper and fabrics.
Assuming walls are reasonably level/flat
then there is no need to make good the
surface to be covered.
Cutting of Panels
When using a jig-saw with upward cutting
jig-saw blade (fig 1), panels should be cut
from the back, decorative face down to
prevent chipping of the laminate
surface.When using a standard hand saw
(fig 2) - decorative face should be UP.
For the best results - where possible apply
masking tape along the line of cut.
Cutting Apertures
Although Selkie Board has a highly durable
finish, care should be taken when cutting
apertures or inspection hatches.
Internal corners of apertures and cut outs
UST always be smoothly radiused to as
large as possible, with a 5mm minimum
radius. This radius should be increased as
the side lengths of the aperture are
increased.
Ensure that wooden blocks are placed
below your drilling areas to prevent' burst
out' and any possible damage to the
decorative face.
ark out cutting shape to rear face and
drill positions on front ensuring one at each
corner.
Drill holes at suitable intervals around
perimeter of shape on front face (fig 3).
Leave a 3mm clearance around all pipes
and accessories and seal with silicone
sealant.
Using jigsaw, slowly cut around perimeter
of shape of cut out on rear face (fig 4).
When using a circular saw or fine-tooth
blade hand-saw, panels should be cut
decorative face up, with the protective film
removed from the cutting line only.
Ensure that your fitting overlaps the
aperture cut-out. (fig 5).
When measuring distance from walls, or
past shower enclosures, allowances
should be made for the thickness of
aluminium profiles and the space between
walls and profiles.
Getting Started
Selkie Board Installation Guide
BY REARO
Fig1.
Fig2.
Fig3.
Fig4.
Fig5.
Rearo Selkie Install 51218 .qx _Layout 1 11/01/2019 14:48 Page 3

2 Sided Shower Enclosure
(a) Position shower tray, level and fix in
accordance with the manufacturer’s
instructions (fig 6)
(b) Begin by securely screw fixing the
internal corner profile extrusion in the
required position (fig 7), ensuring that it is
plumb in both directions.
(c) Before measuring the correct height
and width of the panel please remove the
tongue and groove to create a square
edge finish, this will ensure a water tight fit.
Please Note: Peel back the protective film
at this stage by approx. 50mm to
accommodate fitting. After cutting - we
recommend a “dry fit” (before applying
adhesive or Silicon Sealant) of the Selkie
Board to ensure correct fitting
(d) Apply a generous bead of silicone
sealant into the channel of the corner
profile section (fig 8).
(e) If applying an ‘end cap’ (fig 9) apply a
generous bead of sealant along the length
of the ‘end cap’, then fix into position by
applying hand pressure across the full area
of the panel.
Please note: take care not to apply
excessive silicone to channels in profiles
(f) Apply a bead of panel adhesive around
the perimeter on the back surface of the
panel along with a grid (approx 300mm
squares) covering the full area of the panel
(fig 10).
(g) The Selkie Board should be fitted to be
positioned just above the shower tray.
Using ‘packers’, leave a 3-4 mm gap from
the base of the Selkie board to the top
edge of the shower tray.
(h) Ease the panel into the corner profile
and fit panel onto wall (fig 11).
(i) When the adhesive has set and the
Selkie Board securely in position remove
the ‘packers’.
(j) Fill the gap between the tray and the
panel with silicone so the panel is
effectively sitting on a “bed” of sealant.
(k) Run bead of silicone to face of gap
ensuring a neat smooth “perfect” finish
(l) Repeat the same process on the
adjacent panel.
(m) Remove the remainder of the
protective film to complete the installation
(fig12)’.
3 Sided Shower Enclosure
When installing three Selkie Boards in a ‘U’
shape formation - follow the above
guidelines, however ensure that the
second internal corner profile is fitted to
‘panel 2’ - middle panel, prior to fixing to
‘wall and before ‘installing panel 3’ (fig 13).
It is always wise to dry fit first to ensure
a good fit.
selkie waterproof wall cladding
system is quick and
easy to install
Fig6.
Fig7.
Fig12.
Fig13.
Fig9.
Fig11
Fig10.
Fig8.
Rearo Selkie Install 51218 .qx _Layout 1 11/01/2019 14:48 Page 4

Rearo, Loanbank House, Loanbank Quadrant, Govan, Glasgow, G51 3H
Tel: 0141 440 0800 Fax: 0141 445 3342 www.rearo.co.uk sales@rearo.co.uk
Accessories and Sealants
Important accessories to help with a
successful installation of Selkie Board
include:
Finishing Trims: designed specifically for
Selkie Board are available in satin silver,
polished chrome, white and black including:-
Internal Corner Profile, External Corner
Profile, End Cap,Quad End cap and
'H' section, for vertical application in
heights above 2400mm height.
Sealants and Adhesives: For best results
we recommend that Selkie Board is
installed using an external grade 'high grab
adhesive' such as GRIP FILL. This will
quickly secure the Selkie Board to the fixed
wall. For sealing of all profiles and trims we
recommend the use of a clear silicone
waterproof sealant.
If you are panelling an entire wall using
tongue and grooved* panels, we
recommend the use of Rearo colour
matched sealant for a seamless finish.
*Please see Tongue and Grooved installation guide.
Cleaning
Once installed, Selkie Board requires
minimal maintenance. Selkie Board should
be cleaned with warm water and a
nonabrasive mild detergent.
Scouring products or similar products
should not be used, and doing so may
invalidate your warranty.
FURTHER INFORMATION
For further information please contact your local rearo service centre, where our experienced team can
offer further advice regarding installation or maintenance.
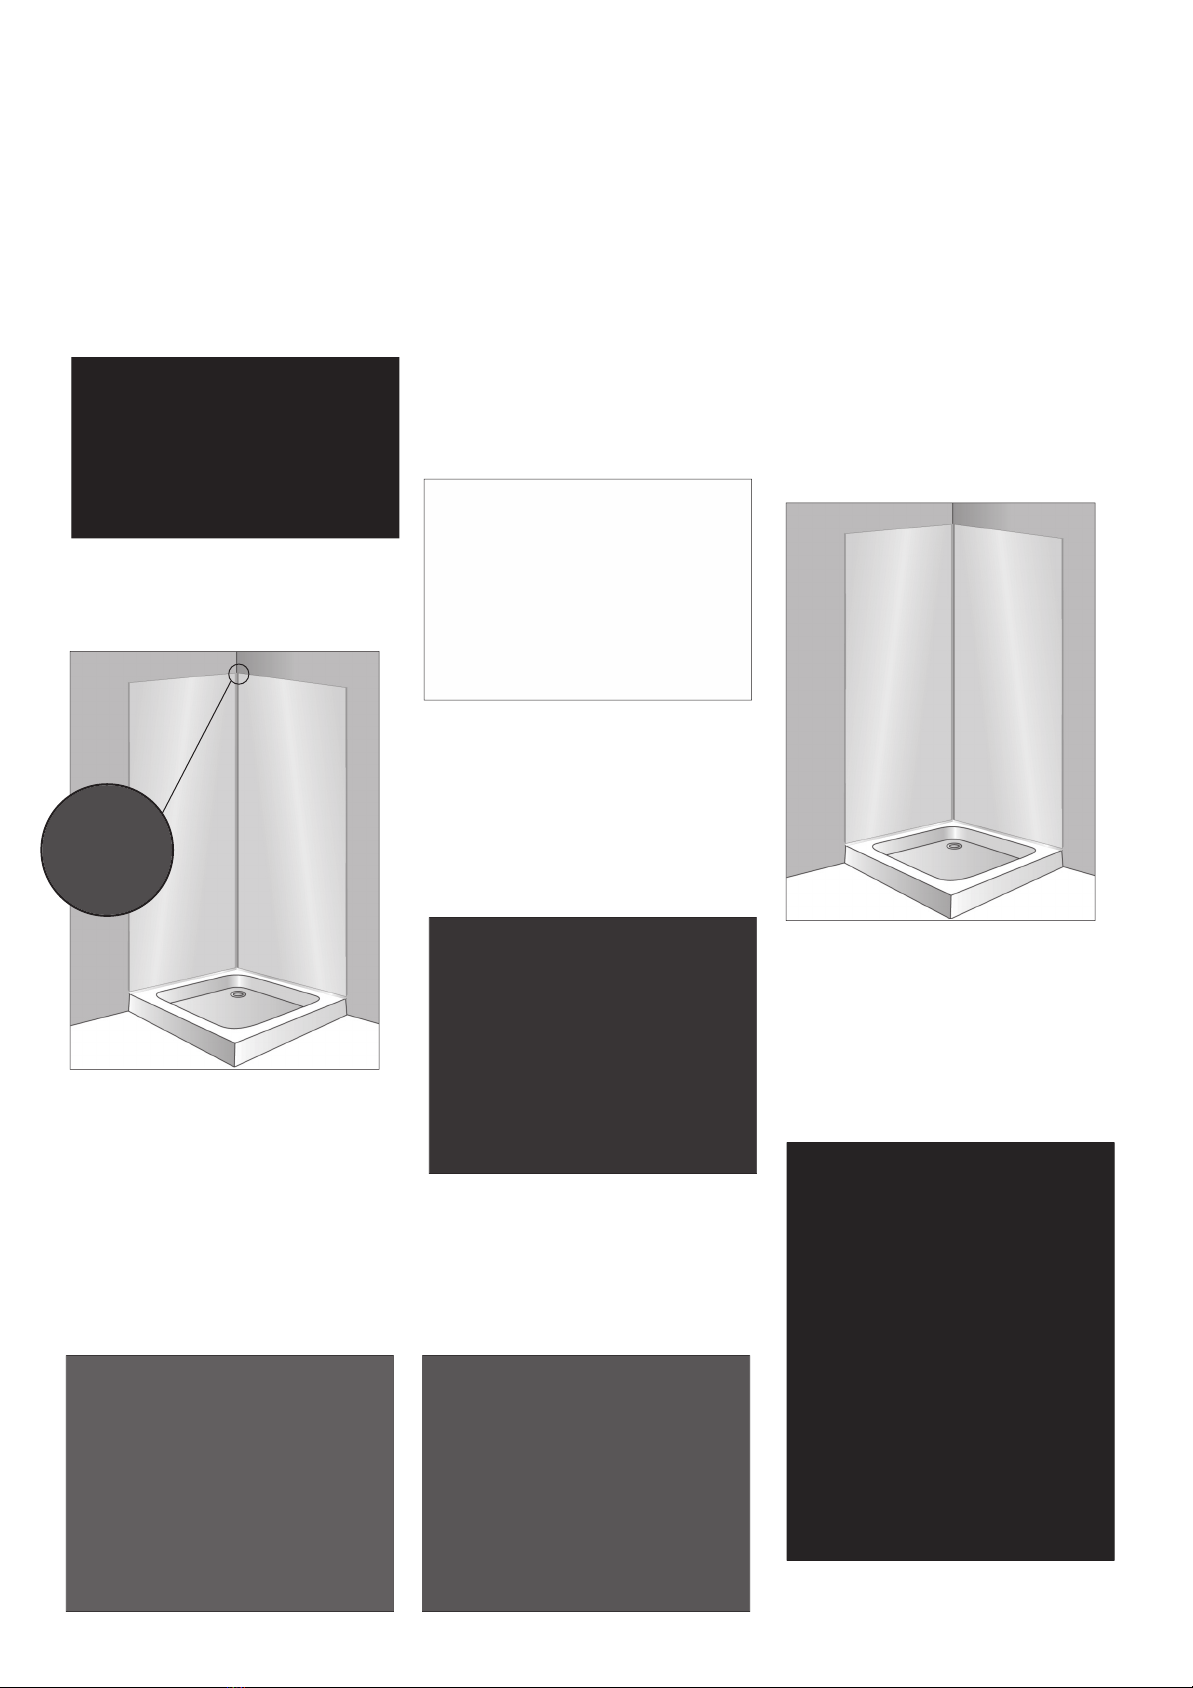
Panseal Kit
Where it is identified that there may be a
risk of movement such as a flexible floor or
the possibility of settlement it maybe
appropriate to use a system such as
“Panseal”. The Panseal kit ensures that
the joint between the bottom of the Selkie
Board and the top of the shower tray is
secure and watertight. (fig 14)
Please see fitting instructions supplied with kit.
Fig14.
Apply Sealant to
areas as shown in
Panseal
instructions
Please be aware that these instructions are not exhaustive, if
you require further information, advice or are in any doubt as
to how to proceed please contact the Rearo technical team
on 0141 440 0800.
Please also note that for all installations there are some
general, simple guidelines which must be followed without
which our warranty would be invalidated including:
• all exposed edges of panels must be sealed.
• panels should never be fitted directly onto a shower tray
without adequate sealing. Please see instructions.
Dec 18
Rearo NORTHAMPTON
5 Rye Hill Close
Britannia Trade Park,
Northampton
NN5 7UA
T: 01604 212559
F:
E: northampton@rearo.co.uk
Rearo SHETLAND
taneyhill Gas Depot
North Road
Lerwick
hetland Isles
ZE1 0QA
T: 01595 692807
F: 01595 695469
E: lerwick@rearo.co.uk
Rearo ROSYTH
Unit 15 & 16 Primrose Lane
Dunfermline Business Park
Rosyth
KY11 2RN
T: 01383 414000
F: 01383 414400
E: rosyth@rearo.co.uk
Rearo WASHINGTON
Unit 15, Tilley Road
Crowther Industrial Estate
Washington
Tyne & Wear NE38 0AE
T: 0191 482 2298
F: 0191 482 6245
E: washington@rearo.co.uk
Rearo Selkie Install 51218 .qx _Layout 1 11/01/2019 14:48 Page 1