Reboot ARC145 User manual

Version Number: ARC145-20210106A1
1
Operation Manual
Reboot ARC145 is an intelligent and easy-to-operate welding machine with manual welding mode. It has the
characteristics of good welding performance, diversified usage scenarios, and outstanding welding effects. It is highly
praised by welding enthusiasts and is also very good for beginners in welding. Friendly and can get started quickly.
Part 1: Machine Introduction
1. Power indicator light
Turn on the power, this light will be on.
2. Current display meter
Only displays the preset current.
3. Fault light
When the welding load is overloaded and the output current of the machine is too large, this light will be on. This situation is
normal and the machine can be restored; when there is damage inside the machine, this light will be on. In this case, the machine
is abnormal and requires maintenance.
4. The current adjustment knob
Just adjusts the current.
5. Positive connection
Install welding holder and grounding clamp.
6. Negative connection
Install welding holder and grounding clamp.
Note: ARC145 AC 110V OR AC 220V voltage input
Part 2: Introduction to the product and configuration list.

Version Number: ARC145-20210106A1
2
No.
Picture
Name
Qty
Remark
1
ARC145
1
Please check the appearance after
receiving the machine, and power on to
check
2
Welding
holder
1
1.5m 16MM2 cable, 200A Italian welding
holder +15-25mm2 European quick plug
3
Ground
clamp
1
1.5m 16MM2 cable, 300A Ground clamp
+10-25mm2 European quick plug
4
Hammer
and brush
1
5
Conversion
line
1
Conversion line only suit for 220V to
110V dual-voltage input machines, if not
dual- voltage machines no this line
included.
6
Manual
1
Normally provides manuals in English, if
you need other language like French,
German, Italian, Spanish, and Russian
please contact us to get electronic
version documents .
7
Warranty
Card
1
If you have more questions for
consultation, please contact us through
the after-sales mailbox on the card.
Part 3: Simple test for powering on the machine
Reboot ARC145 welding machine will undergo strict various tests when it leaves the factory to ensure that
every welding machine that reaches the user is of high quality, because our machine has to go through tens of
thousands of kilometers of long-distance transportation from the factory to the delivery to you. And many times of

Version Number: ARC145-20210106A1
3
handling, it is inevitable that some uncontrollable factors will cause some internal components of the machine to
become loose or even damaged during the process. We recommend that you perform a power-on inspection as soon
as you get the welding machine to ensure that what you receive is qualified product.
Precautions for power-on inspection:
1、 Please make sure your power supply voltage is 110V+-15% or 220+-15%. REBOOT ARC145D supports 110V
and 220V input voltage in North America and Japan, and REBOOT ARC145 supports 220V input voltage in the
UK, EU and other regions; if you have a generator power supply, please ensure that the generator is not less than
4000w.
2、It is recommended to choose 50A circuit breaker protection when your power supply voltage is 110V, and 30A
circuit breaker protection when 220V.
3、 For the current machine, please choose the power plug that suits your local electrical law requirements
4、 Extension cord: #12 AWG or larger; 25’ (8m) or shorter.
Turn on the power switch of the machine and the fan on the back of the machine rotates, and the digital
display on the panel indicates that the power is normal.
Note:
1) In order to reduce the working temperature of the machine, it is normal for the fan to continue to rotate for a
few seconds after the power is turned off.

Version Number: ARC145-20210106A1
4
2) In the process of high-strength continuous welding, machine protection may occur, and the OC light on the
machine panel will be on. After continuous heat dissipation, the machine will return to normal, which is normal.
3) During the welding process, if you feel that the welding is not good, the spatter is too large, or the arc is
broken, please exchange the connection of the welding clamp and the grounding clamp with the machine.
Attached table: Self-examination of abnormal conditions without response when turning on the machine:
1. The machine's power switch is not turned on.
2. The power input voltage is wrong.

Version Number: ARC145-20210106A1
5
3. The power plug is loose.
4. The internal circuit is loose (due to long-distance transportation, bumps), you need to open the cover and
check the internal connection line.
Part 4: Technical specifications
TYPE
ARC145
ARC145D
Input power voltage (V)
1phase AC220V±15%,50/60Hz
1phase AC110V/220V±15%,50/60Hz
Rated input current (A)
29.1
44/29.1
Rated power capacity (KVA)
6.4
6.4
Current adjustment range (A)
30-145
30-115/30-145
Welding thickness (mm)
>1.0
>1.0
Voltage adjustment range (V)
23.2-25.6
23.2-25.6
No-load voltage (V)
56±5
56±5
Rated duty cycle
60%
60%
Efficiency (%)
80%
80%
Power factor
0.7
0.7
Protection class
IP21S
IP21S
Insulation class
F
F
Size (mm)
300*290*330
300*290*330
Weight (Kg)
3.85
4
Part 5: Machine operation guidance.
If you want to repair some broken fences or fix brackets, you like to use traditional welding rods for operation,
you can use REBOOT ARC145.
1、Connect welding holder and ground clamp.

Version Number: ARC145-20210106A1
6
2、 To adjust the current, only the current can be adjusted.
Note:
1) The welding rod specification supported by REBOOT ARC145 is below 4.0(5/32in), usually 2.5(3/32in) and
3.2(1/8in). European style generally uses E6013, American style generally uses E7018,and stainless steel
generally uses ER308.
2) It supports welding of 1-8mm(1/64-5/64in) carbon steel and 1-5mm(1/64-7/32in) stainless steel. Aluminum can
not be welded. For carbon steel, please use carbon steel electrode. For stainless steel, please use stainless steel
electrode.

Version Number: ARC145-20210106A1
7
3) Connect the ground clamp to clean bare metal. No rust, paint or other coatings, and ensure good electrical
conductivity.
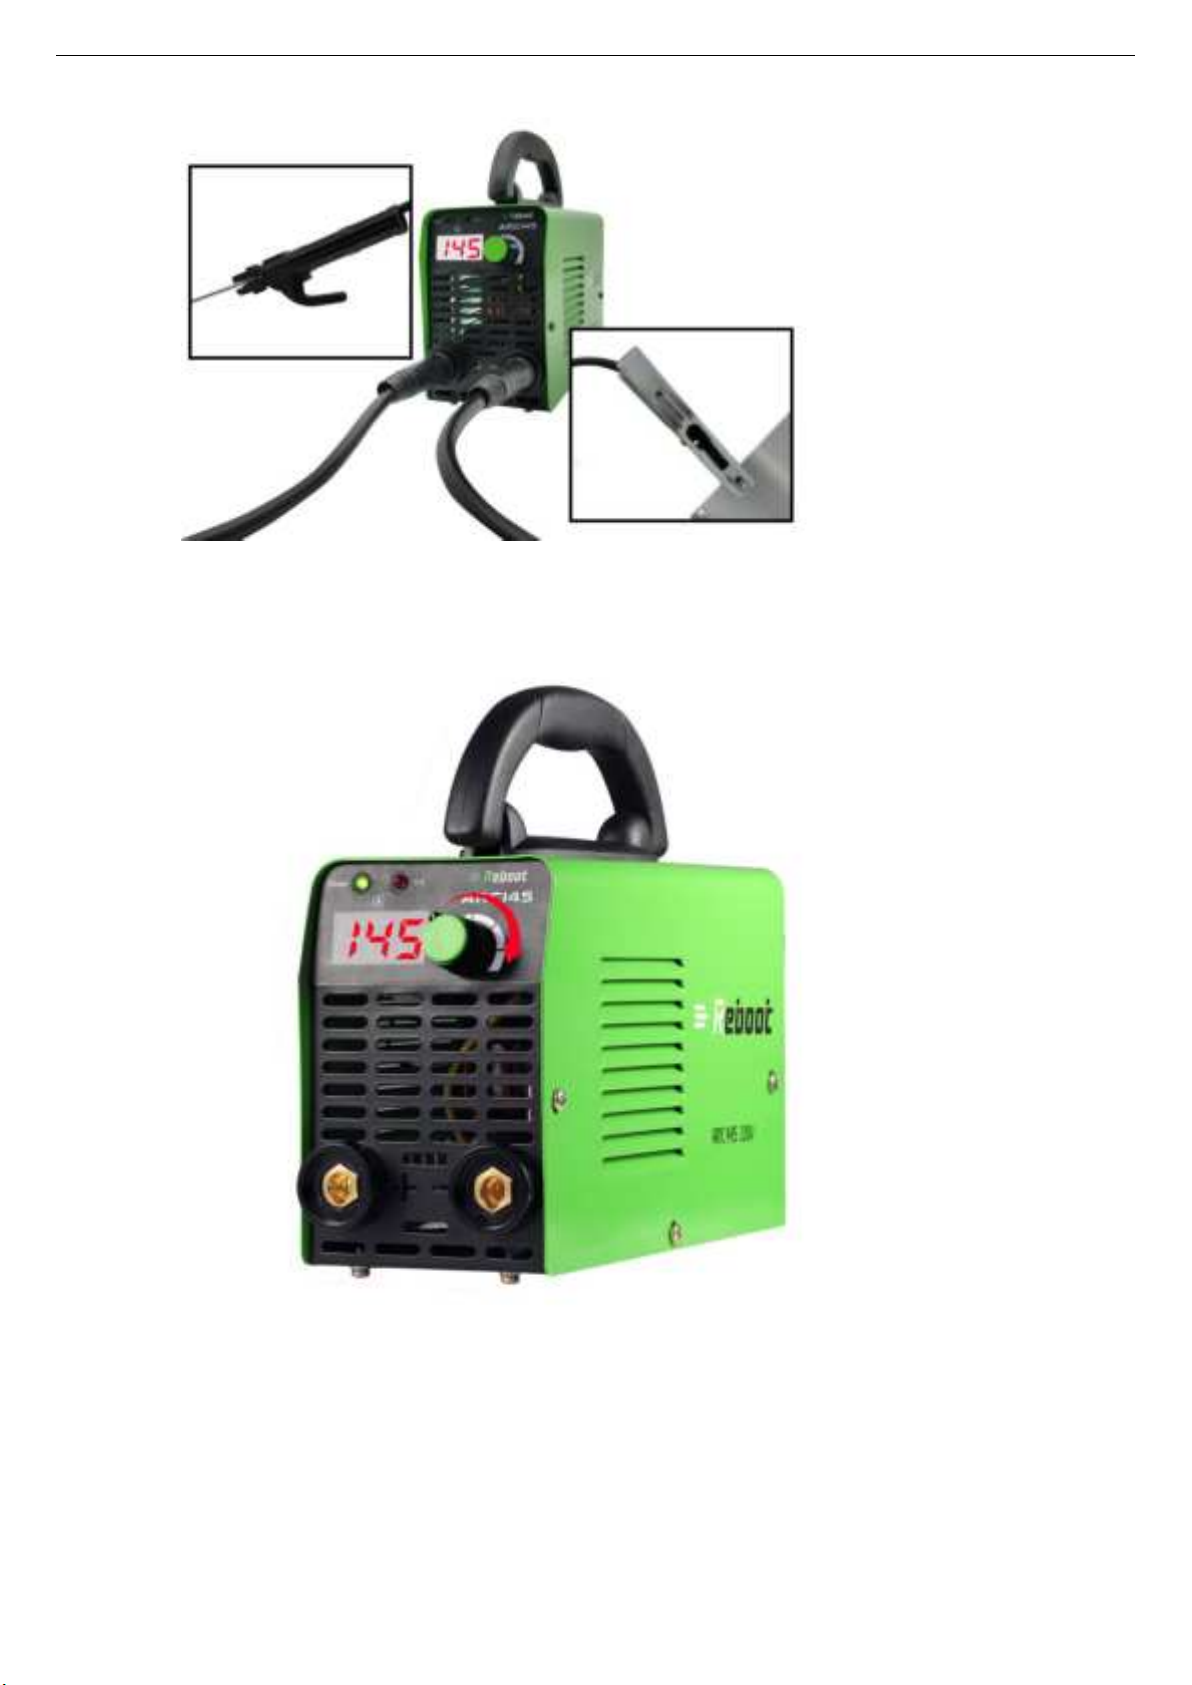
4) The ideal distance between the welding rod and the welding object is 1-2mm(1/64-5/64in), to ensure that the
welding rod and the workpiece are in continuous and stable contact. The welding rod should not be too high or
pressed too low to avoid arc breaking and adhesion.
5) It is normal for novices to have adhesion during the welding process, and you can try to friction arc to avoid
adhesion.
6) Suitable for ordinary welding rods, such as 7018, 6013, etc., but not suitable for special welding rods, such as
7010, 7011.
Possible problems
1) There is no arc, check the ground wire to connect the workpiece to ensure that there is no rust, paint or other
coatings on the workpiece.
2) There is no arc, check the direct distance between the welding rod and the welding object, the ideal distance
is 1-2 mm; check whether the welding object has rust or oil stains, it is recommended to polish with sandpaper
or a grinder.
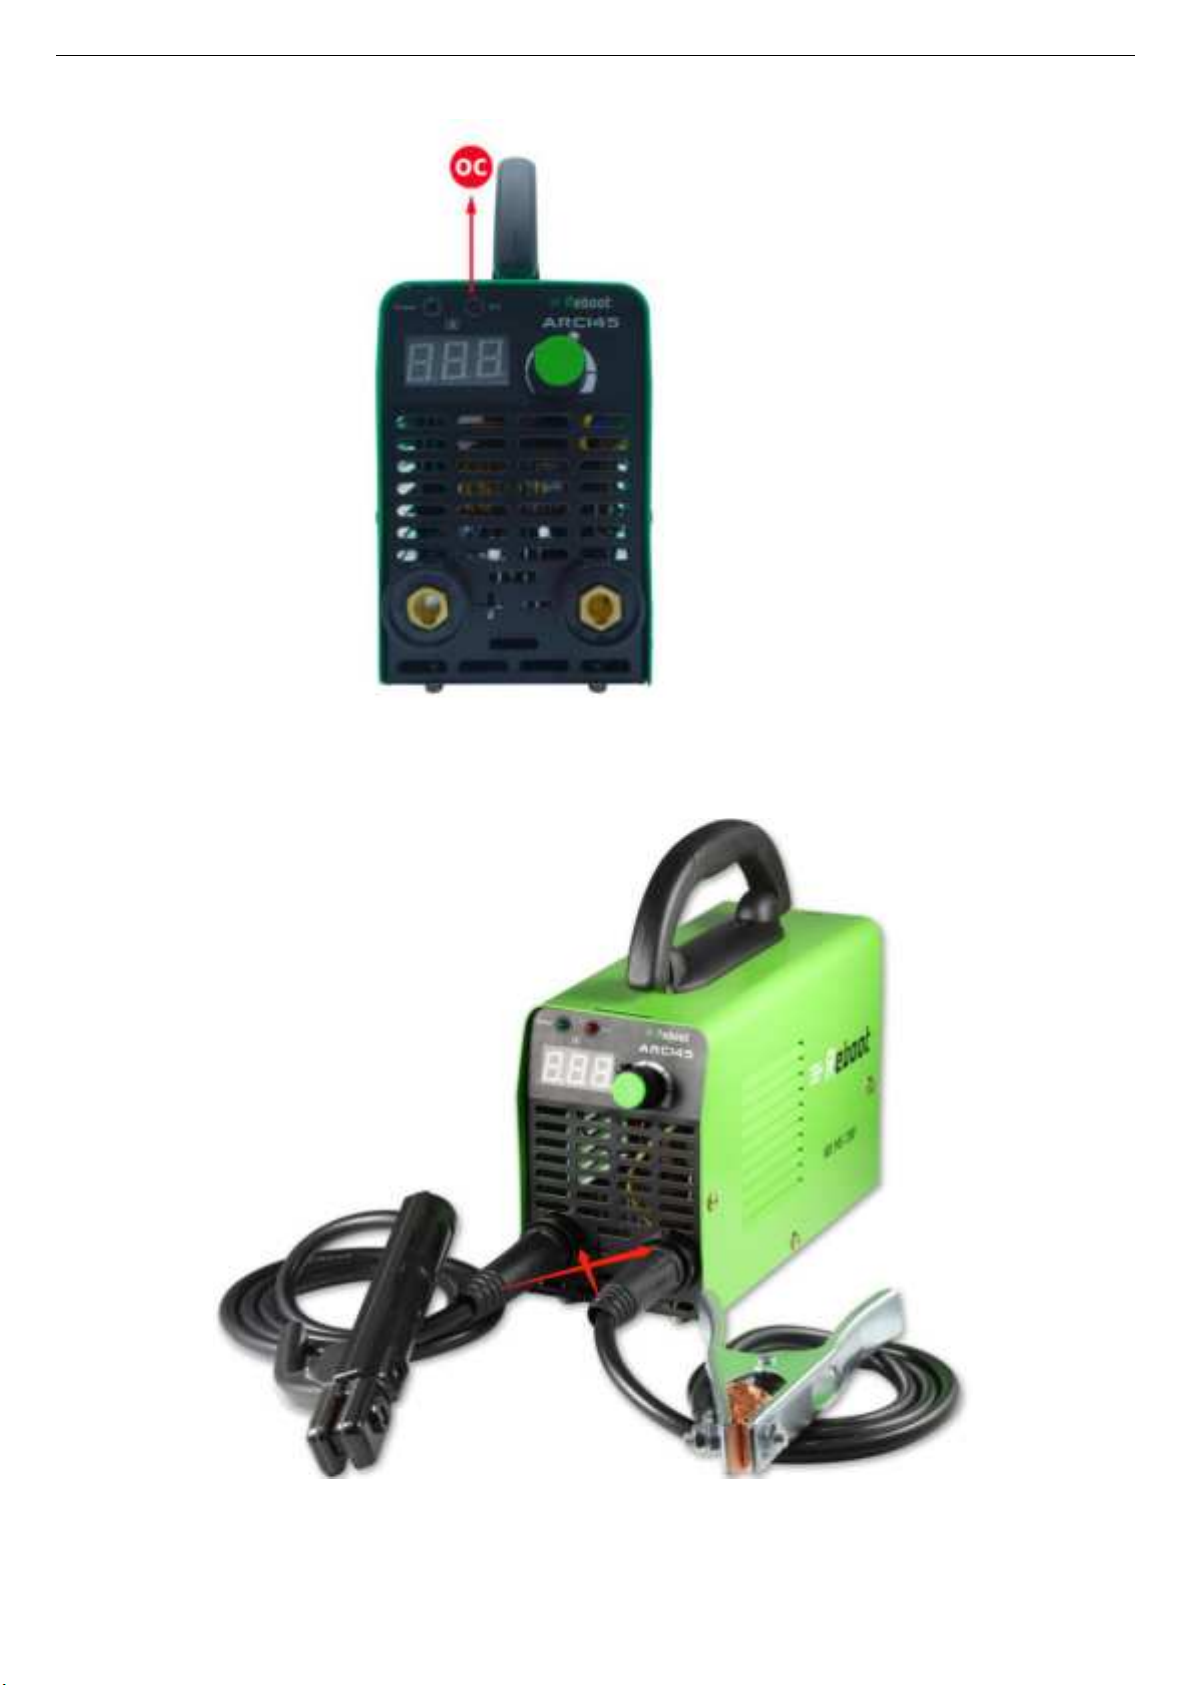
3) During the welding process, the oc fault light is on, and it may be over-current protection. You need to stop
working for a few minutes, let the machine cool for a period of time, and automatically recover. If the air cools
for more than 10 minutes, the machine does not automatically recover, please shut down and restart.
4) The OC light is on when the machine is turned on, please contact us.
5) If you have any problems that cannot be solved, please contact us at service@mirthtek.com .
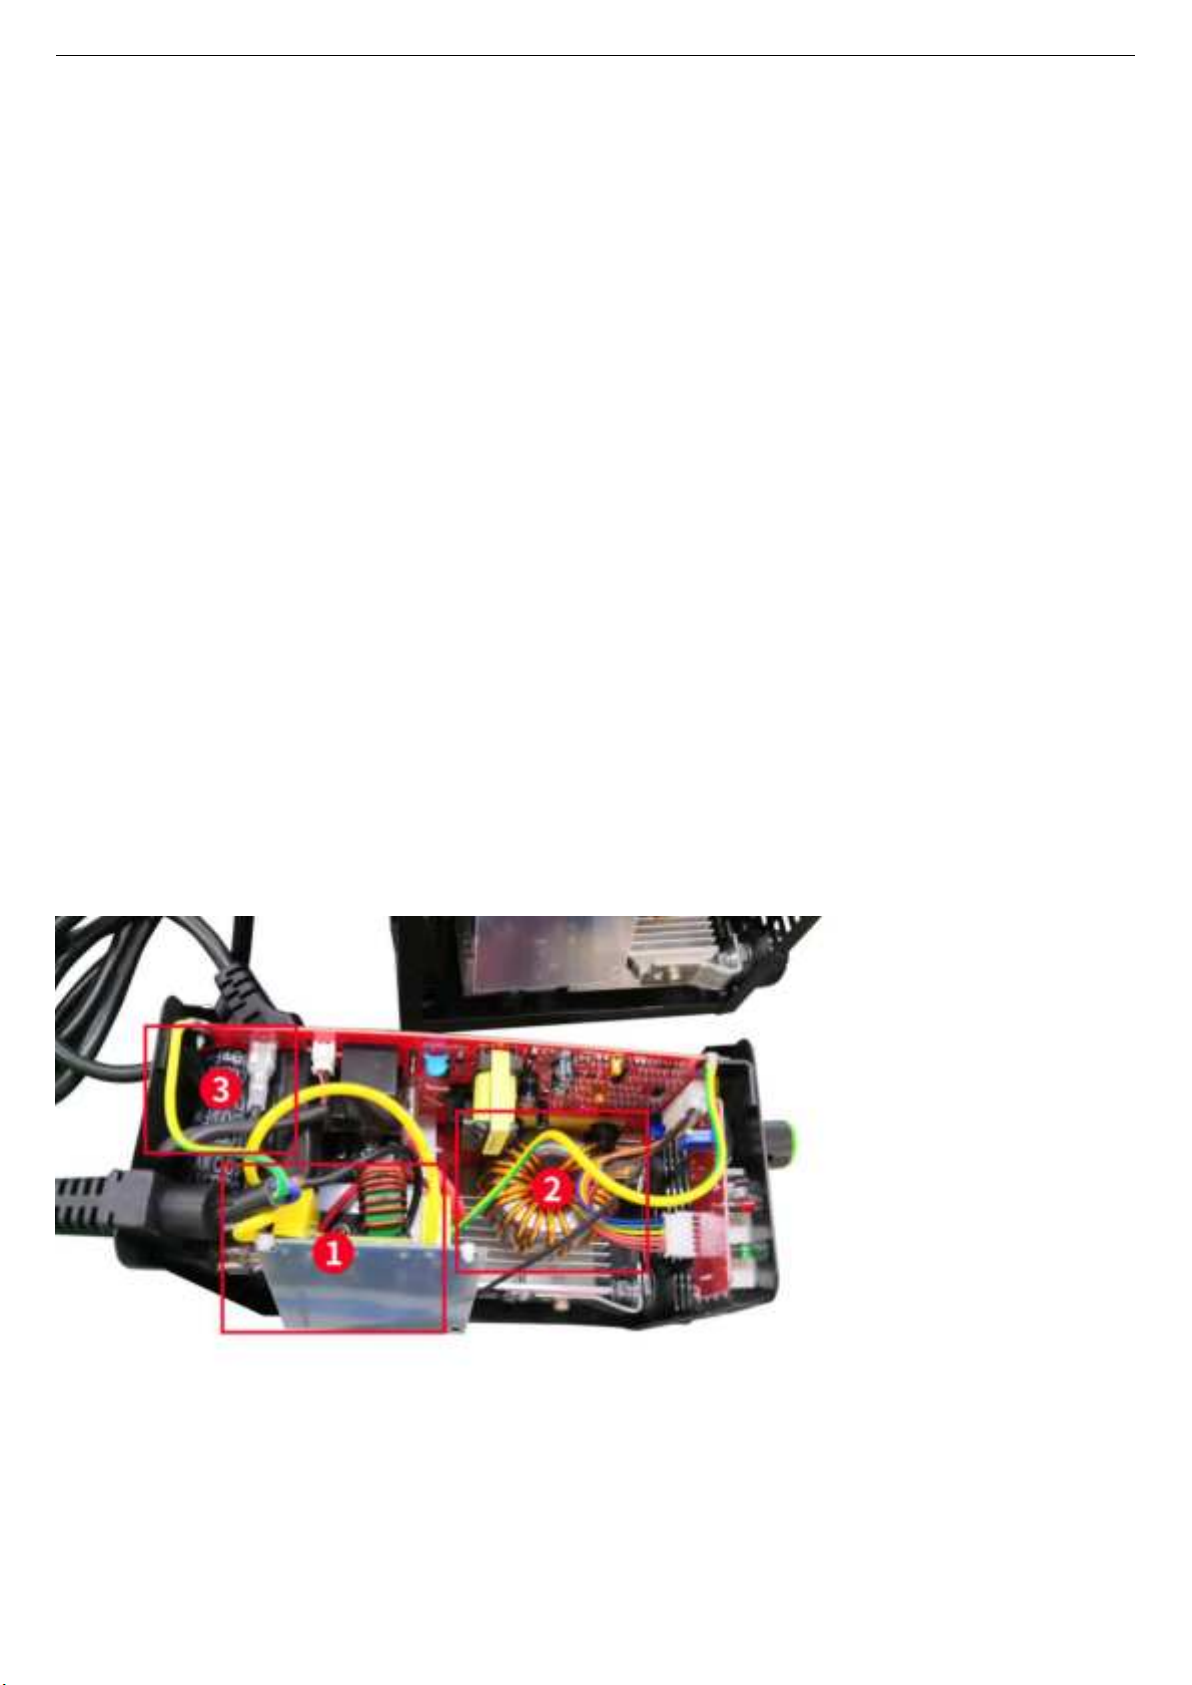
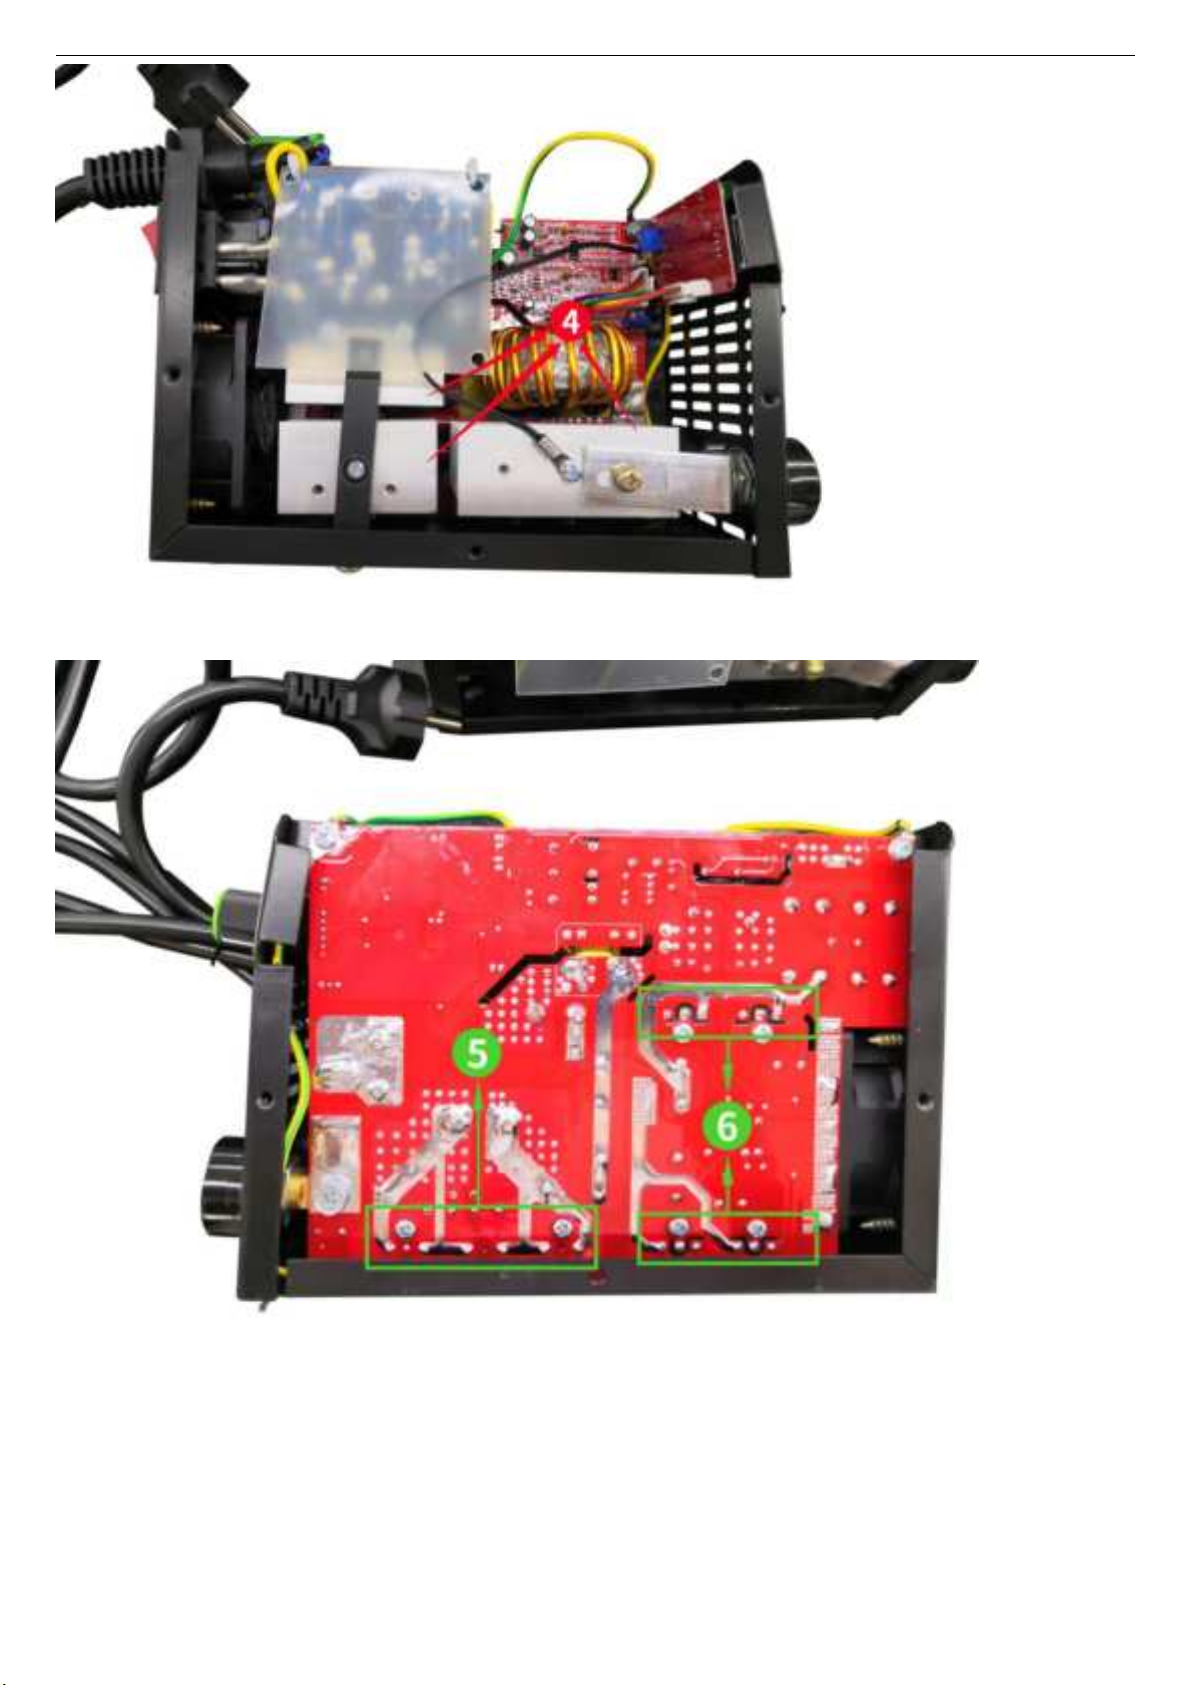
Part 6: Internal diagram of the machine

Version Number: ARC145-20210106A1
8
1. The EMC board is used to isolate the external power grid and internal circuits of the machine to avoid mutual
interference.
2. All-copper main transformer, big power.
3. 3 high-power large capacitors, the machine is more stable.
4. Thicker radiator for better heat dissipation.
5. 4 imported IGBT, stable and powerful current output.
6. 3 imported rectifier tubes, stable and powerful current output.

Version Number: ARC145-20210106A1
9
Part 7:Trouble Shooting
PROBLEMS(SYMPTOMS)
POSSIBLE CAUSE
PROBLEMS IN STICK WELDING
Excessive spatter
1. Long arc.
2. High current.
Craters
1. Fast movement of the electrode away from piece.
Inclusions
1. Poor cleanliness or distribution of the Welding passes.
2. Improper movement of the electrode.
Insufficient penetration
1. High progression speed.
2. Welding current too low.
3. Narrow chamfering.
Sticking
1. Arc too short.
2. Current too low.
Porosity
1. Humidity in electrode.
2. Long arc.
Cracks
1. Current too high.
2. Dirty materials.
3. Hydrogen in weld (present on electrode coating).
ELECTRICAL FAILURES
Machine fails to come on
(Power LED off)
1. No Input Voltage.
2. Faulty supply plug or cable.
3. Internal fuse tripped. Allow time to Auto reset.
Thermal overload (Thermal LED on)
1. Unit has been operated beyond its capacity rating.
2. Airflow through machine is restrict- ed or fan has failed.
Part 8: Welding parameter settings
Welding thickness(㎜)
2
3
4-5
Electrode diameter(ф㎜)
2
3.2
3.2-4
Welding current(A)
40-65
50-80
100-130
If you are interested in translating professional local languages, please contact us at
This manual suits for next models
1
Table of contents
Other Reboot Welding System manuals
Popular Welding System manuals by other brands

Lincoln Electric
Lincoln Electric POWERTEC 161C Operator's manual

Tregaskiss
Tregaskiss TOUGH GUN TT3 Reamer owner's manual

Fimer
Fimer King 320 instruction manual

SUNSTONE
SUNSTONE AC1050 user manual

Lincoln Electric
Lincoln Electric VANTAGE 575 CUMMINS Operator's manual

Sealey
Sealey SGA10 instruction manual